
The Never-Ending Quest For Power
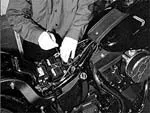
1. The last time this bike left OC Harley, it had 65.2 hp and 75.3 lb-ft of torque. Not bad, but we were hoping to bring both figures closer to 90 if possible. We kicked off the procedure by having Tony remove the seat and disconnect the battery.
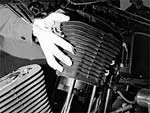
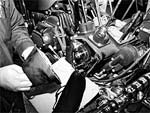
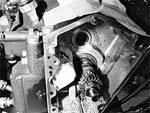
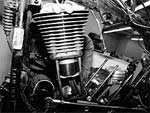
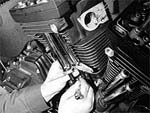
2. The fuel was then emptied and the gas tanks were removed. We started with the rear cylinder by spinning the engine until it was at top dead center (TDC). This will take all the tension off the pushrods so we can safely remove the rocker boxes. Here we see Tony has already taken off the upper part of the rocker box and run into his first complication — the rear rocker box doesn’t have enough room on this bike to take it out without removing the rocker shaft assemblies first.
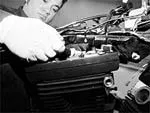
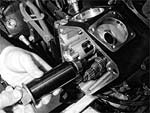
3. With the rockers out of the way, the rear box is removed and we can see the pushrods (as shown here) on the front cylinder. From this point, the pushrods can be pulled up and out, and the heads can now be unbolted.
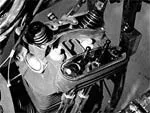
4. The two heads are now removed…
5. …and the cylinders are slid off one at a time.
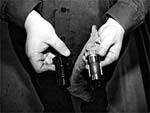
6. The snap rings are removed from the piston wristpins, and both pistons are removed from the ends of the connecting rods.
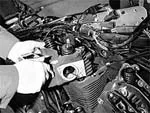
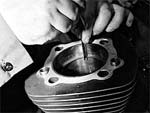
7. Extra care is taken as Tony thoroughly cleans the cylinder base gasket surfaces with a gasket scraper and a rag soaked in cleaner. Cylinder base gasket leaks on Evos are so common, taking the extra time to prepare the surfaces can save you a major headache down the road.
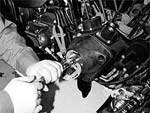
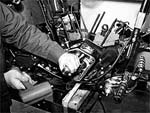
8. The special rivets holding the timing cover in place are drilled out and the cam position sensor (shown hanging below socket wrench) is unscrewed to allow access for the nose cone pulling tool.
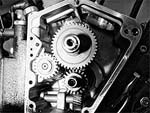
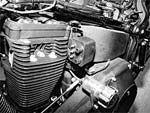
9. Now the nose cone is removed and we have access to the cam cavity.
10. We’ll install this all-steel breather gear in place of the plastic stocker. It will help our engine breathe a bit better since it’s timed slightly different than the stock item. Another advantage is metal chips can’t get embedded into it, which can happen with the plastic part.
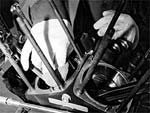
11. We’ve taken out the cam and the breather gear, and the lifter blocks have been unbolted and removed. The area pointed out here (on the case) will have to be cut down with a special tool to allow the cam lobe to clear it as it rotates. If we don’t do this, we’ll surely suffer a severe case of engine damage when the cam and case meet.
12. Tony employed this special case cutting tool — also from Zipper’s — to remove the interfering area of the engine case.
13. Before the cutter was used, all areas where metal chips could find their way into were covered up with a protective layer of masking tape. The loose chips are now vacuumed out and everything is thoroughly rinsed out with brake parts cleaner. Remember to be sure that every last remaining sliver of metal is removed from the cam cavity before continuing.
14. Now, our old cam bearing can be removed using this special puller.
15. Our new Torrington bearing is installed using a special driving tool made for Tony by his father.
16. Before installing our new cam, Tony checks out the endplay of the new, steel breather gear and selects the proper shim to properly space it.
17. All three items — the cam, the breather gear, and the pinion gear — are aligned by using their timing marks…
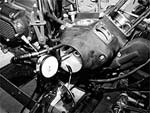
18. …and the nose cone is installed with a new gasket and torqued down. Tony took a comparison measurement of the new and old cams before installation. Using this tool, he was able to check that he set everything up for the proper amount of endplay before moving on.
19. At this point, the lifters and lifter blocks are inspected and reinstalled.
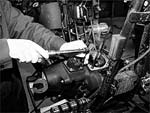
20. The new high-compression Zipper’s pistons are installed on the rod ends, while a few lengths of rubber hose are used to protect them from the cylinder studs during installation. Notice how tall the dome is on these new pistons, in comparison to the original flat-tops that came out of the engine. These pistons, in combination with the 559E-cam, will give us a net compression ratio of about 10.5:1 — considerably higher than stock, but not high enough to forbid the use of pump gas.
21. Before the cylinders can be installed, they are meticulously cleaned with solvent, wiped with a coating of oil, and the rings are installed and checked for proper endgap spacing.
22. Tony installed the rings on the pistons and then used a ring compressor to hold them down as he slid the cylinders over top of them.
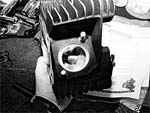
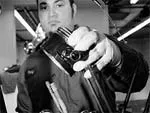
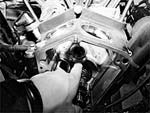
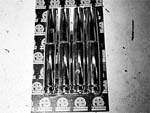
23. Here is what we consider to be the heart of the kit: the CNC-ported Zipper’s cylinder heads. With 1.930-inch intake and 1.615-inch exhaust valves, these heads should really wake up our little Softail when we’re finished. Just look at the nice machine-work done on this exhaust port.
24. The heads are installed and initial torque is set to factory specs. At this point, Tony will mark each head bolt and give them one last turn of 90 degrees with his socket wrench.
25. Before the pushrods were dropped back in, we decided to jazz them up a bit by adding a set of AB Tech billet pushrod tubes.
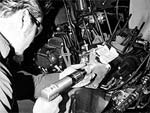
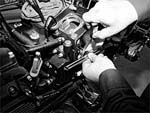
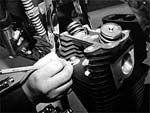
26. The rocker boxes were reinstalled, and here Tony is adjusting our Crane pushrods that came with the Zipper’s kit. Following the factory service manual and the Crane instruction sheet, Tony backs off the rods until all play is removed and gives them three more full turns before locking them down.
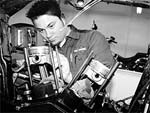
27. Our Dyna single-fire high-output coil is now installed…
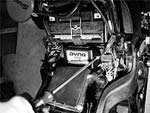
28. …followed by the module being bolted underneath the seat.

29. After wiring the ignition coil and going over what we’ve done with a fine-tooth comb, we went back to the dyno room after a few break-in miles to see how it went.
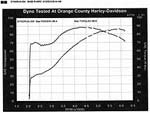
30. You can see by the chart that Zipper’s kit delivers as promised. We now have 86.4 horsepower and 88.8 lb-ft of peak torque. With a little more tuning of the carburetor, we might be able to squeeze out a couple more digits from each number. Unfortunately, O.C. Harley’s gas analyzer died the day before, so we weren’t able to check out our jetting. Even so, we’re thoroughly pleased with the way our bike runs. The power strokes hit harder than ever before, and it’s like having a brand-new bike — until we get bored and move on to the next step, which we hope will take a lot longer to do this time around.
Engine hop-ups can become addictive. Sometimes we’re content with what we’ve accomplished and leave it at that, but then there are a few bikes that we just can’t leave alone. Each upgrade drives us to the next level — our ’99 Softail Night Train is one of those bikes. Even though it is logging more than 100 miles per day traveling back and forth to work, we keep giving it more power. We just can’t seem to keep ourselves from tinkering with it.
A few months ago, we took the Night Train over to Orange County Harley-Davidson/Buell to add a cam and a new ignition system. At first, that added horsepower was enough to make the bike fun, but it didn’t take very long to outgrow, and the fun began to wane. It seems that some bikes, such as our Softail, become more and more fun with each modification made — a sort of addiction, if you will.
This time we decided to stick with our original displacement of 80 inches, but we wanted to push it a bit with a high-compression package consisting of cylinders, heads, pistons, cam, single-fire ignition system, and a few other select items. Knowing it’s always best to leave guesswork involved in creating a kit to the experts, we contacted Zipper’s Performance in Maryland for a little guidance.
Danny Fitzmaurice, the tip of the cheese pile at Zipper’s, steered us toward his 80/80 Evolution Performance Kit. This aptly named kit promises to provide more than 80 horsepower at the rear wheel with an accompanying torque reading near the 90 lb-ft mark. The 80/80 kit includes: CNC-flowed cylinder heads with a set of pistons carefully matched to the combustion chambers, a RedShift 559E-cam, a steel replacement breather gear, pushrods, gaskets, and a precise cylinder bore machinework.
The kit also comes with a Zipper’s high-performance CV carburetor, but we opted to go with one that our contributing editor/tuner extraordinaire Tracy Spencer set up for us, using his T-mod procedure. And we added a module and coil package from Dyna to give our bike single-fire ignition, and stuck with our Thunderheader that found its way onto the bike months ago.
We loaded up everything and went back to the Orange County Harley to meet Richard Hodges, service department head. Rich told us he knew we’d be back (he’s spent enough time with us and our ’99 Softail to know we can’t keep our hands off of it), and set us up with Tony Luffredo to do the work. Tony had our bike torn down, built up, and running again in no time at all. After the work, we logged a few hundred break-in miles and went back for a dyno printout to see how we did.


