Harley-Davidson Road Glide Special Main Fuse Removal
So you’ve gotten yourself one of them brand new baggers from the Motor Company? Well that right there is a mighty hefty bill, why add unnecessary service fees to that price tag when we both know that you are more than capable of tackling a few of the basic maintenance procedures yourself. Much like everything in this world every task has to start somewhere, and just like most cases when dealing in mechanics, the HD models damn near always start in the same place. We are of course talking about, the main fuse.
So let us dive into the main fuse and how to locate it on your bike as well as how to remove it. There are plenty of instances where you’ll need to remove the main fuse before servicing your Road Glide Special (or other motorcycles) both for safety reasons as well as to avoid damaging your bike’s electrical systems. “Remove the main fuse” is quite literally the beginning sentence in almost every procedure referenced in the service manual.
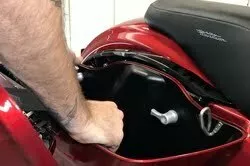
First things first: location. The main fuse is found on the left side of the Road Glide Special, under the left side cover. To get to the side cover, you’ll need to first remove the saddlebag. With the bag now off the bike, you can pull the side cover off. The cover is pressed into grommets and should come straight out. Now that you are under the cover, the last step is to remove the main fuse. It is labeled with “50” on it, which means it is a 50-amp fuse (and it is red in color). If your motorcycle is equipped with security, be sure the FOB is in proximity, especially if you have the siren equipped. Trust me, you will burn your bike to the ground if that crap goes off in your garage. (Which makes it a great anti-left device I suppose)


