
White Bros. Softail Lowering Kit – Hot Bike Tech
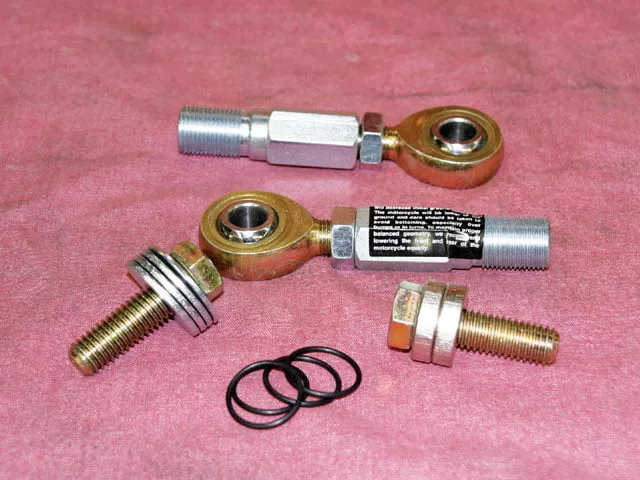
The White Bros. lowering kit from Custom Chrome (part No. 8478) fits Softail models from ’89-’99 and comes with everything necessary for the installation: adjustable Heim joints, mounting bolts, washers, spacers, and O-rings.
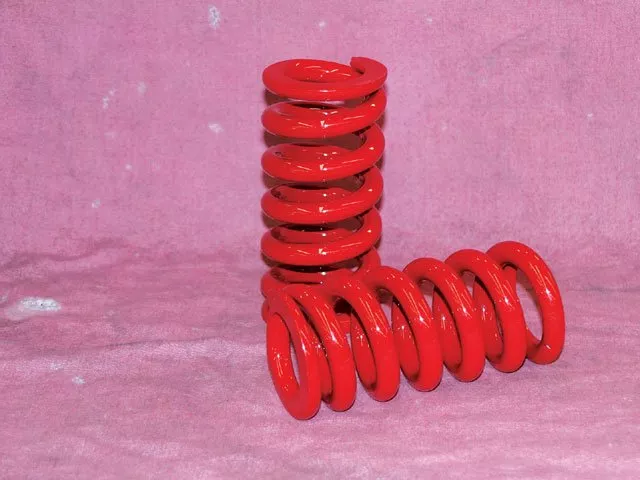
Since we were going to be lowering the bike, we started thinking about the worn, spongy springs in our OE shocks, and the possibility of bottoming the fender out on the tire on a hard bump. One way to help prevent this would be to swap out the stock springs for a new set of stiffer springs. The OE springs are rated at 800 lbs per square inch, but these LA Choppers Red Springs, also available from Custom Chrome (part No. 28648; MSRP: $209.99), are rated at 1,100 lbs per square inch.
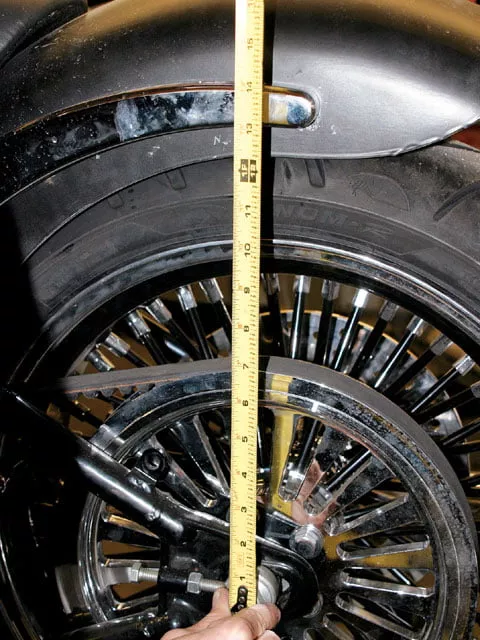
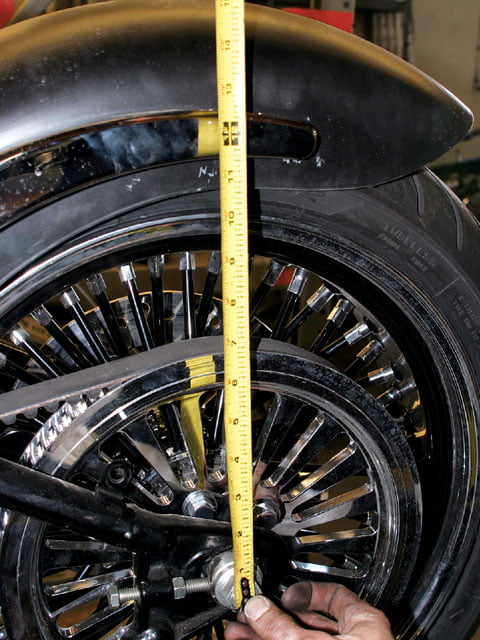
We stopped in at LifeStyle Cycles in Anaheim, CA, for the install. With the bike secured on a lift, the first thing we did was take some measurements to compare the before and after heights. With the new fender mounted and stock shocks, LifeStyle tech Sparky came up with 12-3/8 inches from the middle of the axle to the bottom of the fender lip.

Sparky then used a flat jack to lift the rear end and take the weight off the shocks so they could be removed. He unbolted one shock at a time and used some blocks of wood to keep the rear tire and swingarm propped up.
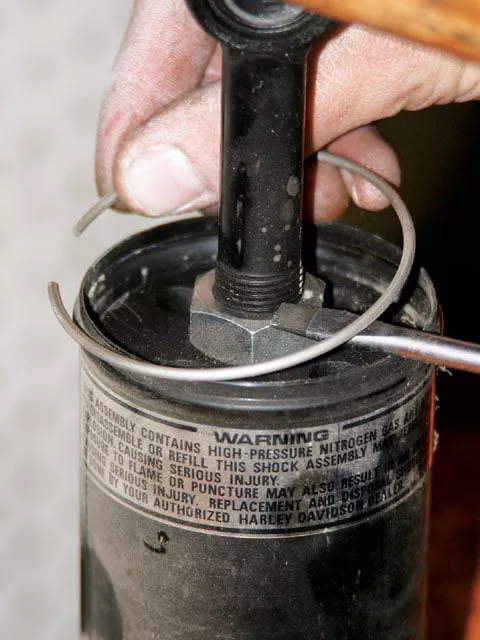
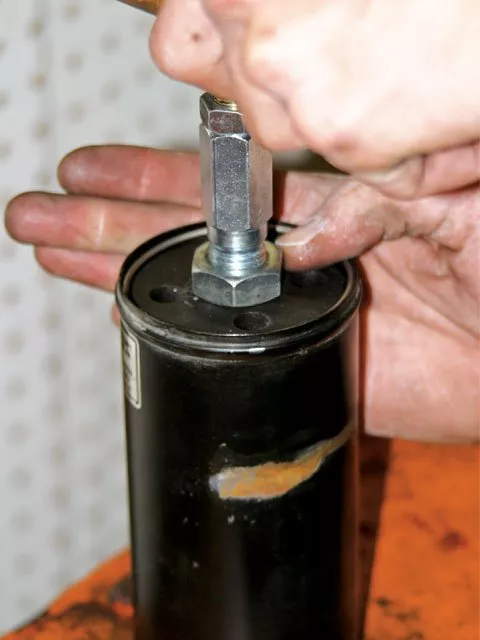
In order to install the lowering kit and new springs, the shocks needed to be disassembled. Sparky secured one of the shocks in a press, and then compressed the shock so he could remove the retaining ring that keeps the shock assembly together.
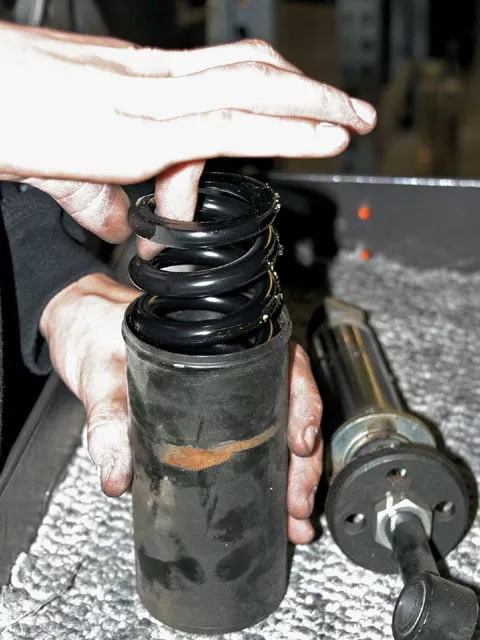
With the retaining ring removed, he was then able to pull the shock can apart and pull out the stock spring.
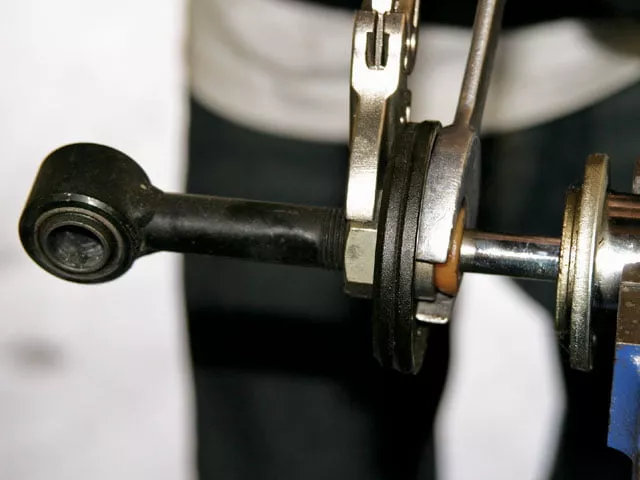
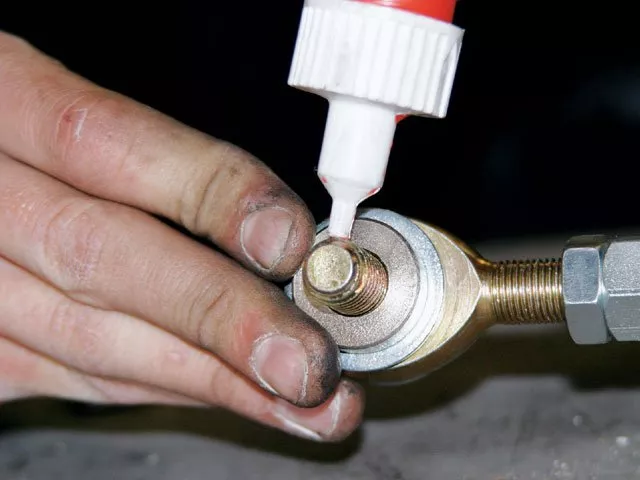
The new adjustable Heim joint mounts the shock to the swingarm. The stock (non-adjustable) Heim joint had to be unbolted from the shock shaft.
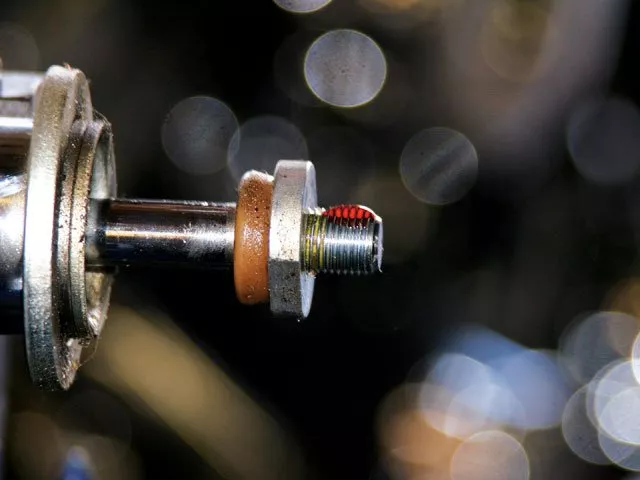
Before the new Heim joint was secured onto the shock shaft, a dab of red threadlocker was applied to the shock-shaft threads.
With the adjustable Heim joint secured to the shock shaft, Sparky dropped the new Red Springs into the shock can and slid the shock assembly into place.
Then it was back to the press to compress the shock and spring assembly and install the retaining ring.
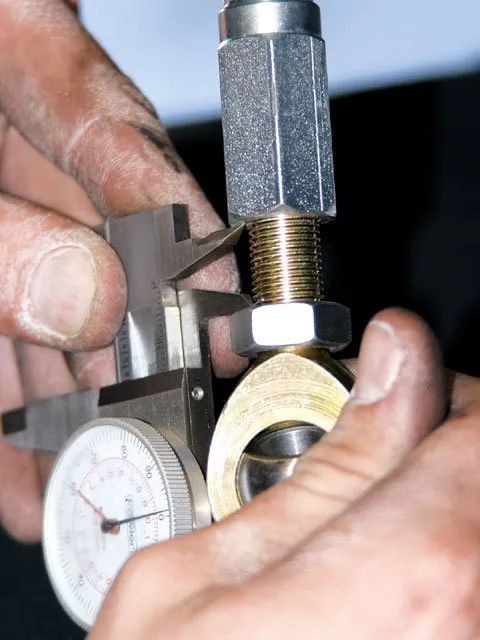
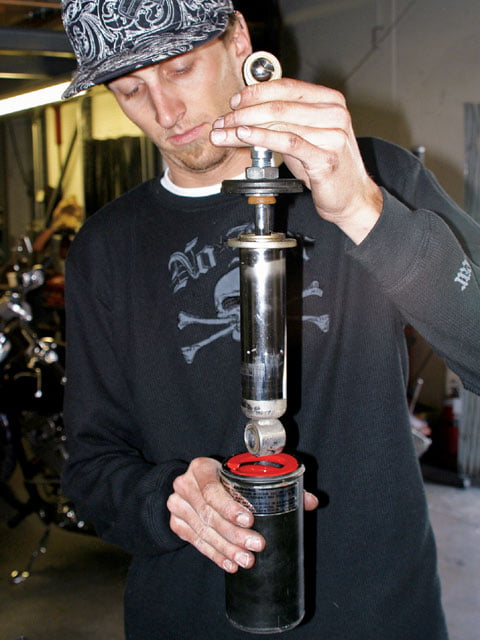
Next came the adjustment. Sparky used a set of dial calipers to set the adjustment. Sparky said opening the Heim-joint adjustment about .600 would lower the bike approximately 1-1/2 inches (the more threads exposed, the lower the bike will sit).
With both shocks set up with the new springs and lowering kits adjusted to the same length, Sparky began reinstalling the shocks. The spacers, O-rings, and washers were installed on each side of the Heim joints, and then a dab of red threadlocker was applied to the mounting bolts.
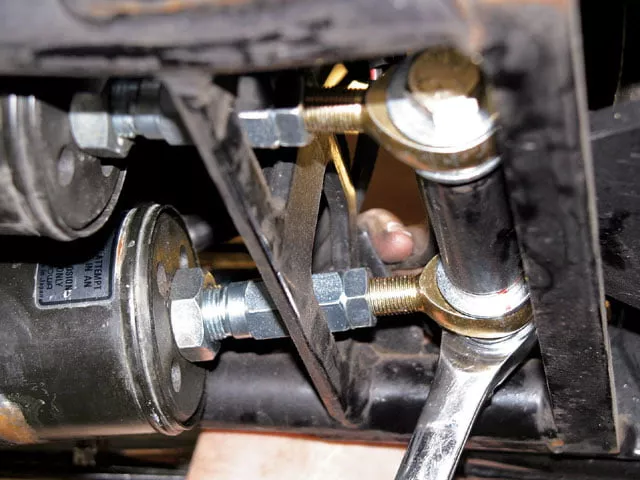
The shocks were then bolted in place.
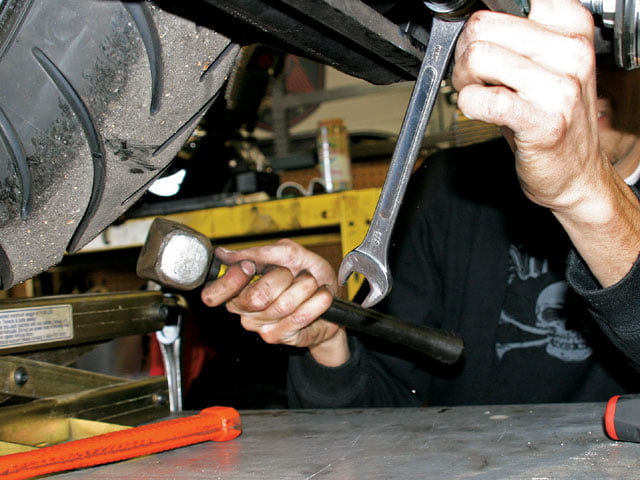
To ensure the bolts were tight, Sparky gave them a light tap with a sledgehammer.
Several issues back, we installed a Heartland 180 kit on our ’96 Springer Softail. The installation of the Heartland kit includes mounting one of the company’s three rear fender options: short, 20-1/2 inches; medium, 24-1/2 inches; or long, 28 inches. When mocking up the fender, you can only set it so low on the struts and still have enough material for the mounting bolts to hold the fender securely in place. So to get that low-profile, tire-hugging look, Heartland recommends lowering the rear of your bike before drilling the mounting holes so the ride height is pre-established and you can get the fender to fit around the tire exactly how you want.
The most popular way to lower a Softail is to install adjustable shocks, which come in two forms: manual and air ride. The only problem is that both types can be expensive, about $500 for a decent pair of manually adjustable shocks, and $1,300 and up for a good air-ride system.
After the Heartland kit, our budget was blown out until we could scrape up some more funds for a new set of adjustable shocks. So we took the next-best option and got our hands on a bolt-on lowering kit that would allow us to manually lower the bike almost 2 inches. There are several kits available, but after searching through the Custom Chrome website (www.customchrome.com), we found the White Bros. kit (MSRP: $99.95) to be the perfect solution to our money problems.
Once the jack was removed, Sparky took the final measurement and came up with 10-7/8 inches, 1-1/2 inches lower than when we started. The total install took less than an hour and cost a little more than $300, saving us a couple hundred bucks compared to buying new shocks. Without upgrading the springs, we would have saved quite a bit more. As far as ridability goes with these new springs, we will say you can definitely see a difference. At a load rate of 1,100 lbs per square inch, it takes quite a bit of weight to get these things to compress. Riding solo, they are pretty rough, but with a passenger they are a little more forgiving. It’s OK-we’re willing to sacrifice and save a little scratch until we can afford a good set of shocks.
Sources
_Custom Chrome
(800) 729-3332
www.customchrome.com
LifeStyle Cycles
(714) 490-0155
www.lifestylecycles.com_


