
Installing The S&S 1250 Hooligan Kit For Harley-Davidson Sportsters
Hooligan racing on Harley-Davidson Sportsters has been raging for several years now—with good reason. What’s funner than getting together with a bunch of bro’s and bangin’ bars on a dirt oval? And while hooligan racing’s resurrection started as a grass-roots movement, it’s evolved into a highly competitive sport, even making its way into the X Games. As competition levels have risen, so has the need for more speed. And who knows more about making American V-twins faster than S&S Cycle.
For this project we started with my wife Angie’s 2004 Sportster 1200 Custom. While we’ve gone over just about everything else on her bike, the one thing we’d never touched was the engine. A blown gasket was all the incentive we needed to upgrade to the S&S 1250cc Hooligan Kit for 2000–2018 Sportsters, as we would be doing most of the same work anyway, and this would result in much greater results.
Helping out with the install was our friend Bob Thiessen and his right-hand man Nick, better known as the pair that make up Redwood Cycles. Thiessen has come through for us numerous times over the years, from mounting new wheels to installing a Progressive monotube fork kit. For the installation of the S&S 1250 Hooligan Kit, he was kind enough to let my wife hang out in the shop and do much of the work herself under their guidance. It was an invaluable hands-on learning experience, and now she understands the intricacies of her engine at a deeper level. Goes to show it’s important to get to know your local shop and to support the independents out there who are the heart and soul of our industry, as they’re more likely to invest in you when and where it matters.
Case in point. In addition to letting my wife learn how to work on her engine, Redwood Cycles went above and beyond, from porting and polishing the heads, to cleaning up the carb, to adding a few old school racing tricks they had up their sleeve. They also installed a new Dynatek Dyna DSPT-1 Programmable Digital Ignition System to maximize the efficiency of your timing. Needless to say, Angie’s rockin’ one of the fastest Sportsters in town now.
For more information about the S&S Hooligan Kit, 1200cc to 1250cc for 2000–2018 H-D Sportster Models, click here.
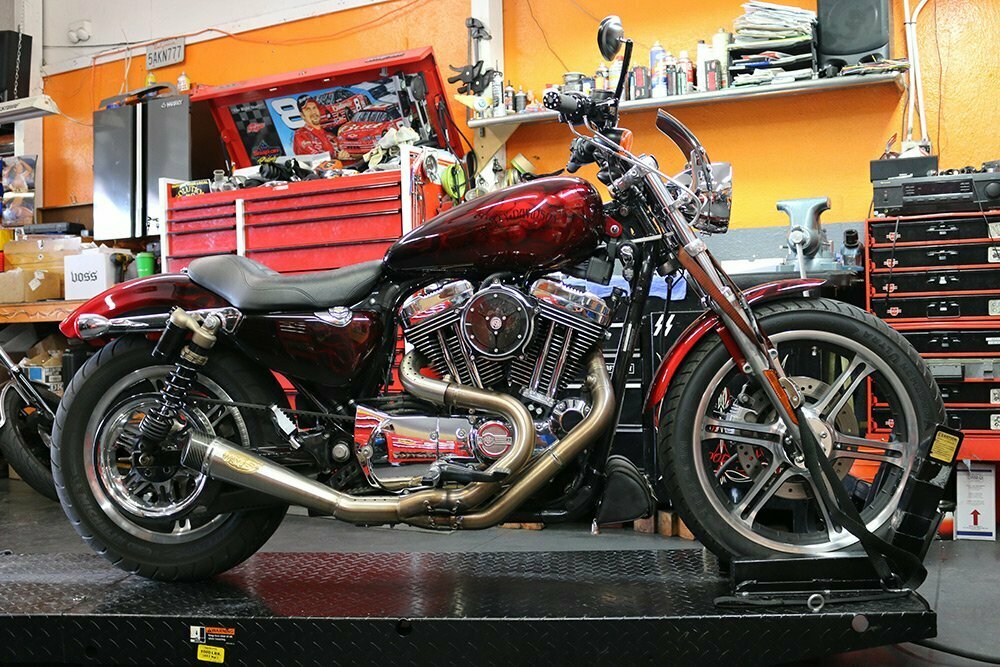
We’ve done plenty of work on Angie’s 2004 Sportster 1200 Custom but we’d never touched the engine.
Bryan Harley
(clockwise)
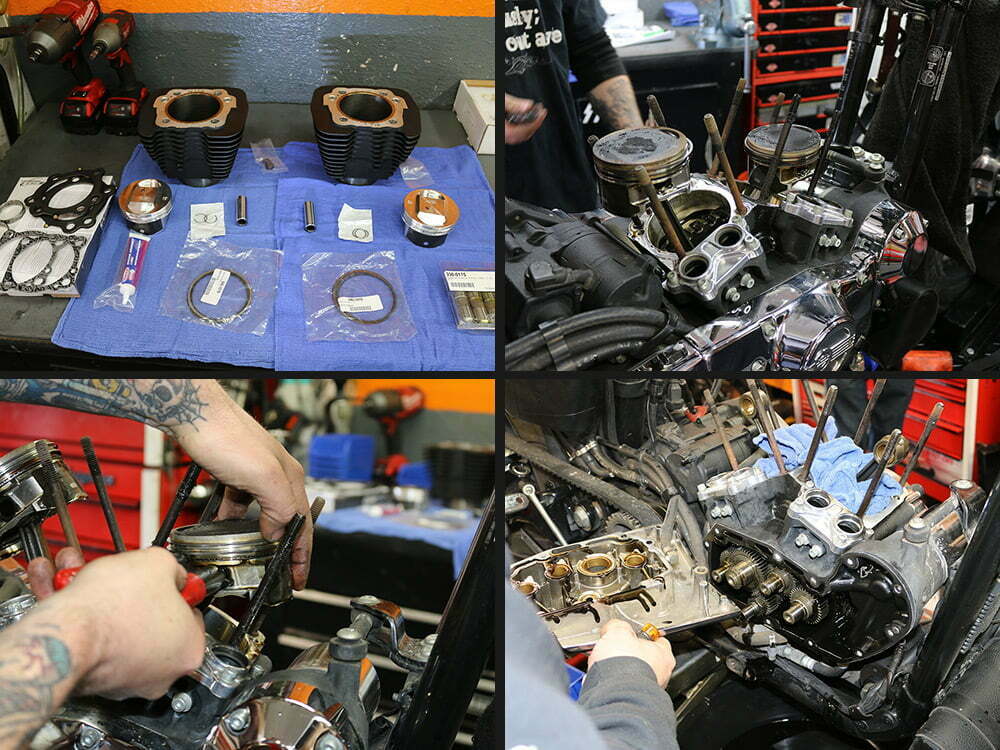
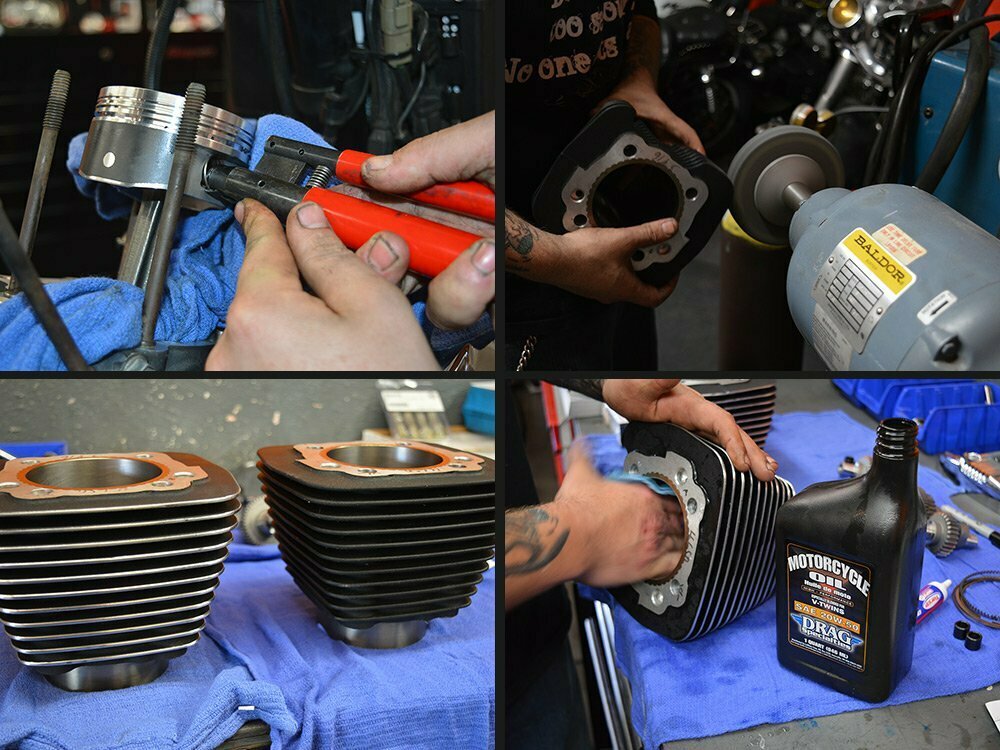
1. S&S 1250 Hooligan Kit includes bigger pistons, new cams, tappets, head, base and exhaust gaskets.
2. With the cylinders removed you could see all the nasty buildup on the piston heads.
3. Off came the old worn pistons.
4. With the mid-controls removed, you’re able to access the cam chamber. Ten 3/16-inch Allen bolts hold the cam cover in place.
Bryan Harley
(clockwise)
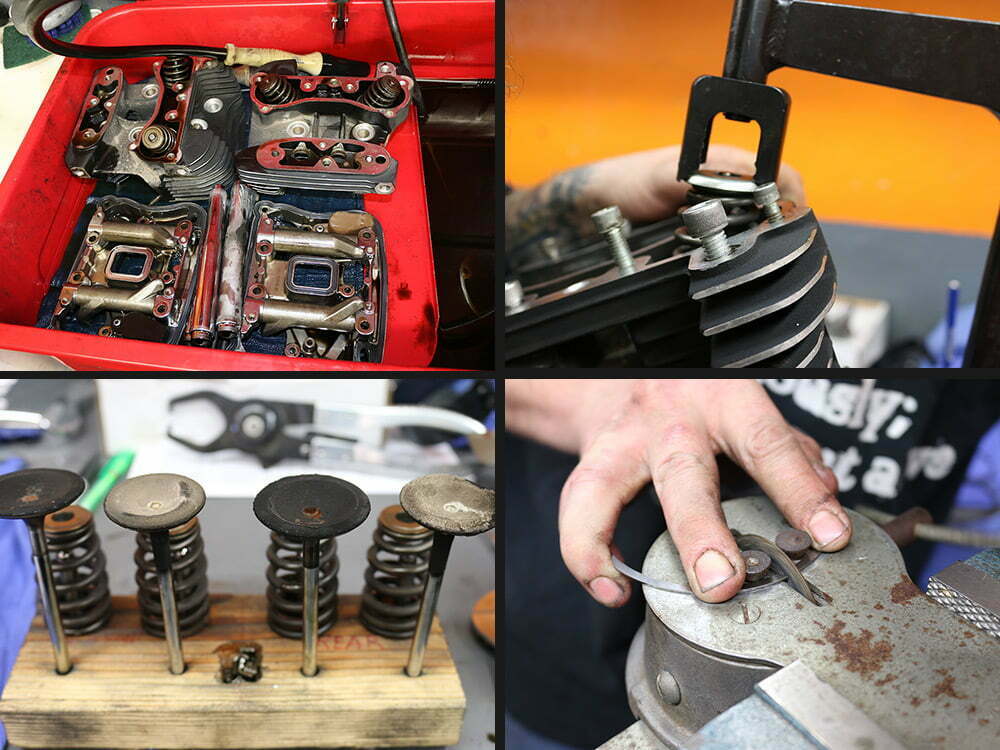
1. We set everything we pulled off so far in the bucket for a good cleaning.
2. A valve spring compressor was used to get the springs out.
3. After inspecting the valves, we realized we needed to order two new ones.
4. One of the most precise steps is gapping the rings to spec.
Bryan Harley
(Clockwise)
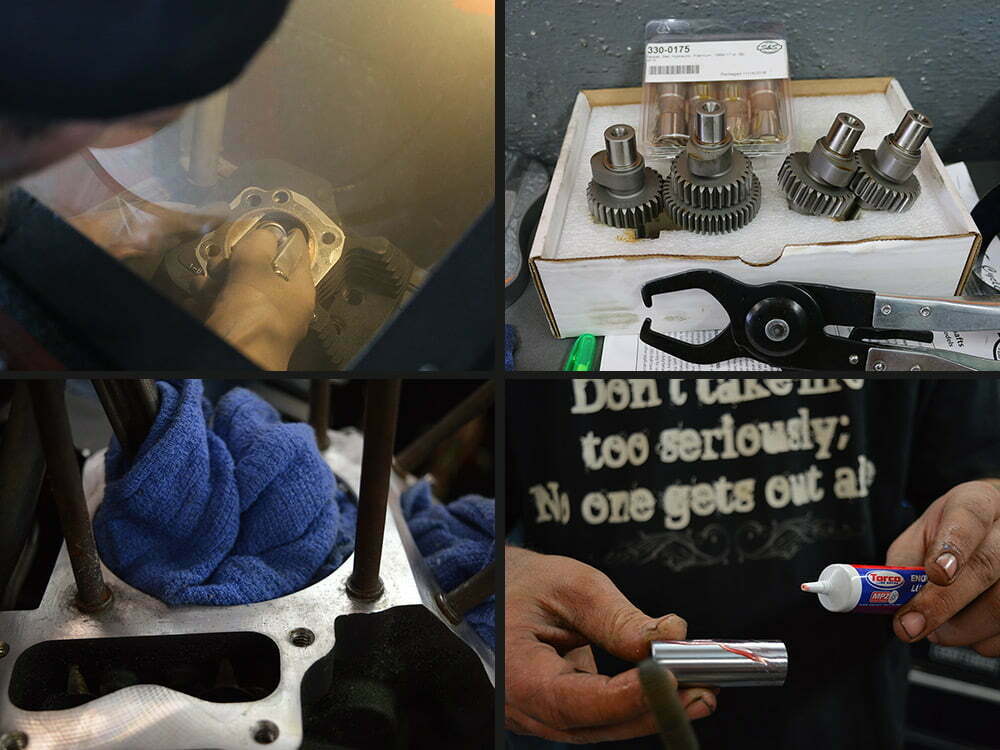
1. Since we had to wait for new valves, the shop started the process of porting and polishing the heads.
2. New cams!
3. We used a razor and Scotch-Brite to remove the residual gasket and chloral acetone on a rag to wipe the base gasket surface area to make sure there’s no grease.
4. Engine assembly lube was applied to the wrist pin.
Bryan Harley
(Clockwise)
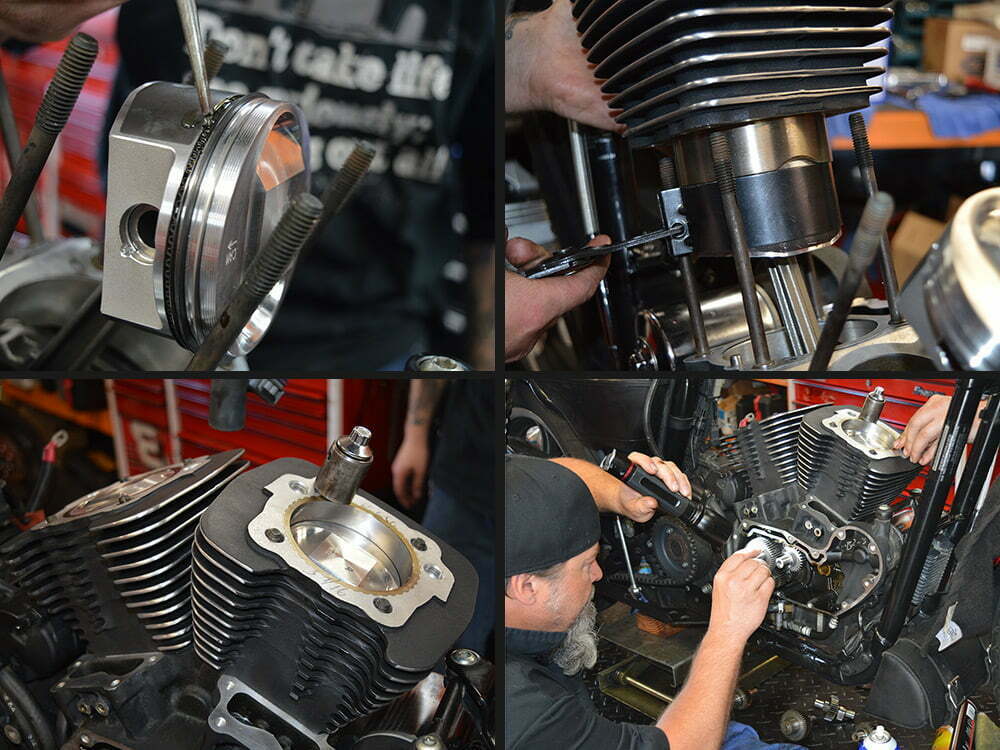
1. The second piston pin keeper was installed.
2. Shop machined the fins on the S&S cylinder so it’d match the stock upper half.
3. One down, one to go.
4. After a thorough cleaning, the cylinder is oiled up and blown dry to avoid rust. After doing so, don’t touch inside or it will cause a rusty fingerprint.
Bryan Harley
(Clockwise)
1. Be careful not to overlap the oil control rings when they’re installed, then prime them.
2. Using a piston ring compressor and snap ring pliers, gently wiggle the cylinder down to overlap rings.
3. The new pistons are in! Ain’t they pretty?
4. Time for the new cams. First 1 and 3, then 2 and 4, making sure the marks are lined up carefully.
Bryan Harley
(Clockwise)
1. Before replacing the cam gasket, the area was wiped with acetone to make sure there was no residual oil or dust.
2. New premium lifters come with the S&S Hooligan Kit.
3. The heads were sent to Ron Godwin at Valley Machine to be resurfaced and the chambers cut so the five-angle valves would fit properly. Godwin also did the five-angle valve job.
4. After lubing the valves, place them into the valve guide and smooth back and forth to get the guide lubed up properly.
Bryan Harley
(Clockwise)
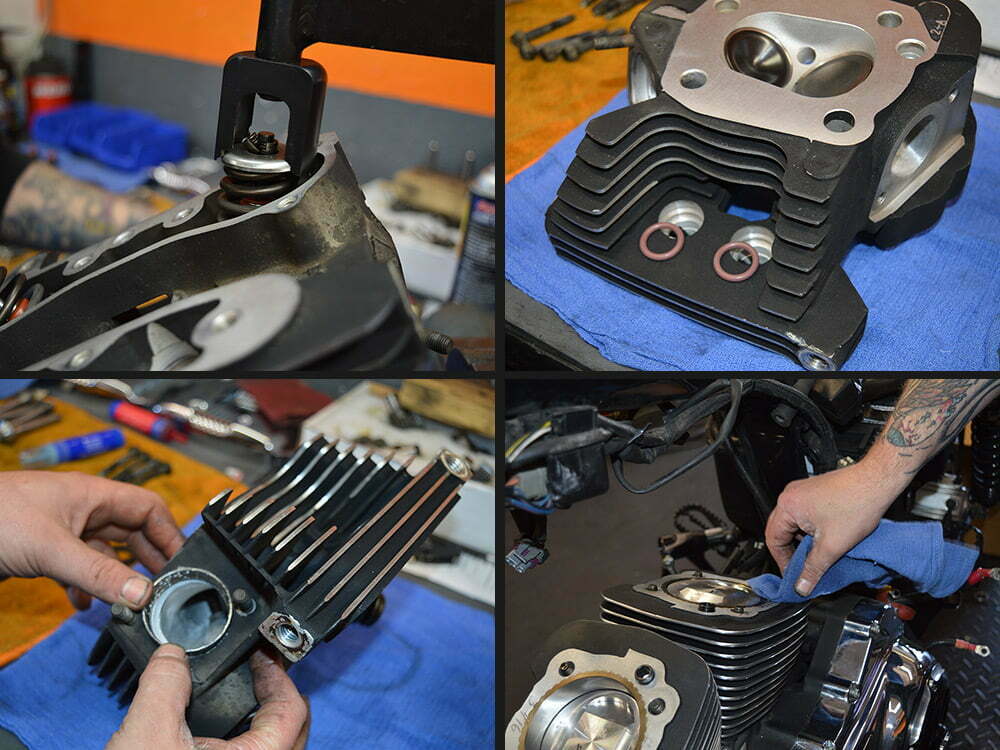
1. Be careful not to bind valve to collar when reinserting the springs. Compress springs to expose keeper notches, install keepers, then decompress.
2. Out with the old, and in with the new pushrod tube O-rings.
3. A new exhaust gasket slides into place.
4. A little surface cleaning before setting the new head gaskets.
Bryan Harley
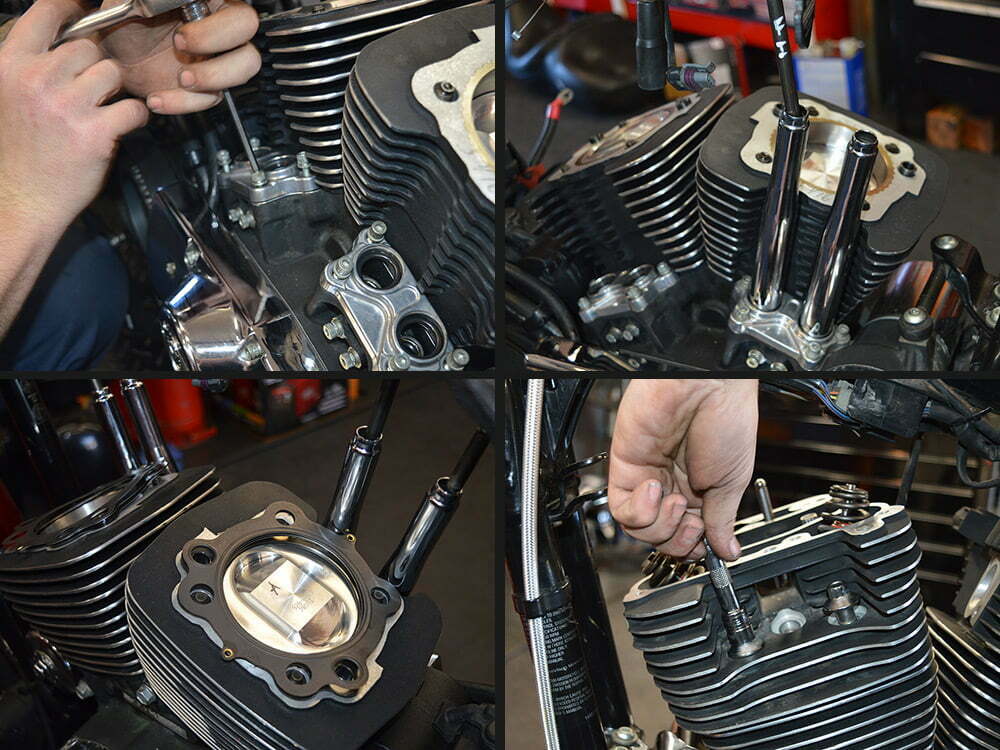
(Clockwise)
1. New lifter block gaskets were put in before the lifter box was tightened down.
2. In go the pushrods!
3. Fresh head gaskets.
4. After putting on new head gaskets, the head was slipped on and four head bolts were cinched down.
Bryan Harley
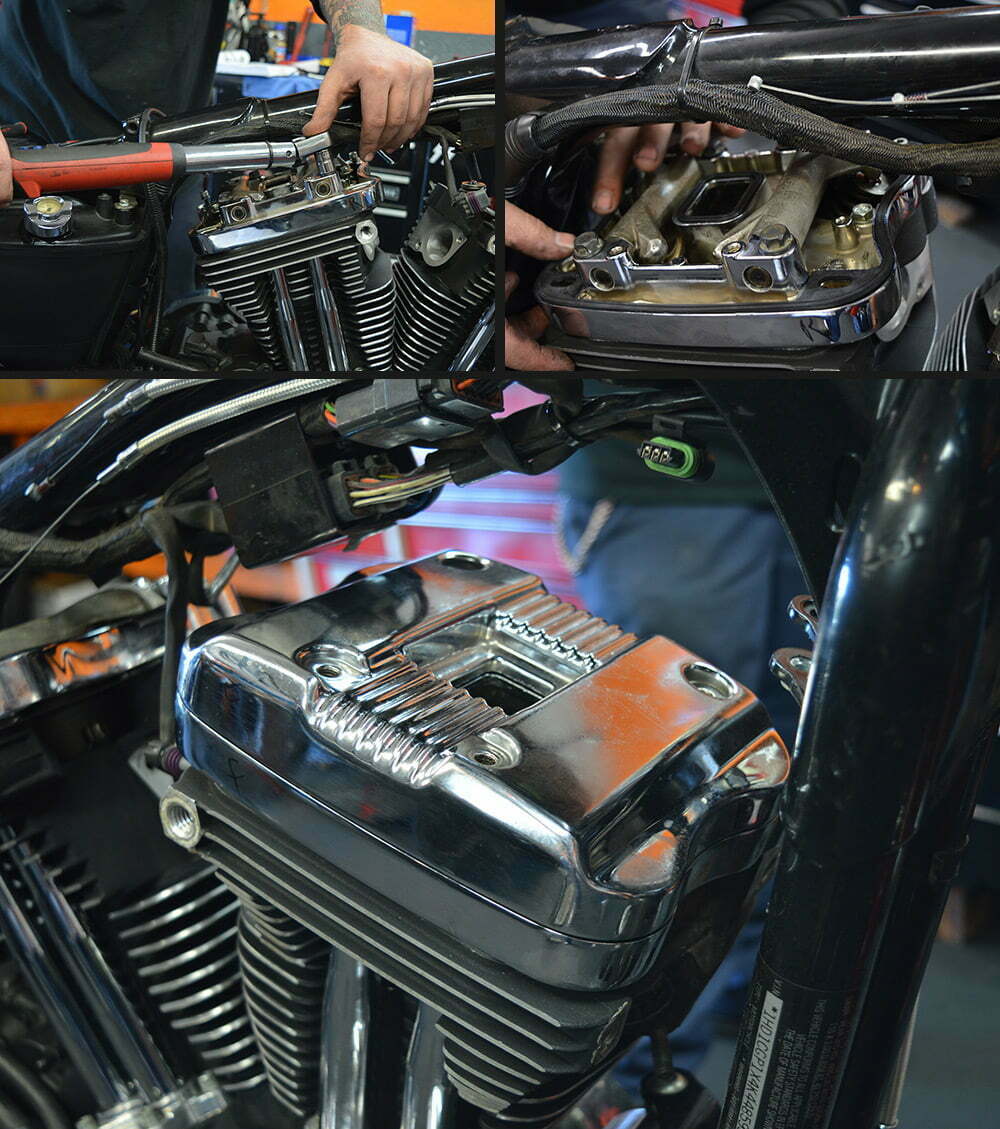
(Clockwise)
1. Back went on the rocker box.
2. The gasket seam was cleaned out and a little gasket cinch was applied with a Q-tip in the valley where the seal sits. The breathers were put back in place, too.
3. The rocker box covers were mounted back on.
Bryan Harley
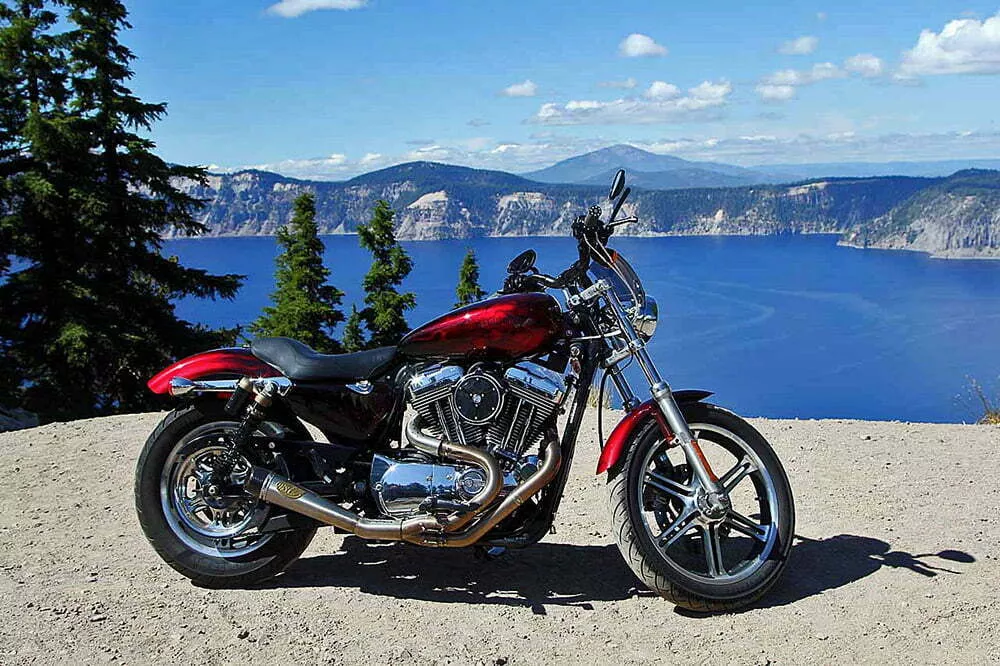
Faster off the line, higher revs in every gear, more top end, the S&S Hooligan 1250 Kit boosted performance top to bottom on Angie’s Sportster.
Bryan Harley


