
Teaching Old Harley Dressers To Backroad Dance
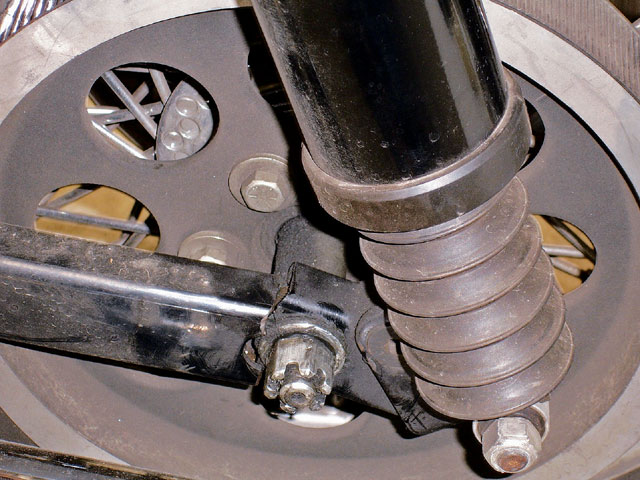
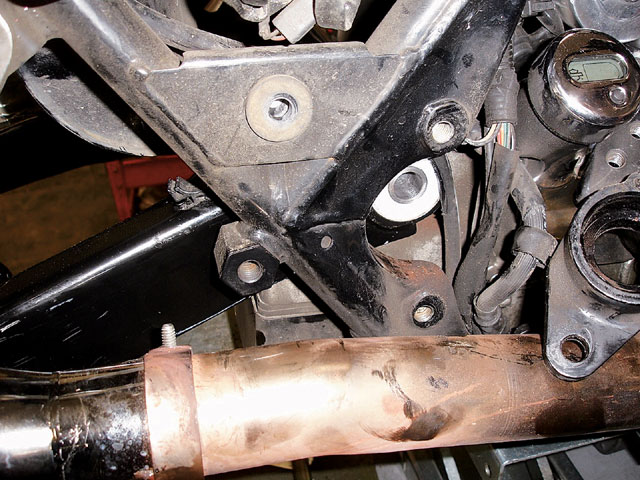
Not good! Like it or not, there are several things we need to talk about in this pic. 130 hp is hard on stuff in the first place, but using so-called “shockback” brackets to lower the bike is messing with leverage and stress points at the axle. The notion of plain old age and high (hard) mileage, plus the fact one of the issues with older swingarms is square tubing that can be crushed and cracked even if you torque things properly, adds up to metal fatigue in one of its worst forms.
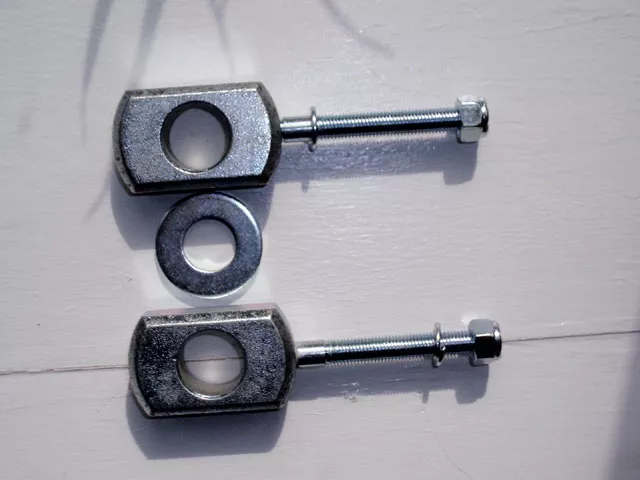
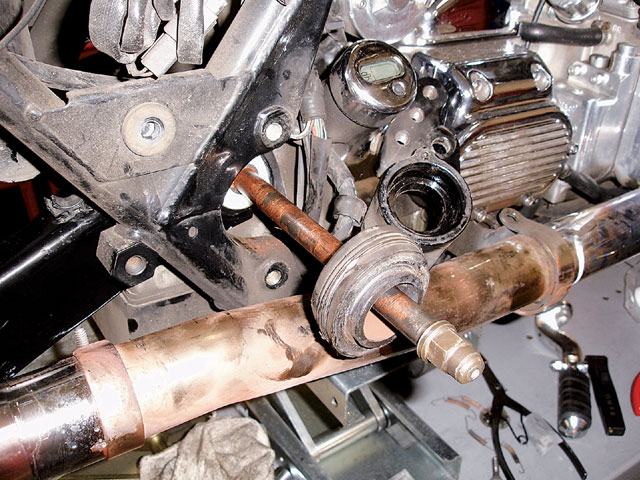
One solution to metal fatigue, if it’s not already too late, is this! Rather than the “lollipop” factory adjusters, which don’t offer much meat to protect the tubing walls, consider upgrading to aftermarket adjusters like these. The additional material backing the walls of the tubing can help prevent stress in the axle area of any pre-’02 swingarm. These are available from V-Twin (’97 to ’01); ’80-’83 models are available from everyone (same as FXR). The only real difference between dresser and FXR from ’84 is the thread pitch on the adjuster bolts.
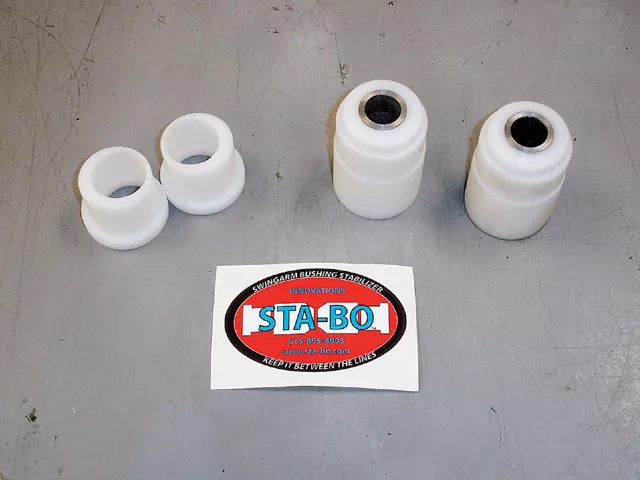
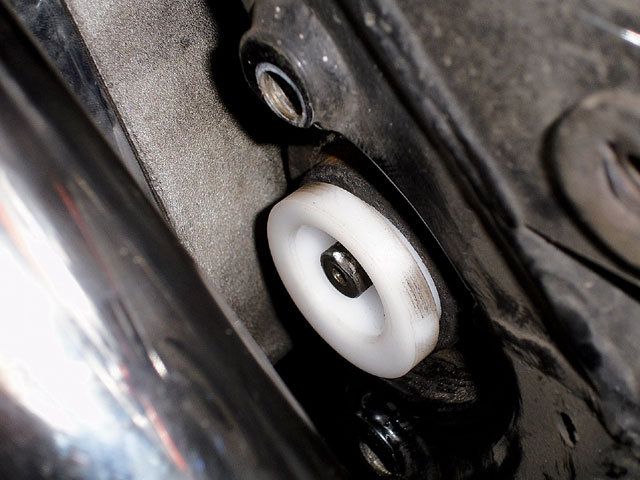
Regardless of which swingarm you choose to use on older dressers, one of the best things you can do for it is add upgraded pivot bearings, like these STA-BOs. Earlier arms benefit enormously from simple elimination of the factory clevebloc setup in favor of this more rigid arrangement. If the swingarm does not flex at the pivot and pass amplified tuning fork types of oscillations onto the rear wheel, handling improves. It’s that basic! The neat thing is that STA-BO now offers a specific kit for just the type of stunt we’re about to pull…
…namely to swap out the old swingarm for the newer (’02-’06) and vastly superior Factory version. As you can see, the bearings have some steps machined into them. What you might not see is that this kit therefore eliminates any need to machine the transmission case in order to swap the newer swingarm into the older chassis. Yet another stress point in high-powered baggers, the swingarm mounting holes are smaller on older models, and machining them enough to accept a bigger pivot bushing has been known to be just enough to cause them to crack. This is a much safer choice, and it’s a pretty straightforward installation.
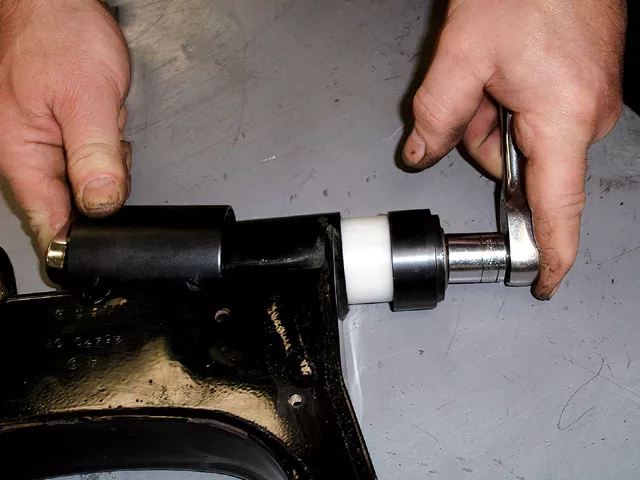
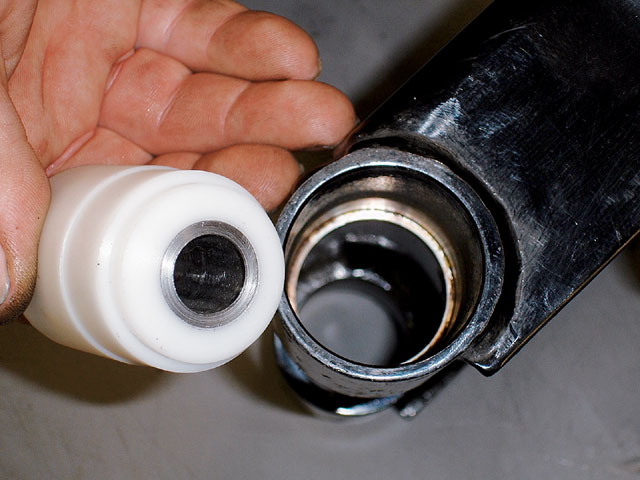
You can press (not pound) them in like this. Just be sure to leave enough of a gap between them in the center section of the arm to allow for a snug but smooth installation.
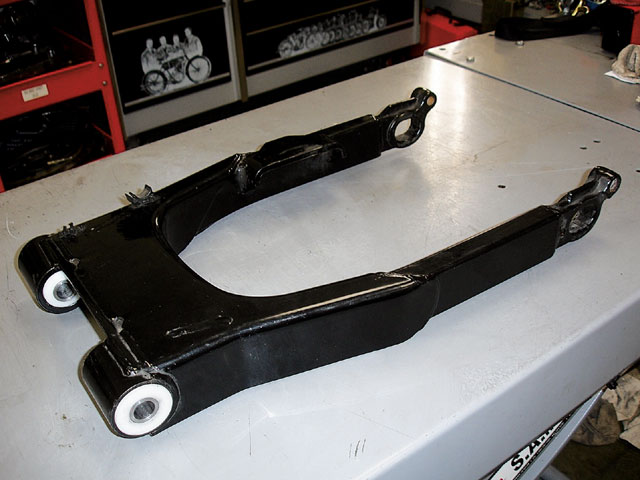
Once the STA-BO bushings are properly installed in the late-model swingarm, it might be beneficial to really look at the differences between older and newer versions.
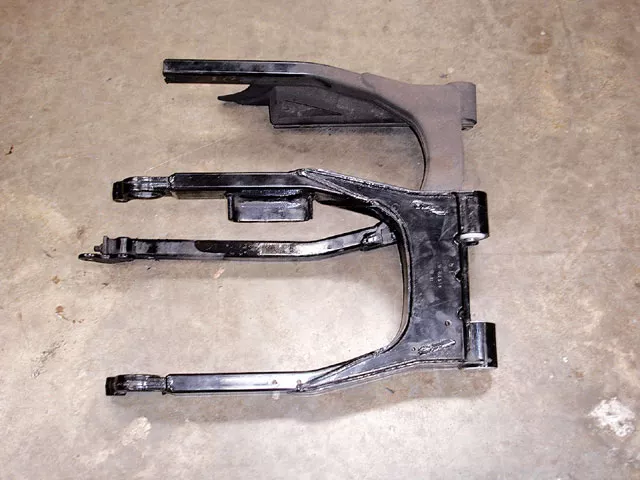
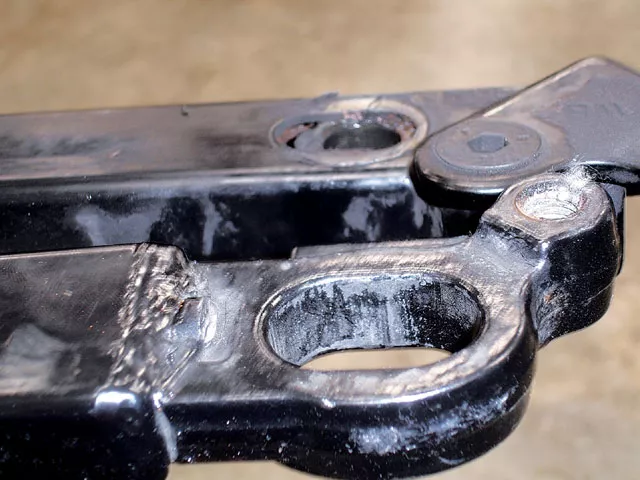
Eyeballing the busted early arm alongside the newer version, one of the first big things to note is the bracing from the pivot point back to the individual legs. The late-model gussets have a span nearly twice that of the older one. This translates into much less twist at the wheel area of the individual legs.
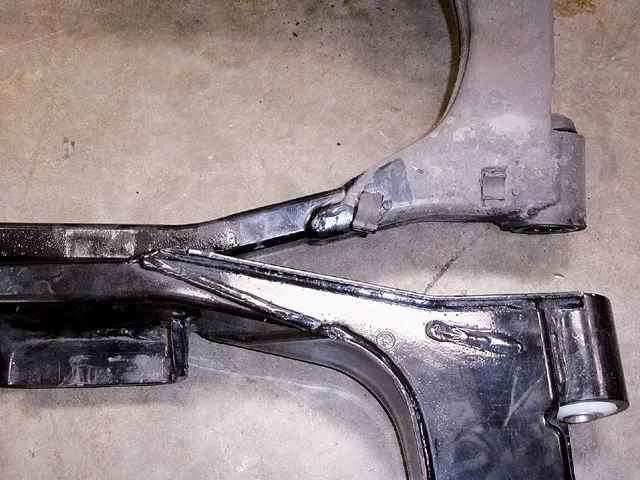
Not just deeper, but wider and more encompassing; you can think of the extra beef at the pivot end of these newer arms as an object lesson in increased torsional rigidity. Or, if you prefer, the Golden Gate Bridge versus the rope bridge in Indiana Jones and the Temple of Doom.
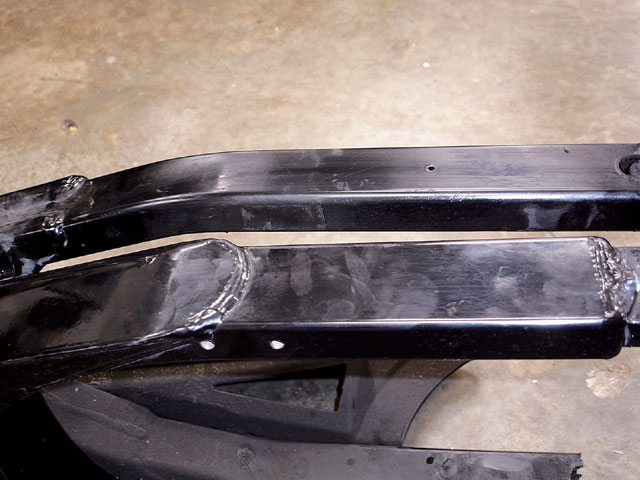
There’s a notable increase in sectional depth on the new arm as well. The square tubing is not only deeper (and therefore more rigid), it has help in the form of bracing that stretches nearly halfway back toward the axle hole. The older swingarm looks positively wimpy in both these areas of design by comparison.
The new design addresses that pesky little issue that Ron discovered the hard way. Where before there was only thin-wall tube to clamp the axle against, there are now solid forgings!
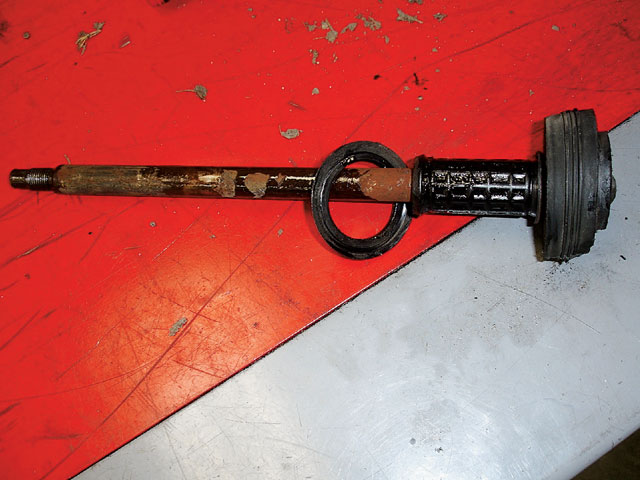
Next up, the actual swap! But before that can happen, the pivot shaft has to shed the remains of a shredded clevebloc so it can be re-used.
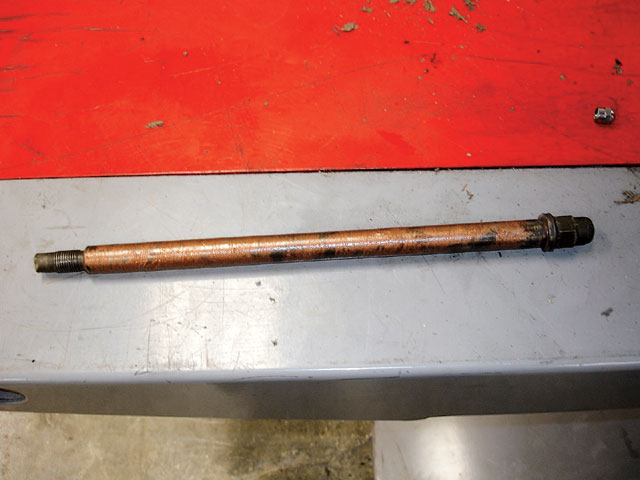
Cleaned and coated with anti-seize, the shaft lives to serve another day.
Now, slip the new arm onto the end of the tranny. You want it to be snug, but not so snug that you’re tempted to use a hammer. You should be able to do this by hand; if not, you’ll need to spread the new bushings a little farther apart and try again.
Examine your rubbermount “donuts” closely for cracks or damage. If they pass muster you can re-use them and feed the freshly lubed shaft back into place. Again, a little wiggling and persuasion is better than brute force and a hammer to get this done.
Once the shaft is back in place, add the outer STA-BOs and button things up as per the shop manual. It’s time to move on the next thing…
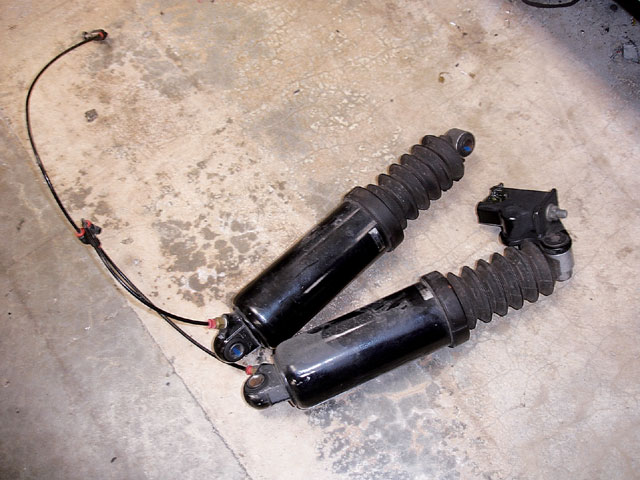
…rear shocks! While there’s nothing all that wrong with Factory shocks, they wear out like any others. When that time comes and the old ones come off (hopefully not quite like Ron’s), you should seriously ponder your suspension choices, if handling to match your newfound chassis integrity is on the agenda.
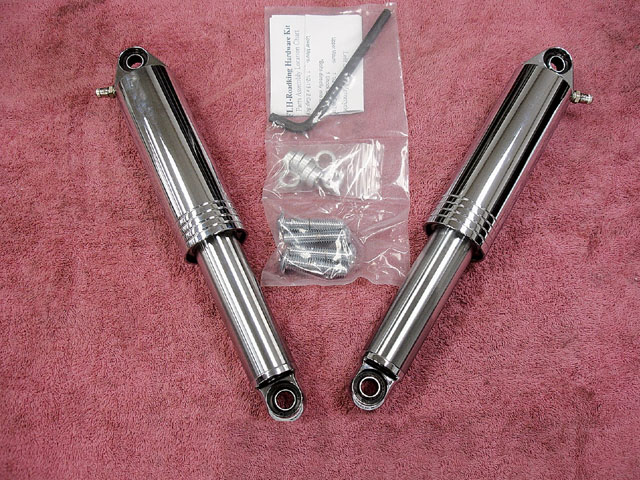
One of the better offerings for your consideration is billet-bodied B&T; Smooth Ride shocks. Perhaps not as well known as some, they are nonetheless among the best-for exactly the reasons the name implies! Besides the fact they look almost too good to hide behind saddlebags, some of the quality features include a main shock body CNC-machined from solid billet 6061-T6 aluminum, and an exclusive internal spring and metering damping system.
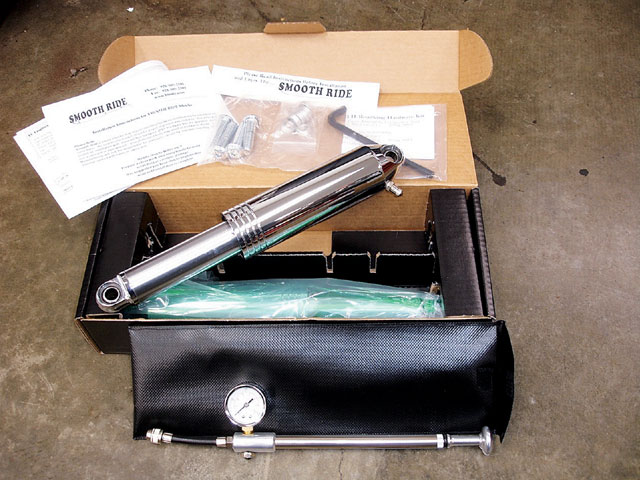
Naturally, these shocks are air adjustable and can be charged and serviced using air-shock hand pumps, which is a near-essential option. Smooth Ride shocks aren’t going to leak oil as standard shocks all too often do, and the range of air pressure adjustment is enormous, as high as 200 pounds! Not that you’ll ever need that much, but it’s nice to know it’s there.
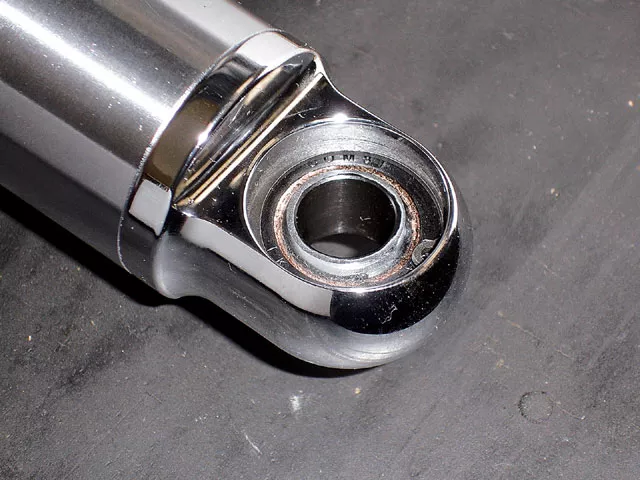
The other exceptional touch exclusive to B&T; Smooth Rides is the spherical bearing shock eye. Unlike typical rubber bushing setups, this trick bearing allows for certain fitment variations from bike to bike, and has self-aligning qualities that are more important than most folks realize when it comes to accurate, smooth damping, and its interaction with wheel/chassis motions at the swingarm.
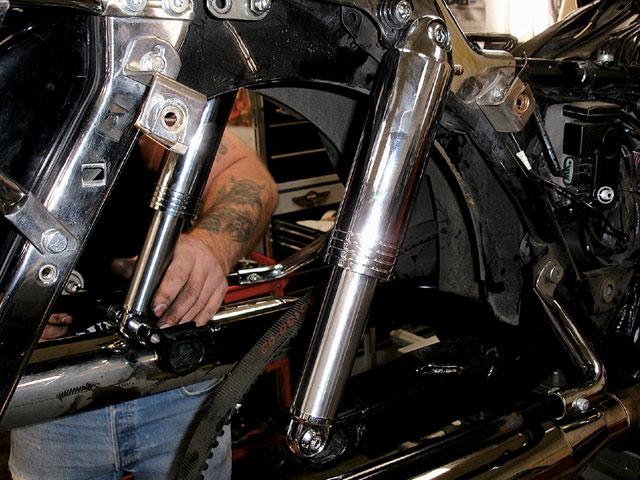
Installation is pretty simple, as you might imagine; just make sure there’s some swivel in those neat bearing eyes and that spacing top and bottom is completely vertical and sufficient to keep things from clanging on parts of the chassis. Run the airlines as normal and start out with 20-25lbs of air pressure. From there, it’s a mostly a matter of adjusting for load and personal taste in the overall ride.
Over the past couple issues we’ve been delving into the intricacies of the touring model chassis. We’ve discussed changes in the frame design and how to lower a new ’07 and love it. Now we’re hitting the larger segment by showing you how you can improve the handling on older FLs.
You might not know my friend Ron. He’s got an older model dresser that has more motor than most can stand, namely an S&S; 124 with over 130 (honest) hp at the back tire, and he’s not afraid to use it! Ron rides it like he stole it, and since he’s a mechanic, he knows how to fix what he breaks. Chances are good that you know someone like Ron (maybe even staring back at you from your bathroom mirror every morning), and there seems to be common thread amongst those who refuse to treat their Glides in geezer fashion. That common thread is the limitation of the chassis.
It’s not like H-D isn’t aware of this. Fact is, after a decade and a half of status quo, the Factory has done many good things to update this chassis over the last few years, namely the move to one-inch axles and beefier swingarms (both of which we’re taking advantage of in this upgrade). For those with older dressers that feature neither, there are these options (and more) available as upgrades.
In Ron’s case, it all started with a broken swingarm. Yes, you read that right-he snapped that hummer right in two! From there, a simple repair bloomed into the project you are about to read about. Hard-riding, high-powered baggers, especially older ones with some mean miles on them, become pretty much a process of finding the weak links. Whether it’s starters, ring gears, tires, or swingarms, finding them is one thing and doing something about it is another.
Keep in mind this particular chase for the missing/weak link all starts with a catastrophic failure of a critical component. Follow along as we attempt to eliminate any possibility of chassis failure in the future and improve its performance to match the engine at the same time.
Going in, we could see that there were going to be at least four major elements involved in purging the demons from Ron’s chassis. First was the swingarm itself and the required conversion to wheels with one-inch axles (although stock wheels are only one option-there are plenty more, as we will see later). Second, the pivot bearings and related goodies. Third, the rear suspension, and finally (we thought) the front forks.
Of course, it never turns out to be quite that simple when a certain degree of re-engineering rather than simple parts swapping is involved. All the same, the results are remarkable, the effort is worth it, and you (or your equivalent of my friend Ron) can link up to a whole new level of ride quality and handling prowess for that beloved pre-’02 dresser or Road King. Can you say better than new? How about better than ever? OK, we’ll settle for handles like a weasel in a drain pipe, and putting all that power to the ground in a non-scary fashion starts with this.
Next month: Forks, wheels, tires, and brakes-oh my! Plus: Issues and answers, or how to know how fast you’re really going (and other chassis upgrade mysteries).
Sources
Harley-Davidson
www.harley-davidson.com
R and R American Cycle
(253) 520.5520
www.randramericancycle.com
B&T; Smooth Ride
(928) 505.2501
www.btmfg.com
STA-BO
(615) 895.8993
www.sta-bo.com
Drag Specialties
www.dragspecialties.com


