2006 Special Construction Chopper – Story With A Moral
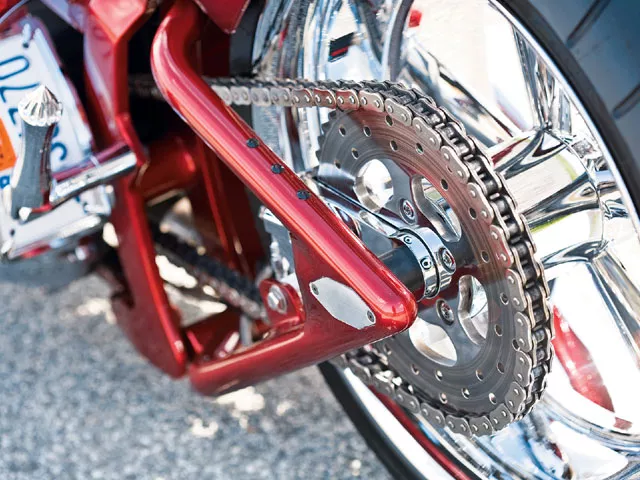
Mike fabbed turn signals on both sides of the swingarm. You can’t even see them unless you look closely.
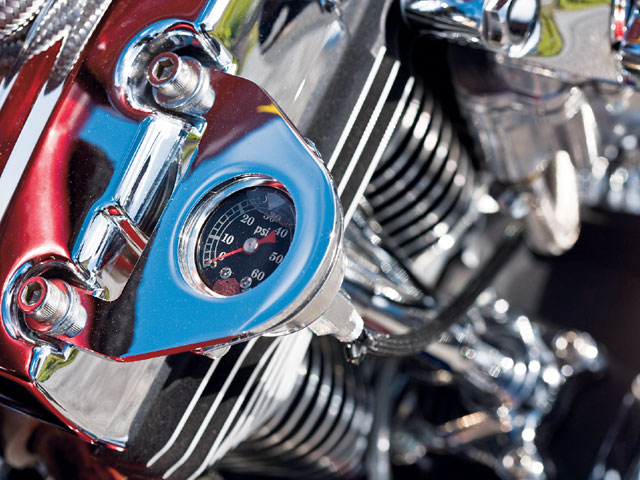
This is the only gauge Mike needs. Less is more!
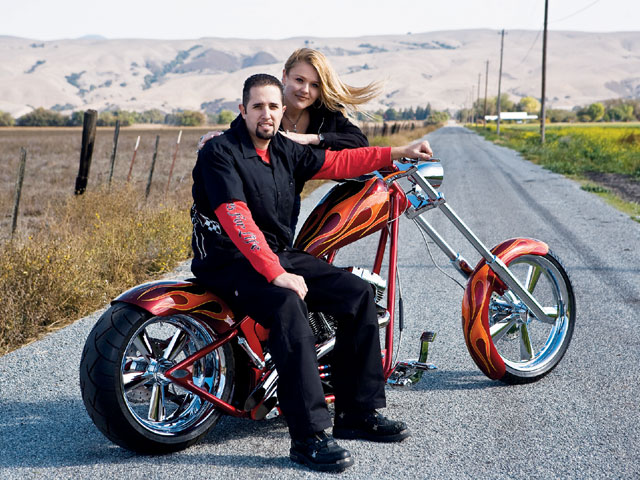
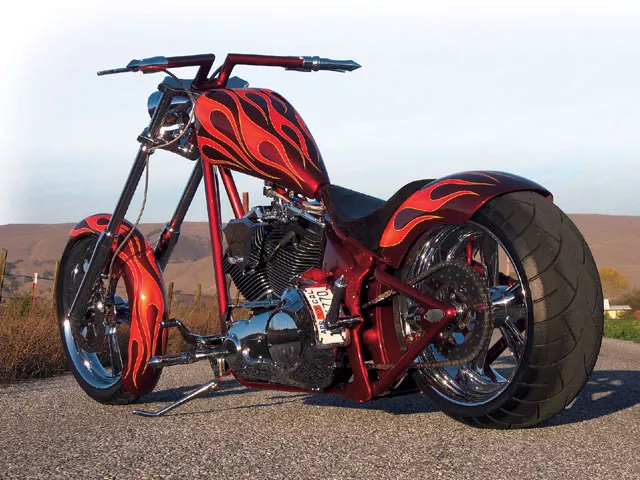
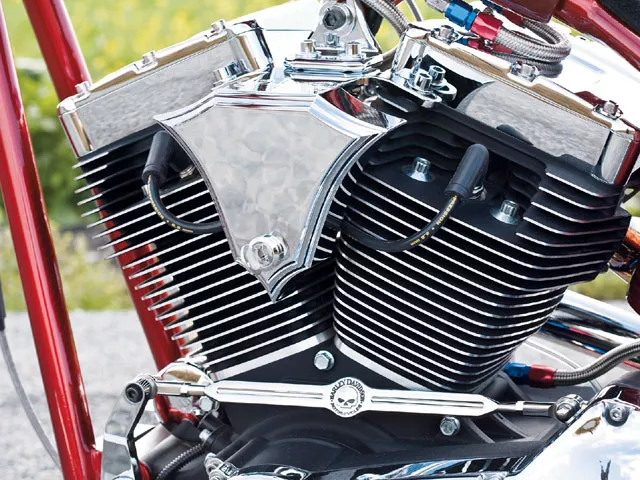
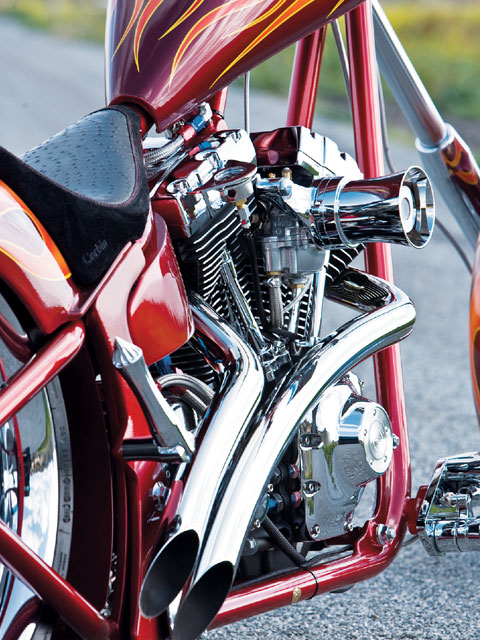
You can’t go wrong with a Twin Cam!
My motto or moral for this story is “What can you do when you don’t know what you can’t do?”
I have never built a bike before. I have played around with my old Fat Boy, installing chrome parts here and there, but I have never built a bike. Motorcycles are my passion. I would love to make a living like some of my favorite bike builders, like Matt Hotch, Paul Yaffe, and Jesse James, but I am not a professional and will likely just continue looking up to these builders and working on bikes as my hobby. Reading HOT BIKE and watching build shows on TV gave me the courage to try building a ground-up custom on my own.
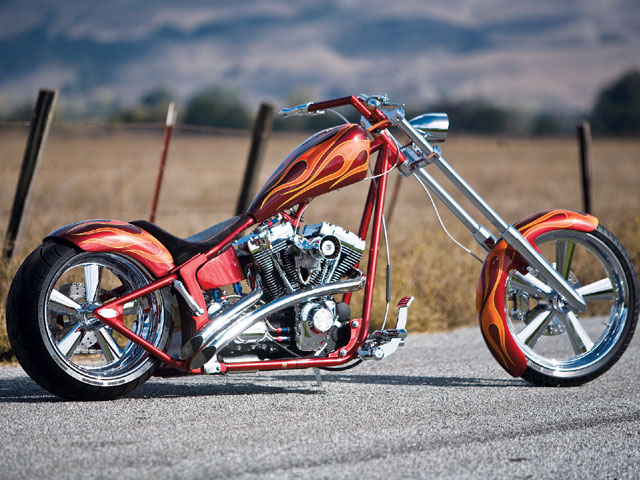
I wanted to build a chopper-style bike with a Harley-Davidson engine, transmission, and primary. Basically, I wanted a sick bike that was reliable and nice to ride. The idea was to use as many Harley parts as possible, but to have a unique custom bike. I started researching some frames online, but kept finding Evo-style frames, which were nice, but I wanted to run a Twin Cam 88B motor. I met a local San Jose guy named Steve Thomas who had a bike that housed the motor I was looking for. After chatting with him about the bike, I found out that he built the frame and would be willing to build one for me. We discussed what I was looking for and two months later I got the call that my frame was ready to be picked up. Now that I had my frame, I had no idea where to start. I put the frame on my workbench and started surfing the Web. The first thing I found was a new Harley Twin Cam 88B, transmission, primary, and carburetor. I picked it up and the next couple of months were the most exciting. As I would find what I was looking for and order it, boxes started showing up at the house on a daily basis. It felt like Christmas!
With no welding experience, I started working on mounting the gas tank. After hours of research, practice, and burnt shirts (I literally caught a few shirts on fire), I was able to MIG-weld all the mounts and get my tank where I wanted it. The tank is from J&P; Cycles and has 4 inches of stretch and a pop-up gas cap. The tank is a flat-bottom style with a teardrop shape. With my new confidence in welding, I bought a $25 oil tank on eBay, cut both sides off, and reformed it with sheetmetal I purchased at the hardware store and bent over my knee. Once I had my oil tank all tacked up and shaped to my frame, I went to my friend Kyle Johnson for help sealing up the tank with a TIG welder.
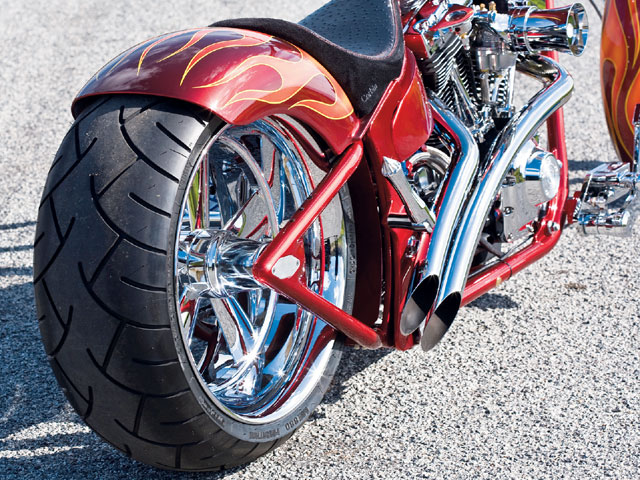
Next were my fenders. I bought a 21-inch blank for a 120 tire in the front. It sits about 1/4-inch from the tire and wraps around to about 1-inch from the ground. The rolling front fender gives the long frontend a nice low look. My rear fender was also a blank that I cut and welded (again with help from Kyle and his TIG welder) to come out with a short, internal strut rear fender that mounts under the seat to the top of the frame. The rear fender is rounded to flow with the rear tire and sits at about 2 o’clock.
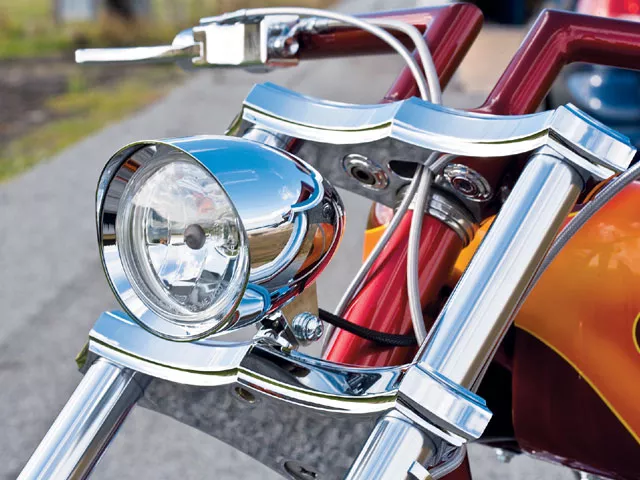
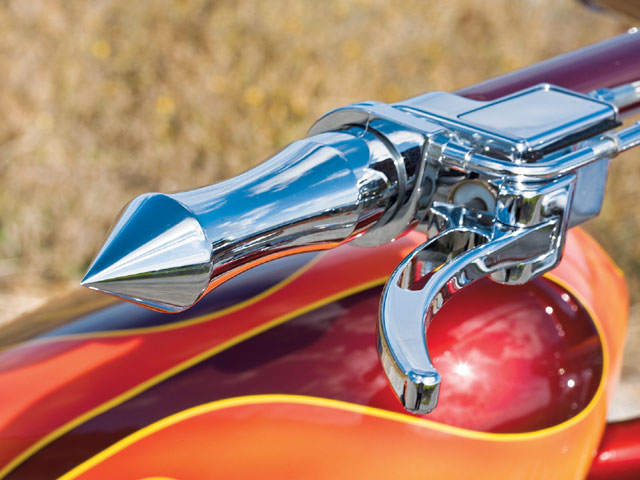
I then purchased the frontend, which is 41mm +10 over stock and has chrome bullet-style legs with hidden axles from Mid-USA. The triple trees are gothic style with 6 degrees of rake. The handlebars I built from 1-1/4-inch steel pipe. I built the 4-inch riser into the bars and reinforced them with a bottom plate that I cut out so that I did not have to use a cross bar. I thought it had a cleaner look that way. The hand controls are from BDL that I bought from a friend. They have hidden bolts and a real clean look up top. I do not have any mirrors because I am trying to come up with a design on my own. The grips are from Eddie Trotta (spike-style) to go along with the triple-tree design and the forward controls. They are sharp as hell, and I have caught my sleeve in the garage a number of times.
The wheels I had in my mind were simple, clean-looking, and chrome. I wanted wheels that looked like the chrome was still wet and flowing over the wheel into the tire. I even looked into having my own wheels machined. Well, that turned out to be way too expensive so I found a set of 5-spoke wheels made by Tight Customs that were exactly what I was looking for. The front wheel is a 21×3.5-inch single-side disc. The rear is an 18×8.5-inch rear single-side drive/brake setup. I went to a local shop in Gilroy, California, called Canyon Hill Customs, and owner David was able to order them for me. When I got the wheels I had to make some adjustments to get them to fit. This was pretty common with just about everything I purchased for this bike: “one step forward, two steps back.” This goes back to not knowing what to do and learning as you go.
The way a TC 88B motor mounts is unique. The bolts slide through the motor horizontally. The trans mounts to the motor and the pivot axle slides through the transmission horizontally as well. When you have the motor in the frame, you can literally slide the motor side to side and line up the transmission sprocket with the rear sprocket. The cool thing about this is that you do not have to use an offset on the primary. I was able to line up the sprockets and have enough clearance to run a chain drive and an Exile sprotor in the rear. Once I had it all lined up, I measured and cut the spacers and it was good to go. Back to the rear wheel, when I first mounted it, the hub was not the correct offset. I took the measurement, pulled the hub apart, and brought the hub to a local machine shop that took off about .25 inches from the hub. After bolting the wheel back together, it fit like a glove. With the bike pretty much in rolling chassis form, I ended up changing a few things like extending the bottom of the tank another inch to fit the frame better. I did this with some sheetmetal, my knee, and a hammer. I also changed a few odds and ends like trimming the grip to fit tightly against the hand control.
When it came time to tear down the bike I felt a little bit more in my league. I have experience painting and doing bodywork. When I was in college I worked for a local body shop and continued on with some custom stuff with mine and my friends’ cars and bikes. For the bodywork/molding I handed my sheetmetal over to my friend Mike Miller to slap down the bondo so that the frame looked like one solid piece. Mike got my tins back to me in primer, ready to go, and I decided on a Candy Apple Red for the base coat. I used House of Kolor metallic silver and then five coats of Candy Red. I then sanded the clear and taped off the flames freehand on my dining room table. Yes, my wife loved that one too! With the flames taped off, I started with a chrome yellow and then fogged in some sunset pearl orange.
From there it was off to the airbrush as I mixed in some tangelo orange, candy red mixed with tangelo, and candy red alone. I got the blend how I wanted it, untapped and applied four more coats of clear. With this round of clear sanded down, I took the sheetmetal to Jean Worth, who striped the flames in yellow, and then I added four more coats of clear. The paint was then wet-sanded and buffed to a show finish. Oh, yeah, all this was done in my backyard. I do not have a paint booth. It’s pretty amazing what good quality can come out of a home paint job without the proper equipment.
Final assembly went smoothly; a few scratches, but not bad for my first time. The Harley motor fires right up every time, nothing leaks, there is zero vibration (balanced motor), and the bike is the center of attention anywhere I take it.
My experience has taught me many things. First of all, it taught me that if you have a vision of building a custom bike, you will not get it unless you try, or pay lots of money. I could not have done this without the support from my family and friends, but most of all I could not have done this without the encouragement from my wife, who stood by me throughout all the blood, sweat, and tears, not to mention the time it took from our lives to build it. She pushed me to keep going when things went wrong and got involved as much as she could. She even got dirty a few times when I needed another hand. By the way, the bike has won First place at the San Francisco Custom Rod and Bike show and First place at the Second Annual Arlen Ness show.
| BIKE OWNER | Mike Vivona |
| YEAR/MAKE/MODEL | ’06/Special Construction chopper |
| FABRICATION | Mike Vivona |
| ASSEMBLY | Mike Vivona |
| BUILD TIME | 1 year, 3 months |
| ENGINE | |
| YEAR/ MANUFACTURER | ’04/H-D |
| TYPE/SIZE | Twin Cam/88B |
| BUILDER | H-D |
| CASES | H-D |
| CYLINDERS | H-D |
| HEADS | H-D |
| ROCKER BOXES | H-D |
| CARBURETOR | S&S; Super E |
| AIR CLEANER | H-D |
| EXHAUST | Big Bear Choppers Venom |
| TRANSMISSION | |
| YEAR/MANUFACTURER/TYPE | ’04/H-D/5-Speed |
| CASE | H-D |
| CLUTCH | H-D |
| PRIMARY DRIVE | H-D |
| FRAME | |
| YEAR/MANUFACTURER | Mid-USA |
| RAKE | 40 Degrees |
| STRETCH | 6 inches in downtubes, 4 inches in backbone |
| SUSPENSION | |
| MANUFACTURER FRONT | Mid-USA |
| LENGTH | +10 inches |
| TRIPLE TREES | 6-degree rake |
| MANUFACTURER REAR | Accessories Unlimited Air Ride |
| SWINGARM | Accessories Unlimited Air Ride |
| WHEELS, TIRES, AND BRAKES | |
| MANUFACTURER FRONT/TYPE | Tight Customs Troublemaker II |
| SIZE-WIDTH/HEIGHT | 21X3.5 |
| TIRE/SIZE | Metzeler 21/120 |
| CALIPER | Epic Sun |
| ROTOR | Tight Customs/Troublemaker II |
| MANUFACTURER REAR/TYPE | Tight Customs/ Troublemaker II |
| SIZE-WIDTH/HEIGHT | 18X8.5 |
| TIRE/SIZE | Metzeler/250 |
| CALIPER | Exile |
| ROTOR | Exile |
| FINISH/PAINT | |
| COLOR | Candy Apple Red |
| PAINTER | Mike Vivona |
| GRAPHICS | Mike Vivona |
| PLATING/POLISHING | H-D |
| ACCESSORIES | |
| FRONT FENDER | Mike Vivona |
| REAR FENDER | Mike Vivona |
| FENDER STRUTS | Internal |
| GAS TANK∩ | J&P; Cycles, Pop-up cap |
| OIL TANK | Mike Vivona |
| GAUGES | H-D |
| HANDLEBARS | Mike Vivona |


