
Arlen Ness Intake and Supertrapp Pipe Install | Enhanced FXR Sucking And Blowing


Tech
It has been known since the dawn of internal combustion engines that a better breathing motor provides more horsepower. Sure, over the past few decades gaining those ponies has become a scientific situation with millions of dollars in research being done, but that information is now spread all over the internet where anyone can lay an eye on it and make more educated choices when it comes to hopping up bikes. And that’s a very good thing no matter what age your motorcycle is.
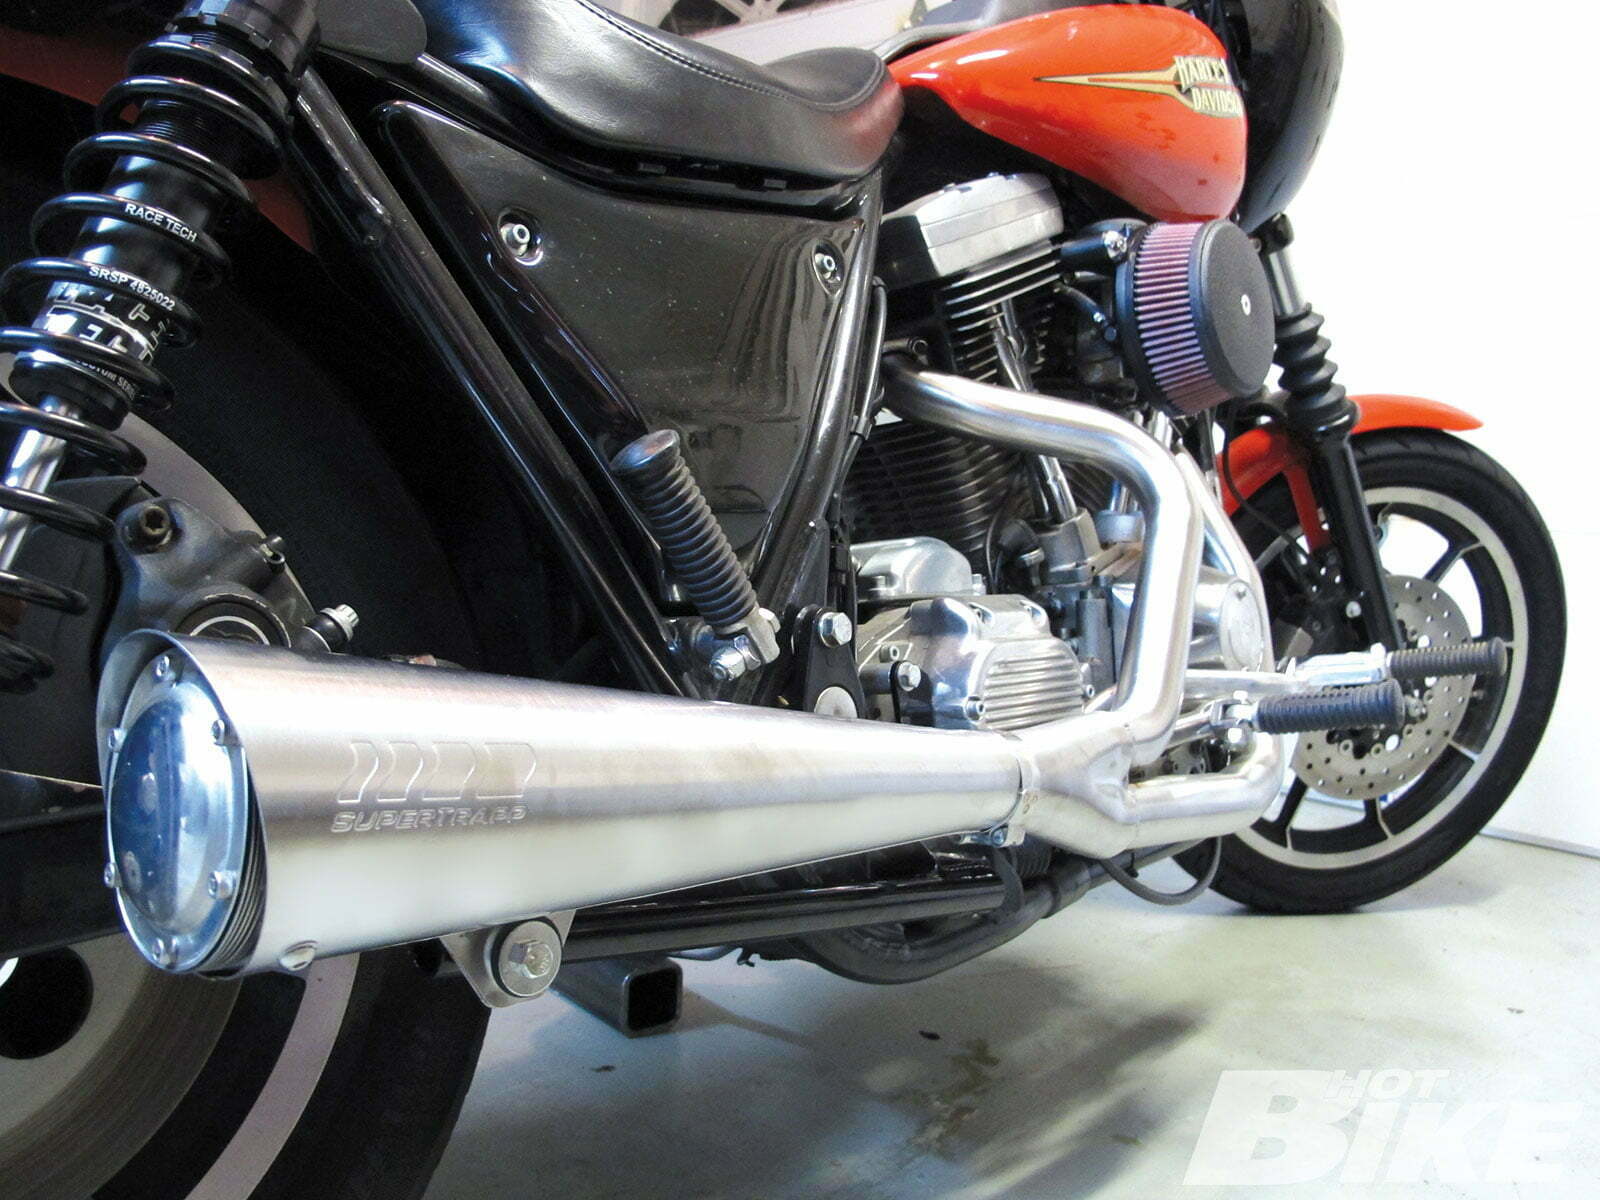
We decided that our old Evolution-powered FXR needed a little pepping up, but nothing that required more than handtools and a butt dyno to know we made the right decisions. We wanted to install an intake and exhaust with just the right combination to get us efficient air draw with some sweet sound coming out the back. We went with an Arlen Ness Billet Sucker Stage 1 intake and a Supertrapp 2:1 Supermegs exhaust.
When it comes to an intake on a V-twin motorcycle, the simpler the better. The OEM intake does a fair job of getting that oxygen into the engine, but it isn’t the most efficient by any means. We like the design of the Arlen Ness Billet Sucker due to its large-diameter exposed filter, which gives the ambient outside air a very good field of consumption. We also admire the quality of the backing plate’s crank case vents and ease of assembly. Topping off the whole intake shebang is the nice and simple wrinkle black powercoated billet aluminum end cover. Ness says these filters will get you “up to” 21 more horsepower, but on this old Evo motor we are sure it’s much less.
FXRs need 2-into-1 pipes like a fat kid needs pizza and the stainless steel Supertrapp is our first choice for a few reasons. The first being Supertrapp’s 4-inch adjustable diffuser discs which makes tuning the exhaust for performance an easy task especially on carbureted bikes such as this. The other is this can be done in just a few minutes with basic handtools, so the correct combination of air and fuel can be had quickly and easily. Having the whole thing made up from lightweight brushed stainless steel is also a very cool thing.
The 2:1 Supermegs possess a 2-inch collector that mates to a 4-inch megaphone where Supertrapp’s patented diffuser discs are housed. Patented in 1971, this technology permits the user to add or subtract diffusers discs to tune the power and sound of the bike. By adding more discs it increases the exhaust outlet and decreases backpressure, therefore widening the power band at the top end as well as increasing exhaust tone and leaning out the air/fuel mixture. By removing discs, it decreases the exhaust opening and increases backpressure, which adds to low-end torque and a “Fat” condition. Supertrapp claims that by simply bolting up its 2:1 Supermegs exhaust you will see a 15 percent horsepower increase.
We loved the look and sound of the Supertrapp pipe and were more than pleased with the simple looks and positive suction that the Arlen Ness intake had. Both were very simple to install and it took less than an hour to get this old FXR out of the OEM iron lung and get it a new lease on life.
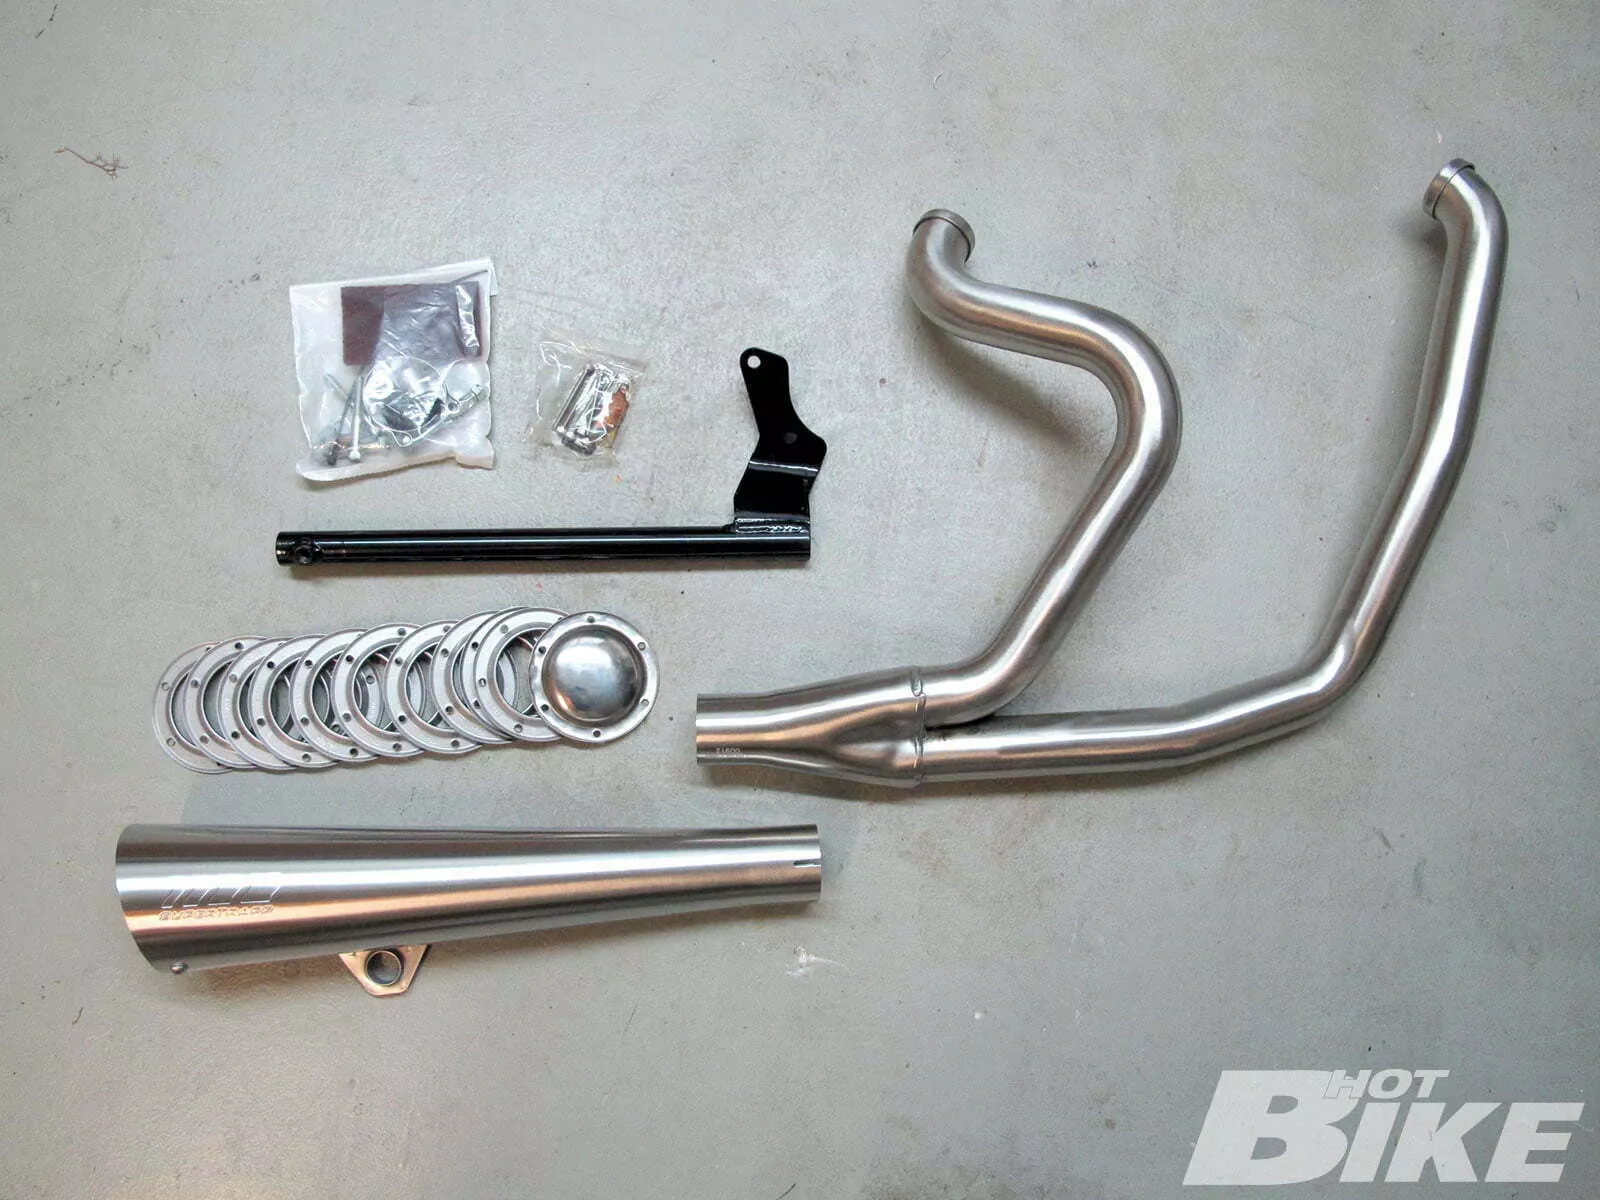
1. This is the complete Arlen Ness Billet Sucker intake. It comes with everything needed to install it on your bike, even threadlocker!
2. This Supertrapp 2:1 Supermegs in stainless steel is simply a thing of beauty. This kit also comes with everything included to get this piece of non-ferrous art onto this FXR.
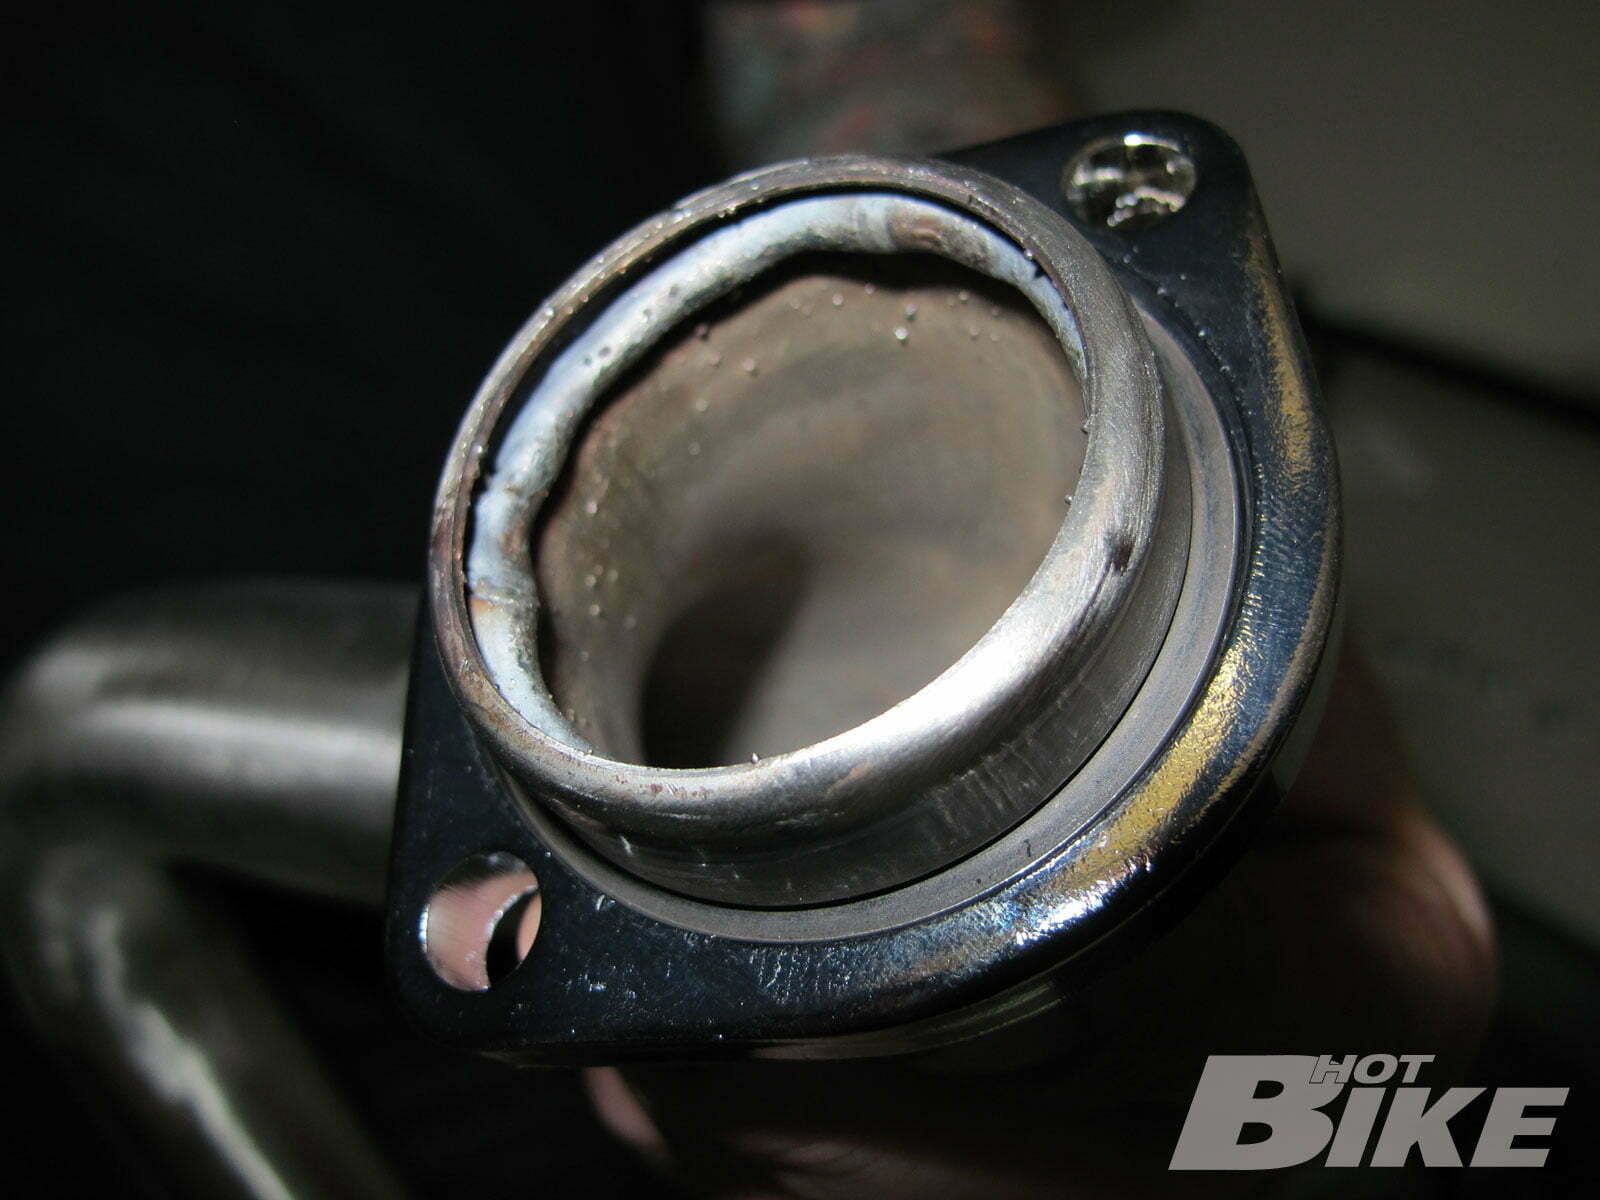
3. We did buy new gaskets and clips because the old stock Harley units have seen major miles as well as better days.
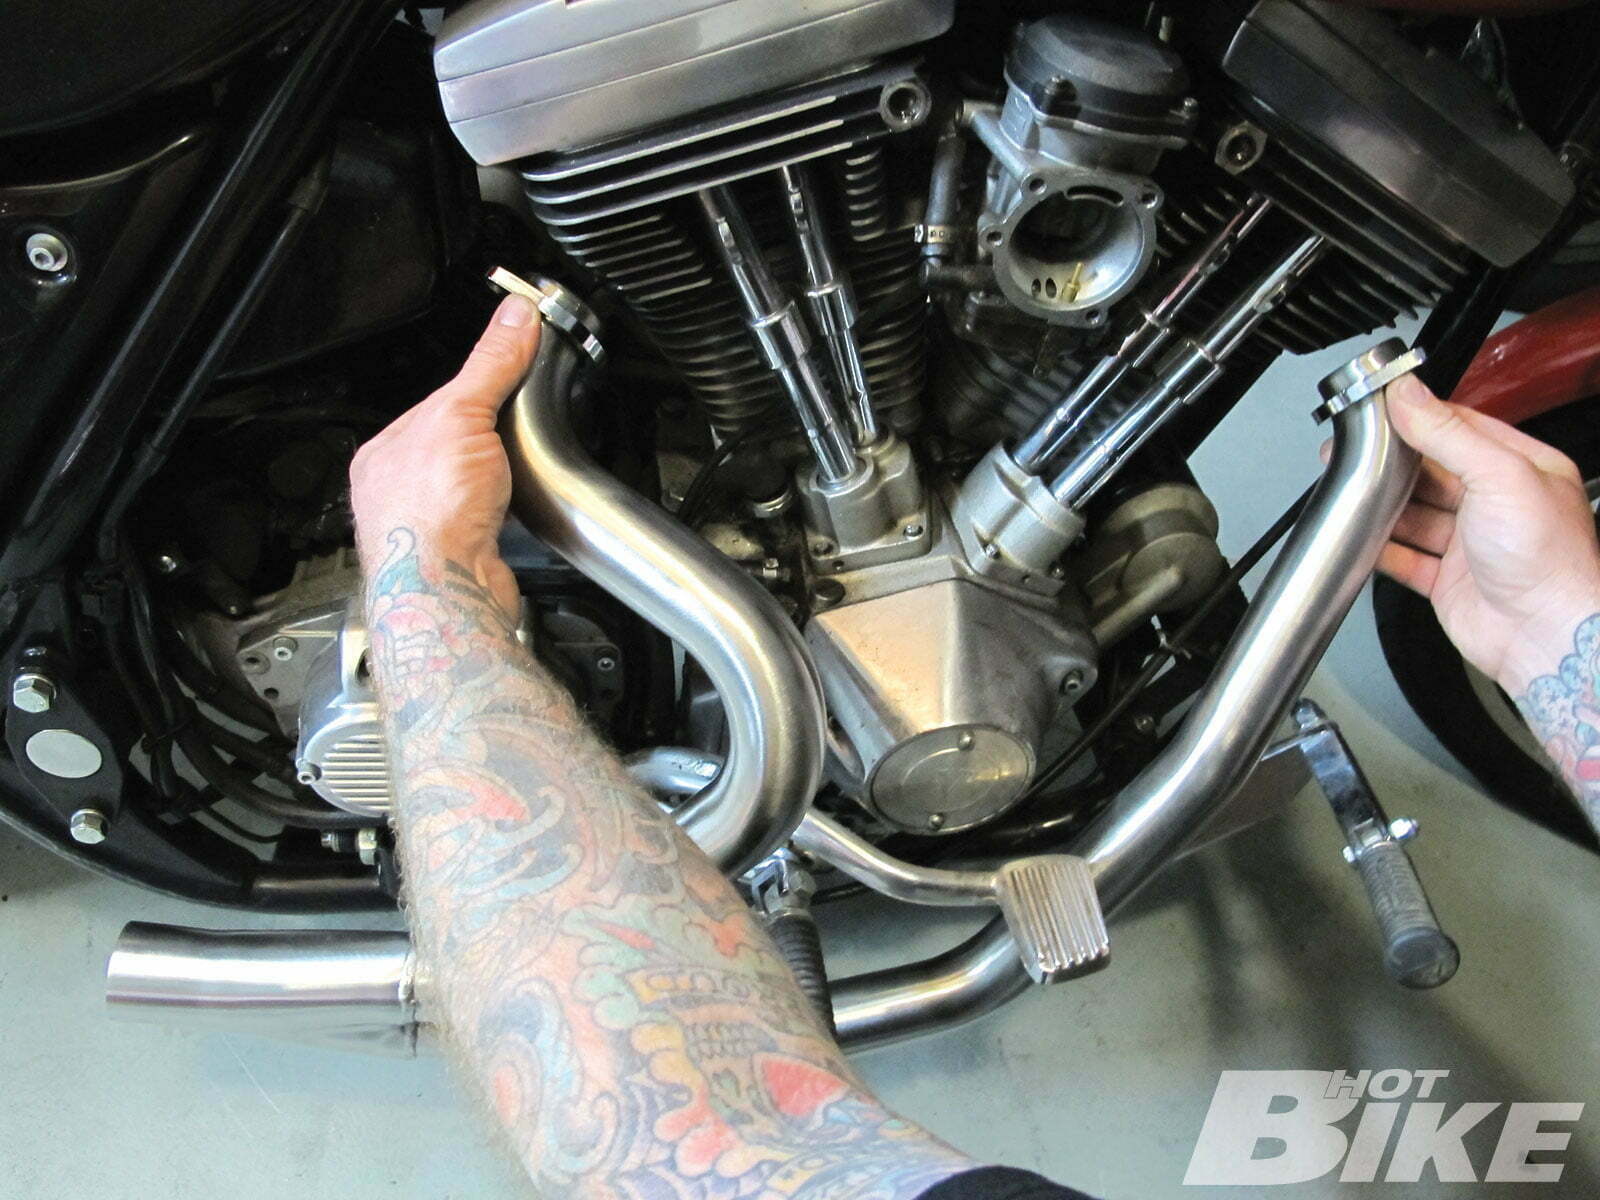
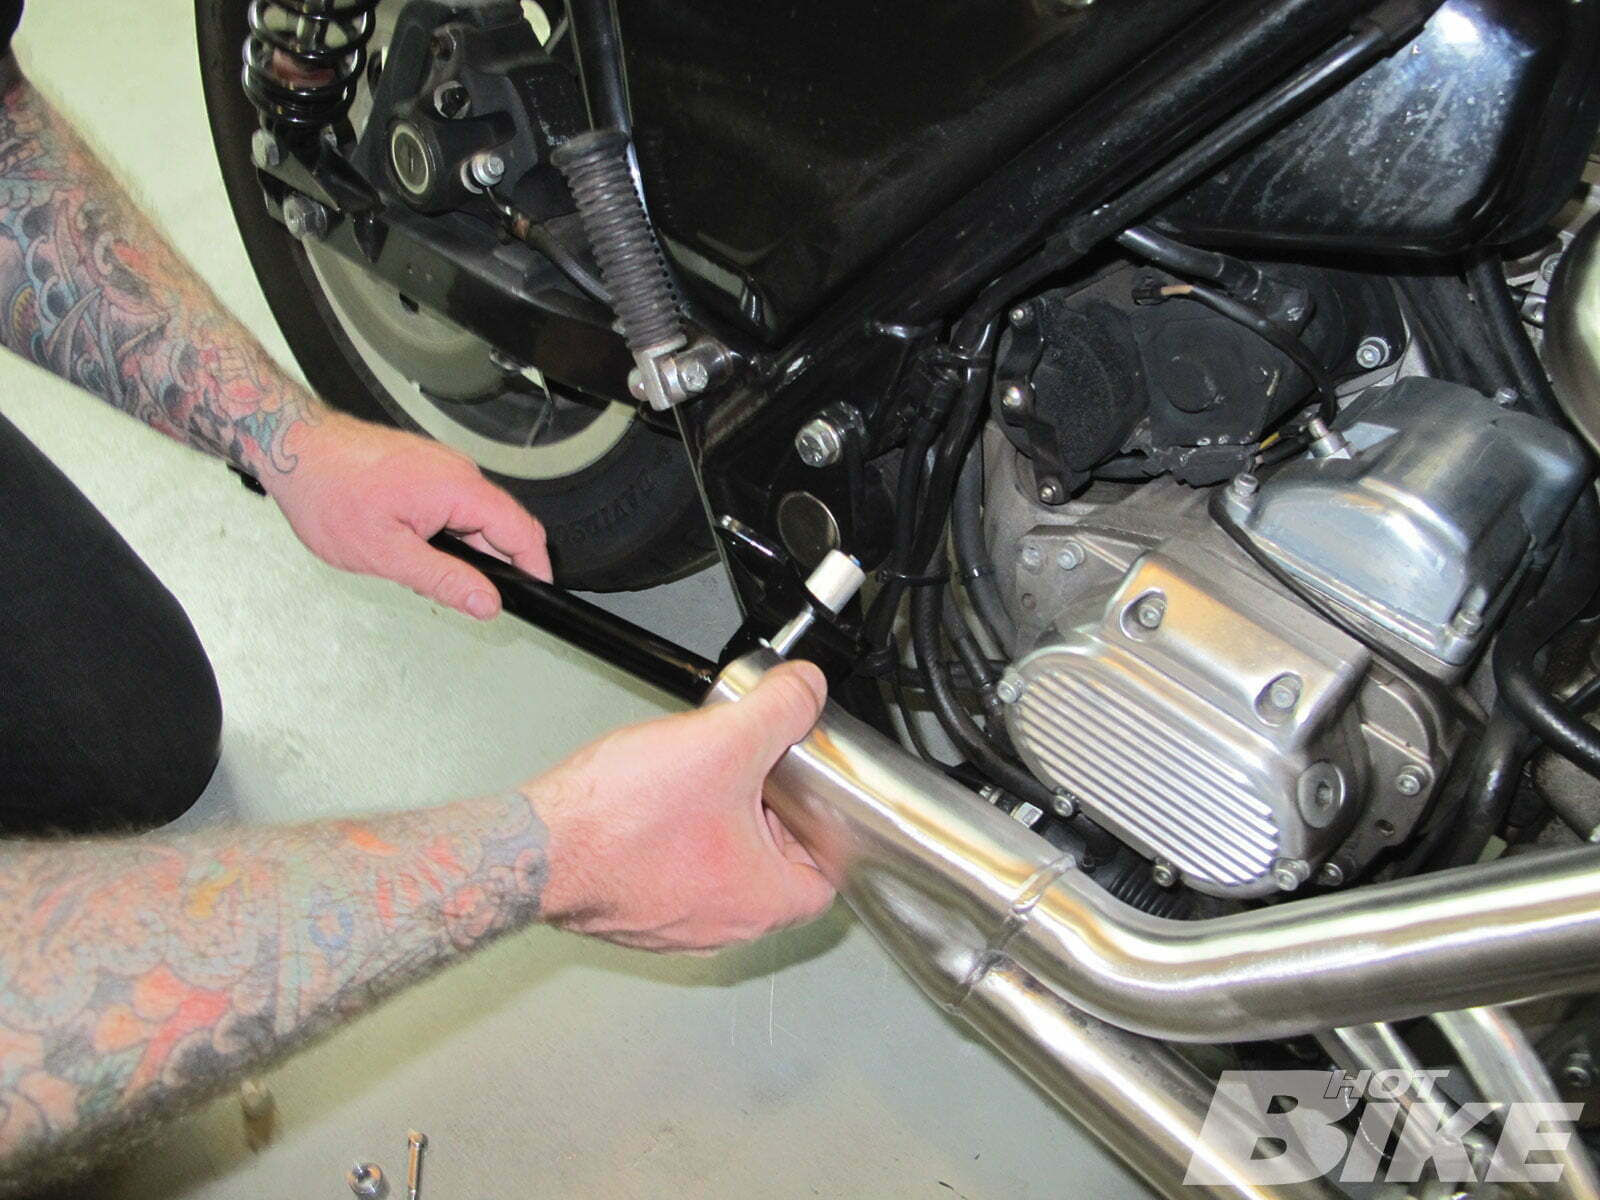
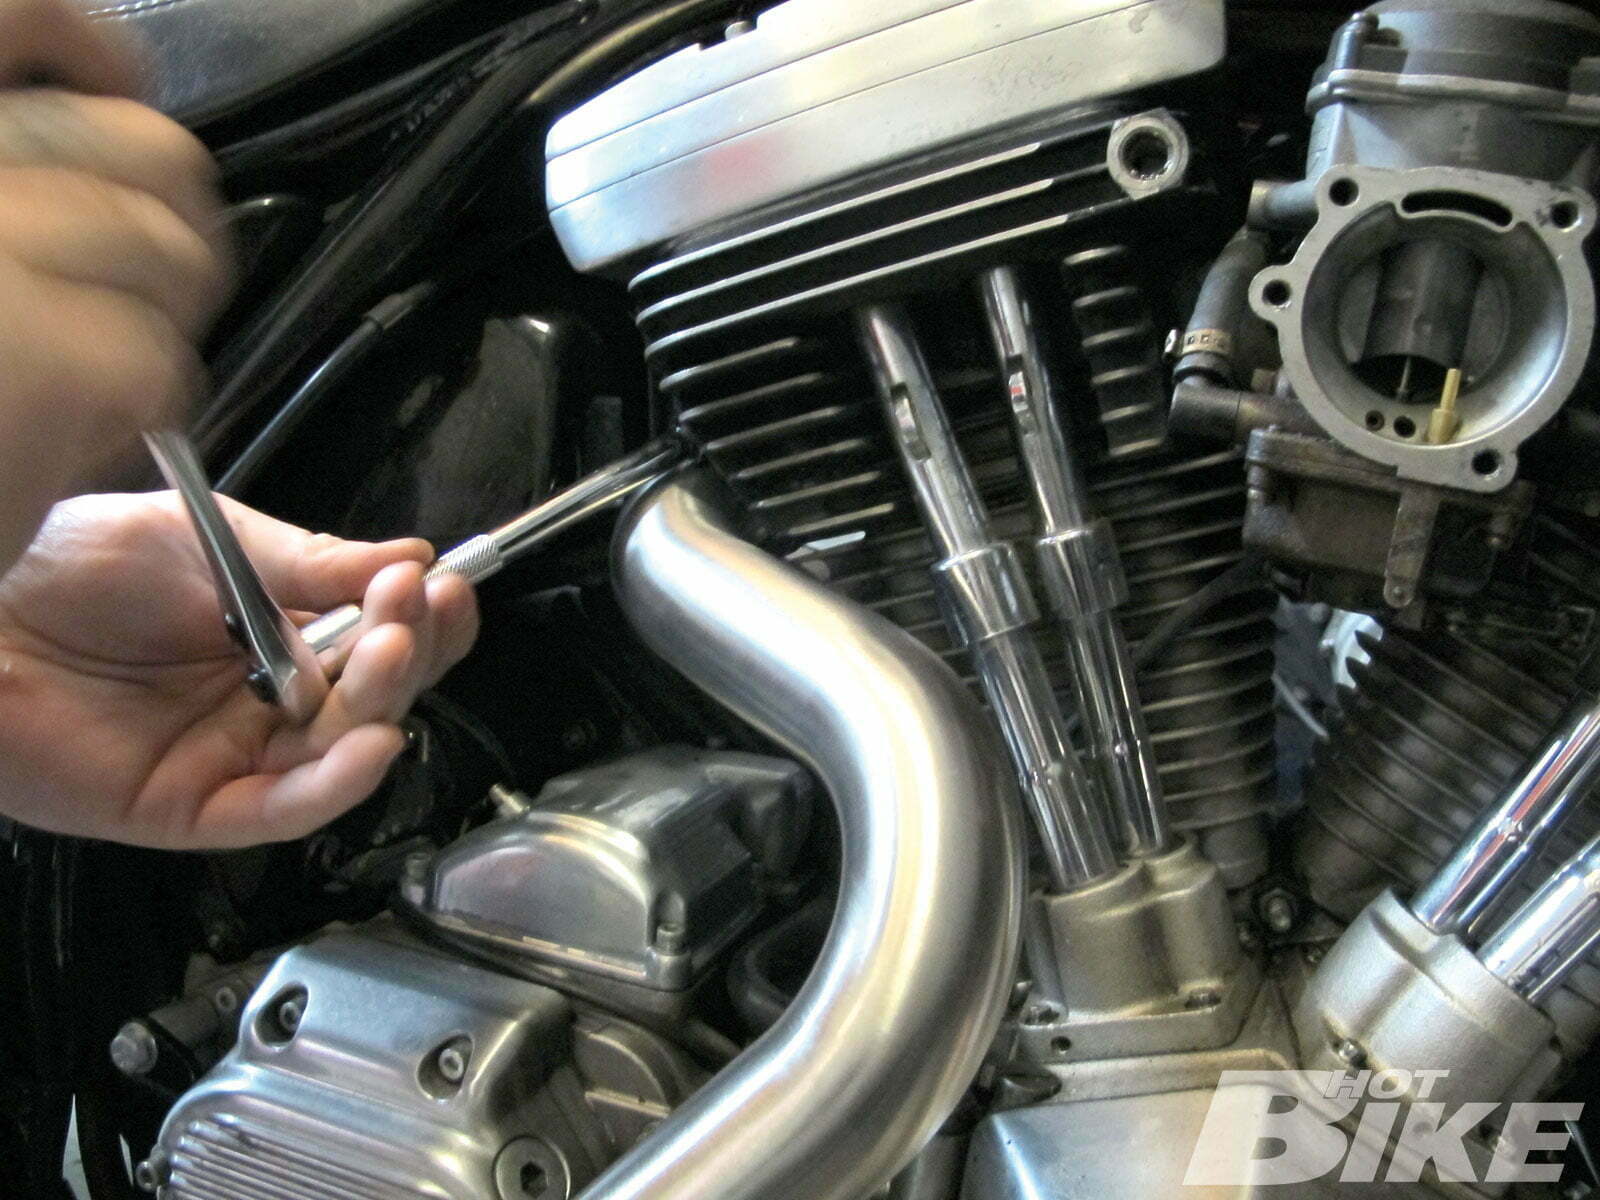
4. The Supertrapp head pipe slid into place with ease showing that these pipes were put together with care and pride right here in America.
5. The pipe uses one simple yet secure bracket to hold the whole system on.
6. The bracket attaches to two of the transmission bolts as shown here.
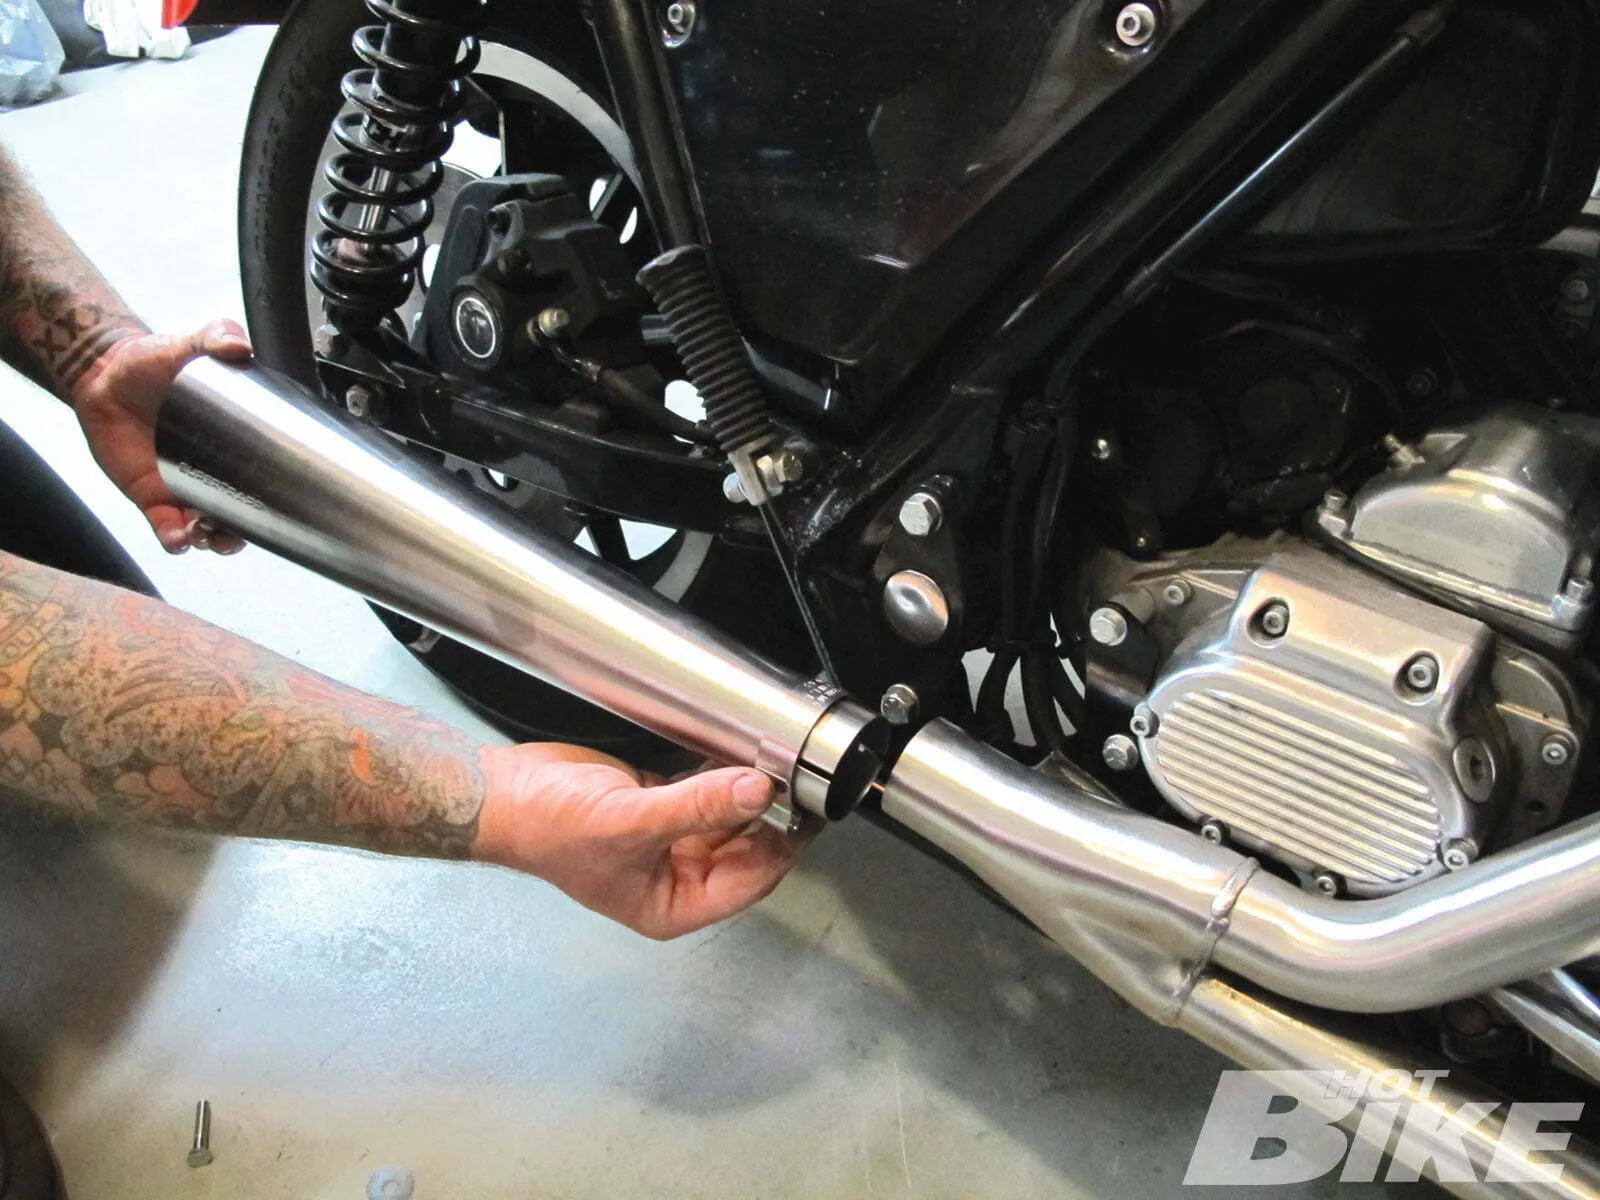
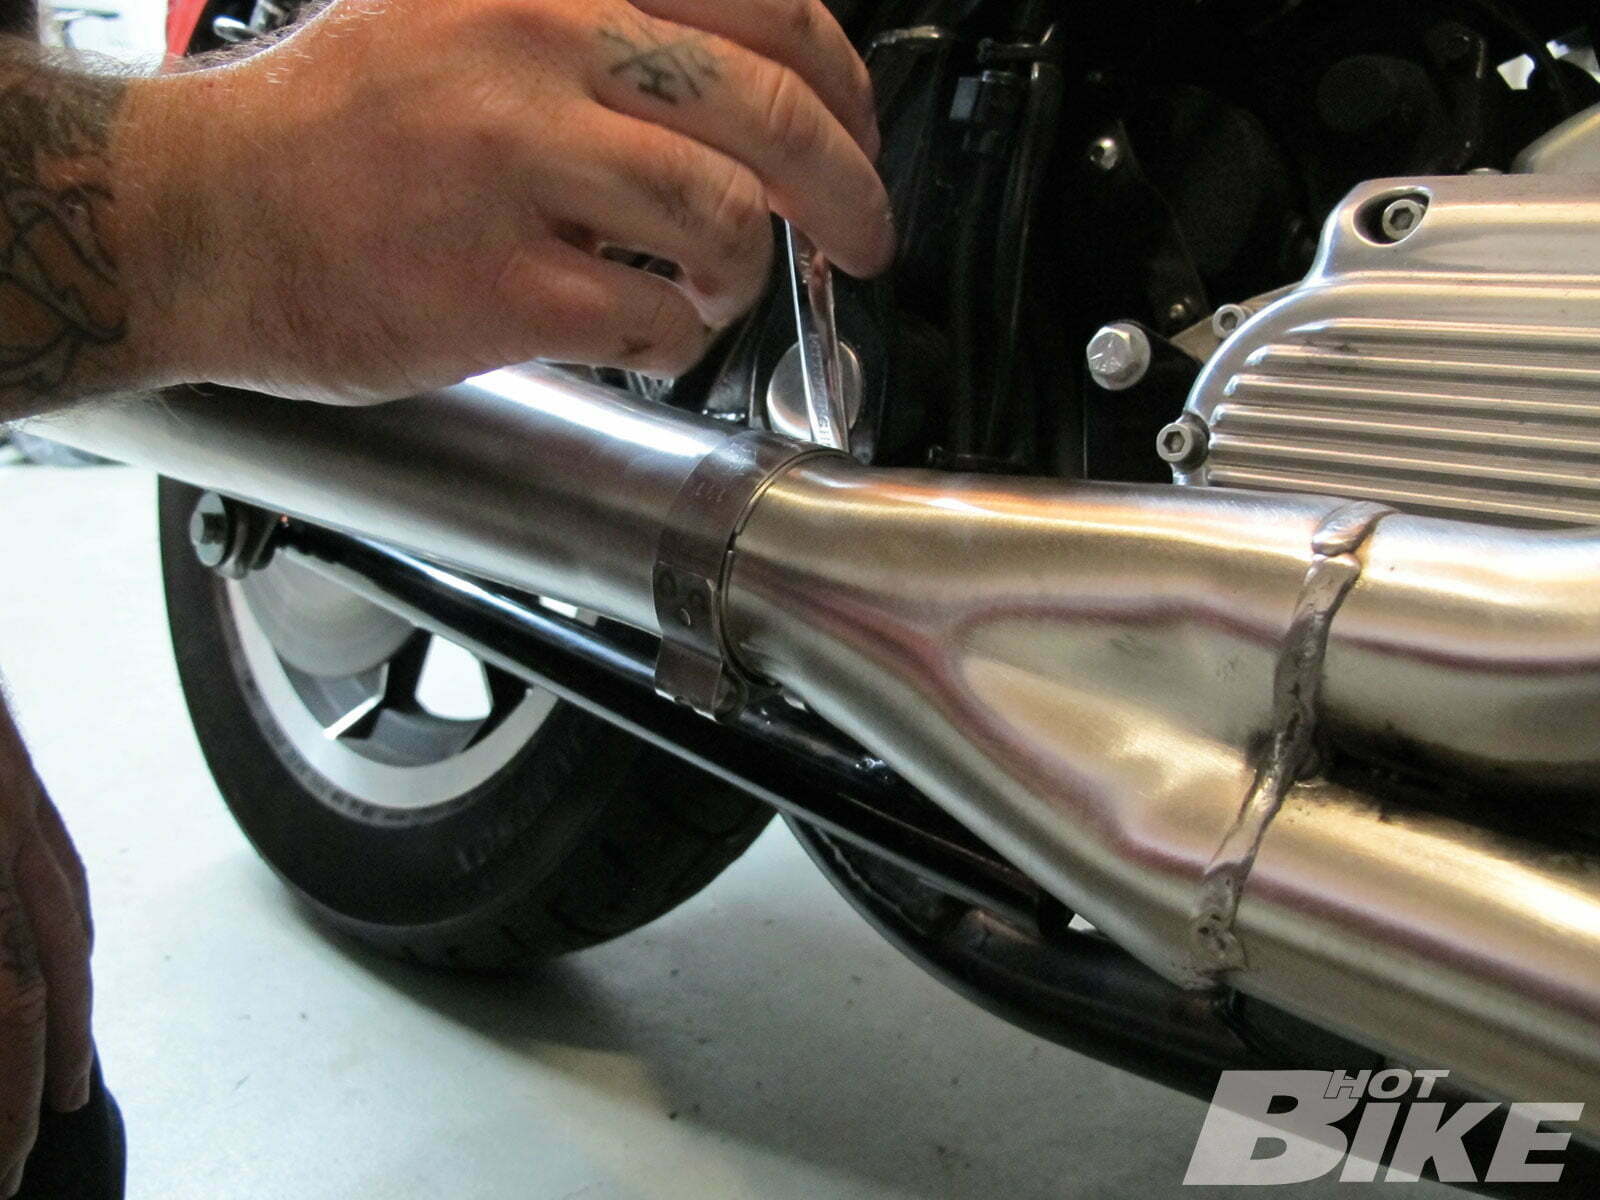
7. A stainless steel exhaust clamp was installed onto the megaphone, then it was slid onto the head pipes.
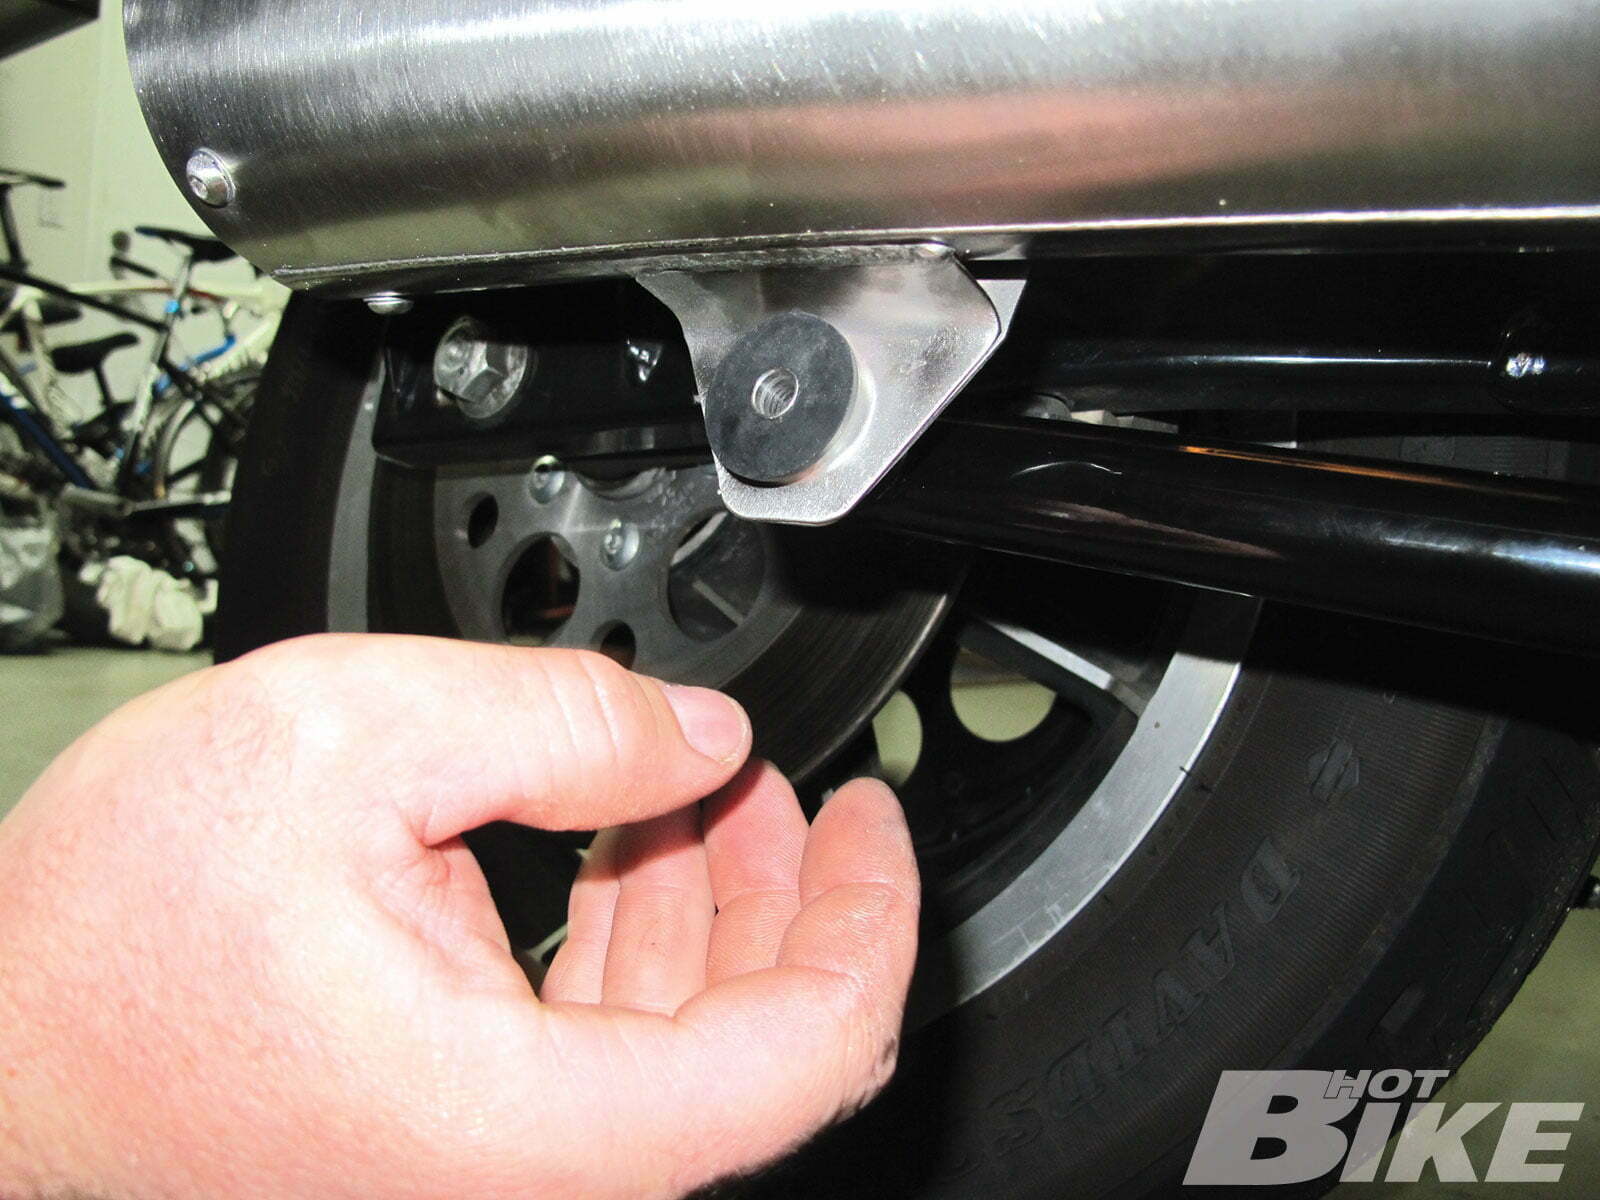
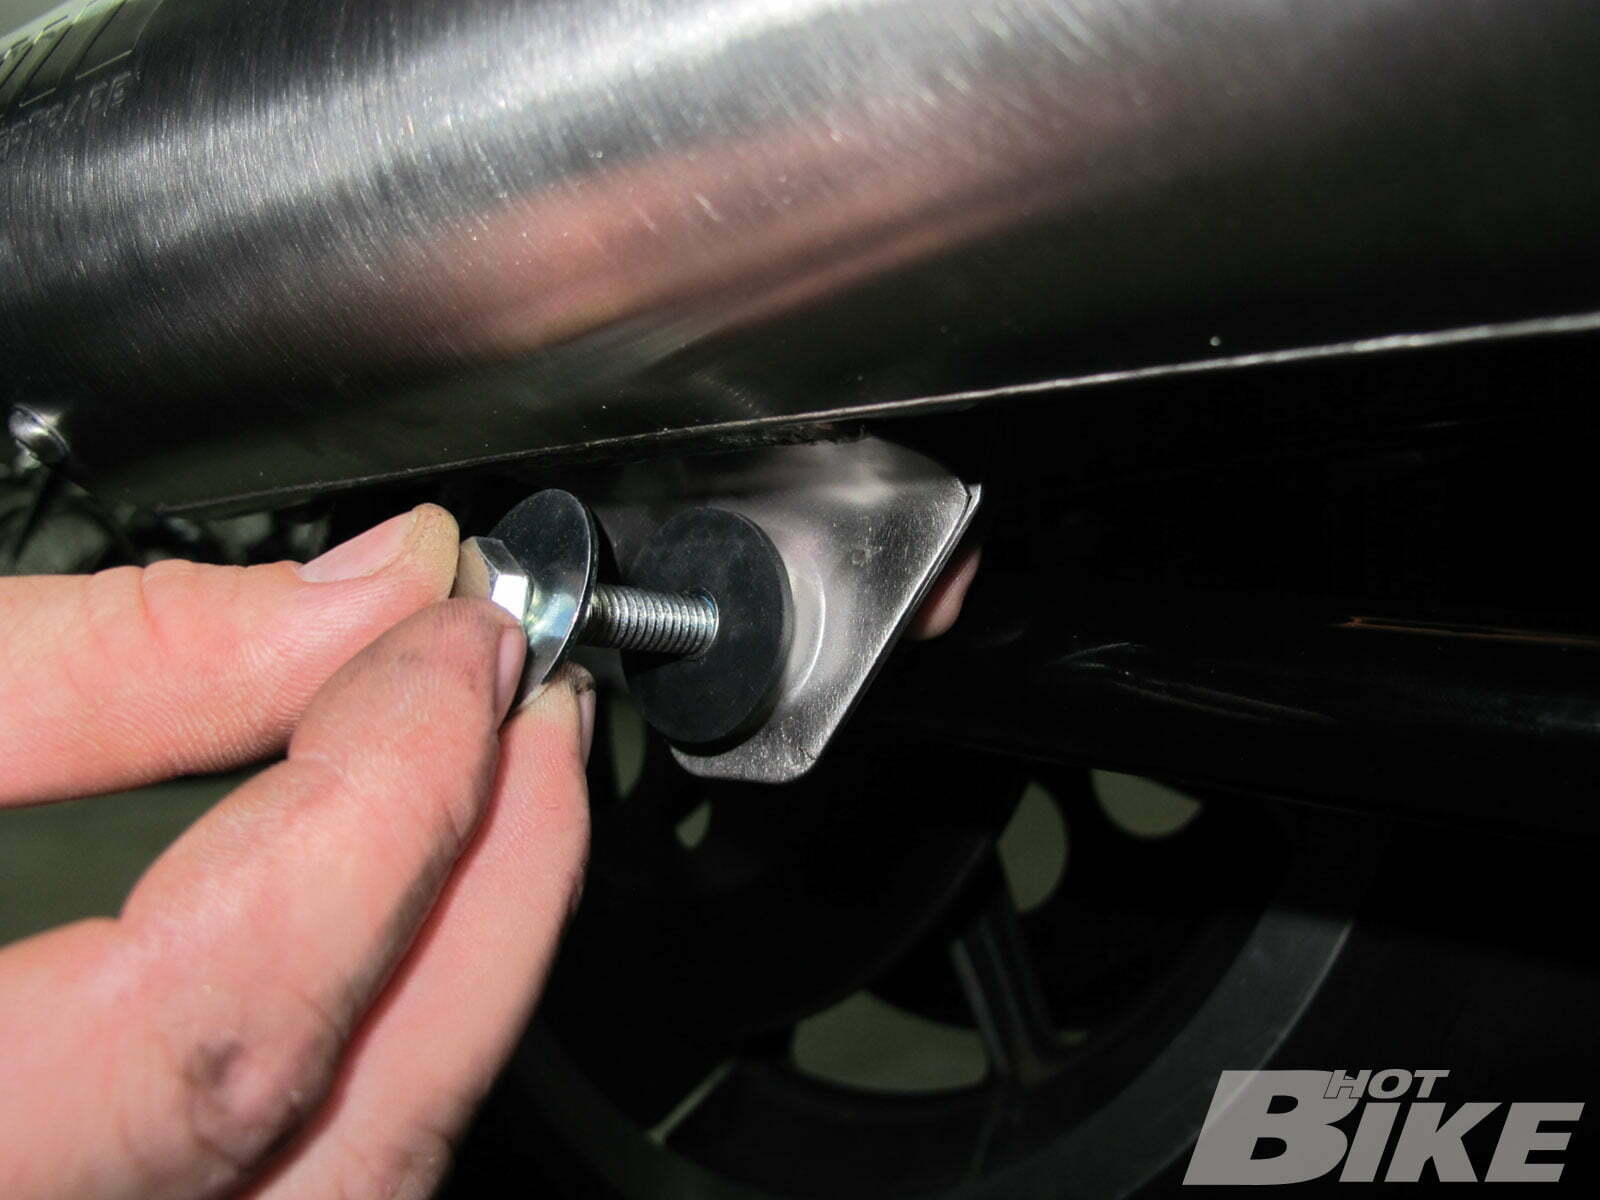
8. The rear mount bracket mounted to the megaphone at a single rubber-mounted location.
9. Supertrapp even supplied a polished stainless bolt with chrome washers. Talk about not skimping!
10. Once the head pipes and rear mount were partially snugged down and in place, the exhaust clamp that holds the two halves of the pipe together was tightened down.
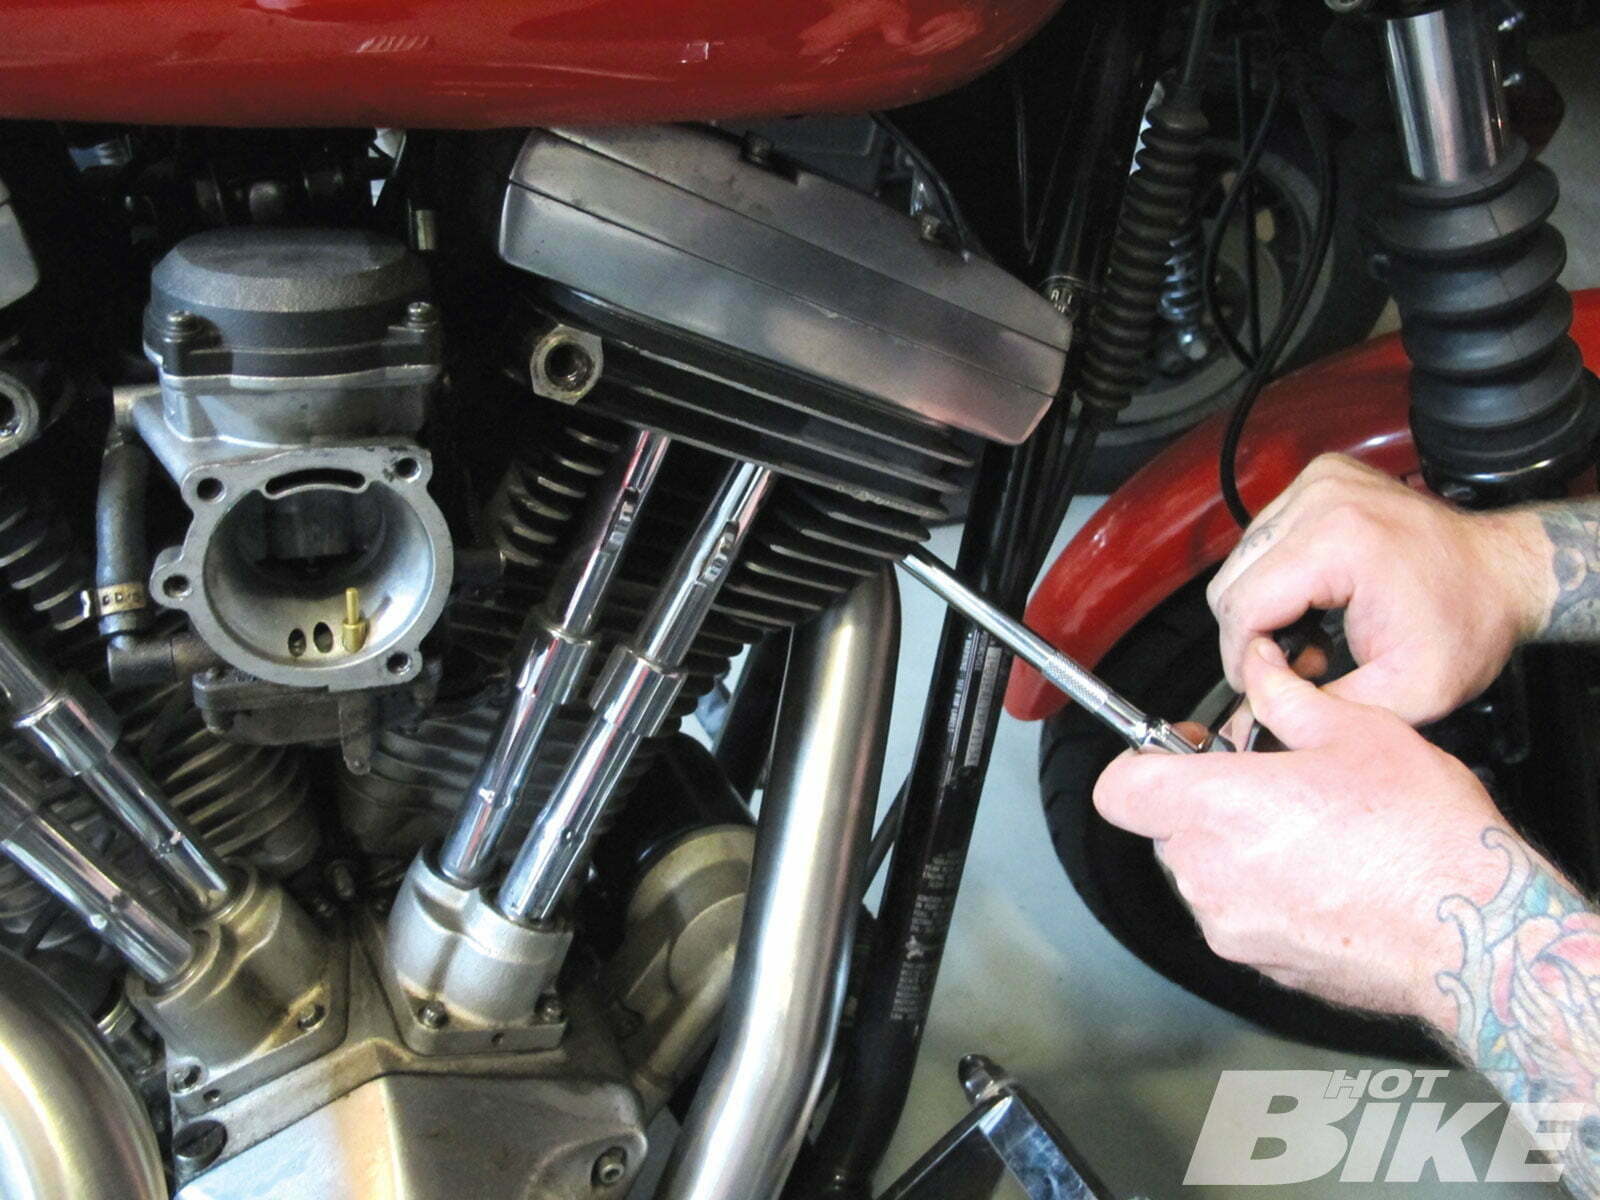
11. & 12. The front and rear engine exhaust bolts were also tightened to factory specifications.
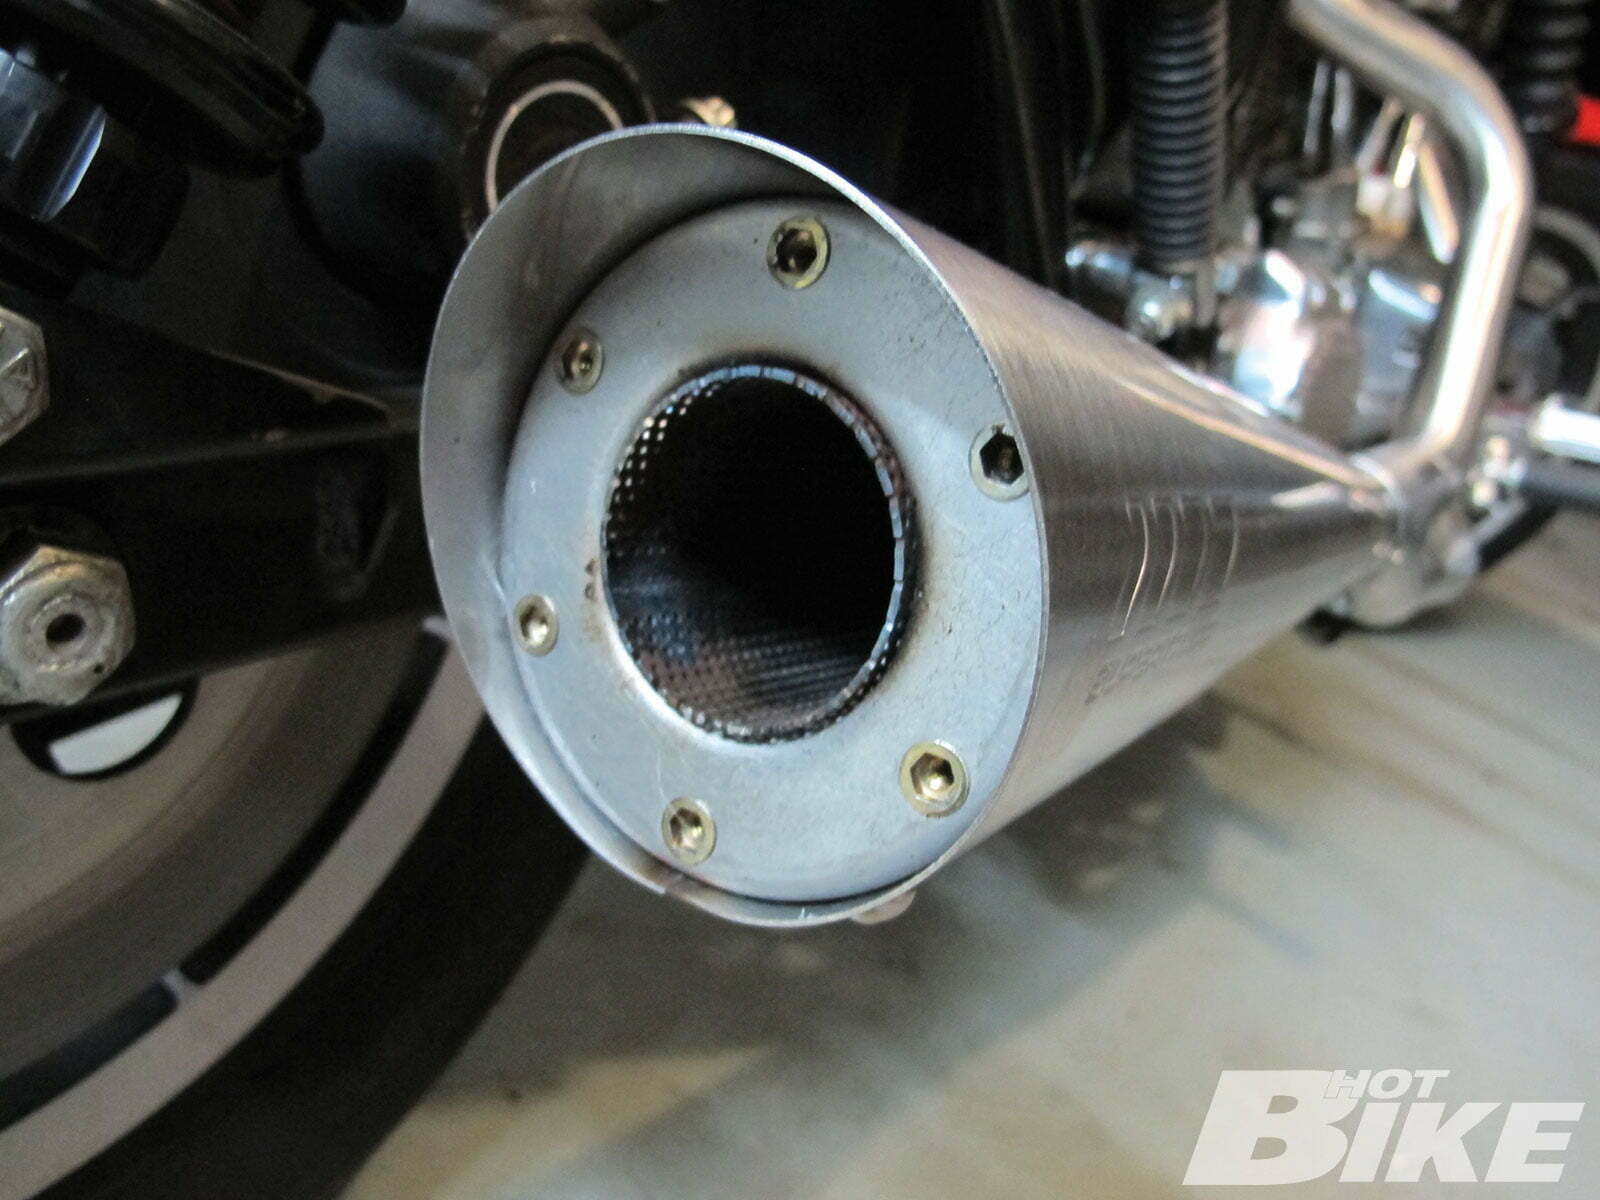
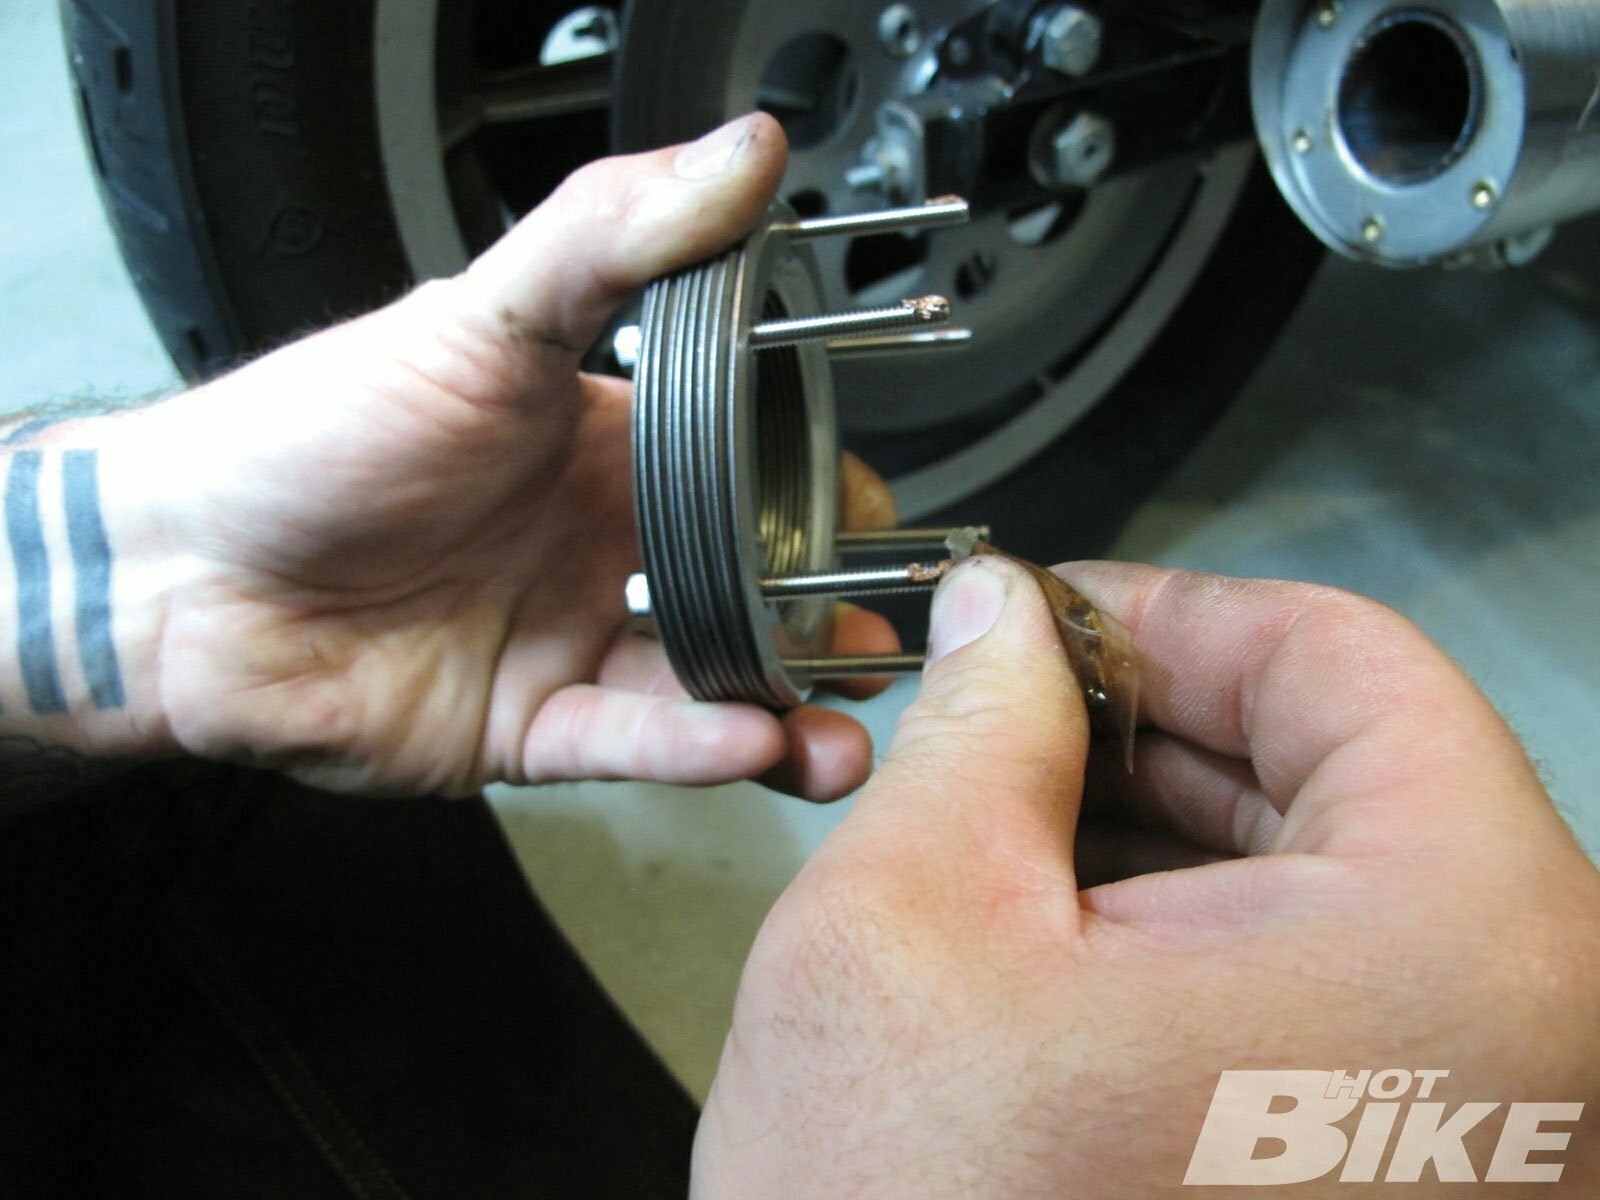
13. Out back it was time to install the diffusion discs. They will stack up and be held onto the rear of the pipe via these six threaded bungs.
14. After speaking with Supertrapp’s technical staff and telling them the model of bike, type of intake, and motor modifications, it was deemed that we should start off by using eight diffusion discs. If we needed more or less to fine-tune the backpressure, it is very easy to do so.
15. We installed the eight discs onto the supplied bolts and added a gracious amount of anti-seize to the threads of the screws so we could get them out when or if we needed to.
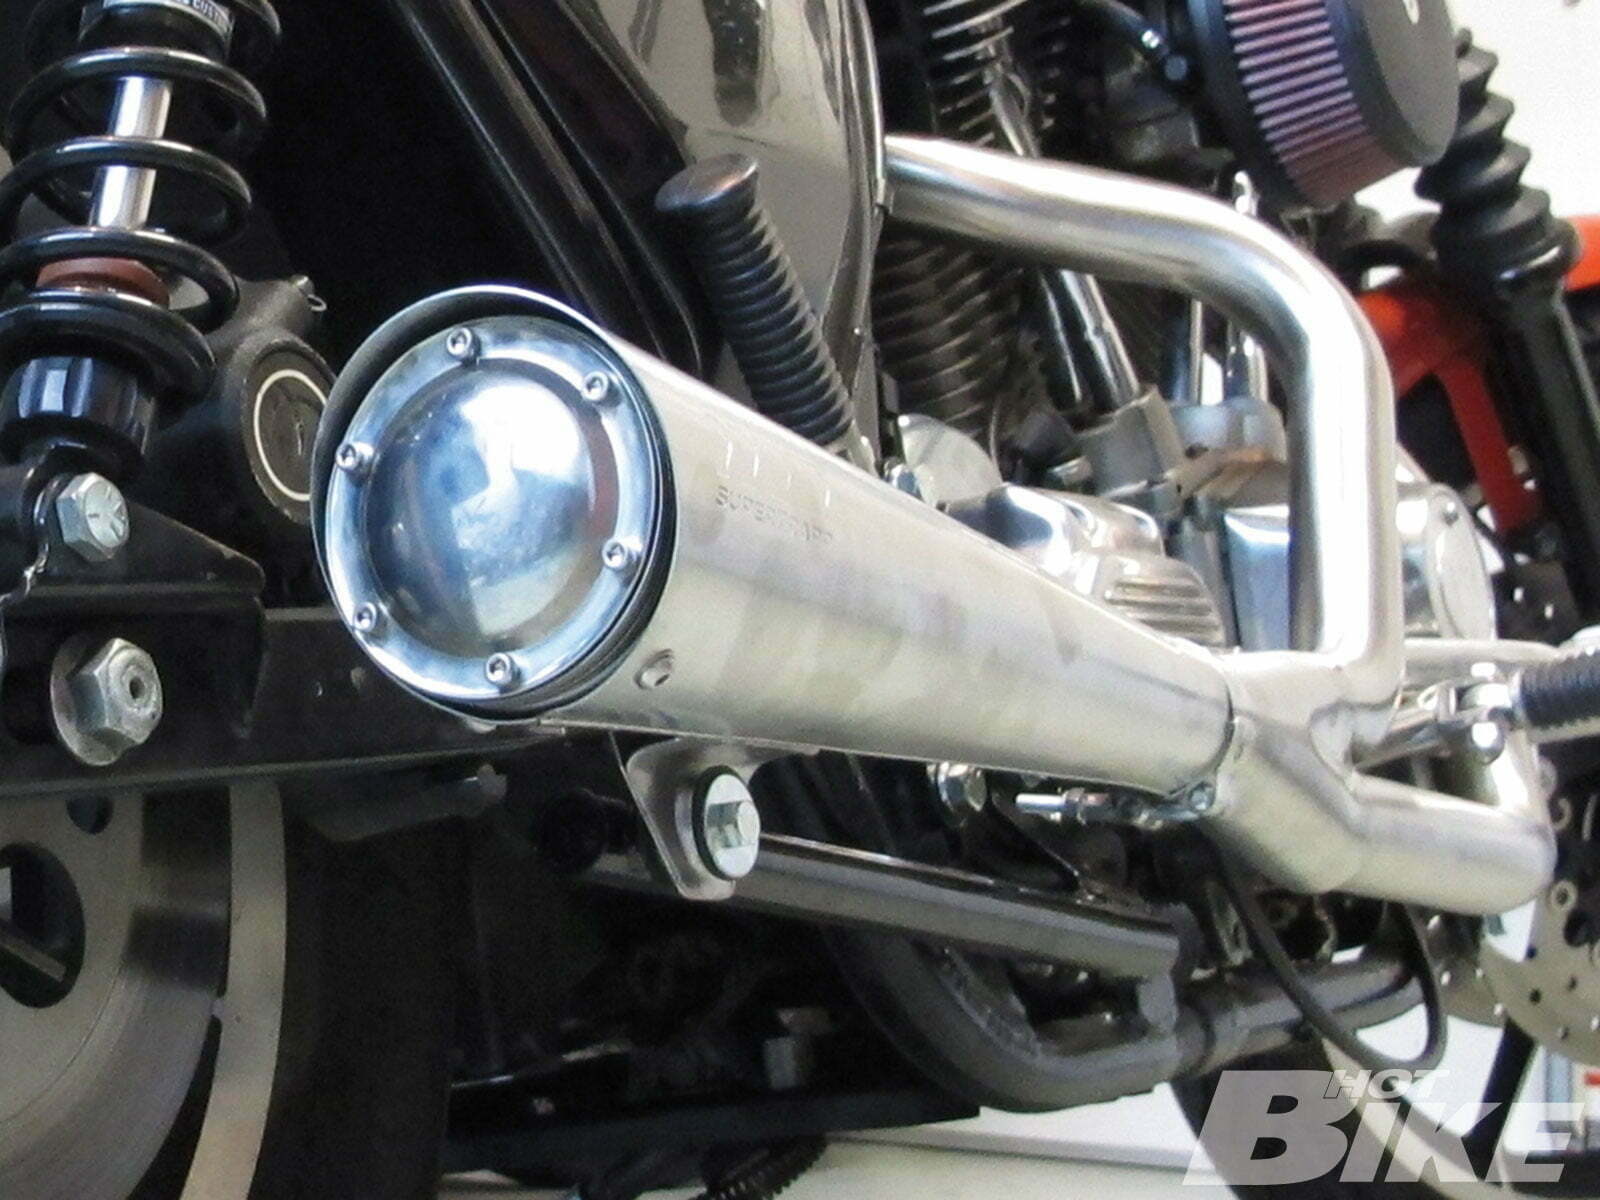
16. And the exhaust part of the install was done. Just look at how nice that new pipe looks on that bike!
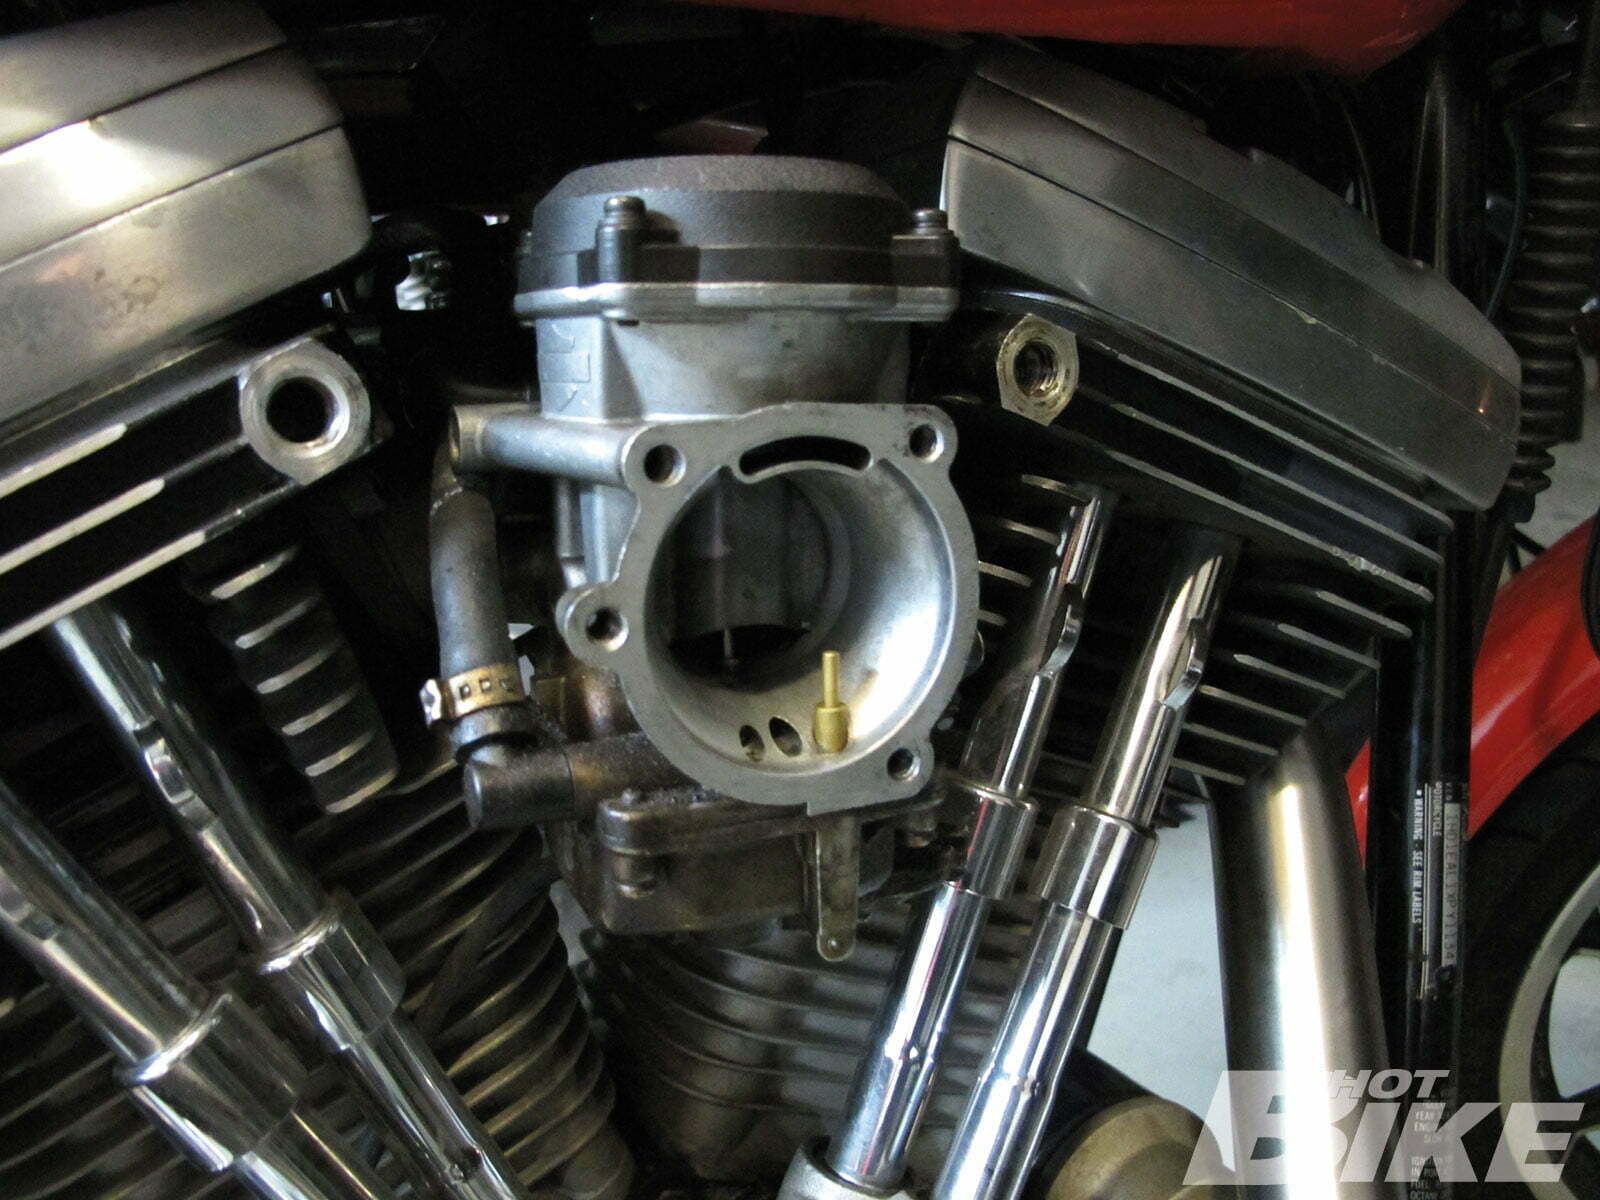
17. Moving onto the intake, we cleaned up the stock CV carburetor with some carb cleaner as well as cleaned any gunk out of the breather threads of the cylinder heads.
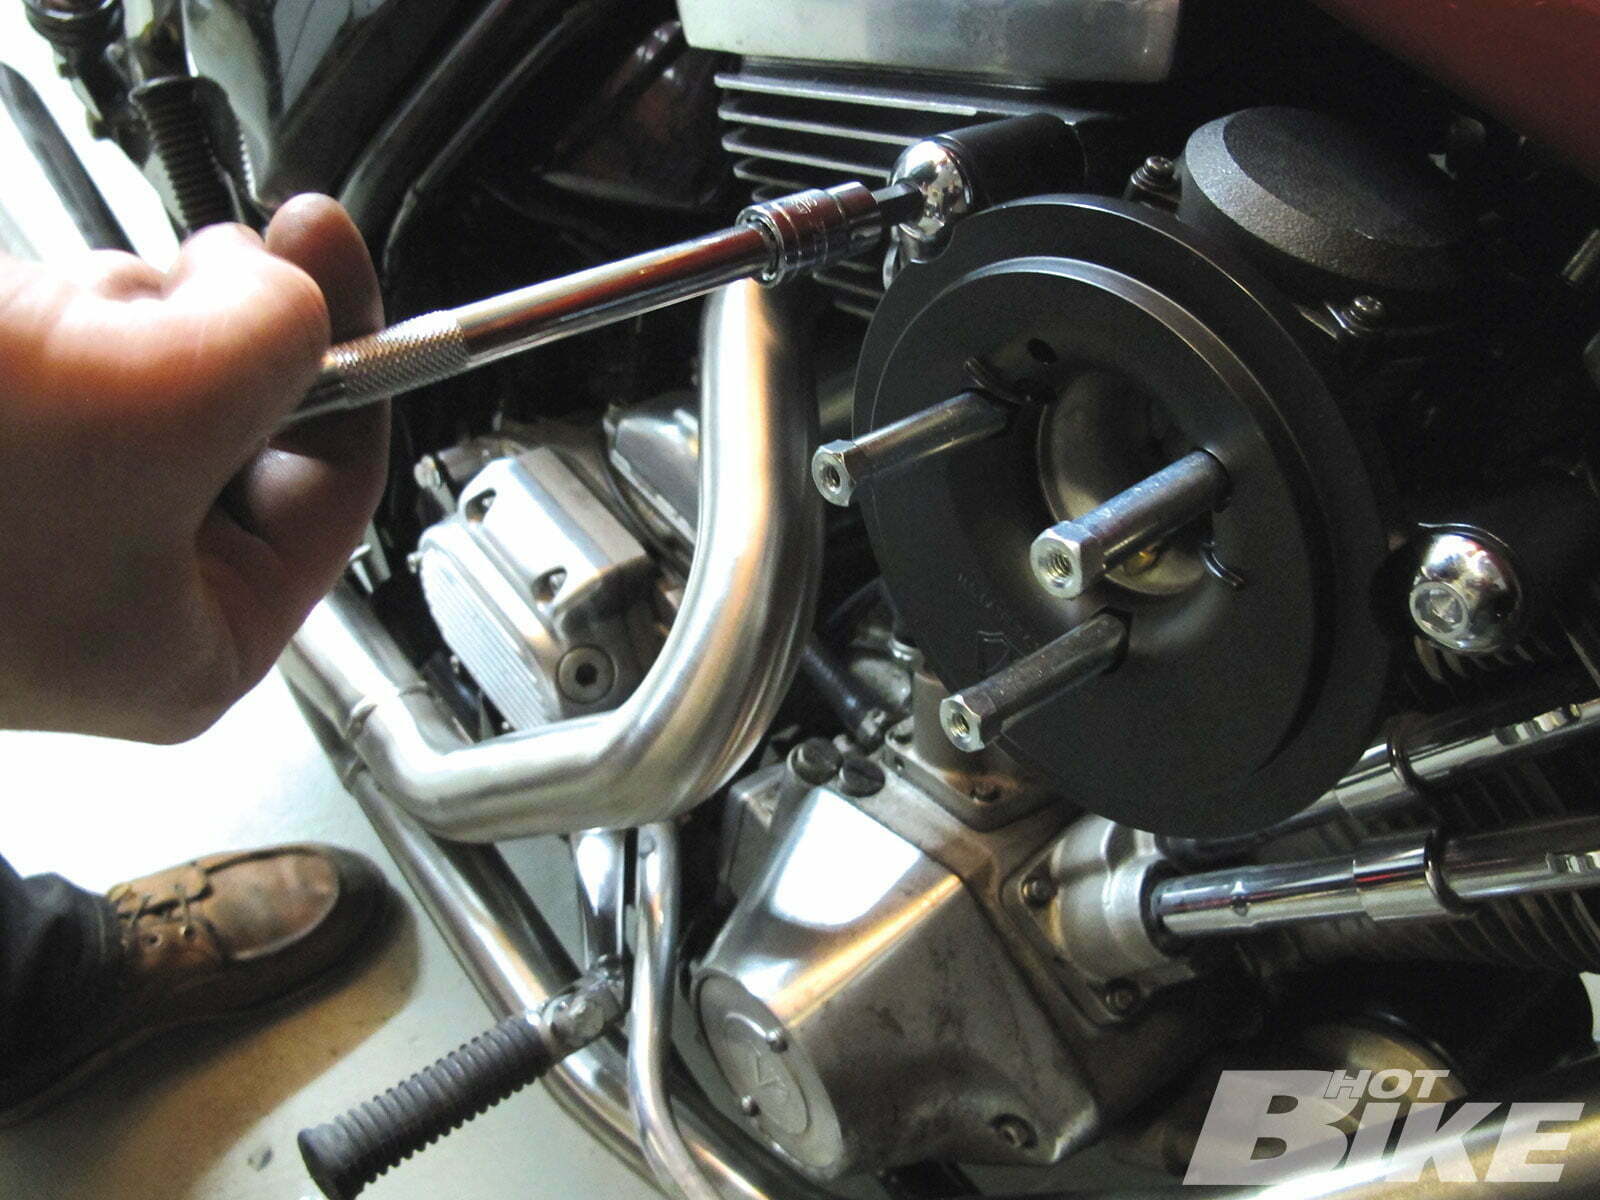
18. The Arlen Ness air cleaner backing plate was attached to the carburetor with three bolts that also act as the standoffs for the air cleaner element.
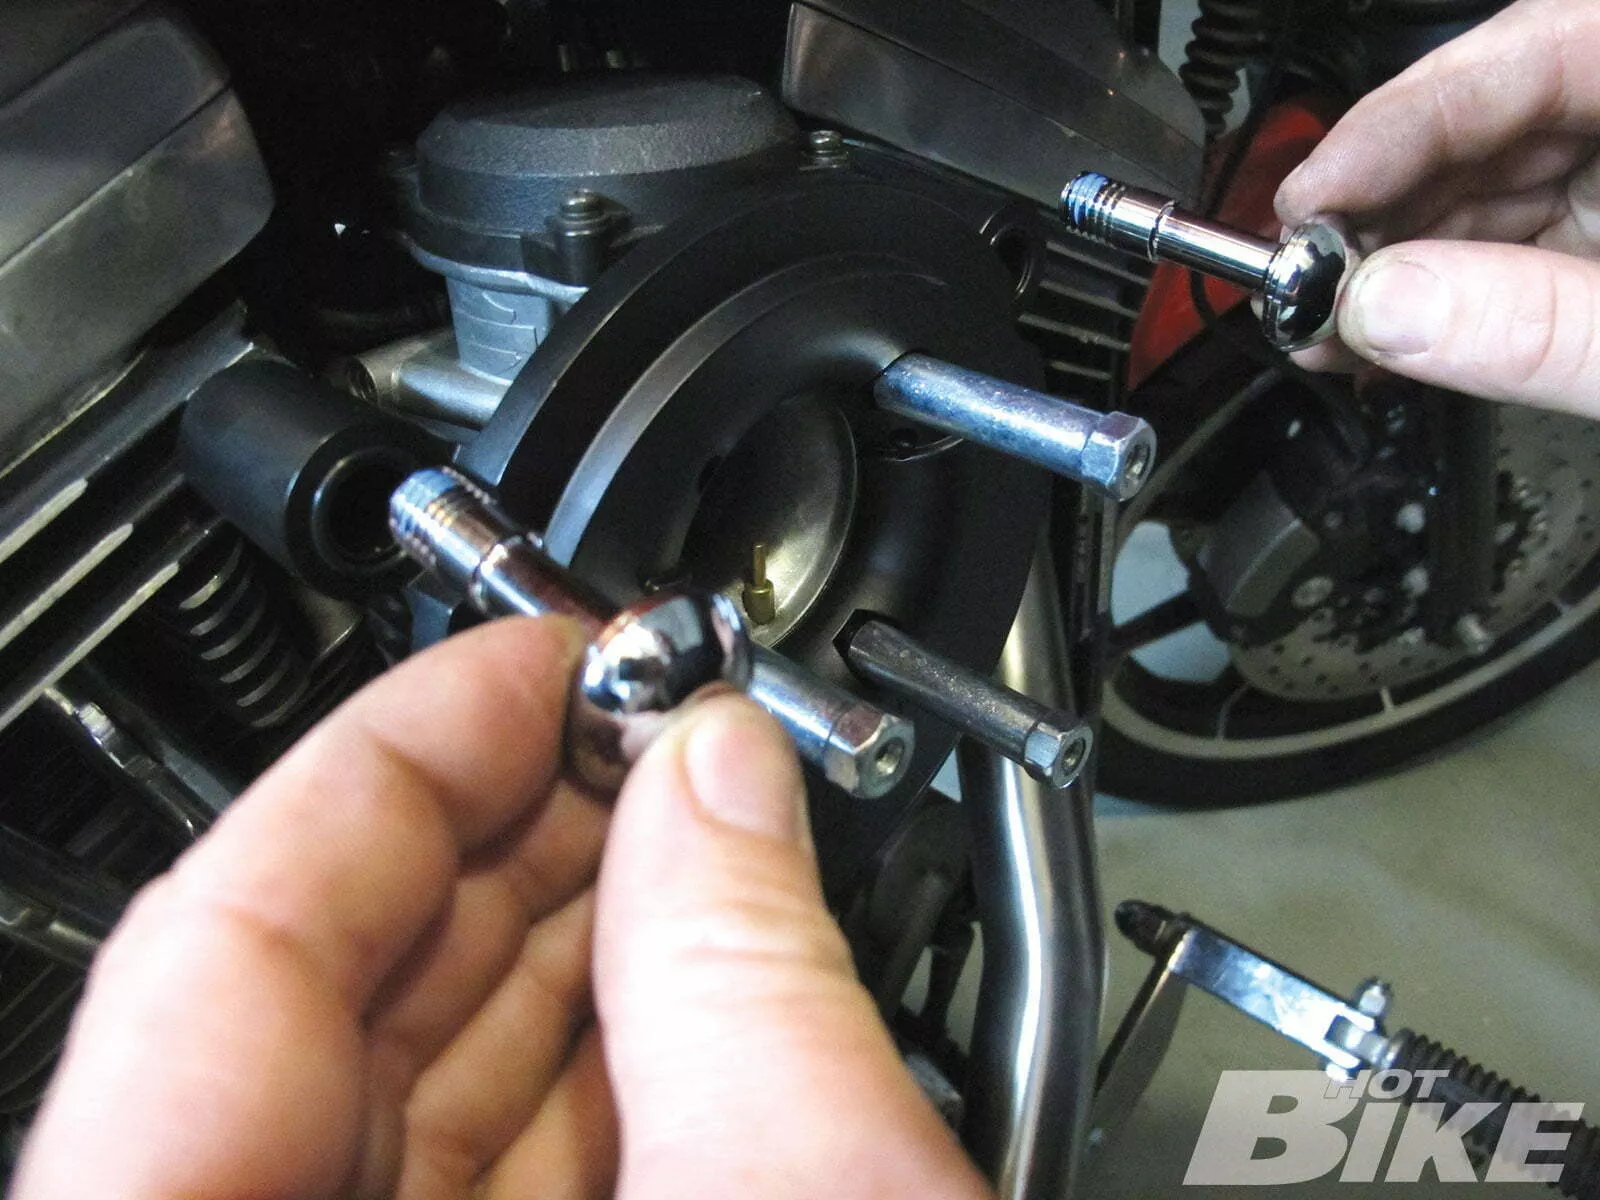
19. The breather bolts, which are hollow to allow the ventilation of the crankcase, had threadlocker smeared onto them. They were then installed by hand to make sure the threads would not be crossed.
20. We broke out the torque wrench and tightened the breather bolts down to factory specs.
21. The standoff bolts were also torqued down to proper specifications.
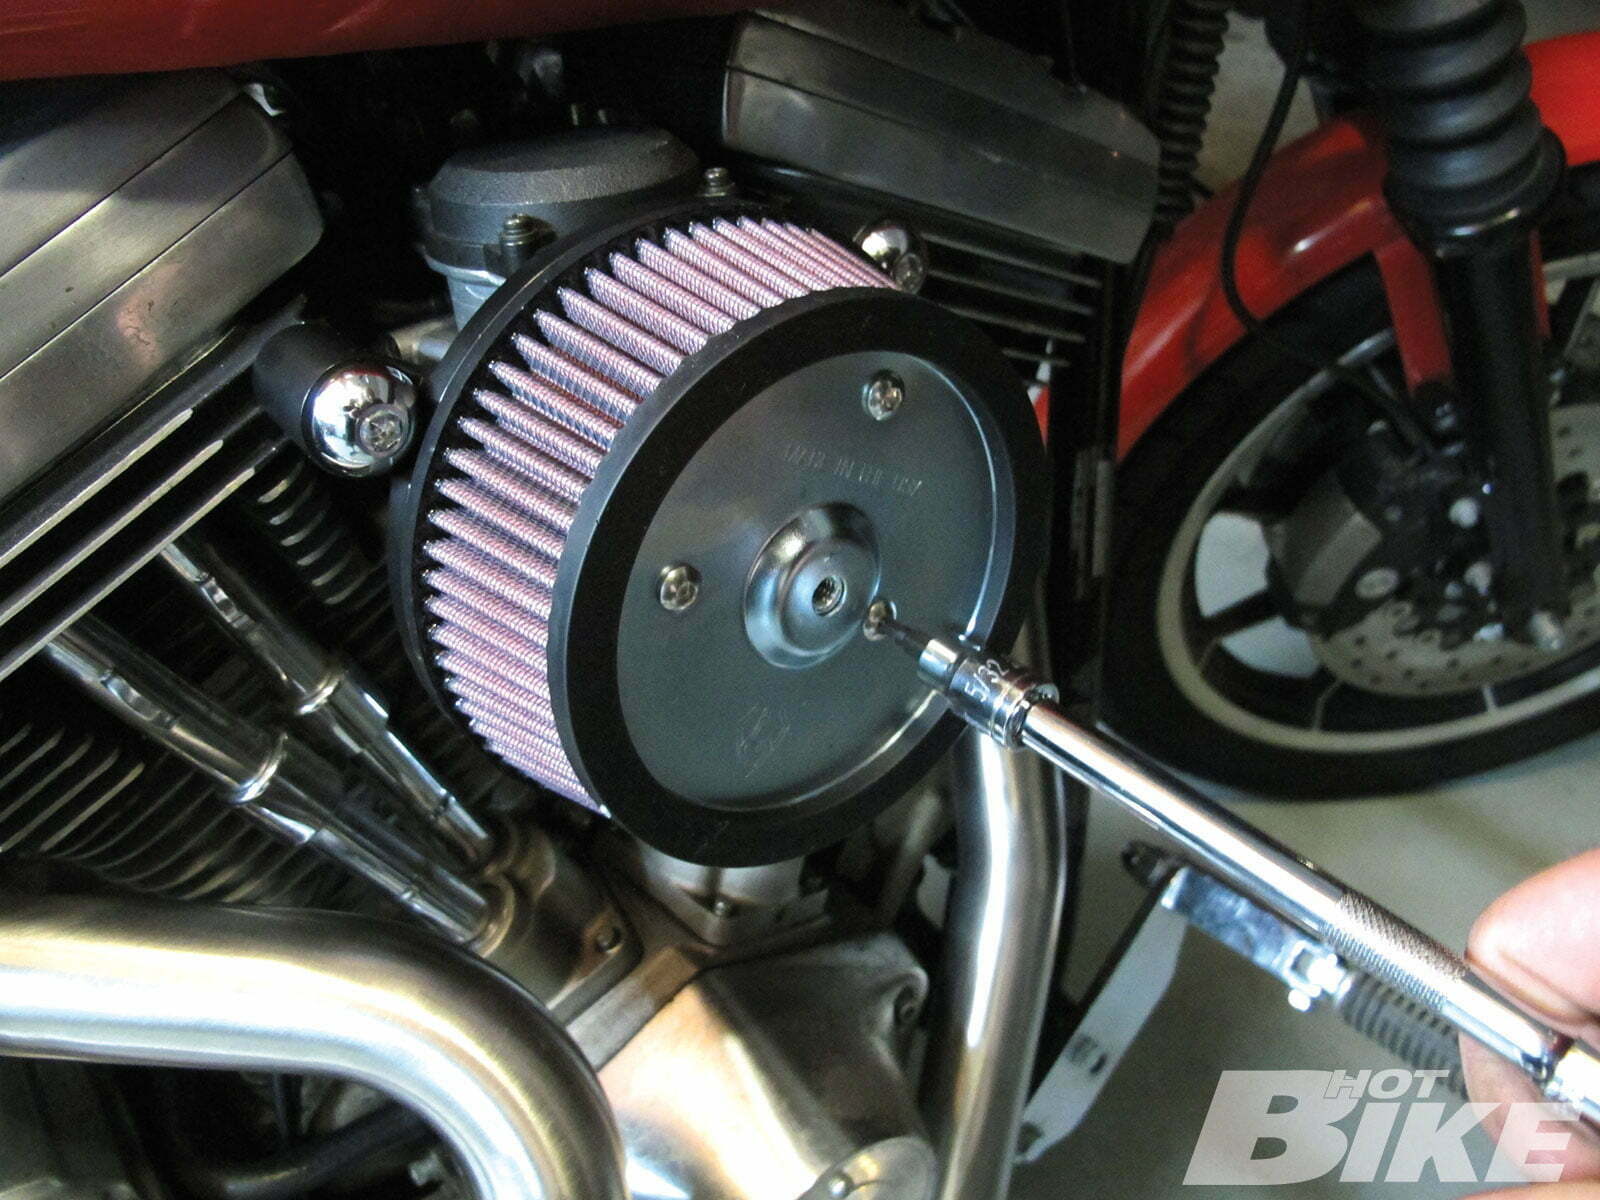
22. It was at this time we were able to install the air cleaner element with the three provided 5/32 cap screws.
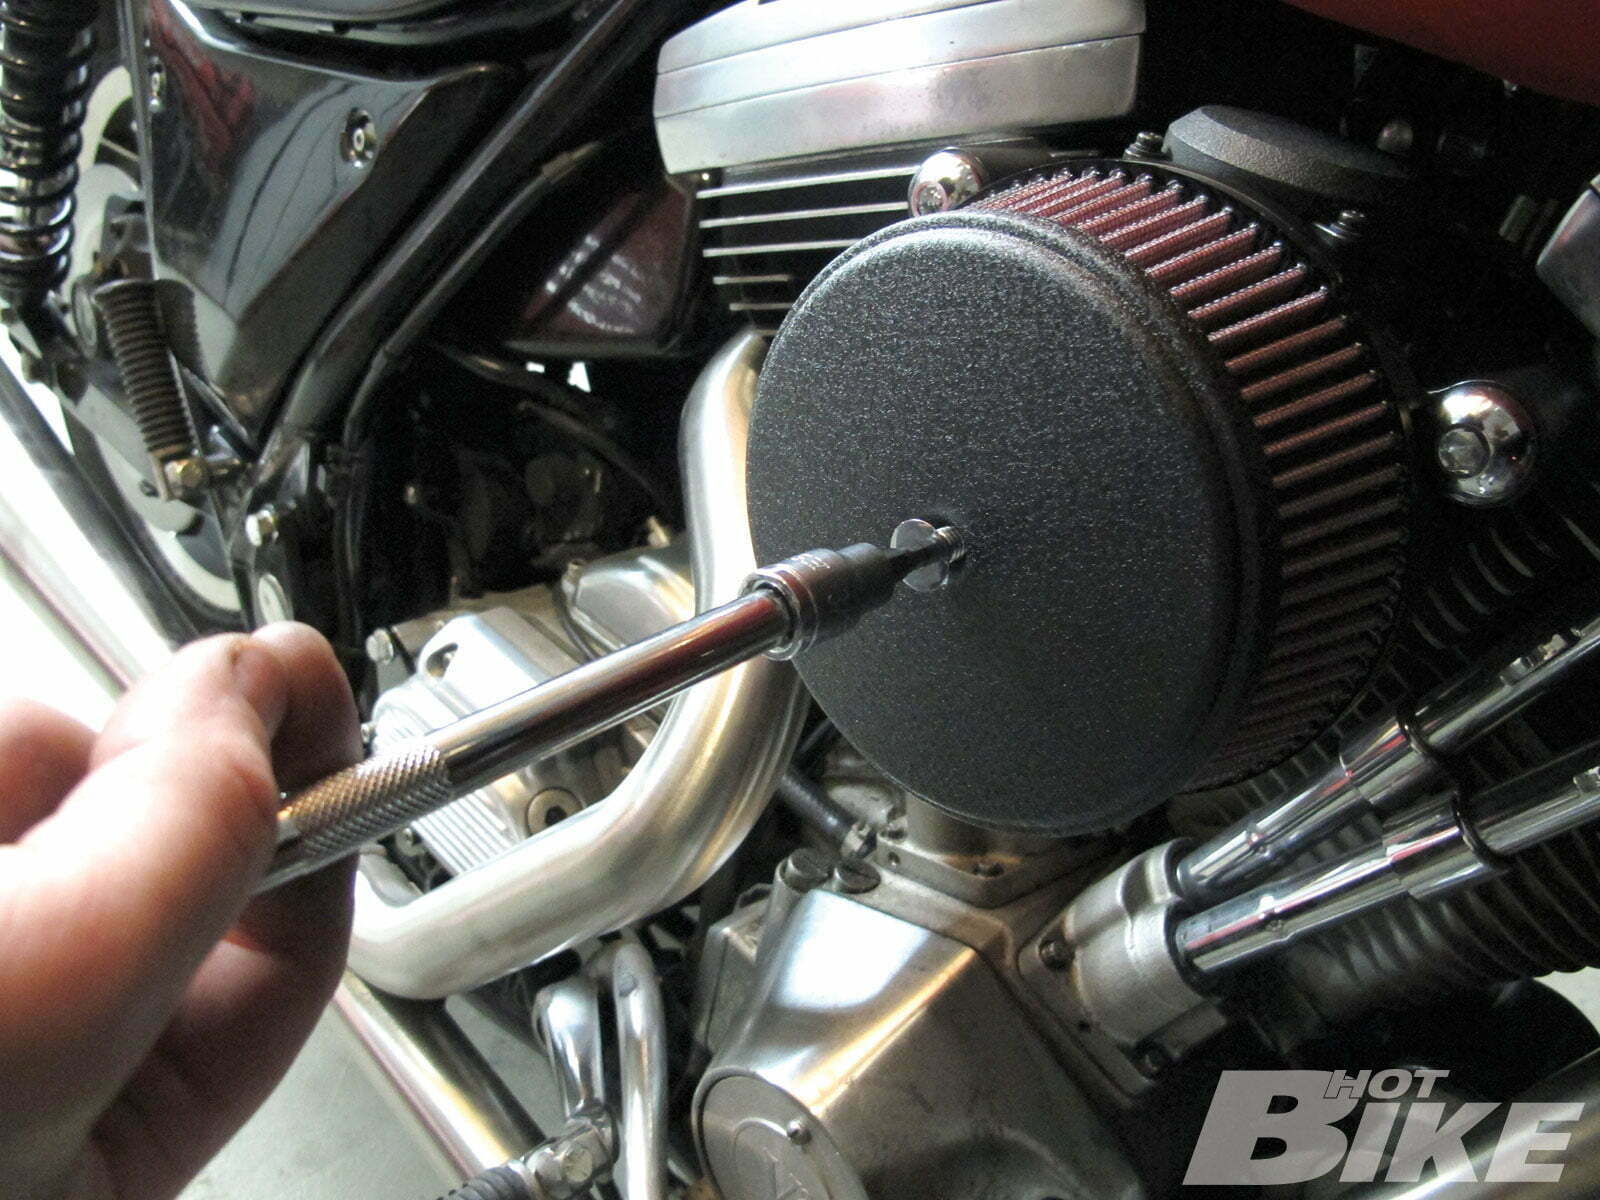
23. Last but not least was the wrinkle black powdercoated end cap, which gives the Billet Sucker air cleaner a really good look to the mostly silver engine.
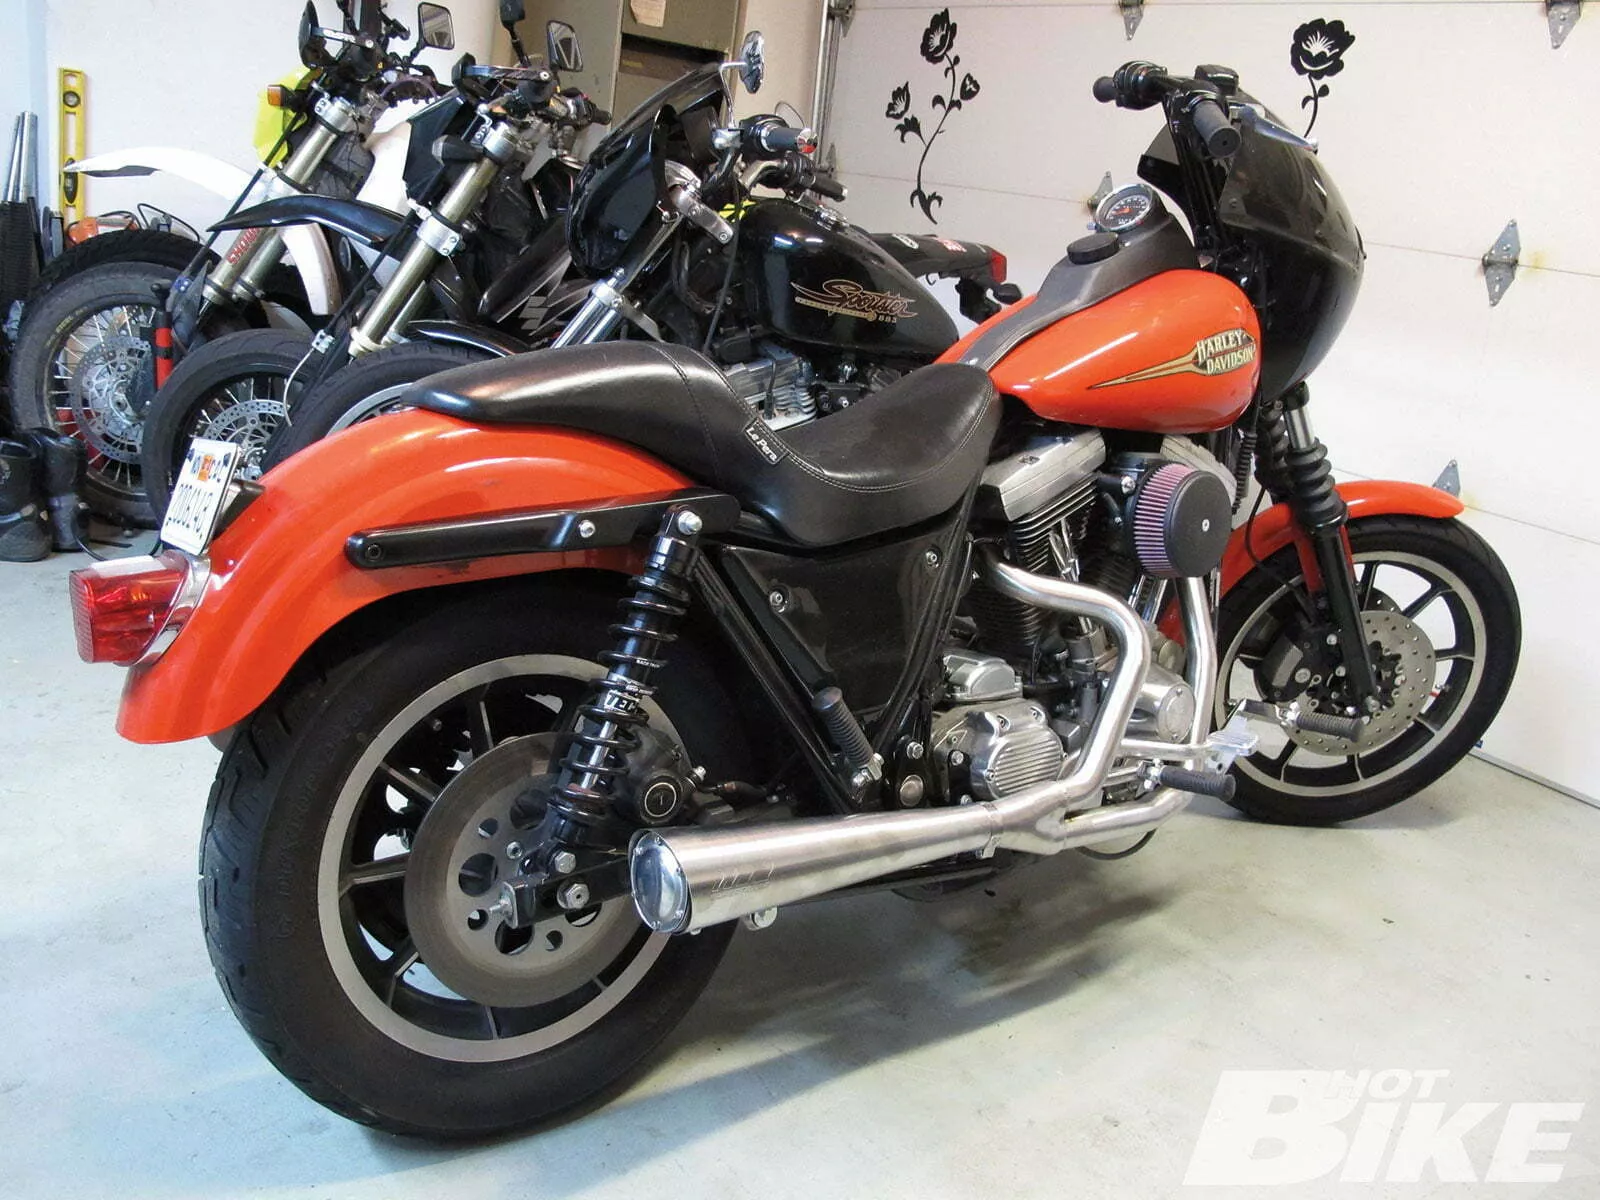
24. As you can see, the bike looks great with the new intake and pipe, but the real sweetness of this combo is the off-of-the-line power we immediately felt with this setup. If you have an older bike with the stock intake and pipe on it, do yourself a favor and swap them out for some new aftermarket items.


