
Kraft Tech Frame Evolution Motor Build – For His service To Our Country
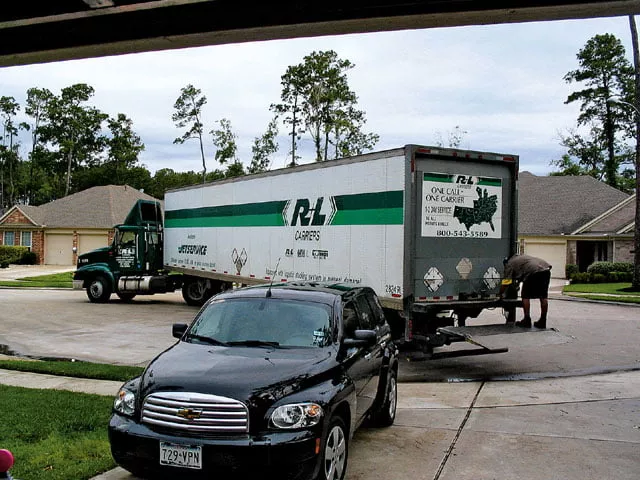
1. A 49-foot trailer backed into my cul-de-sac to deliver parts from Sucker Punch Sallys in Phoenix, AZ. I was clueless as to what parts I would be getting, and was surprised to see a pallet stretch wrapped in the back of the trailer.
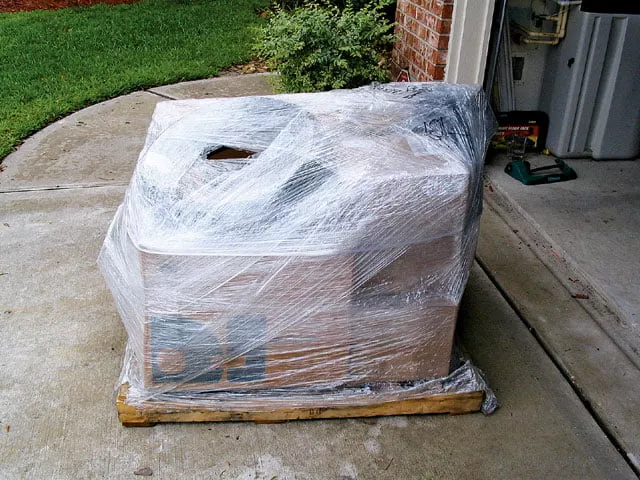
2. The packaging people at SPS must be efficiency experts-they crammed every nook and cranny of the pallet full, with no extra room wasted.
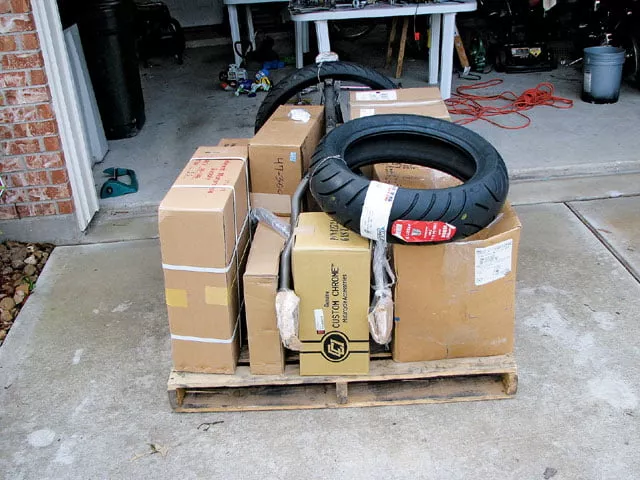
3. After removing many layers of stretch wrap, I located the major parts I would be starting with on the build: frame, sheetmetal, wheels, and tires. Not knowing exactly what I had, and finding no inventory list with the shipping papers, I had to open each box individually and itemize what I had received. At least, that seemed easier to me than trying to figure out what I didn’t have.
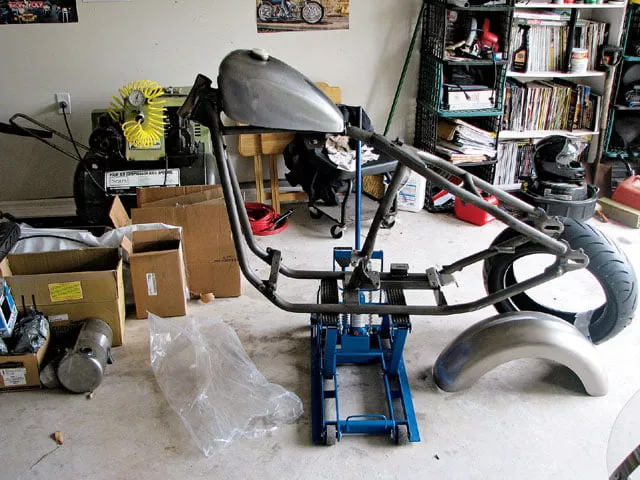
4. Because I wasn’t sure where to start, I began to attempt a mock-up starting with the frame. First, I set the Kraft Tech frame on the lift and placed the Custom Chrome Sportster-styled 2.5-gallon gas tank on top of the Fat Bob mounts. I knew these mounts would have to be cut off, but I would save that for another time.
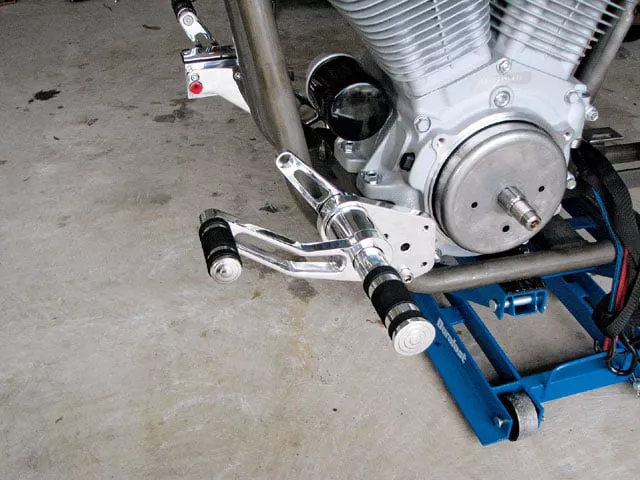
5. I attached the chrome forward controls provided by SPS to the frame using bolts I bought at Ace Hardware. The people at Ace became my best friends over the next few months. Hardware alone can cost several hundred dollars.

6. I placed the 80-inch H-D Evolution motor into the frame easily; luckily no shims were needed to line it up. I asked about lining up the motor in which I was told to install all four bolts loose, then tighten the back two bolts snug to the frame. Then check under the front of the frame to see if there is a gap (even as small as a slip of paper). If a gap was visible, it would need to be shimmed accordingly.
7. I installed the round oil bag to the fasteners SPS supplied on the pallet. Luckily the bag only mounts one way. The frame is set up perfectly for the bag to set right in.
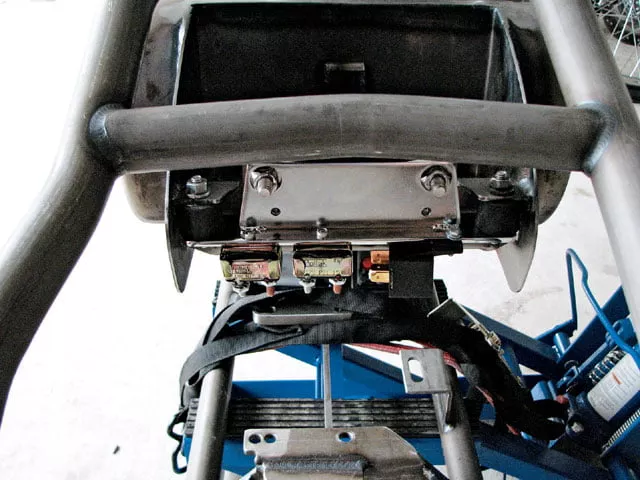
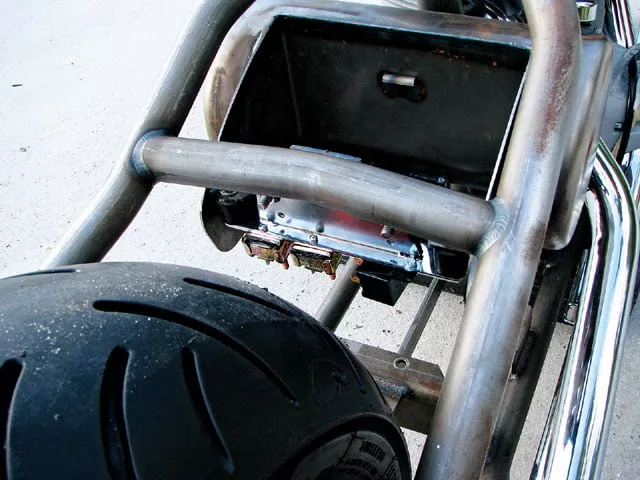
8. Several circuit breakers and relays came already attached to one of the mounting plates for the battery box. I attached this piece to the frame and attached the oil bag to this.
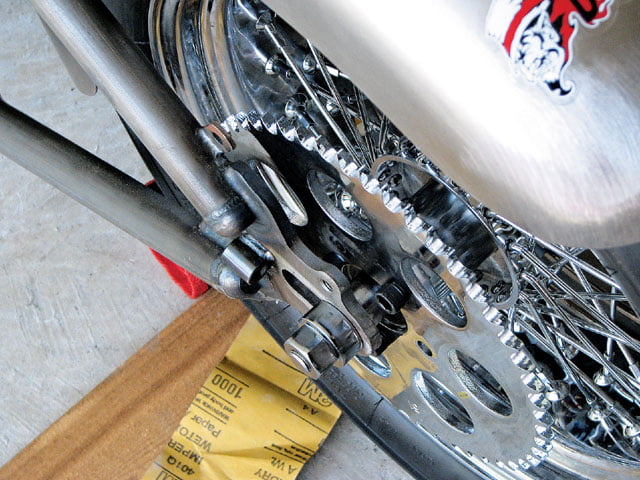
9. After having the tires mounted to the wheels, I installed the brake rotor and sprocket to the rear wheel. The sprocket sat too close to the wheel, and the heads of the bolts rubbed the frame as I spun the wheel. After changing to hex head bolts to mount the sprocket and rotor to the hub, the sprocket was still too close to the frame. I realized I had installed an unnecessary spacer, and ended up not using it in the end.
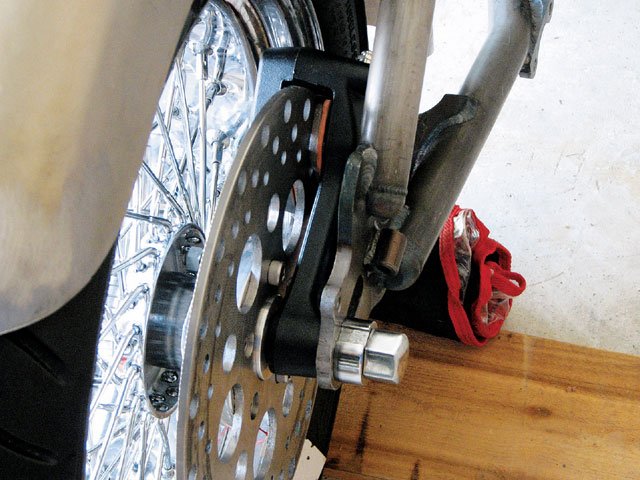
10. The brake caliper and rotor weren’t sitting right, either. I ground away a small part of the H-D rear caliper so it would fit inside of the wheel with the rotor. I must have pulled that wheel off a dozen times while changing that sprocket and rotor spacing. The brake rotor spacing was also tricky. I took some metal off the rear of the sprocket to allow adequate clearance between the wheel and the caliper.
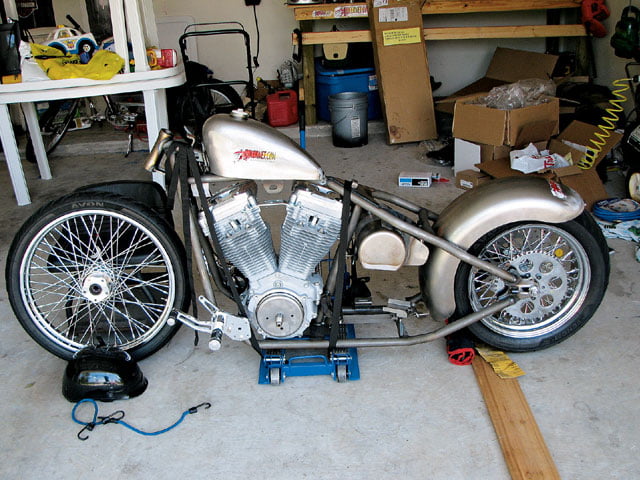
11. Going as far as I could with the build thus far, I set the rear fender on the tire and placed the tank back onto the spine. Not having a frontend yet, I placed the front wheel up in front of the frame to get an idea of what it would look like. So far she has clean lines, but we have way farther to go. Check back with us next issue as I continue on my first build.
Then Ken Conte, marketing guru for Sucker Punch Sallys, gave me a ring. It seems he had read my story on Bikernet and talked with HOT BIKE about helping me build a bike using portions of an SPS kit to get a roller to go along with my H-D motor. Before long I had parts lining my garage and not a clue what to do with them. I was still a ways off from a completed mock-up. It was the third week in June, and I was trying to get this thing finished for Biketoberfest.
I tried to do most of the work myself, but tapped Kent Weeks of Lucky Devil Metalworks in Huston TX. for some help here and there. So far the industry has reached out to help me in the best possible way, and they have truly blown my mind with their efforts. Companies like J&P; Cycle, BDL, and Custom Chrome helped supply parts along the way. Kirk Taylor from Custom Design Studios has volunteered to do the paint job. Now it’s up to me to put this thing together. So watch and see as I build this bike for my brother, the soldier, in appreciation for his service to our country.


