
Cycle Vision’s Illumabezel Fairing Install
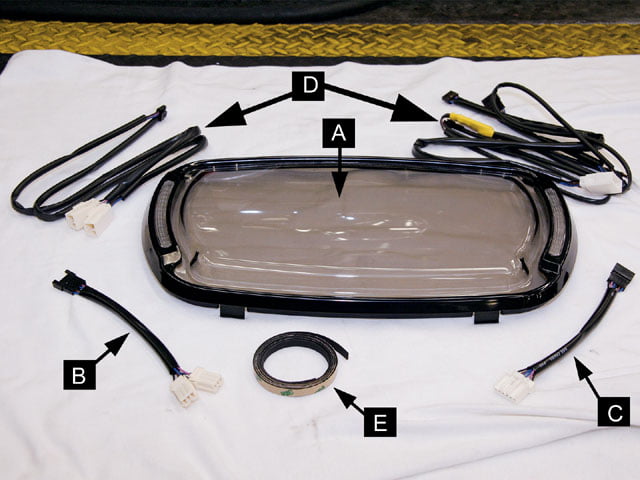
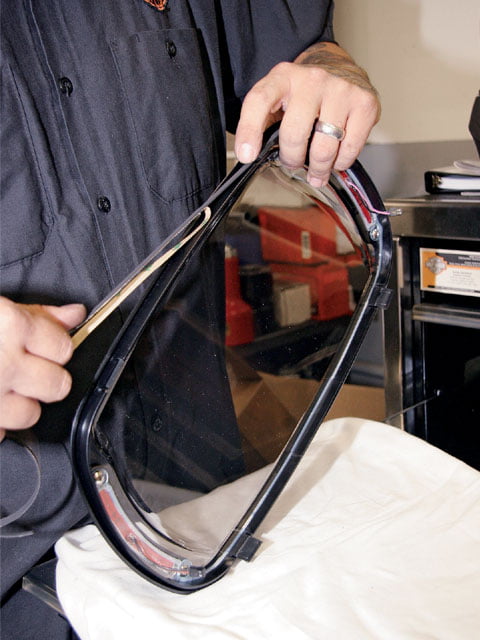
1. The Illumabezel comes complete with everything necessary to install on ’98 to ’06 H-D Road Glides. Included is (A) bezel; we went with black and a smoked lens, (B) 3-pin or (C) 6-pin wire harness; depending on your application, (D) connectors, and (E) adhesive tape.
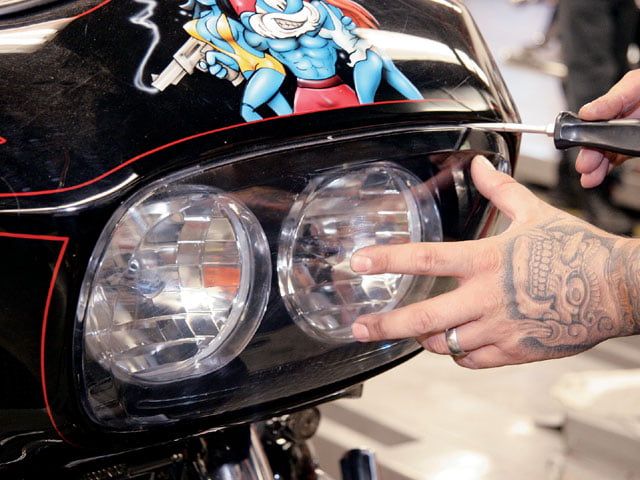
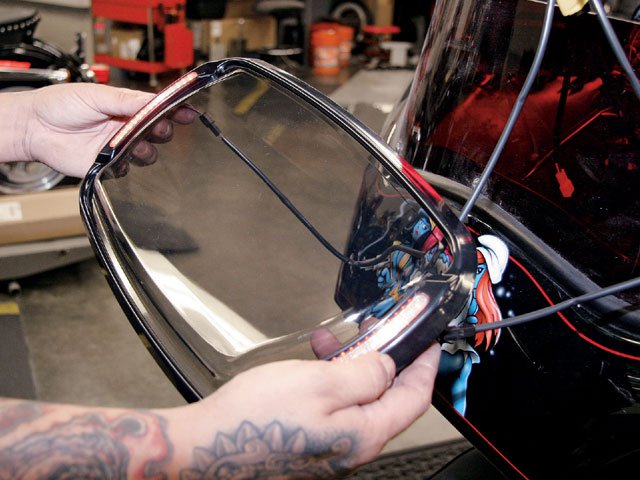
2. Matt removed the clear headlight cover on an ’03 Road Glide. You can also see what the headlamp area looks like prior to the Illumabezel going on.
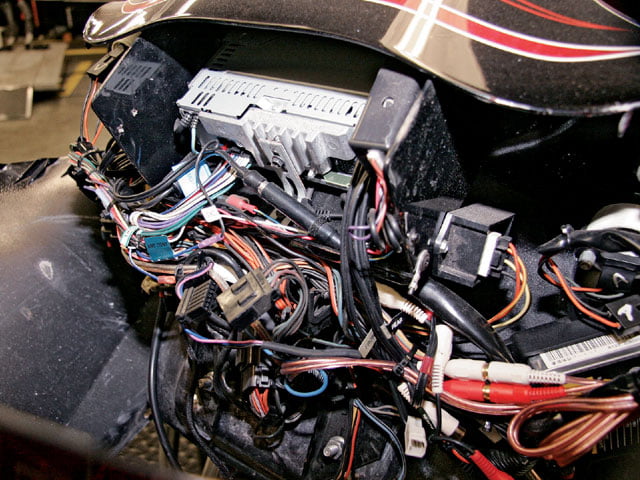
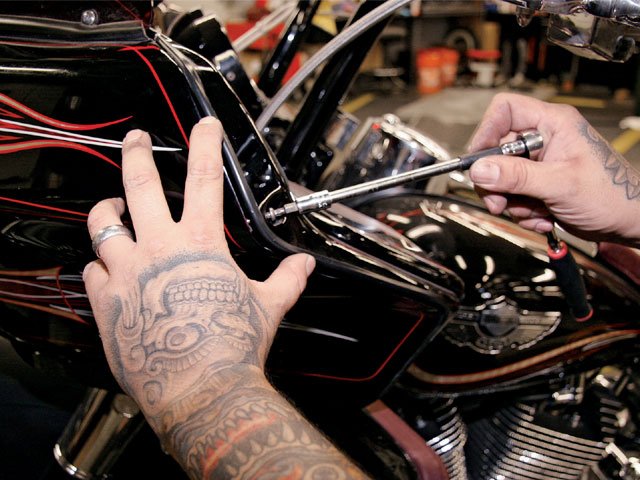
3. After removing the outer fairing (refer to the H-D service manual), Matt exposed every color of the rainbow with this bike’s wiring system. The front turn signal connector plug was located and disconnected (arrow).

4. For our application, we’re using the wire harness with the 6-pin connector. Next, the male end of the new wire harness was plugged into the 6-pin connector on the main wire harness.
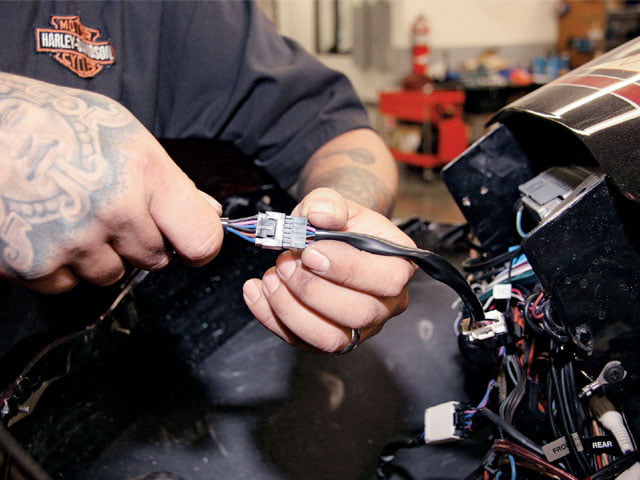
5. We’re using the bike’s existing turn signals in conjunction with the Illumabezel. Therefore, Matt plugged the 6-pin connector from the turn signals into the female plug on the new wire harness. Note: If using the Illumabezel turn signals only, you will need to purchase a load equalizer.
6. After routing the black and brown wire lead between the back of the headlight and the fairing on the right side and the purple and black lead on the left, Matt then checked to insure the Illumabezel worked before reinstalling the fairing.
7. Now that the Illumabezel, well, illuminated, Matt got started reinstalling the outer fairing. Note: Refer to your H-D service manual for fairing installation.
8. With a slow and smooth hand, Matt applied the included adhesive tape around the perimeter of the Illumabezel. Note: Remove any extra tape to insure a solid seal and proper fitment.
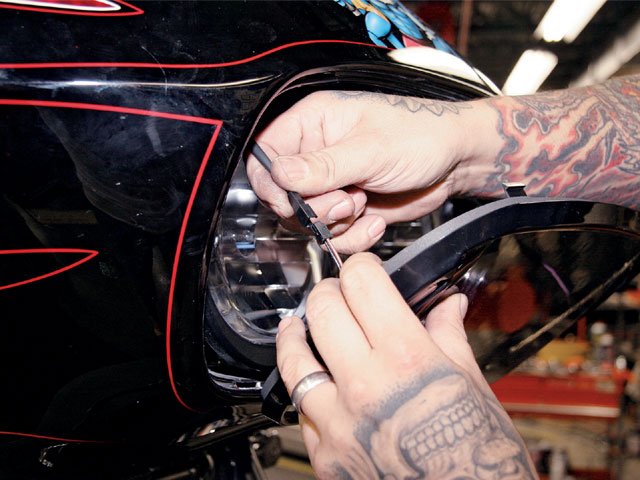
9. The leads were finally plugged into the lights on the Illumabezel before snapping it into place-top first, then bottom. Here you can see the right side lead with the black and brown wire being connected into the lights.
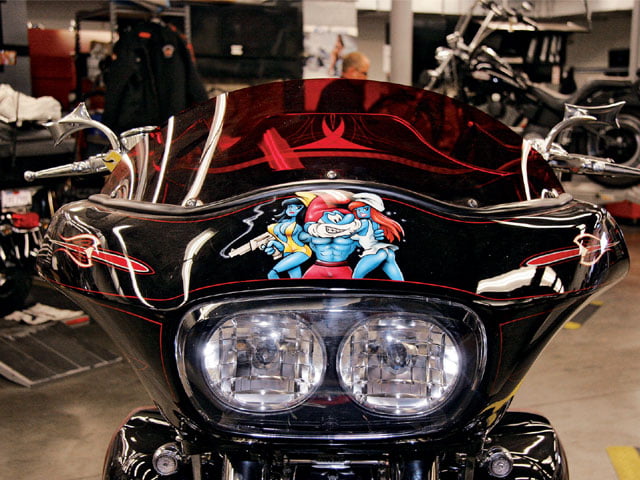
10. Here’s a before shot (left) and the final installation of the Illumabezel. As you can see, the black bezel with the smoked lens really dresses up the front end. It also adds some distinct LED lighting-which can be a good thing to wake up daydreaming cagers.
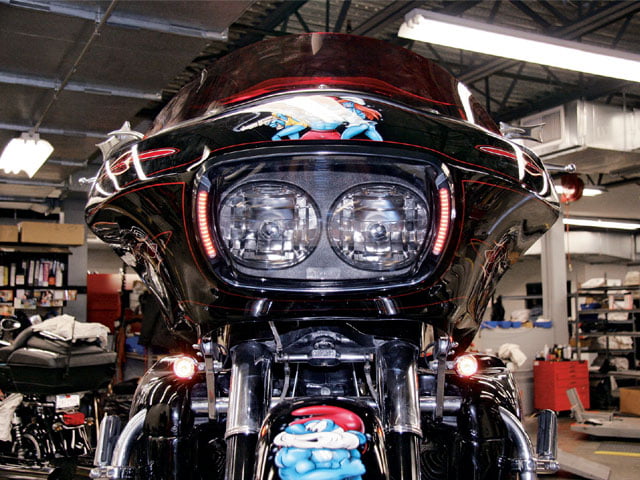
11. Here’s a before shot (left) and the final installation of the Illumabezel. As you can see, the black bezel with the smoked lens really dresses up the front end. It also adds some distinct LED lighting-which can be a good thing to wake up daydreaming cagers.
Upgrades like simple low-budget, quick and easy installations can make all the difference to your existing fairing. Cycle Visions in San Diego, CA, calls it “giving your bike a facelift” with the company’s Illumabezel (patent pending). Fitting ’98 to ’06 Road Glide fairings, the Illumabezel replaces the stock headlight shield found on Road Glides and incorporates additional LED run and turn lights. As its name implies, the Illumabezel helps you be more visible while riding and adds a cool and unique look to your fairing.
The Illumabezel is available in a chrome-plated (MSRP $189) or black (MSRP $179) bezel with integrated LED run and turn signals and features a clear or smoked lens. It comes complete with a plug-in wire harness that fits both 6- and 3-pin connectors, depending on your model year, and works in conjunction with your stock front turn signals. If you want to clean up the front of your Road Glide, you can pick up Cycle Visions’ load equalizer (MSRP $19.95) and remove the stock turn signals. However, take note that the Illumabezel is not DOT-approved to be used as a sole form of turn signals up front.
We met with Matt Cortez, master technician at Anaheim-Fullerton Harley-Davidson in Fullerton, CA, for the installation. Although we had a master handy, we were told the average person could do the install in about an hour. We snapped photos of the Illumabezel being installed and how it dressed up the look of the fairing.


