
RSD Preload Adjuster Install
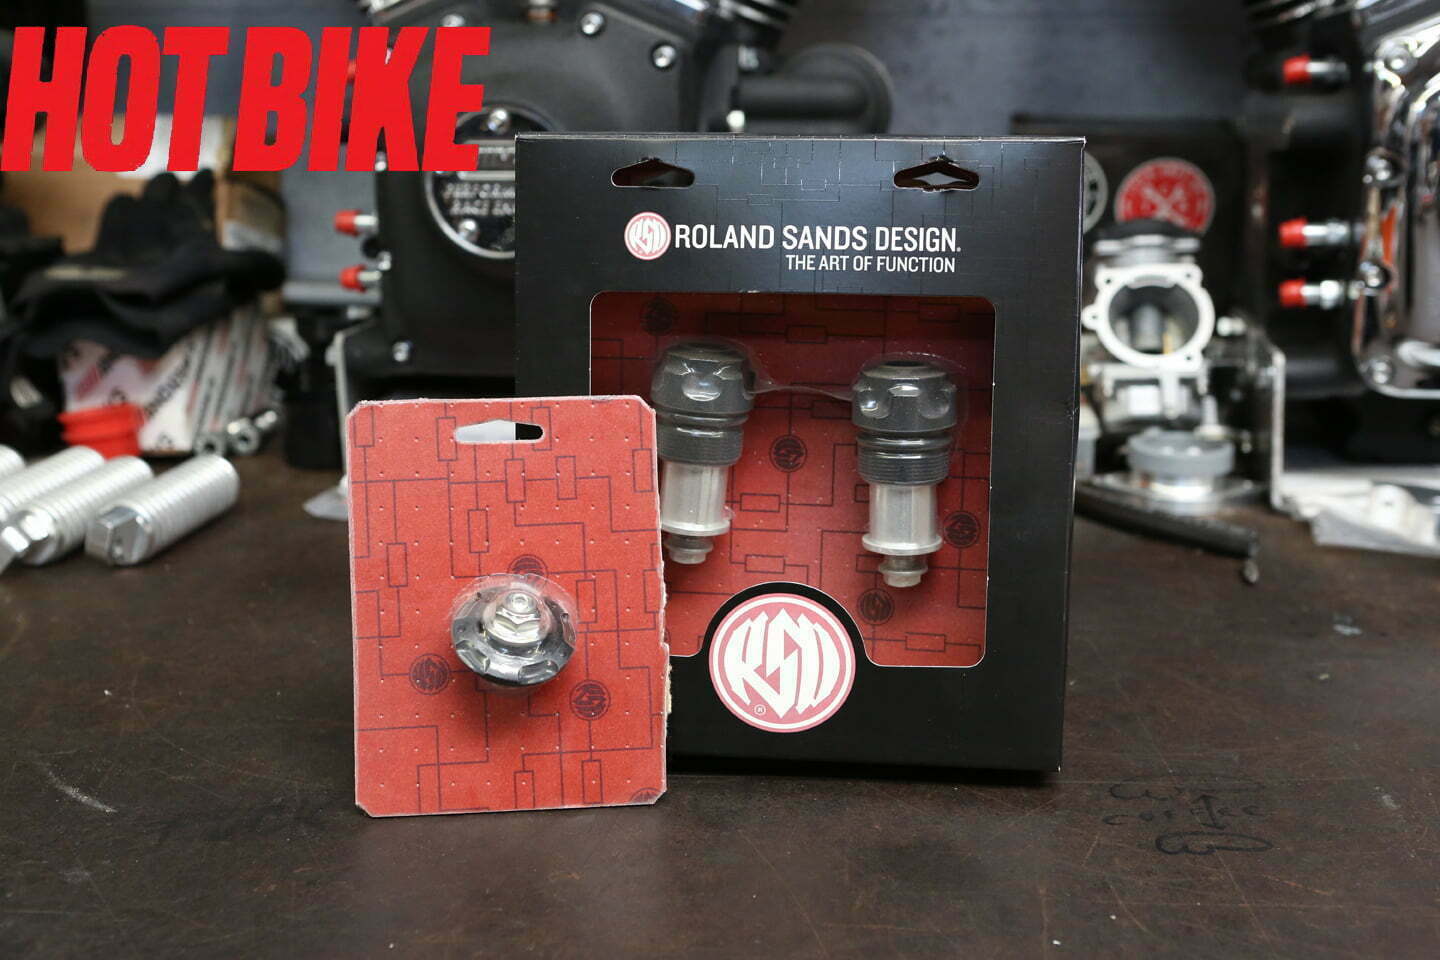
Meet the parts involved.
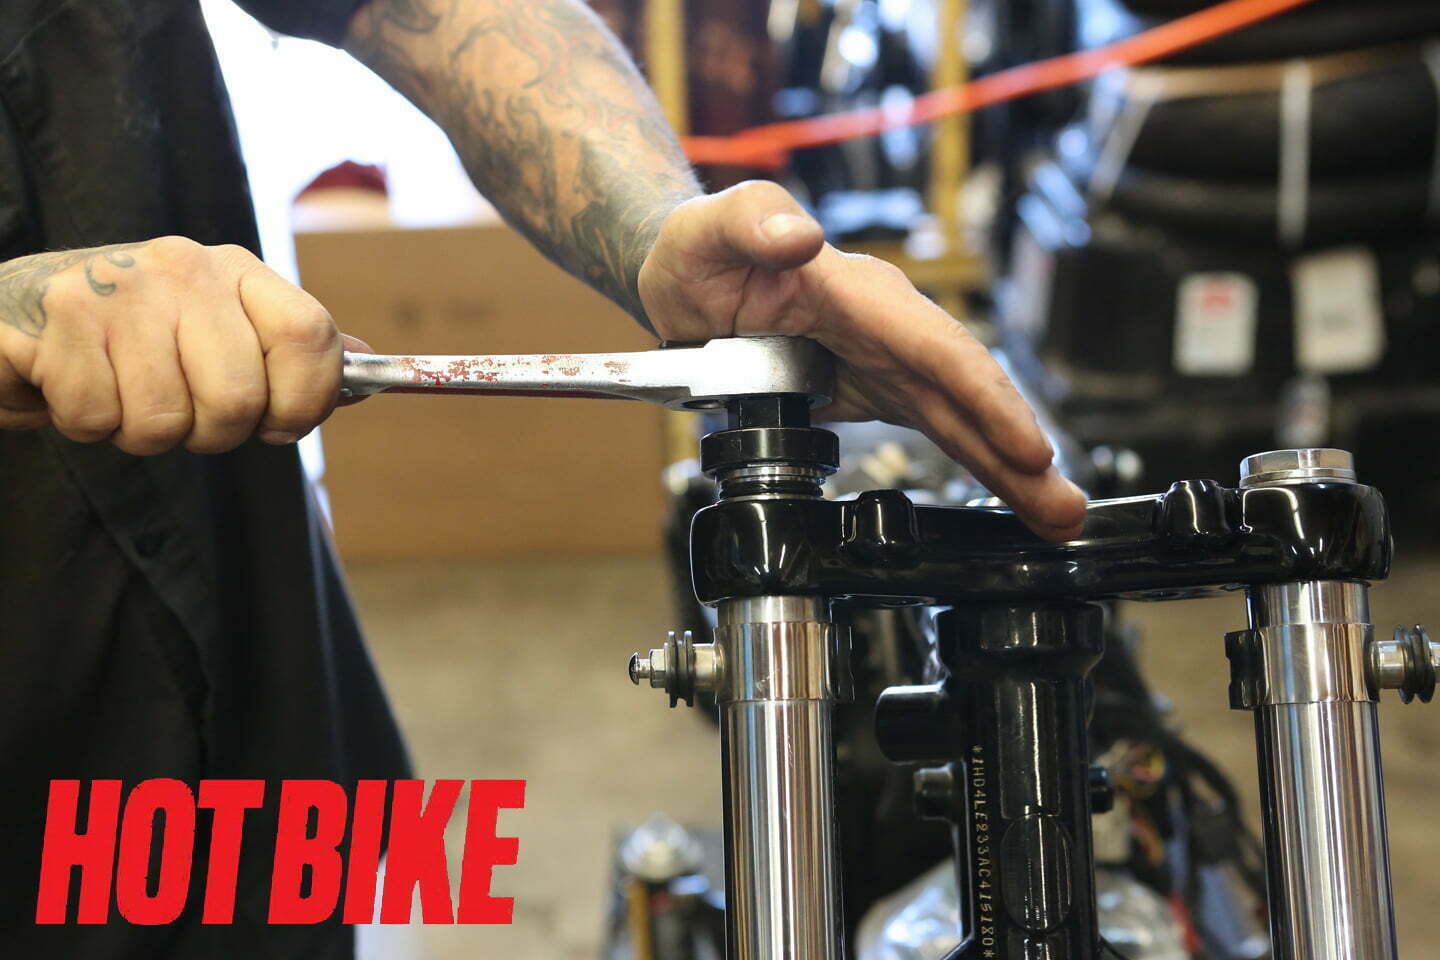
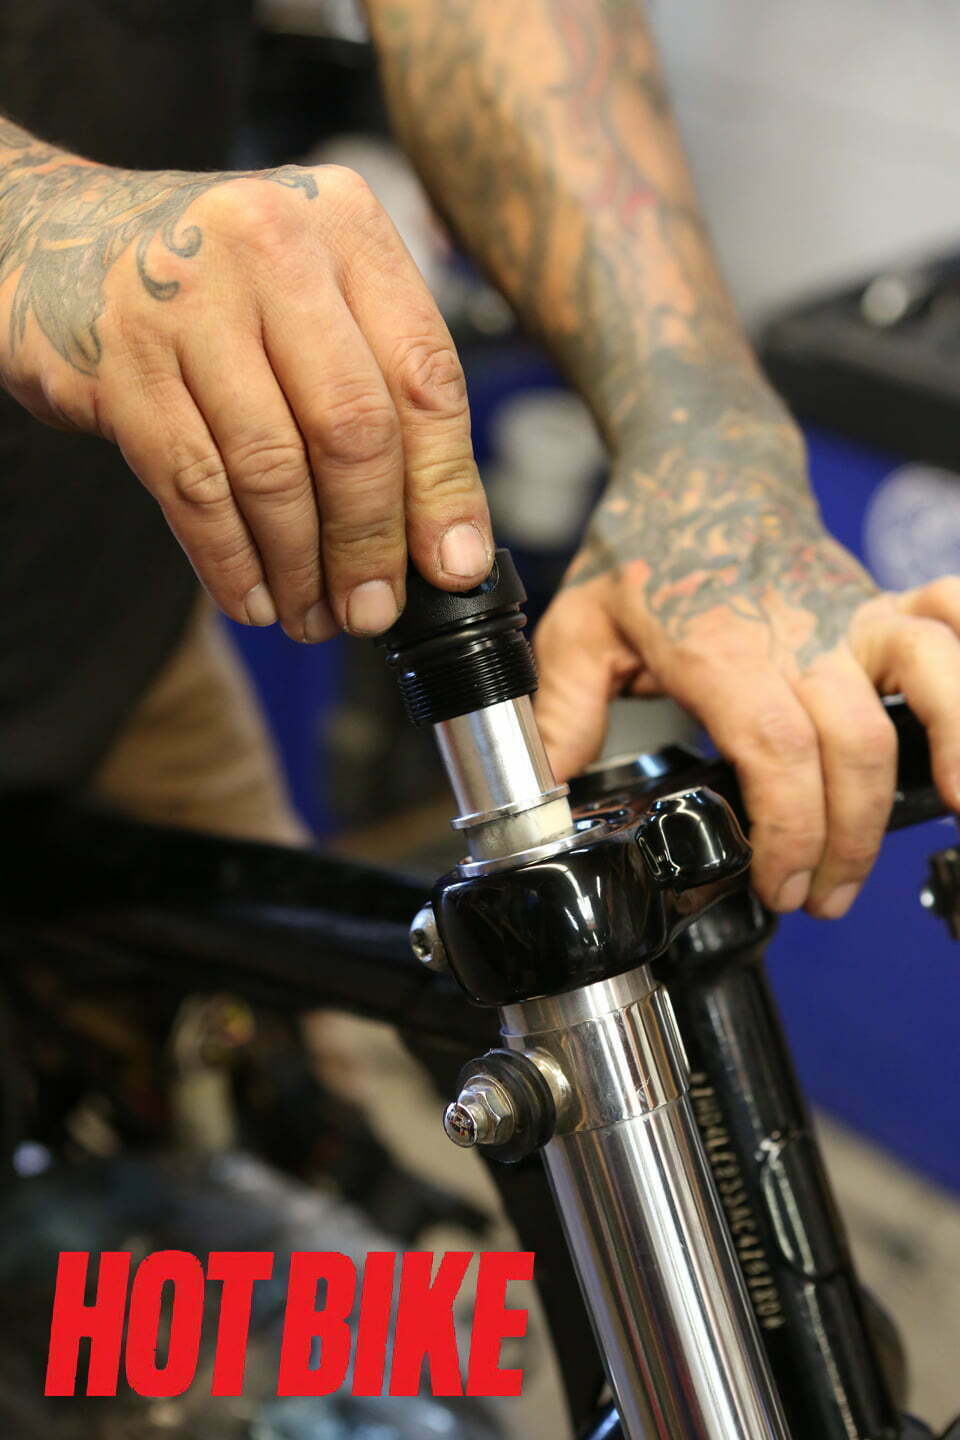
- Since our bars are already off, we can focus directly on removing the stock fork caps from the fork tubes. Using the JIMS fork nut remover tool, we carefully break the fork top nut free.
- After unthreading the nut from the tree, you will see the stock length spacer or PVC equivalent and a washer. These will be under the top fork nut. Be careful when unthreading the fork nut; when it becomes free from the fork tube, it is pushed upward with force via the spring. If you do not have a solid grip, the spring can take your teeth out when it becomes free.

- These are the pieces you should see once you have removed the fork nut from the fork tube.
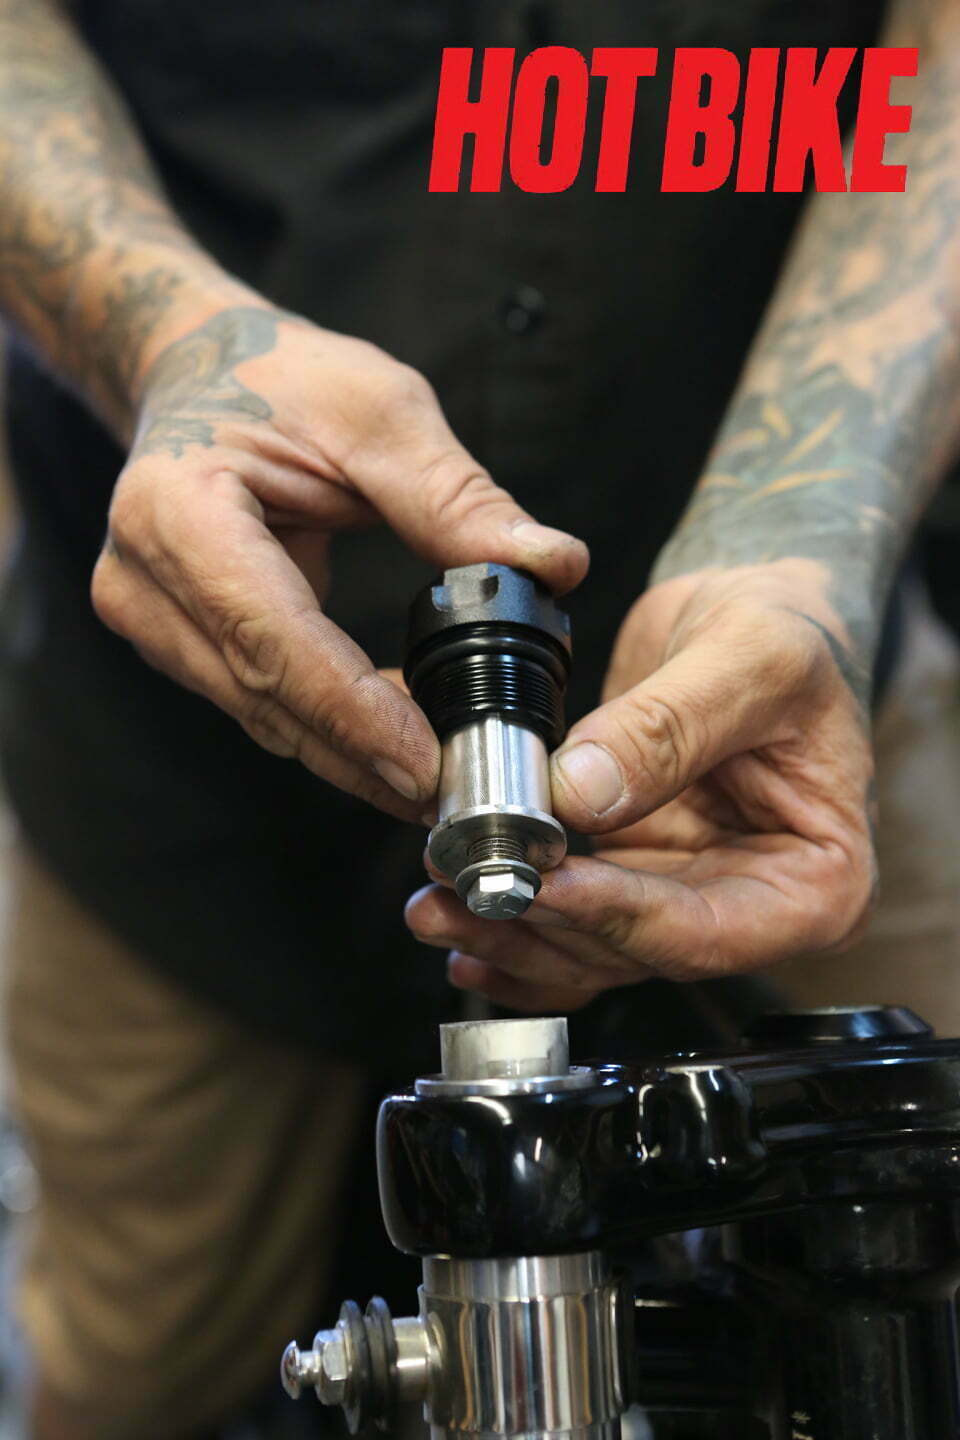
- Grab the RSD fork preload adjuster and inspect it prior to installation.
- Center the preload adjuster in the fork tube spacer. You do not need the washer from the OEM setup.
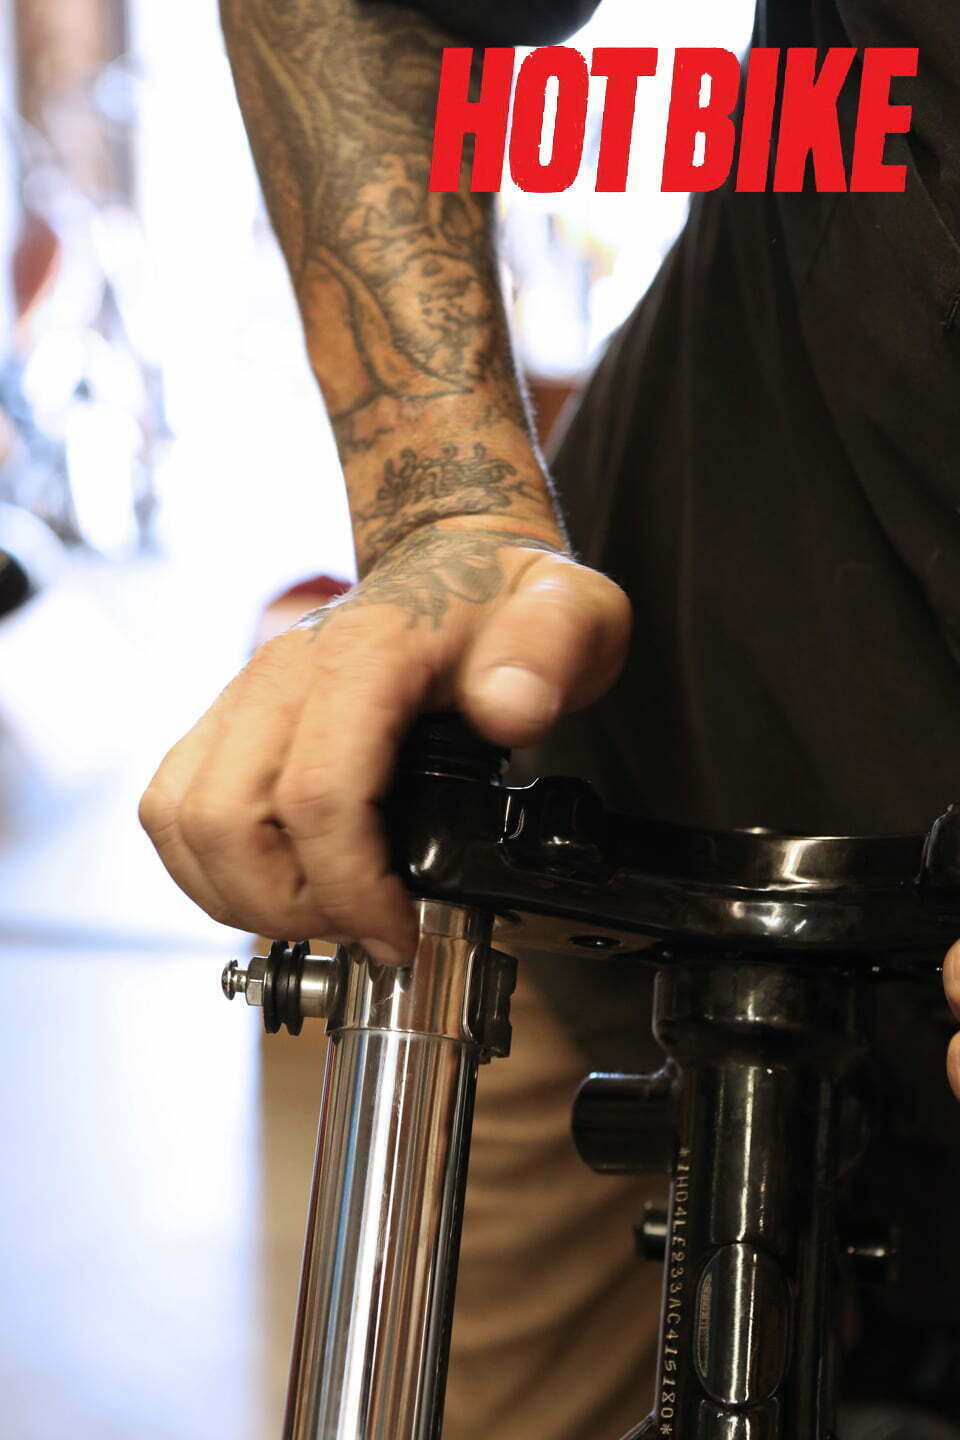
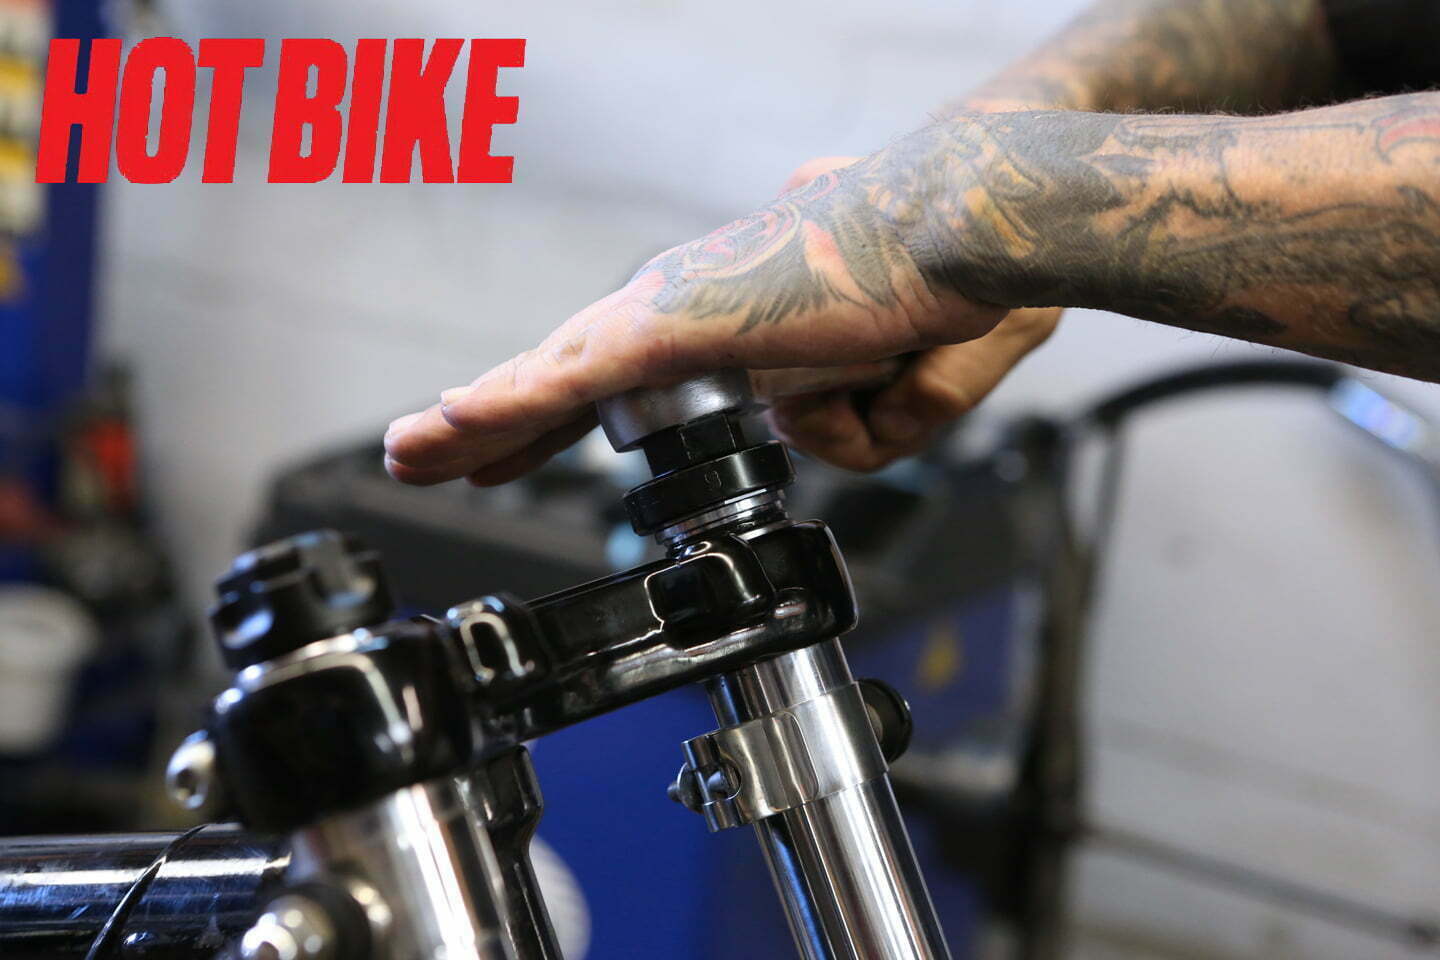
- Using your hand or a palm wrench of some sort, insert the RSD adjuster into the fork tube and begin threading it in. Be careful not to damage threads or cross-thread the adjuster upon installing it into the fork tube.
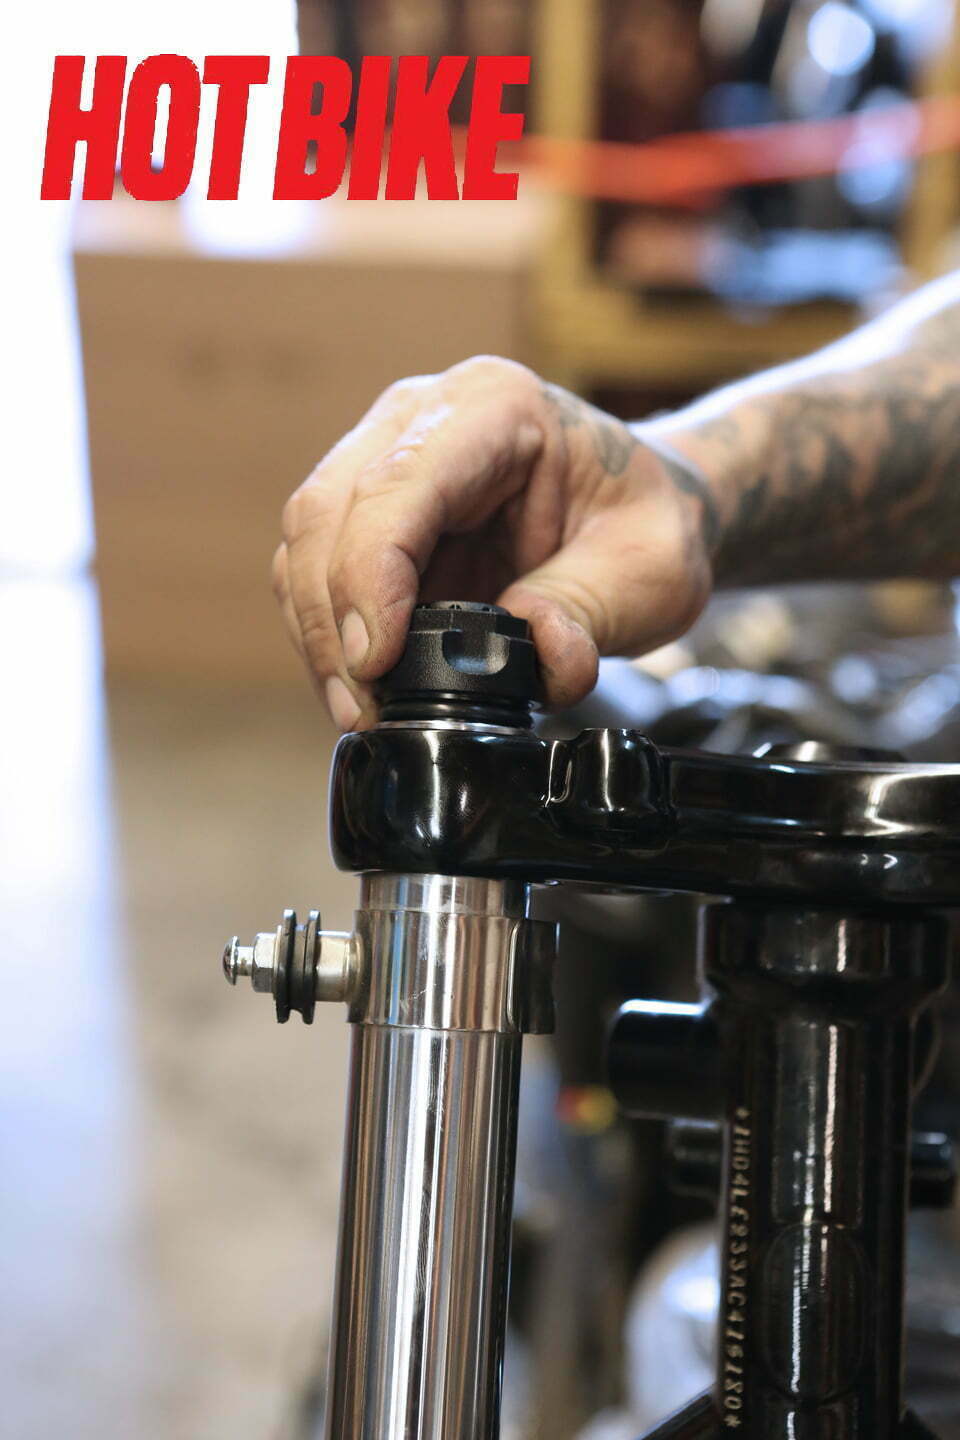
- Once the threads have been started, continue threading the RSD preload adjuster until it is fully seated into the fork tube.
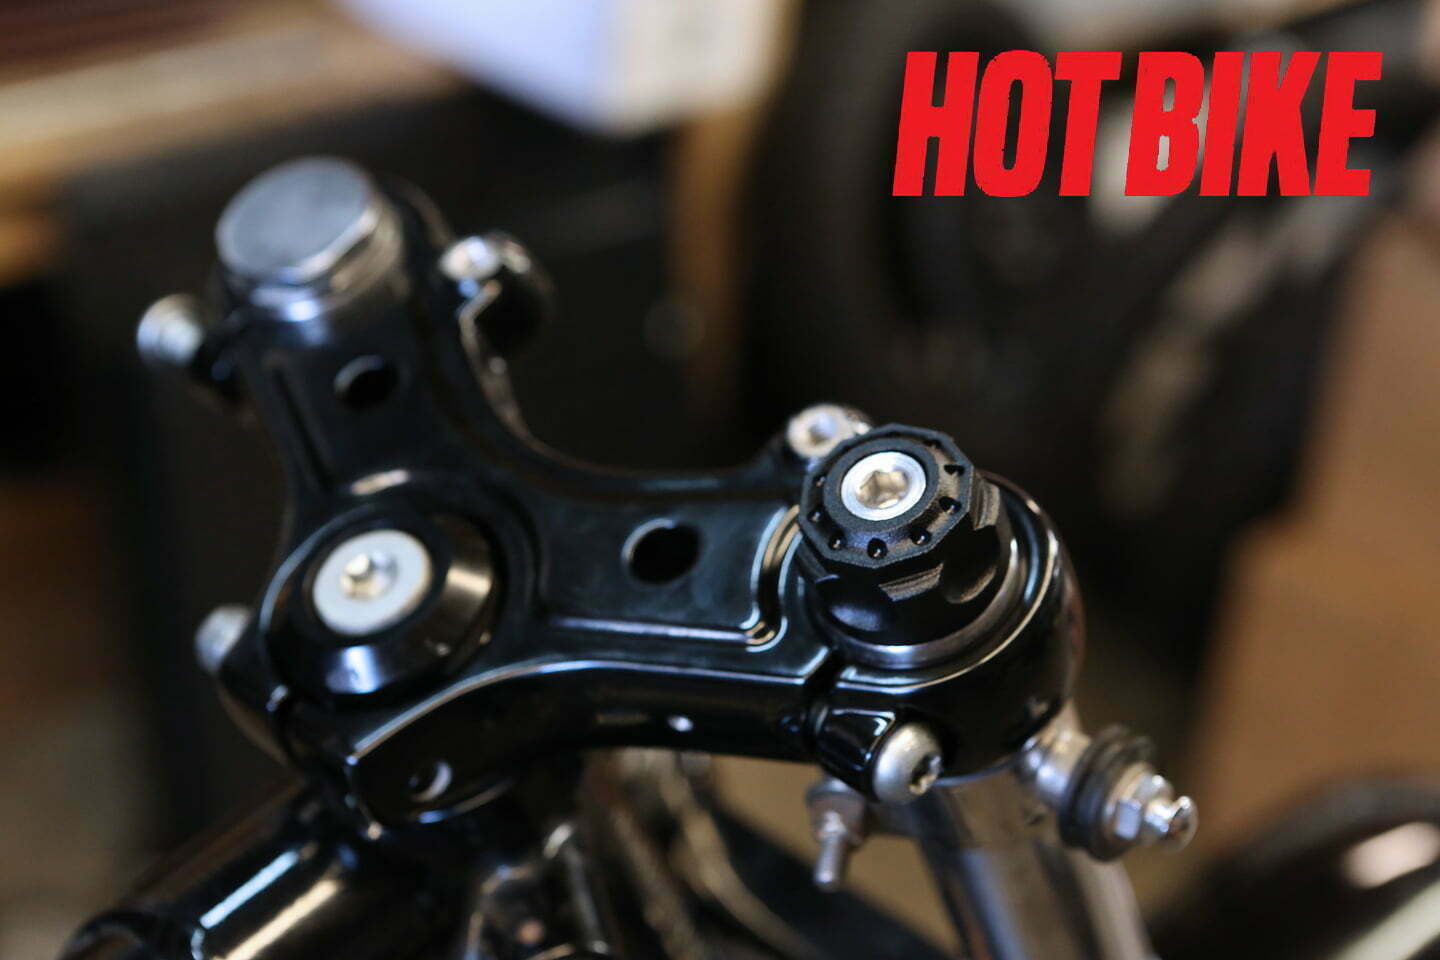
- Pictured here is one RSD adjuster installed into the triple tree. Yours should look similar at this point.
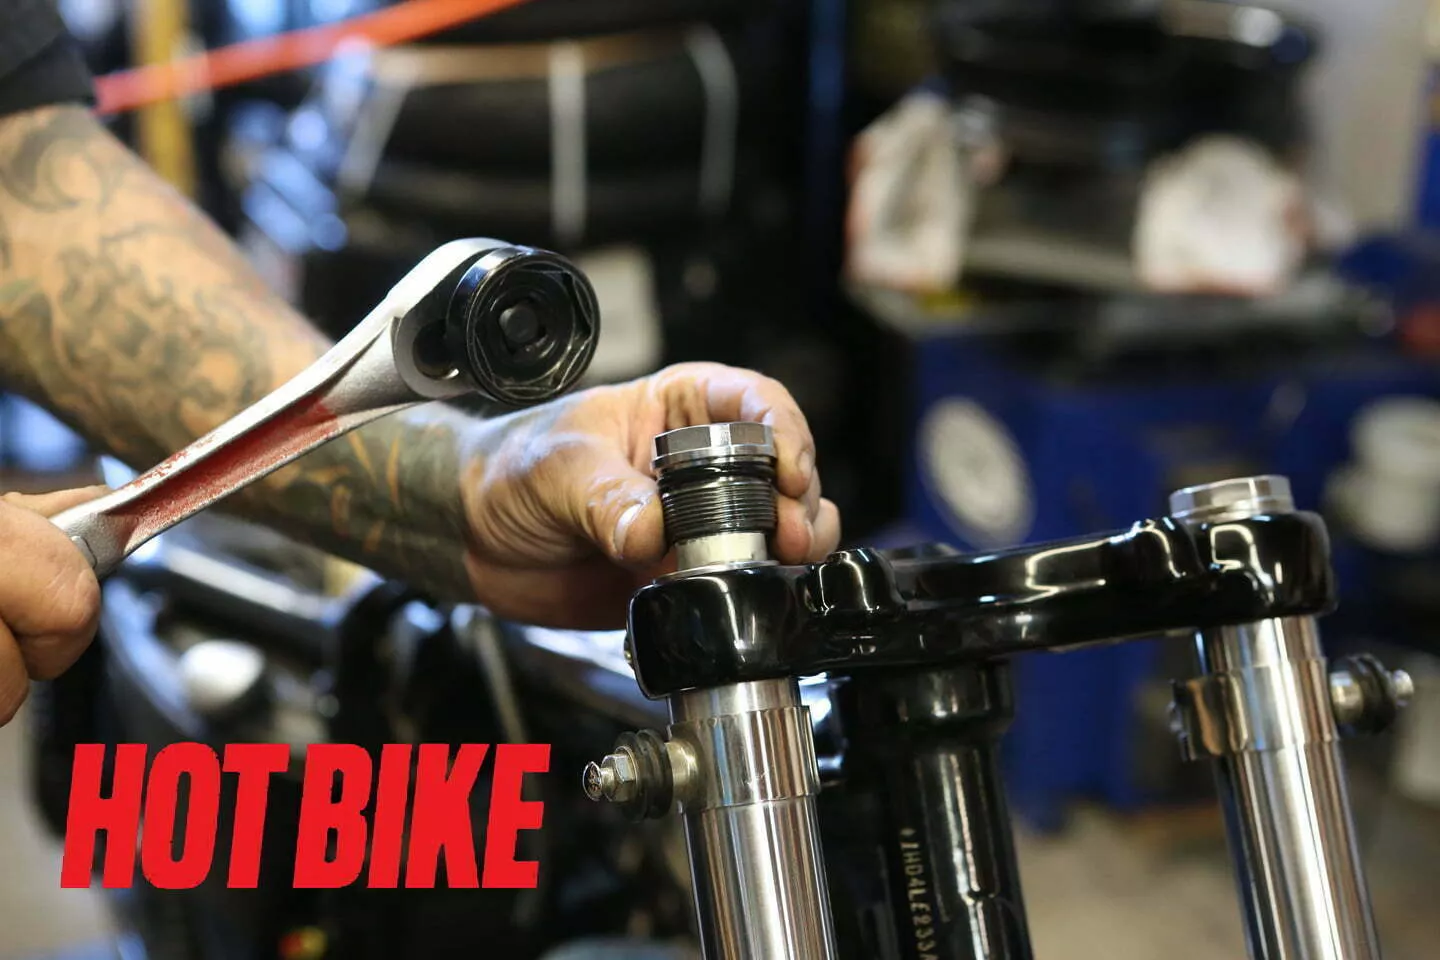
- Using the JIMS fork cap removal tool, remove the other fork cap from the other fork.
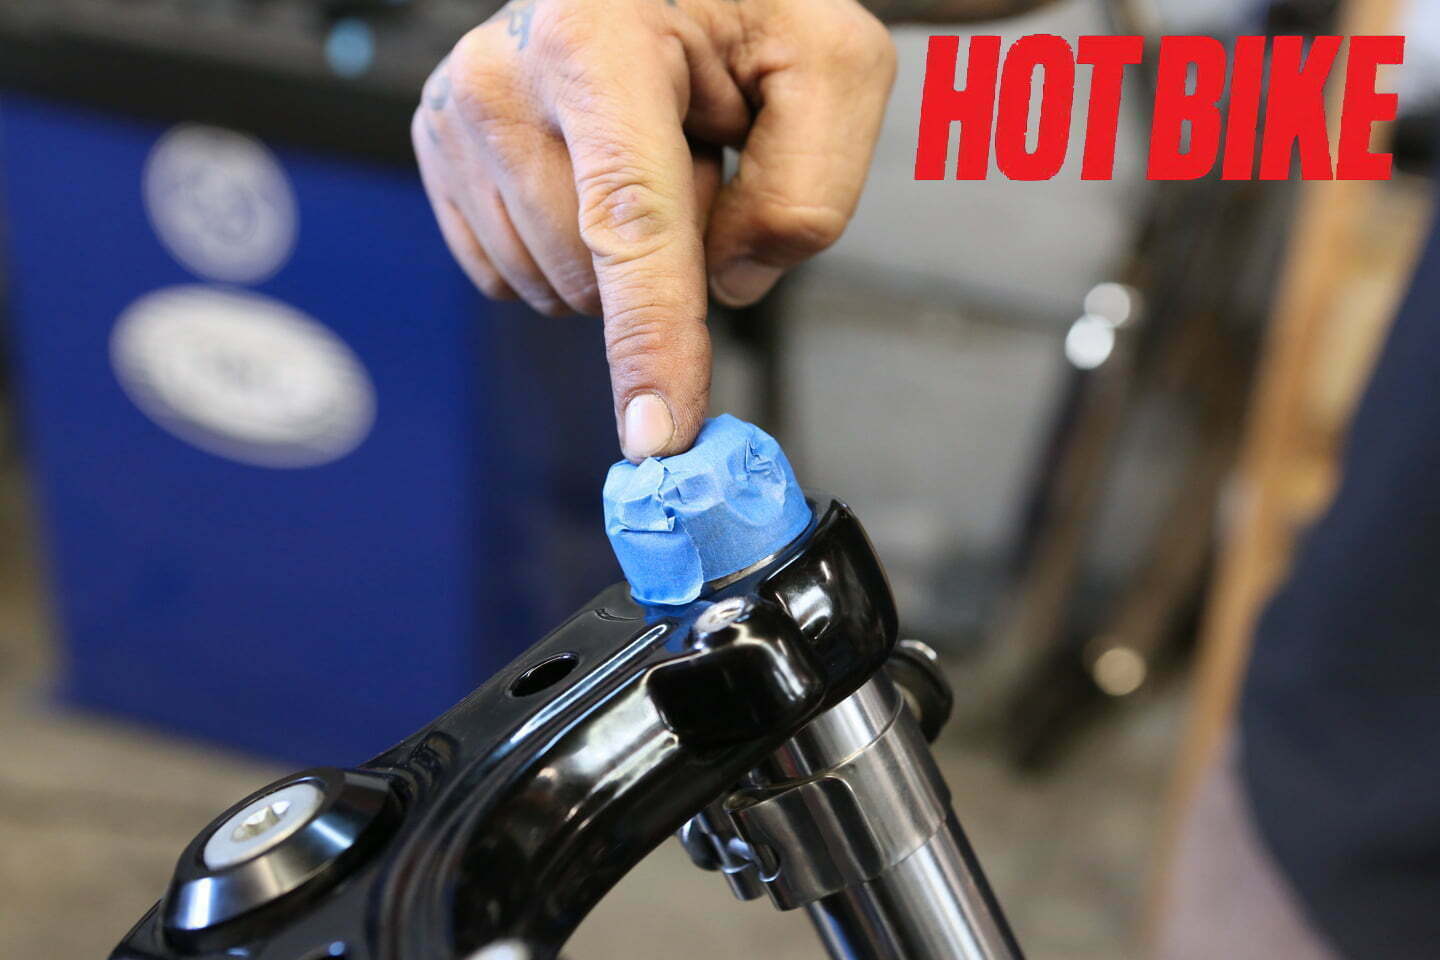
- Repeating the process from the other side, this brings us to the point of tightening the RSD preload adjusters. We begin by taping the adjusters off so no scratches occur under the torque load of a wrench.
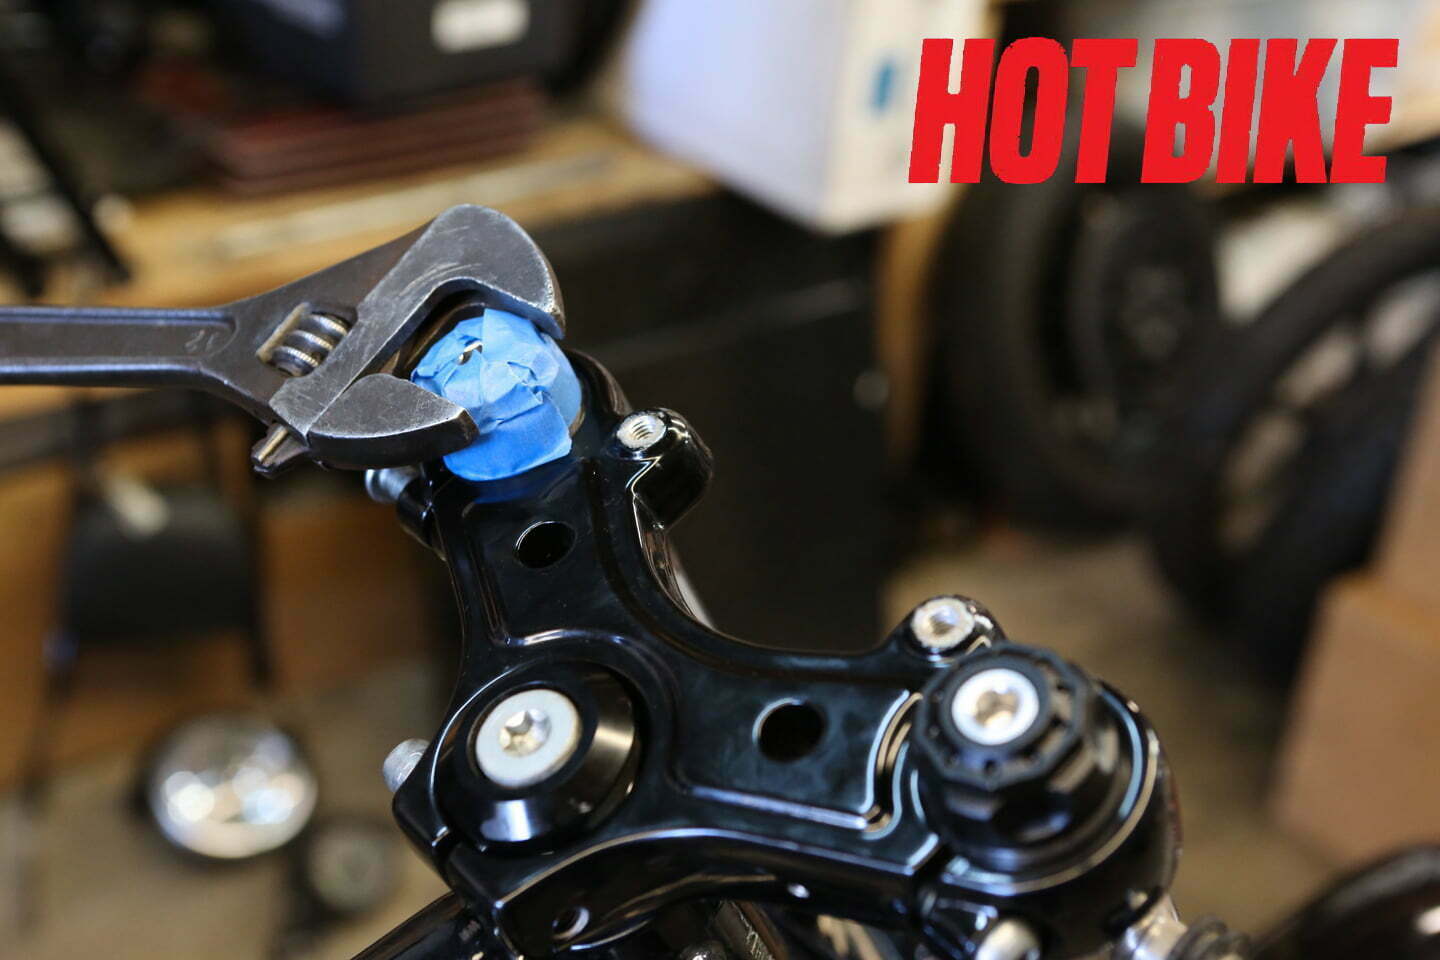
- Using a torque wrench to tighten the RSD adjusters is obviously the best way to do the job, but since a lot of people do not have such a wrench, we show how to tighten the RSD adjusters using a crescent wrench. Make sure not to over-tighten the adjusters.
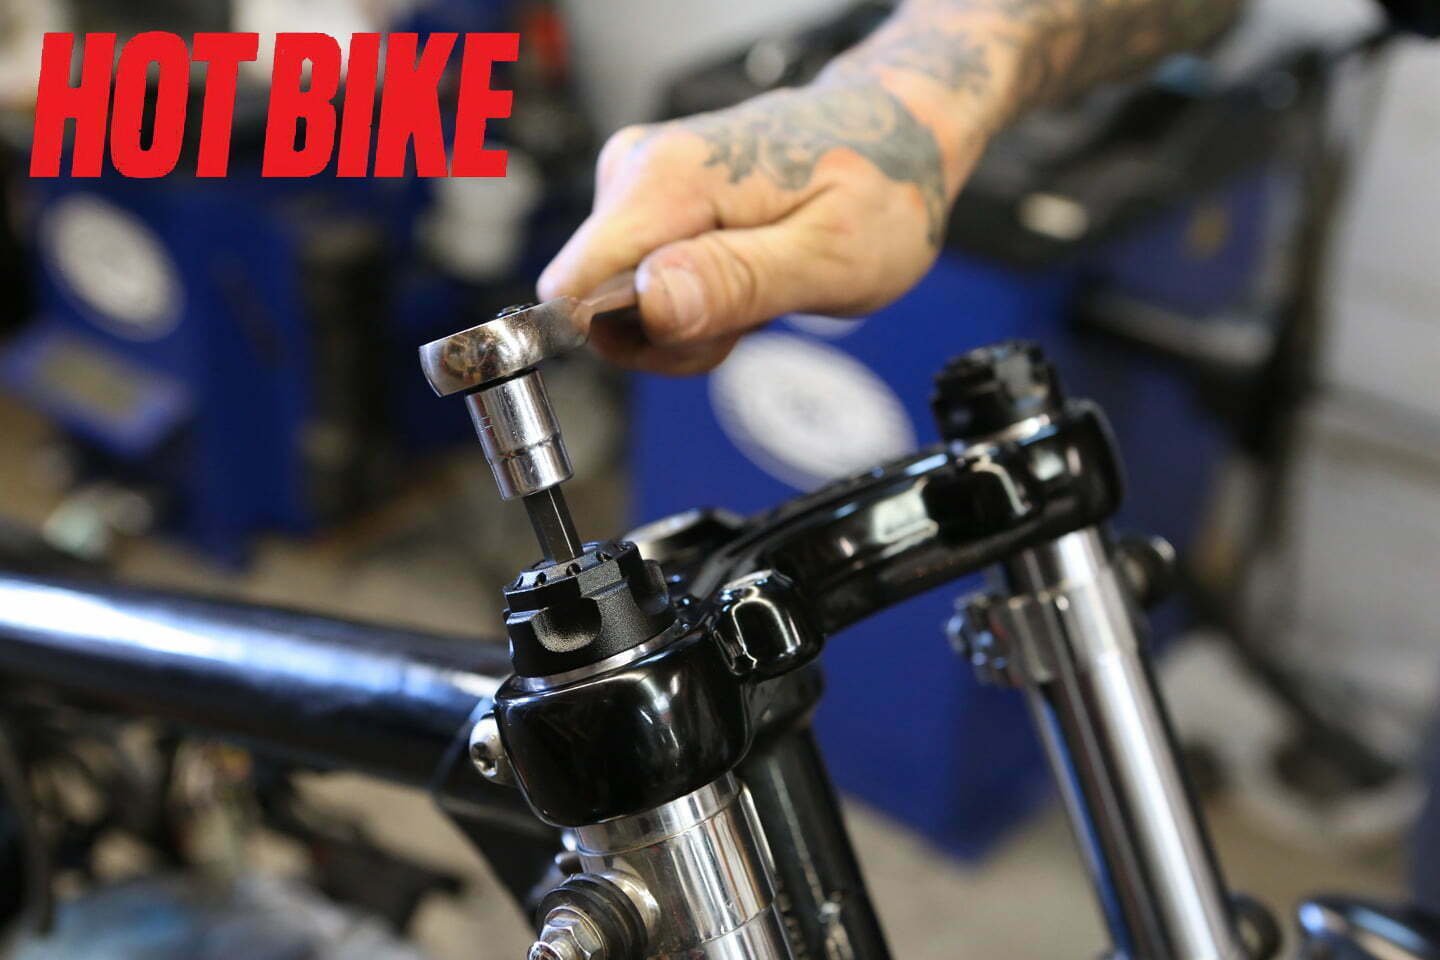
- We now take an Allen socket and turn the preload adjusters counter clockwise until the bolt doesn’t move. This means the preload adjuster is backed all the way out and there is no preload on the fork spring. We then turn the screw clockwise three full turns as a starting point for our RSD preload adjusters. From there, adjust to your riding style and comfort level by adding or lessening your adjuster screw position.
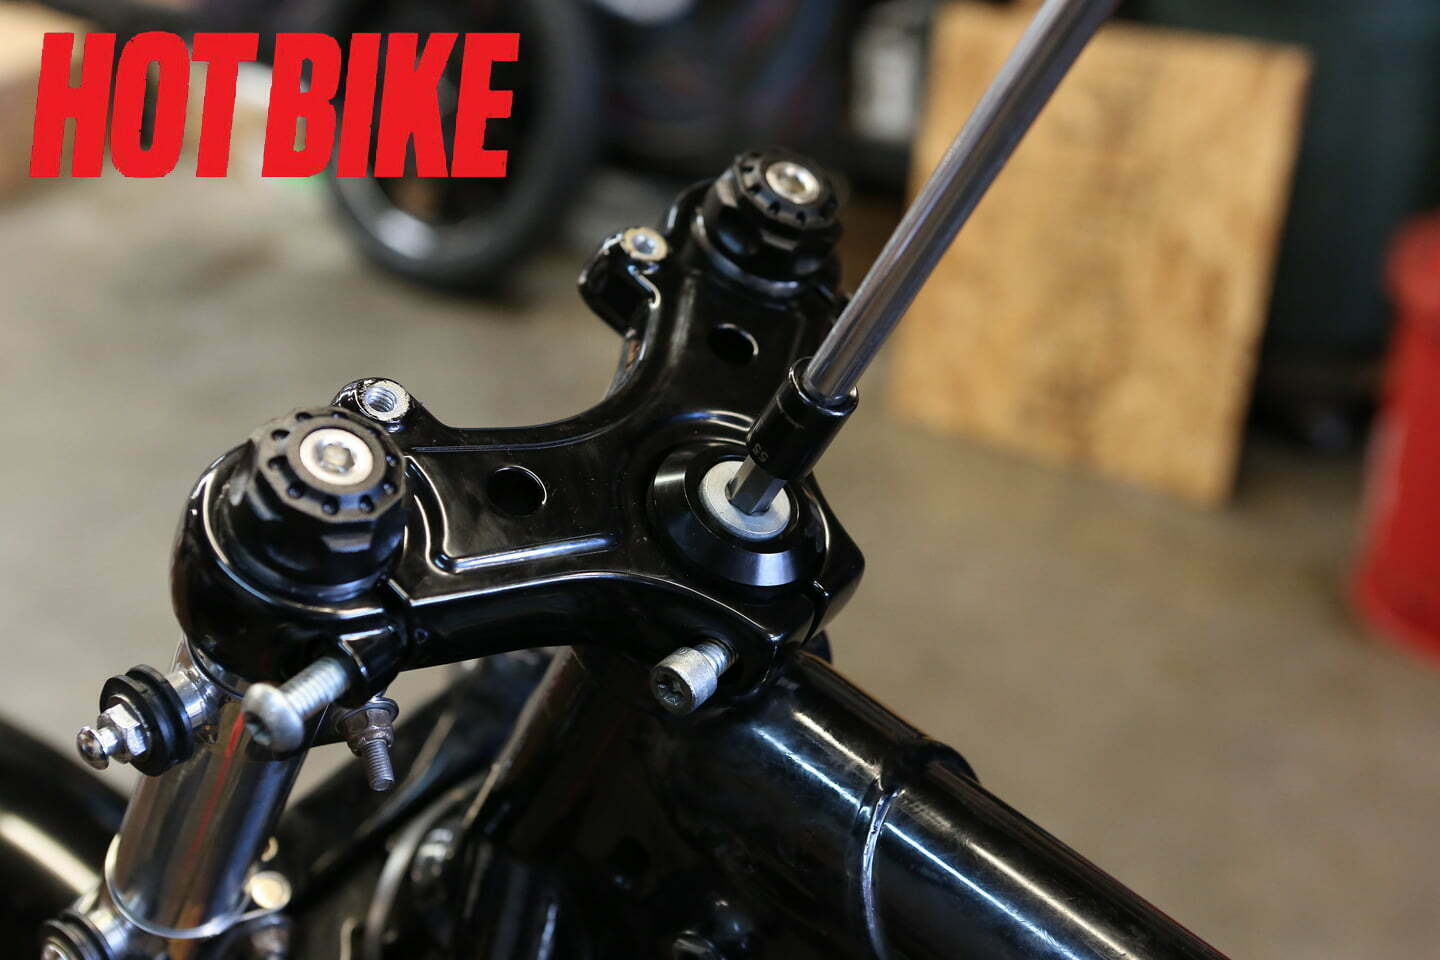
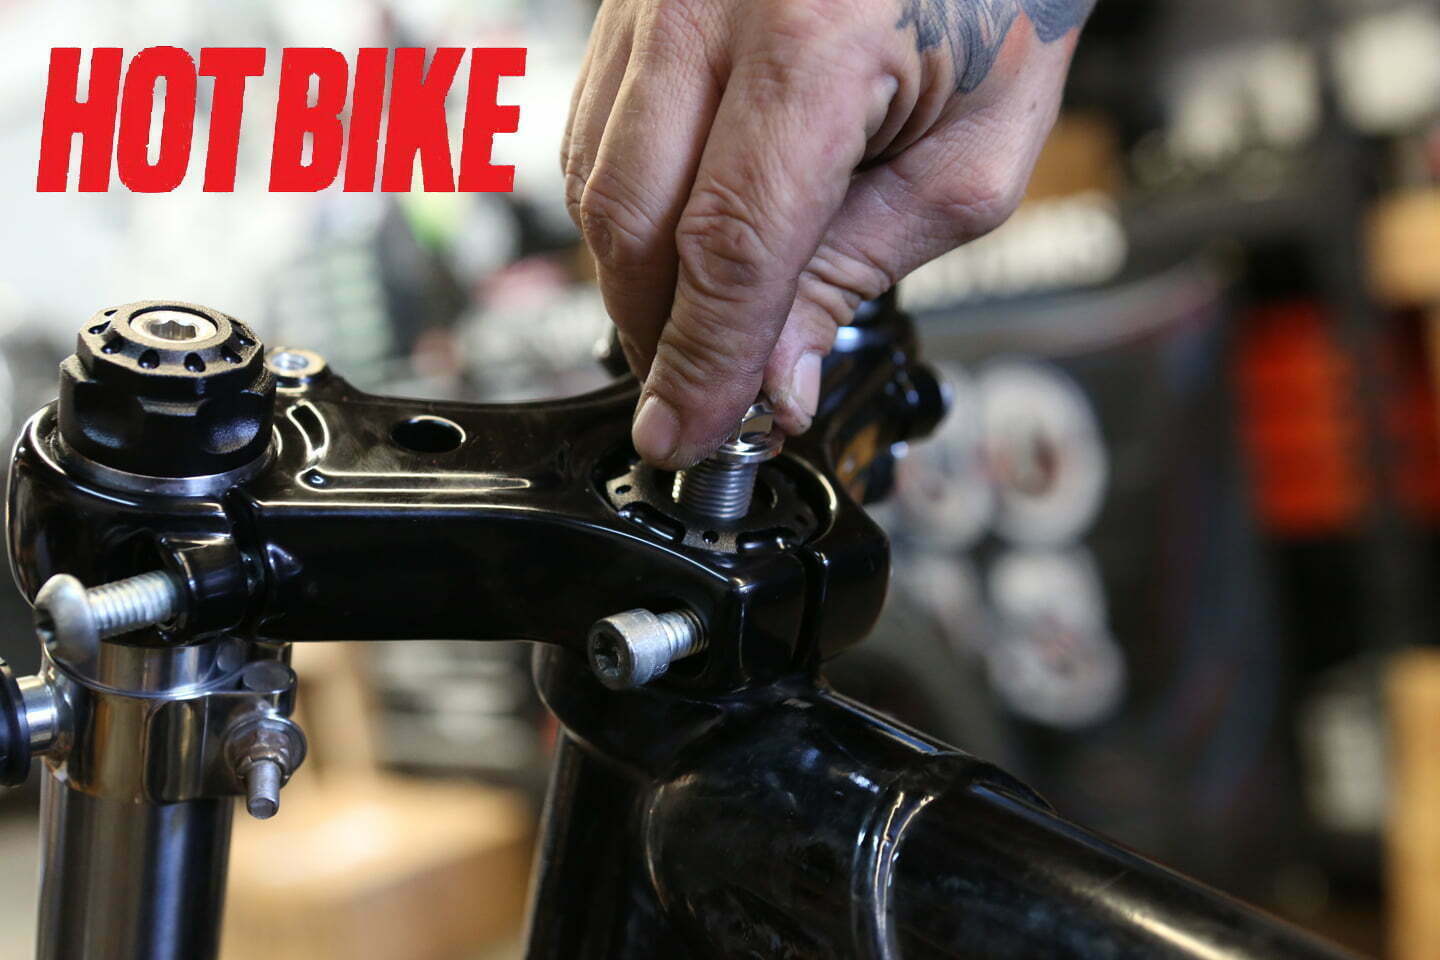
- Next, we break free the stock triple tree nut setup and loosen.
- Next, we remove the stock triple tree nut setup.
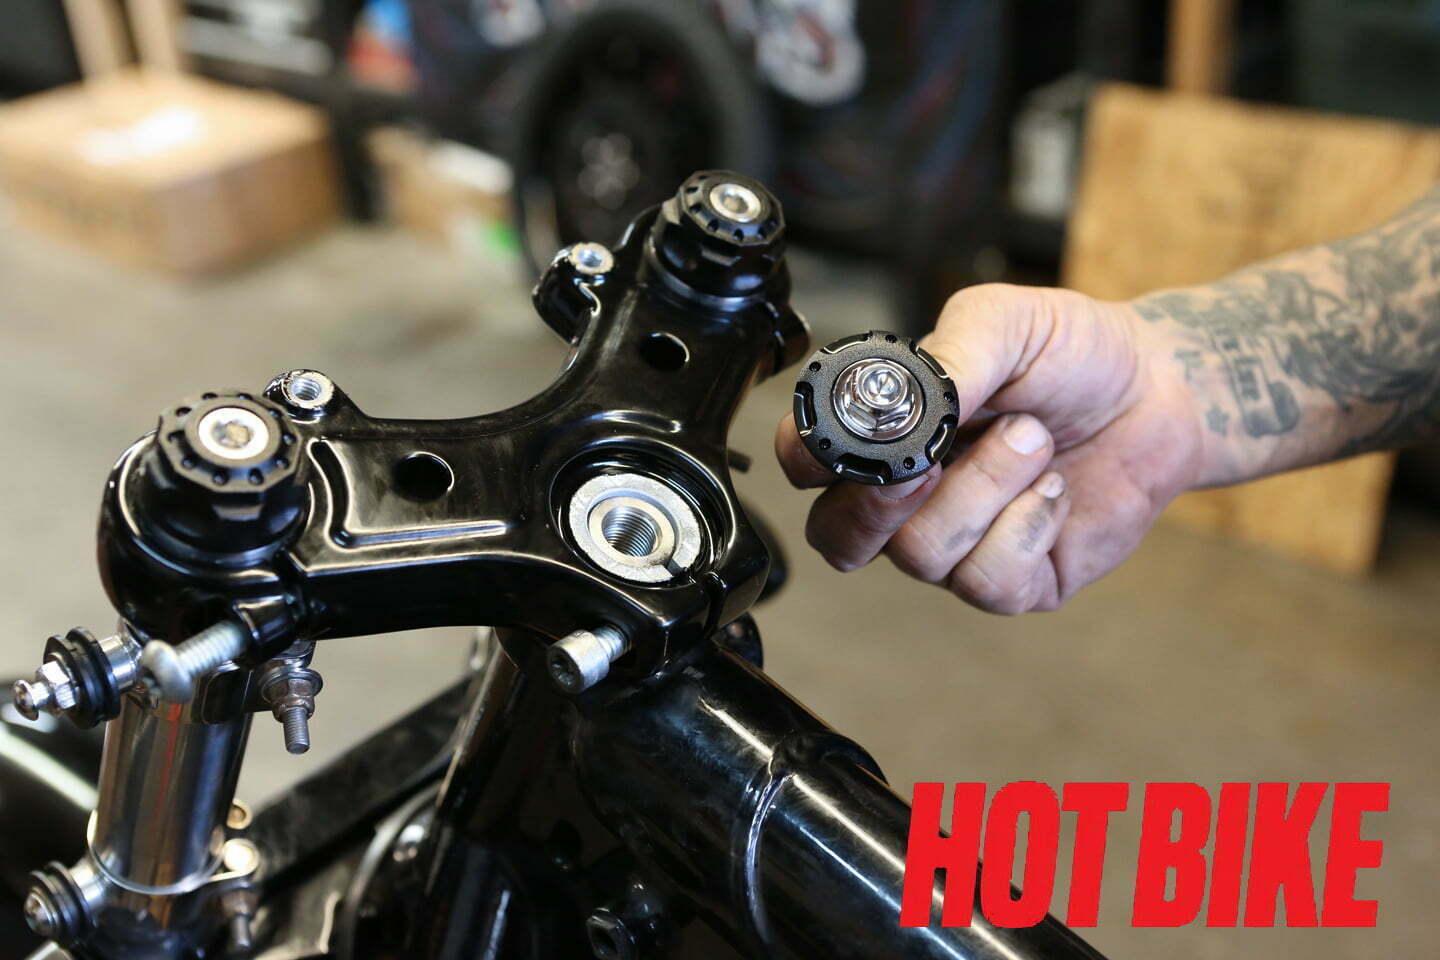
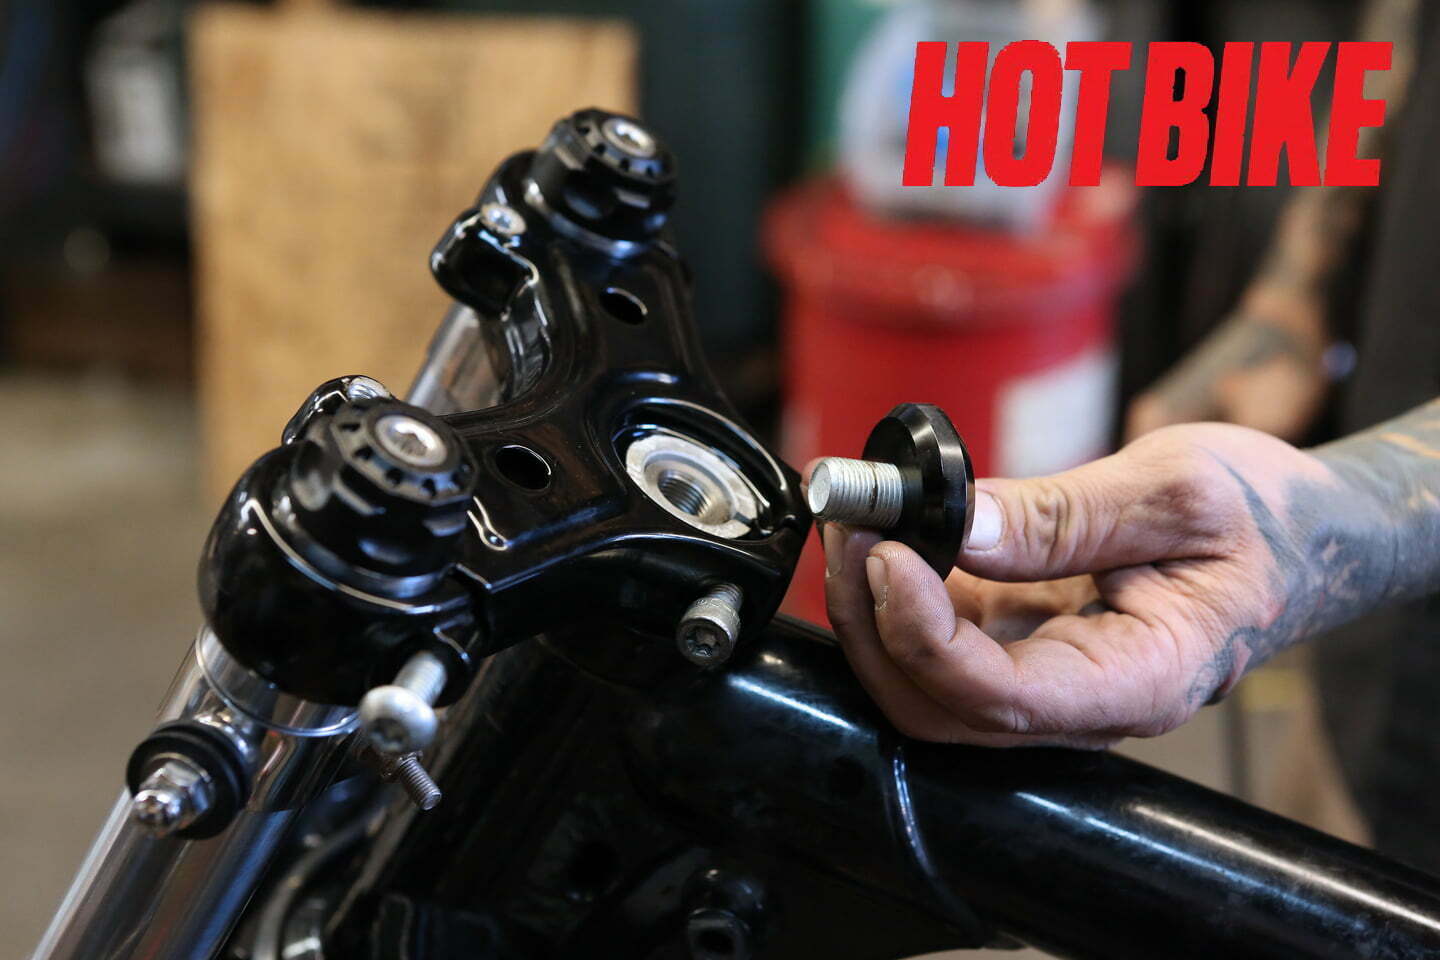
- Take the RSD triple tree nut kit and inspect prior to install. The kit comes with a billet, machined washer in Black Ops finish and a show-quality, chrome hex nut.
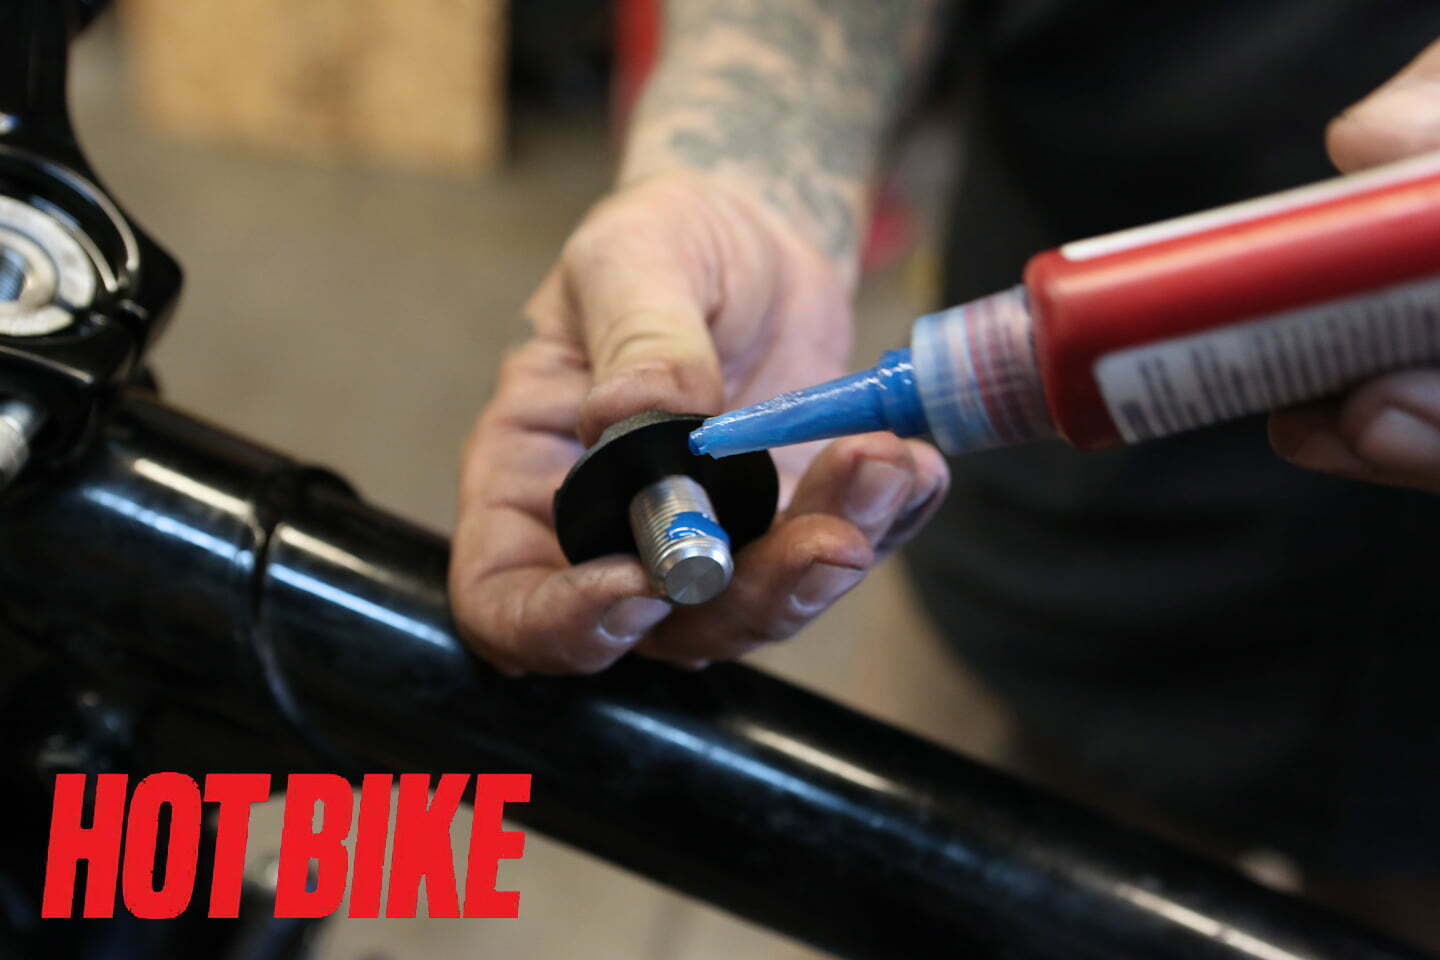
- Add a squirt of blue Loctite to the threads on the bolt.
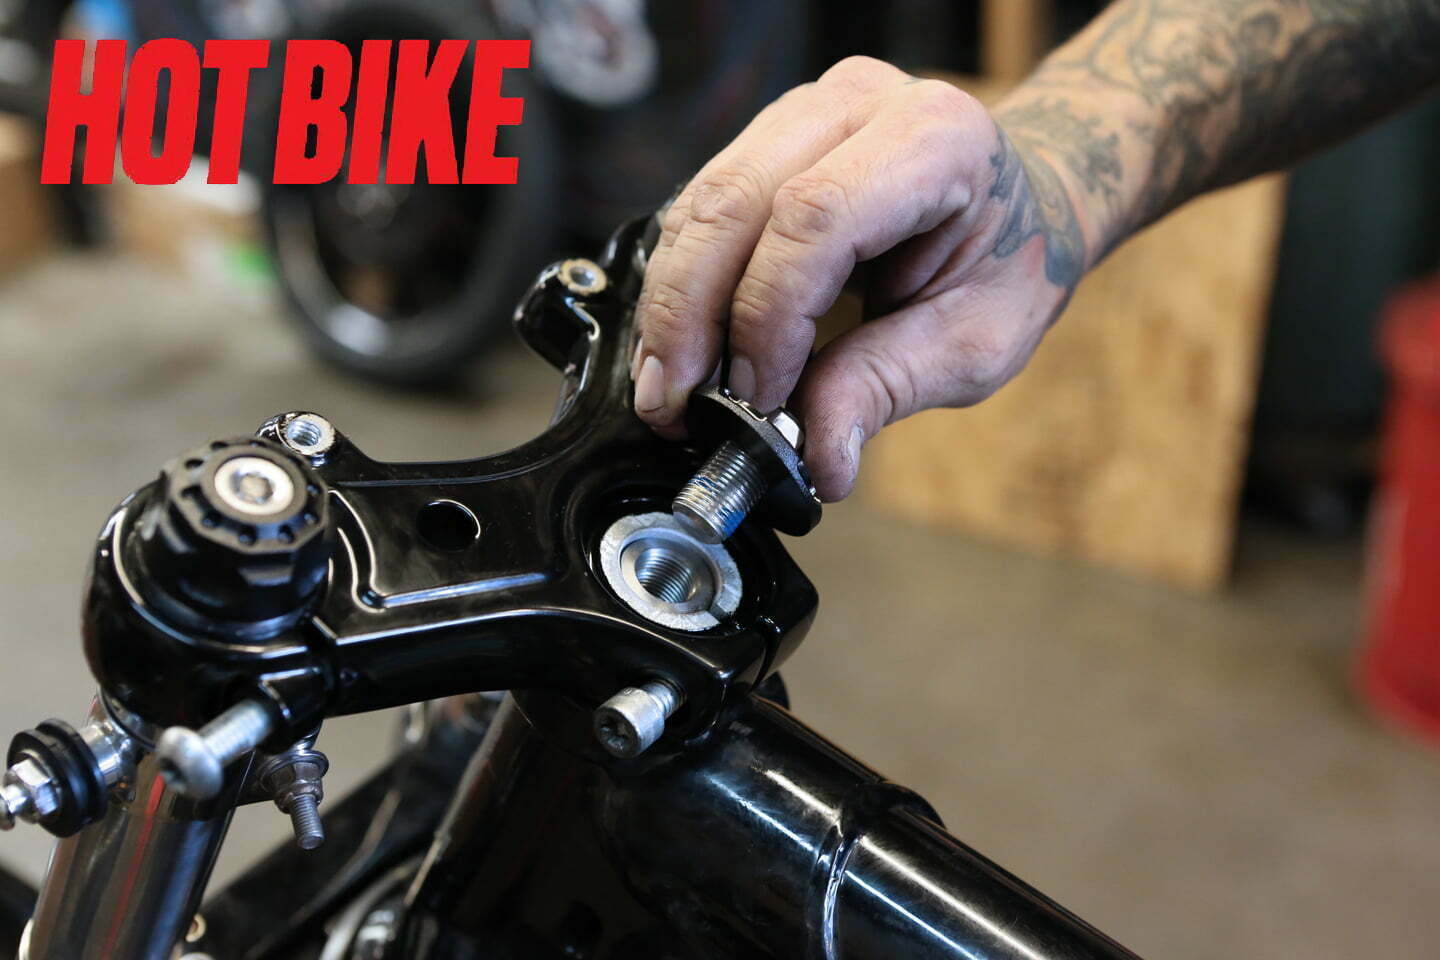
- Insert the RSD nut through the washer and into the top triple tree stem hole.
- Thread the bolt into the stem until seated.
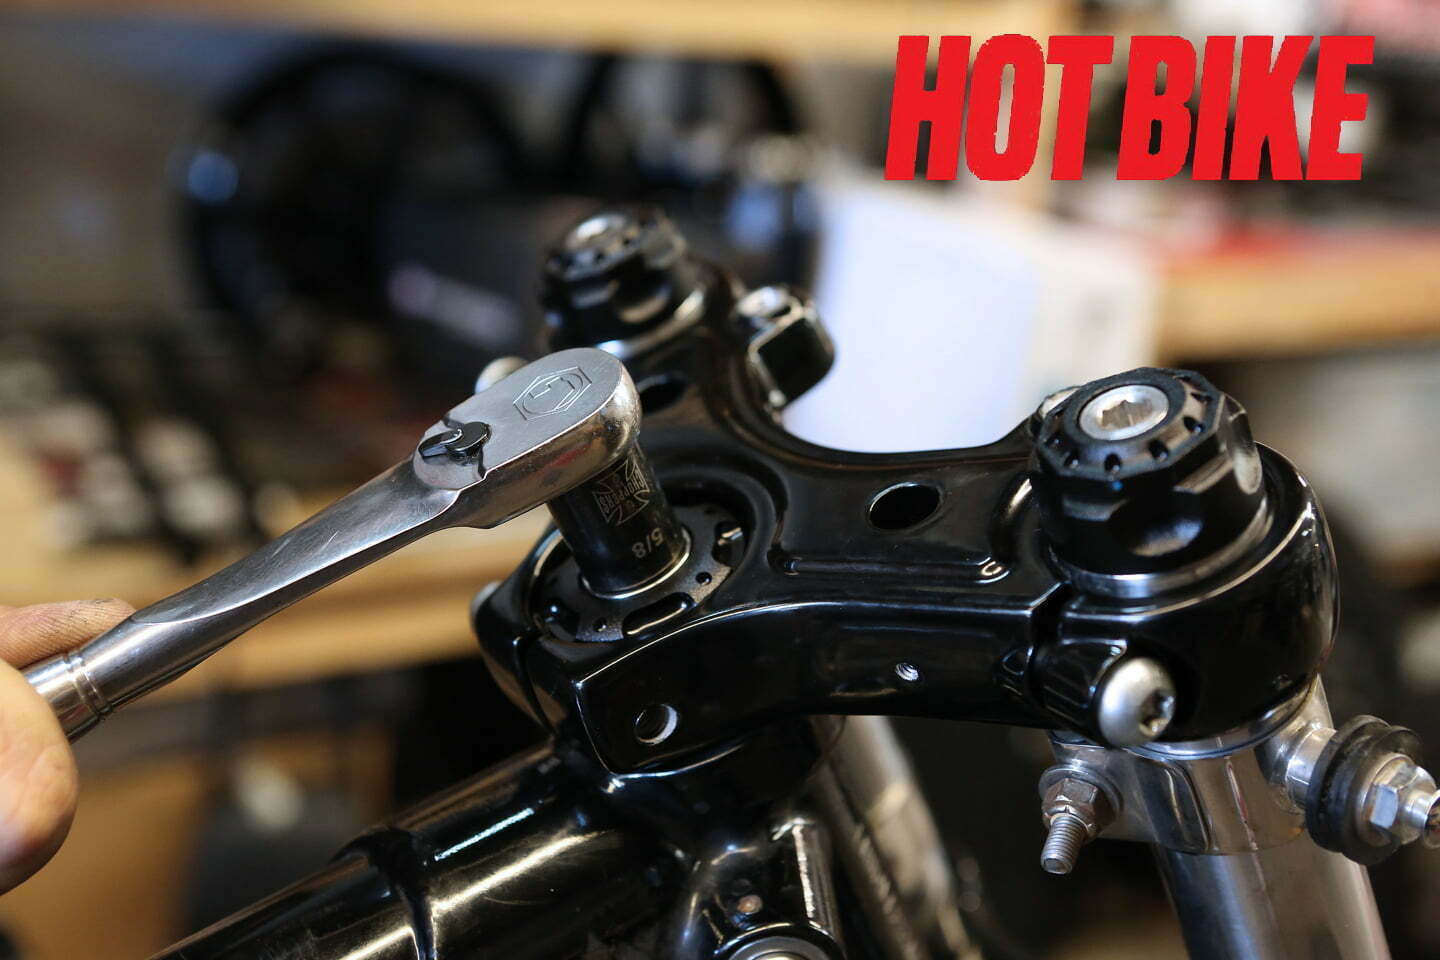
- Using a 5/8-inch socket, tighten the nut. Please refer to the service manual and follow the fall-away procedure to complete your front-end setup.
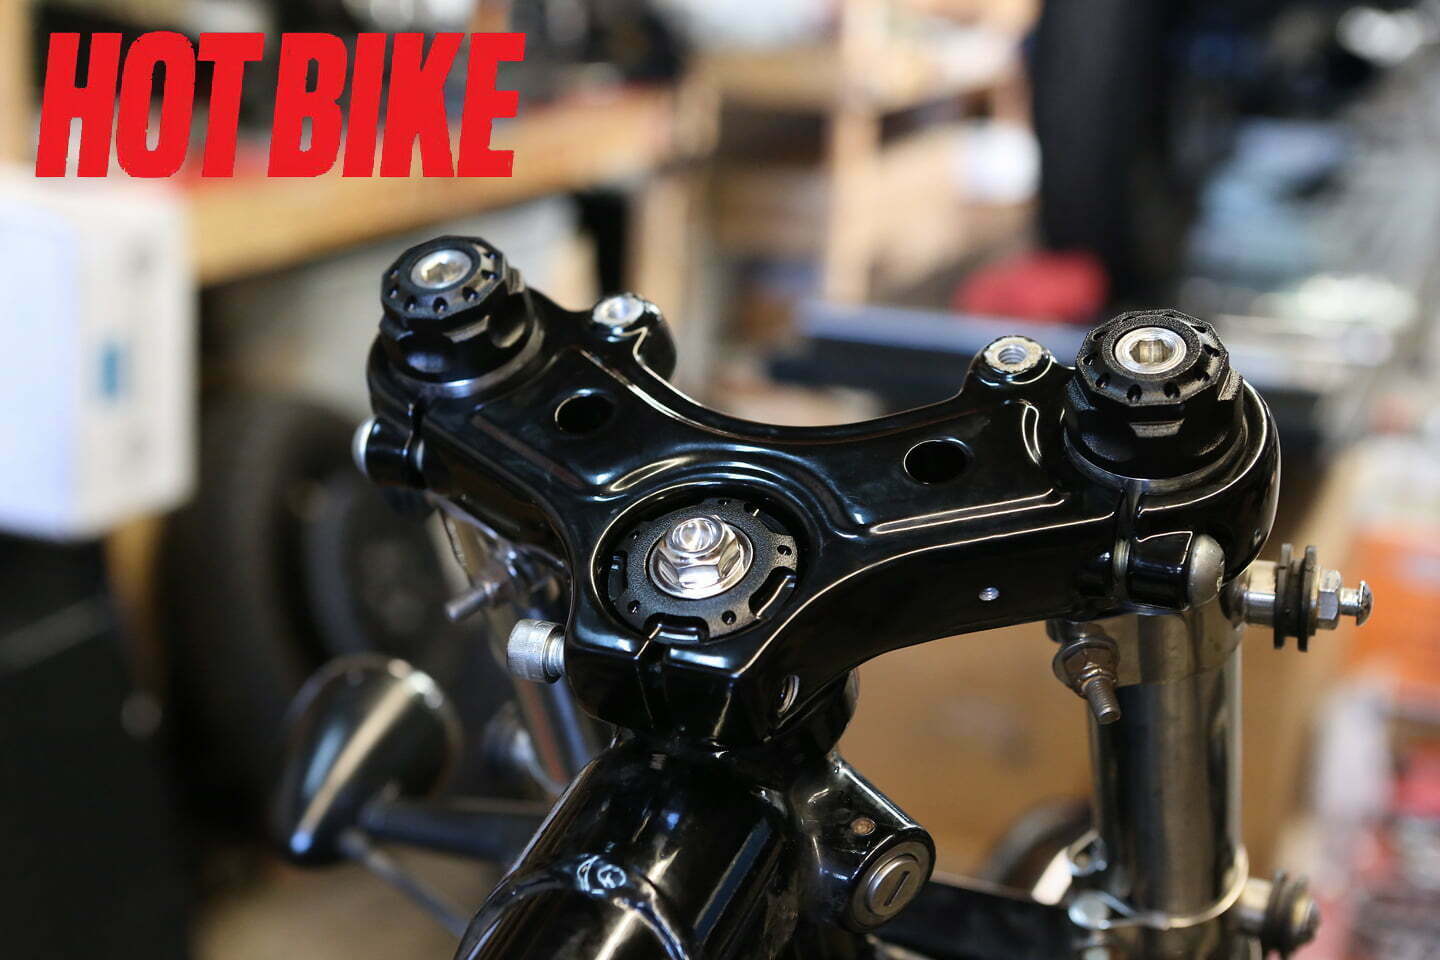
- Pictured here is the RSD Fork preload adjuster kit and the triple tree stem nut kit, which adds a touch of style to any Sportster or Dyna on the road. Thanks, Roland Sands Designs!
In the search for more comfort and control of bikes outfitted with 39mm front ends, we decided to upgrade to a preload adjustable fork cap from Roland Sands Designs (RSD). With these caps you can adjust the feel of your forks with the turn of a wrench. Since the adjusters looked so good, we also decided to get a matching RSD triple tree nut. RSD has been making cutting-edge, industry-shaping components for years, so we know prior to opening the package that what we are about to install is a well-made product.
Sources
")


