
Street Bob to Road Glide | Cycle Visions Shows You How

Here’s the transformed Street Bob. From a distance, it’s hard to tell that it was once a Dyna and not a Road Glide.
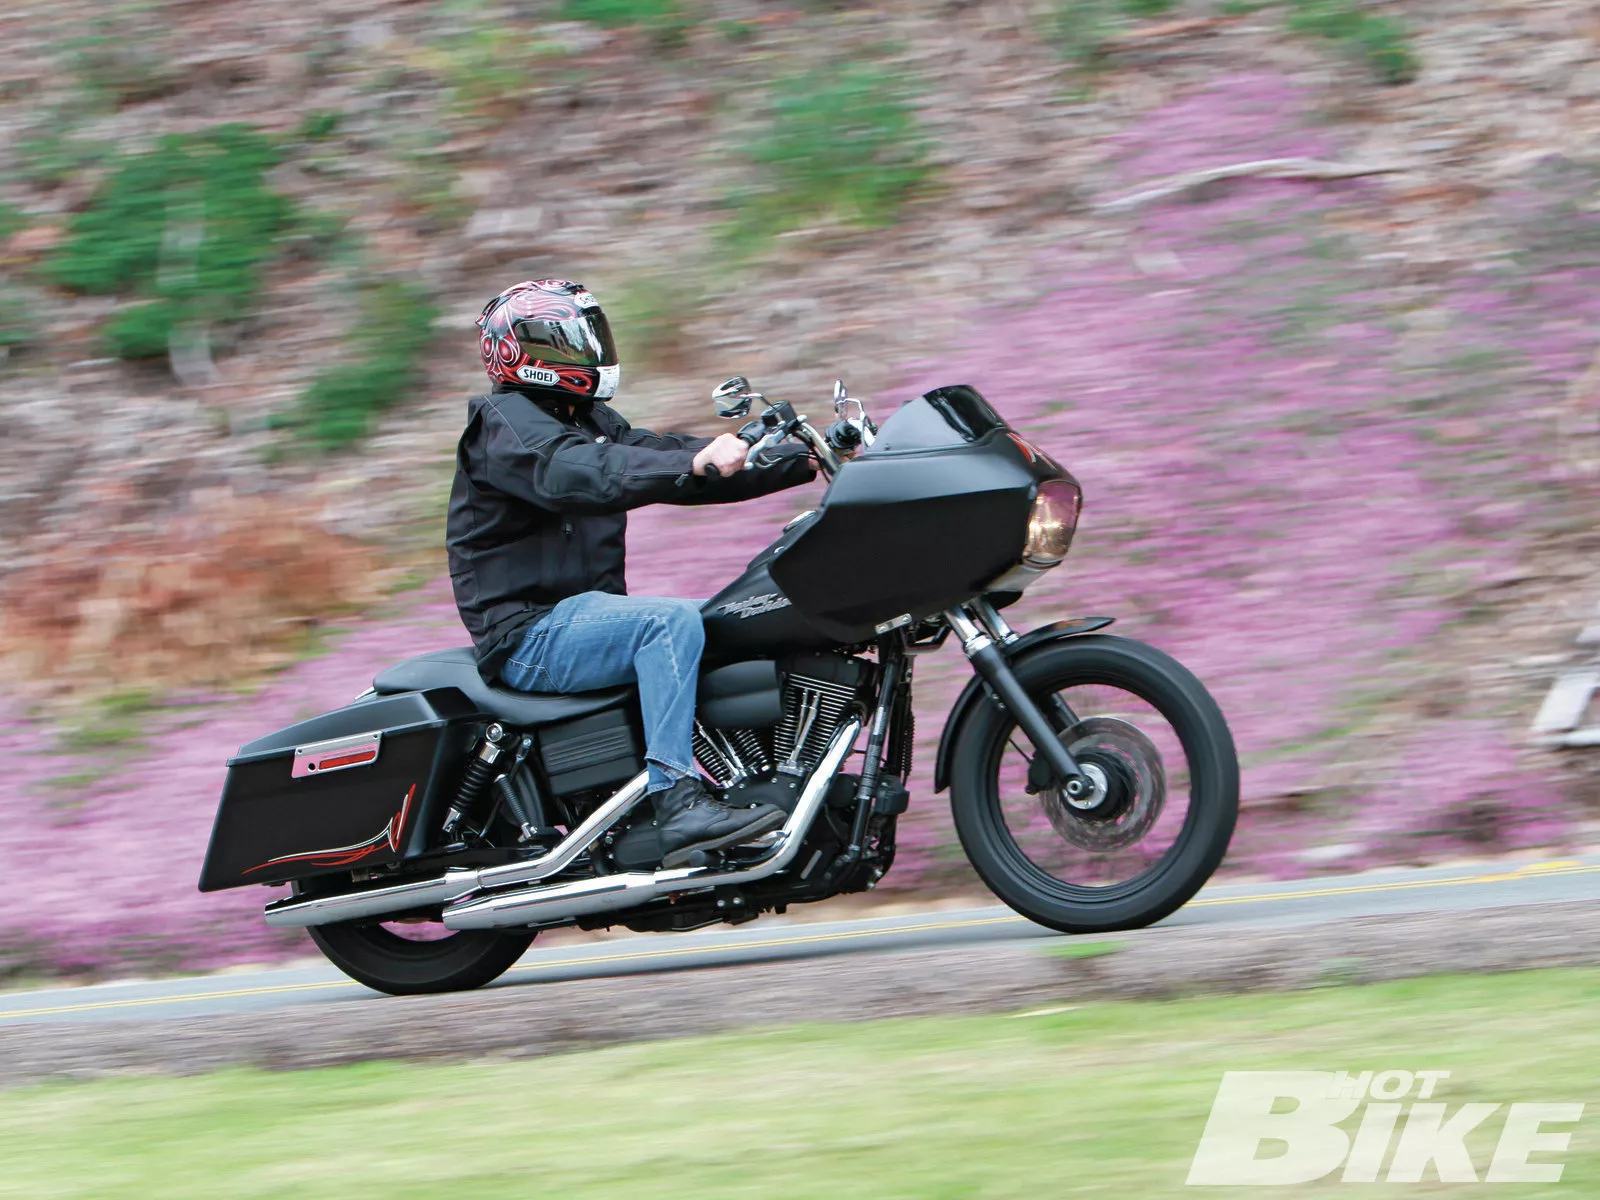
Here’s the transformed Street Bob. From a distance, it’s hard to tell that it was once a Dyna and not a Road Glide.
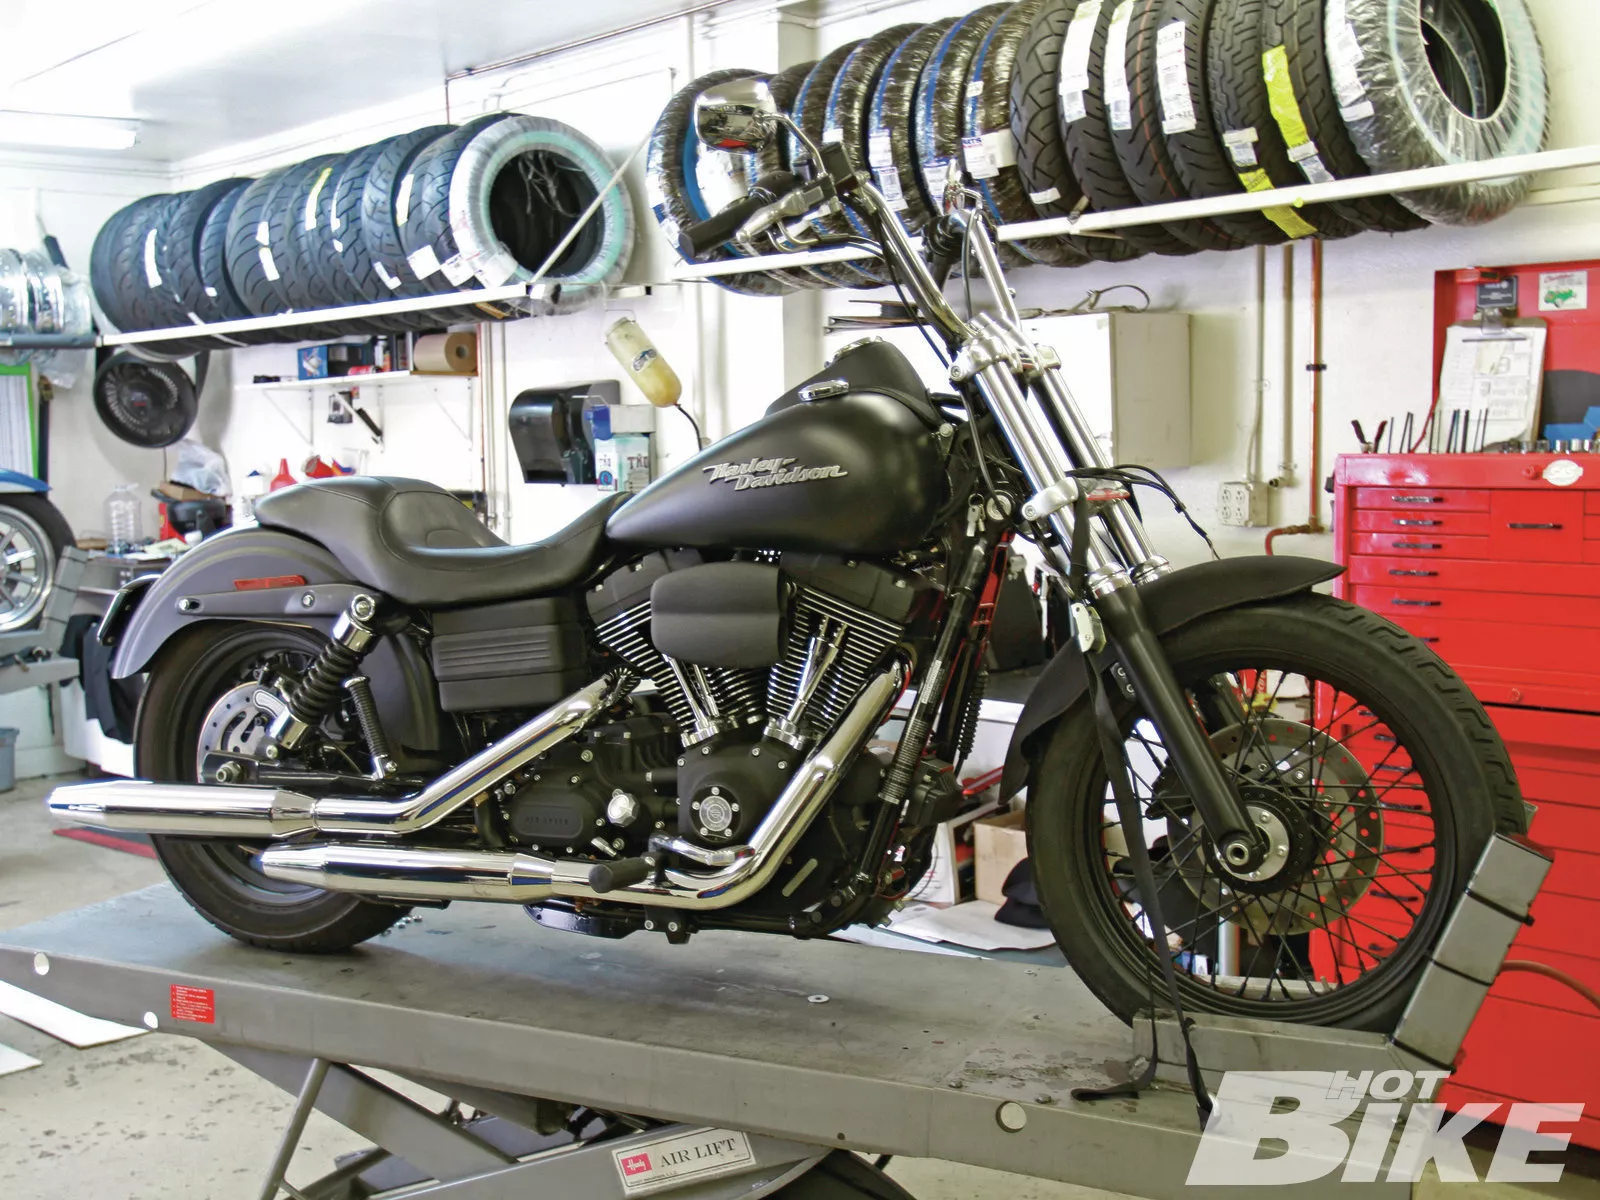
01. To get started, Brad rolled the Street Bob on the lift and removed the stock turn signals. He then loosened the gas tank, disconnected the fuel line, and slid the tank back a few inches in order to make room for the Fairing Mount.
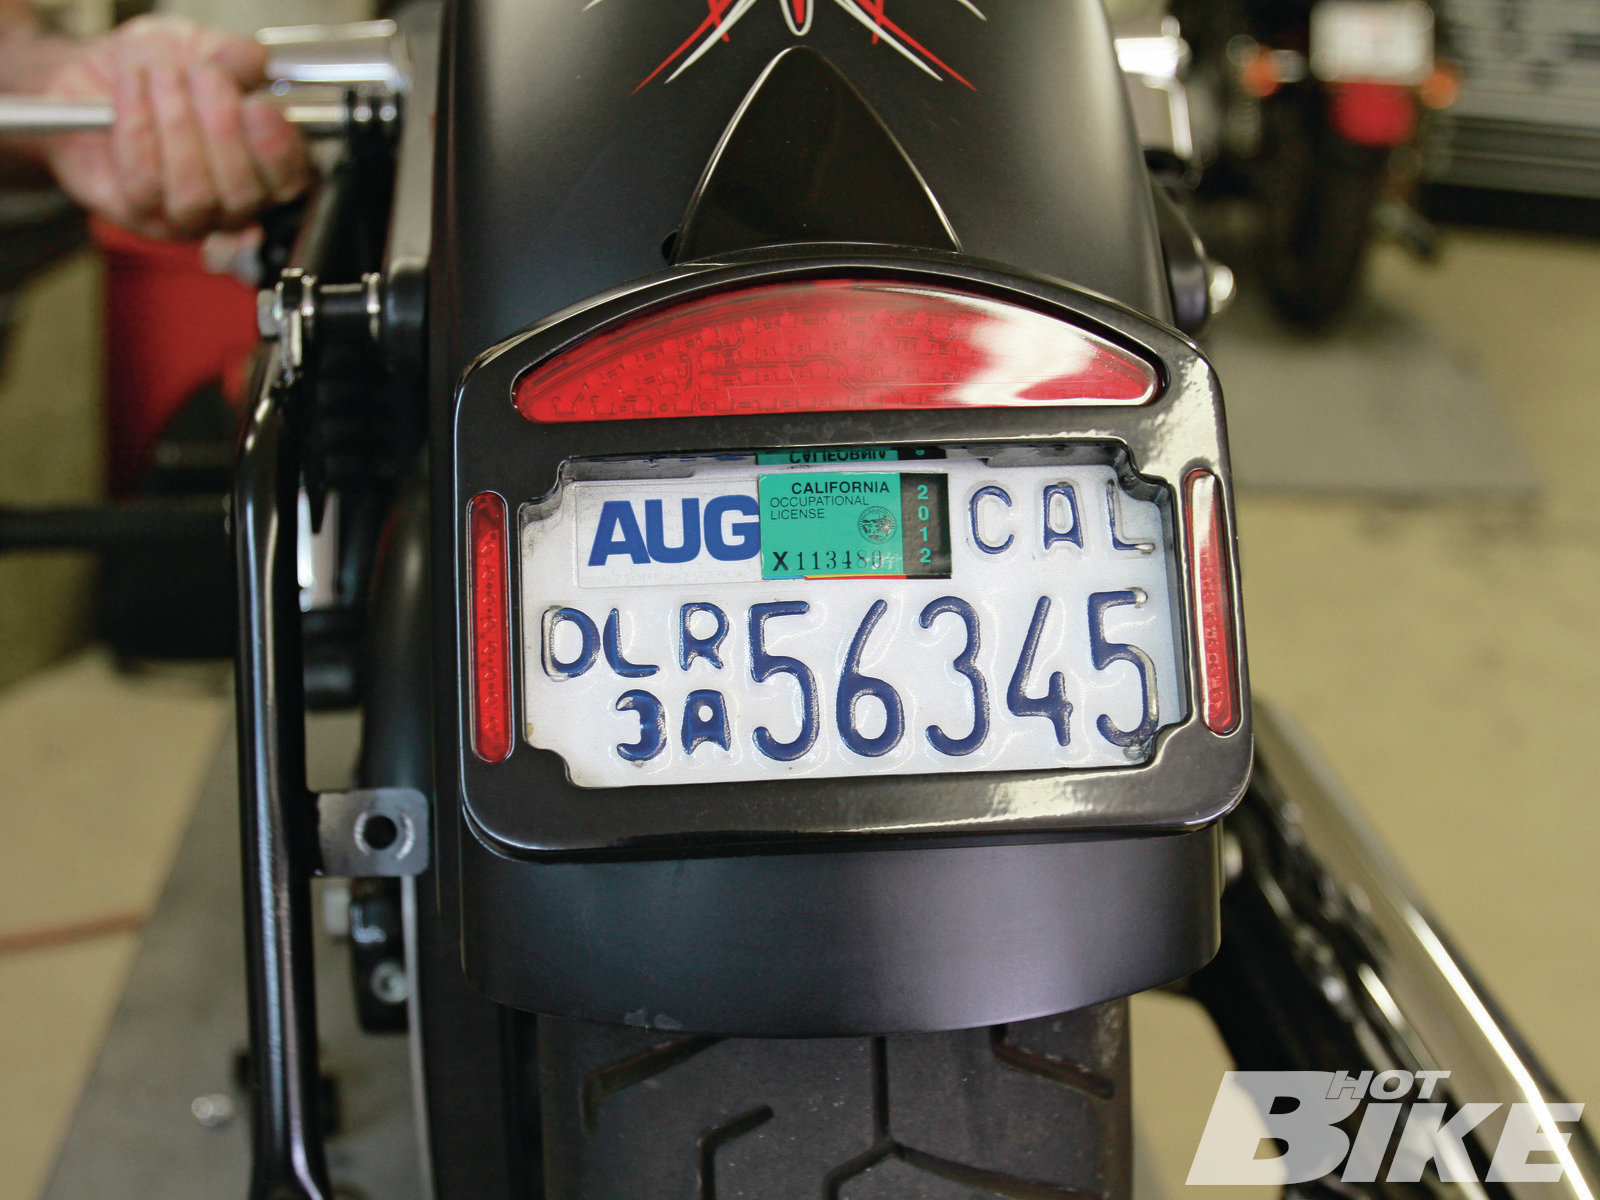
02. Cycle Visions makes the Eliminator ($359.99), which is a turn/brake/license plate assembly that works well with this application since the stock turn signals inhibit the installation of the Baggertail brackets. The Eliminator also adds a nice clean look. Brad popped the Eliminator on to make room for the bags and secured it in place.
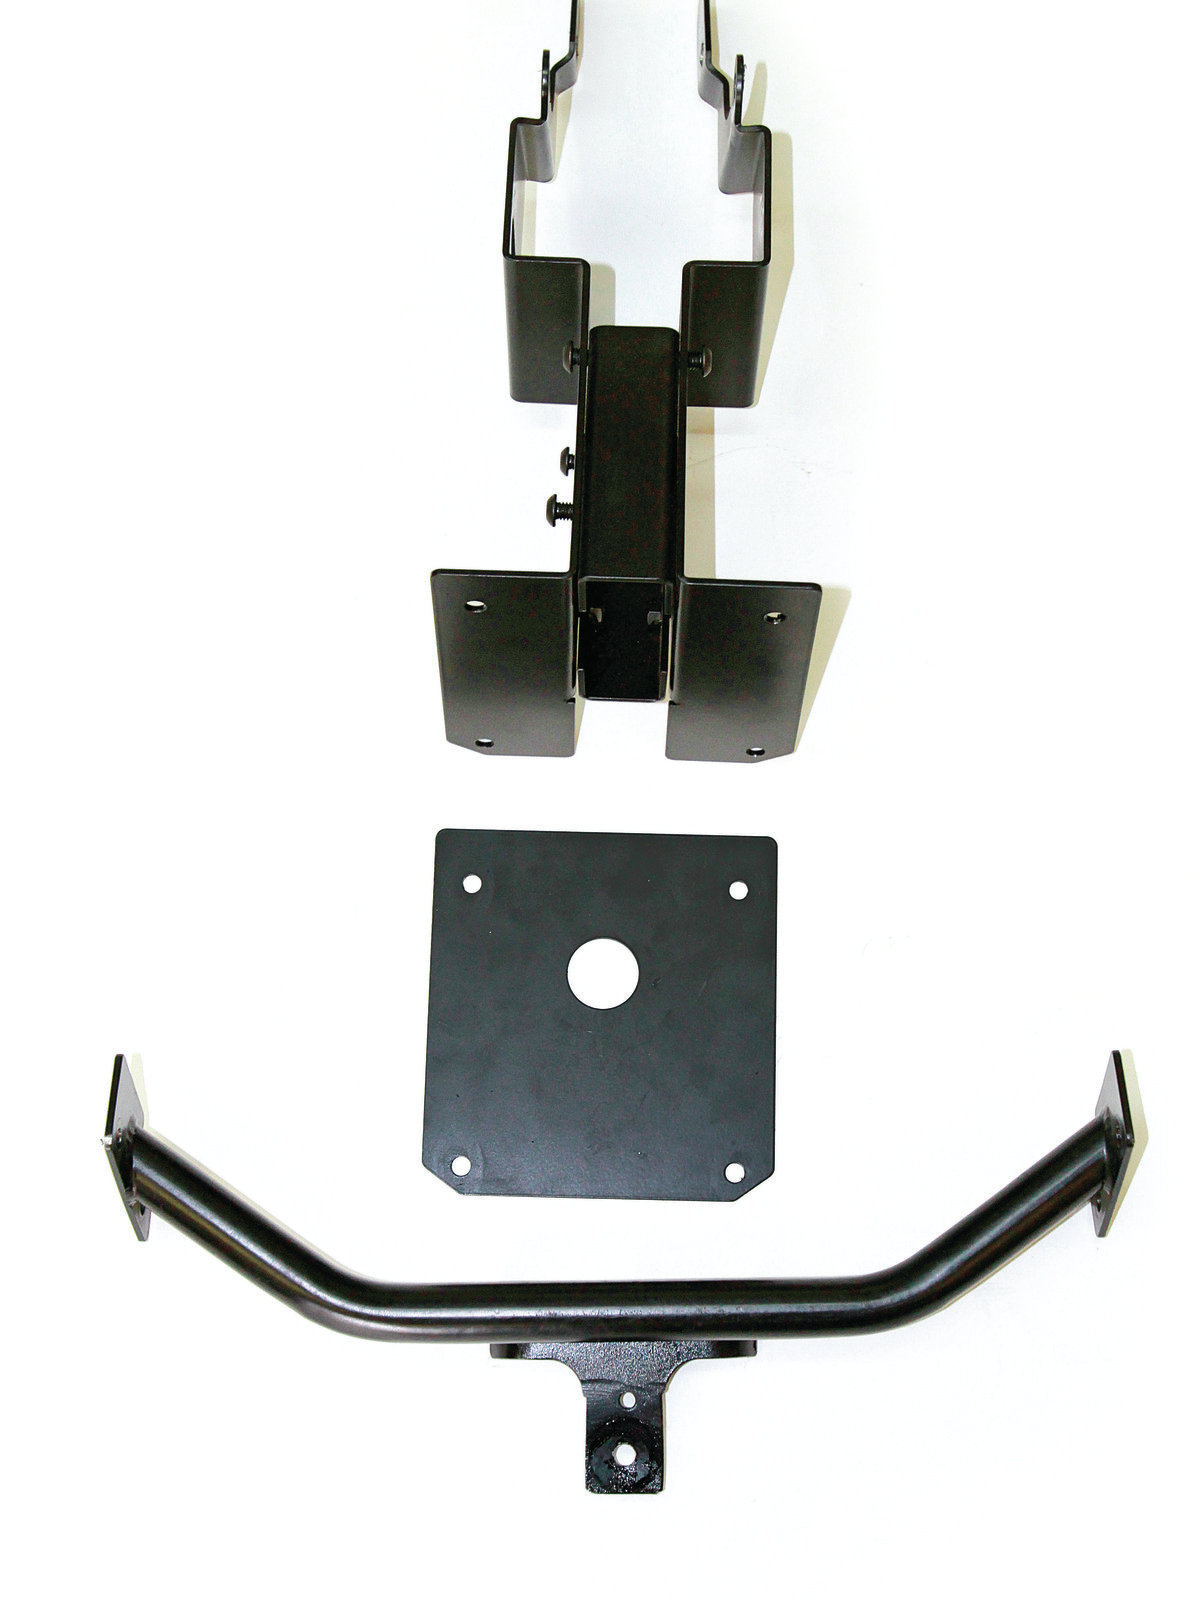
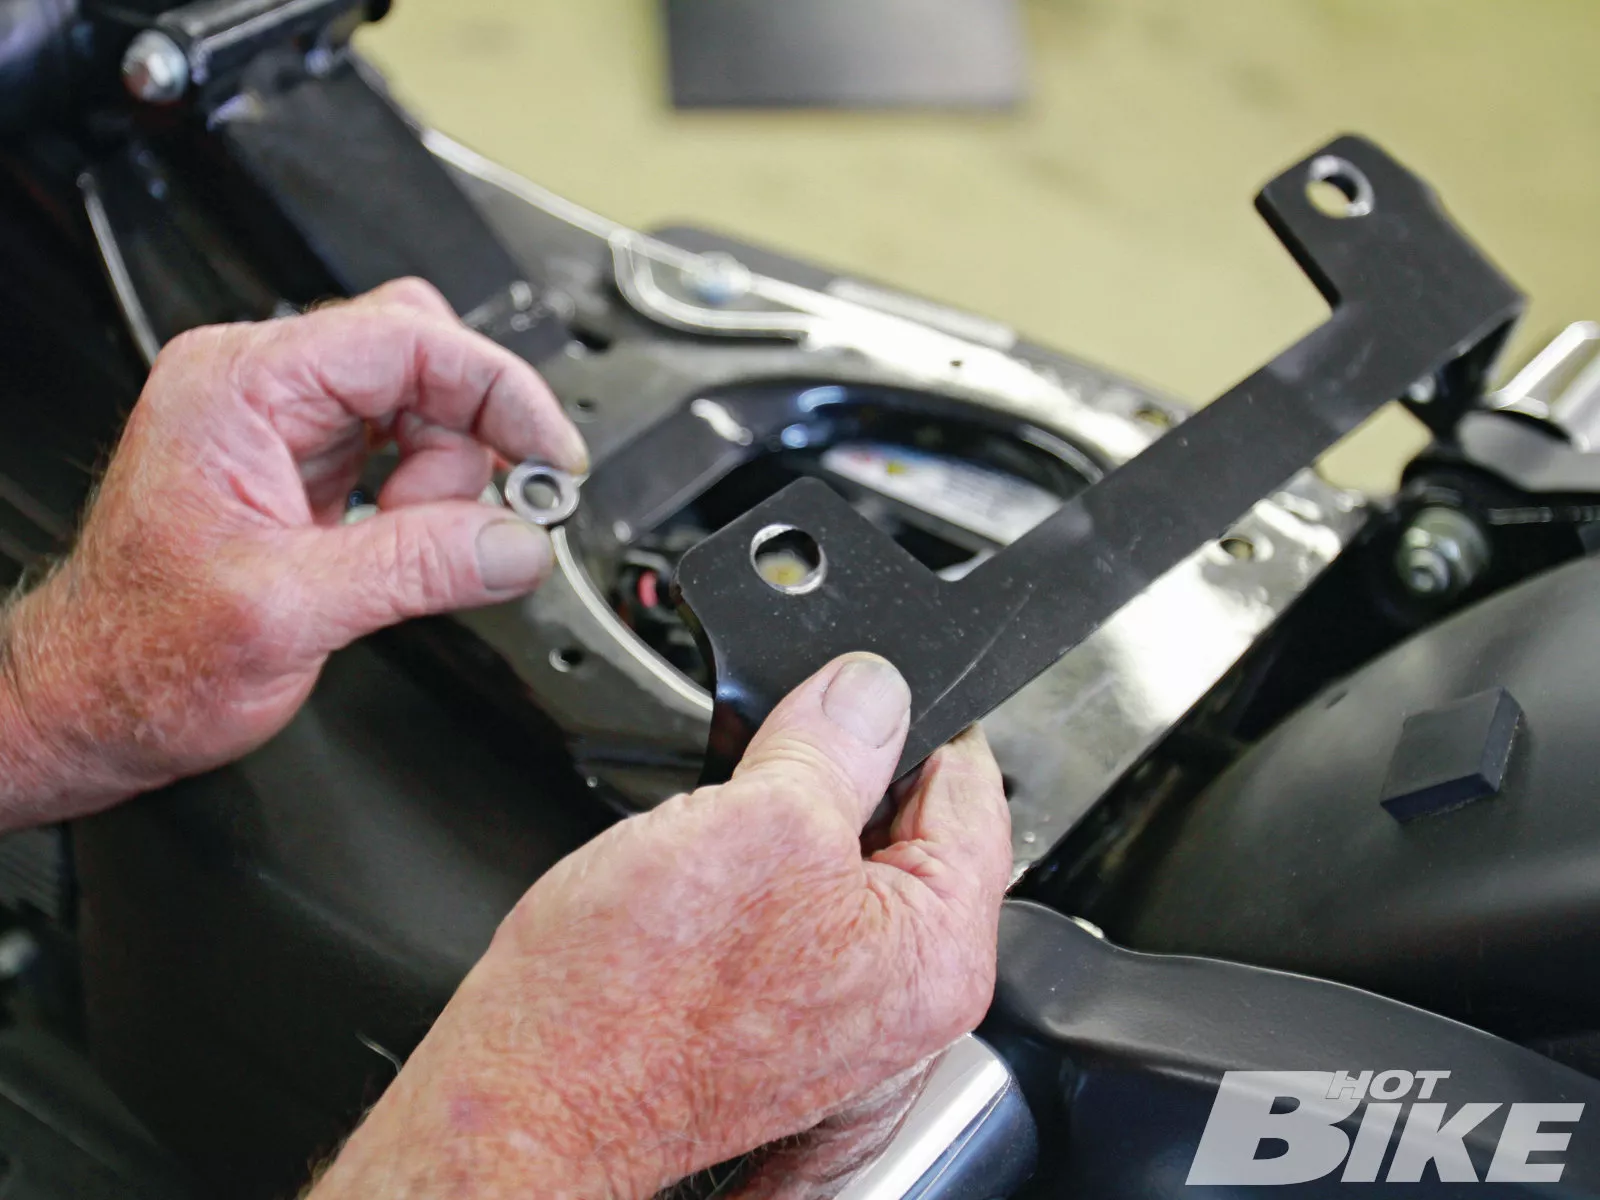
03. After getting started with the rear, Brad switched gears and moved on to the Fairing Mount. The Fairing Mount doesn’t require any frame modifications, is constructed of steel, and comes powdercoated black. From top to bottom are the left and right side fairing mounts (A), the top fairing support bracket (B), the left- and right-side mount plate (C), and the lower fairing support bracket.
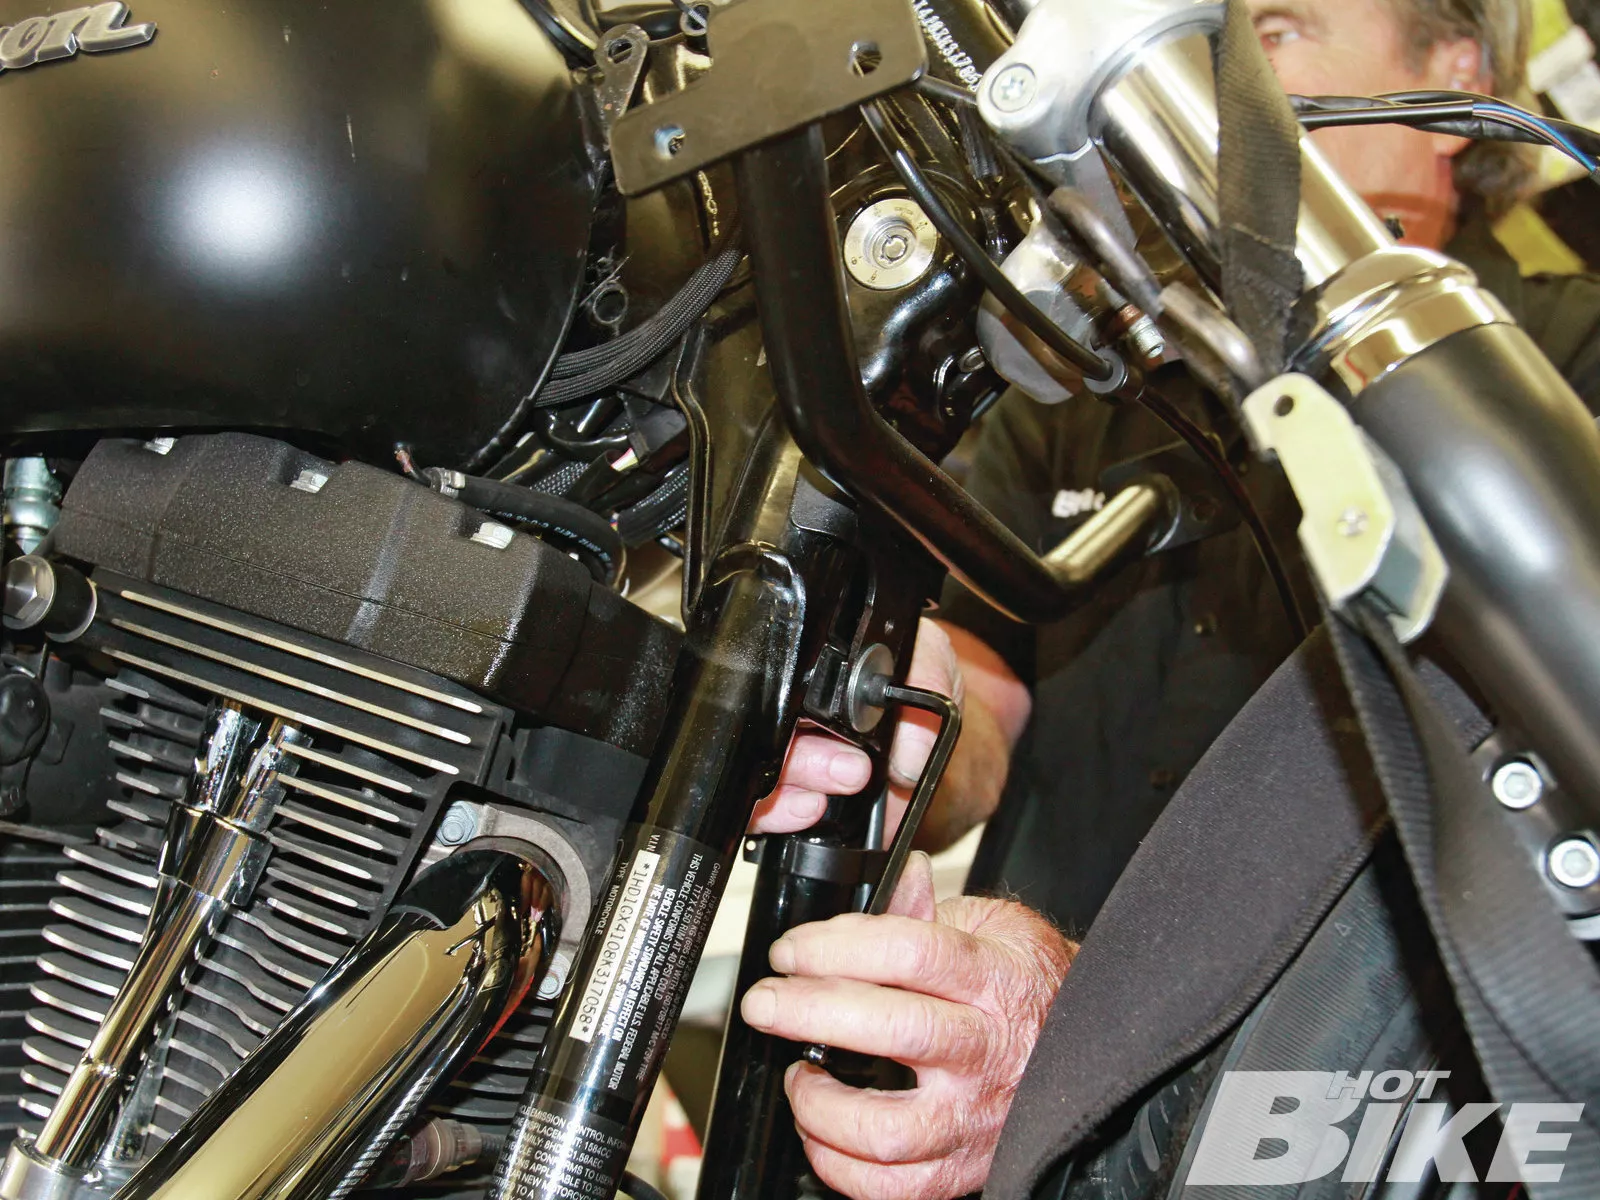
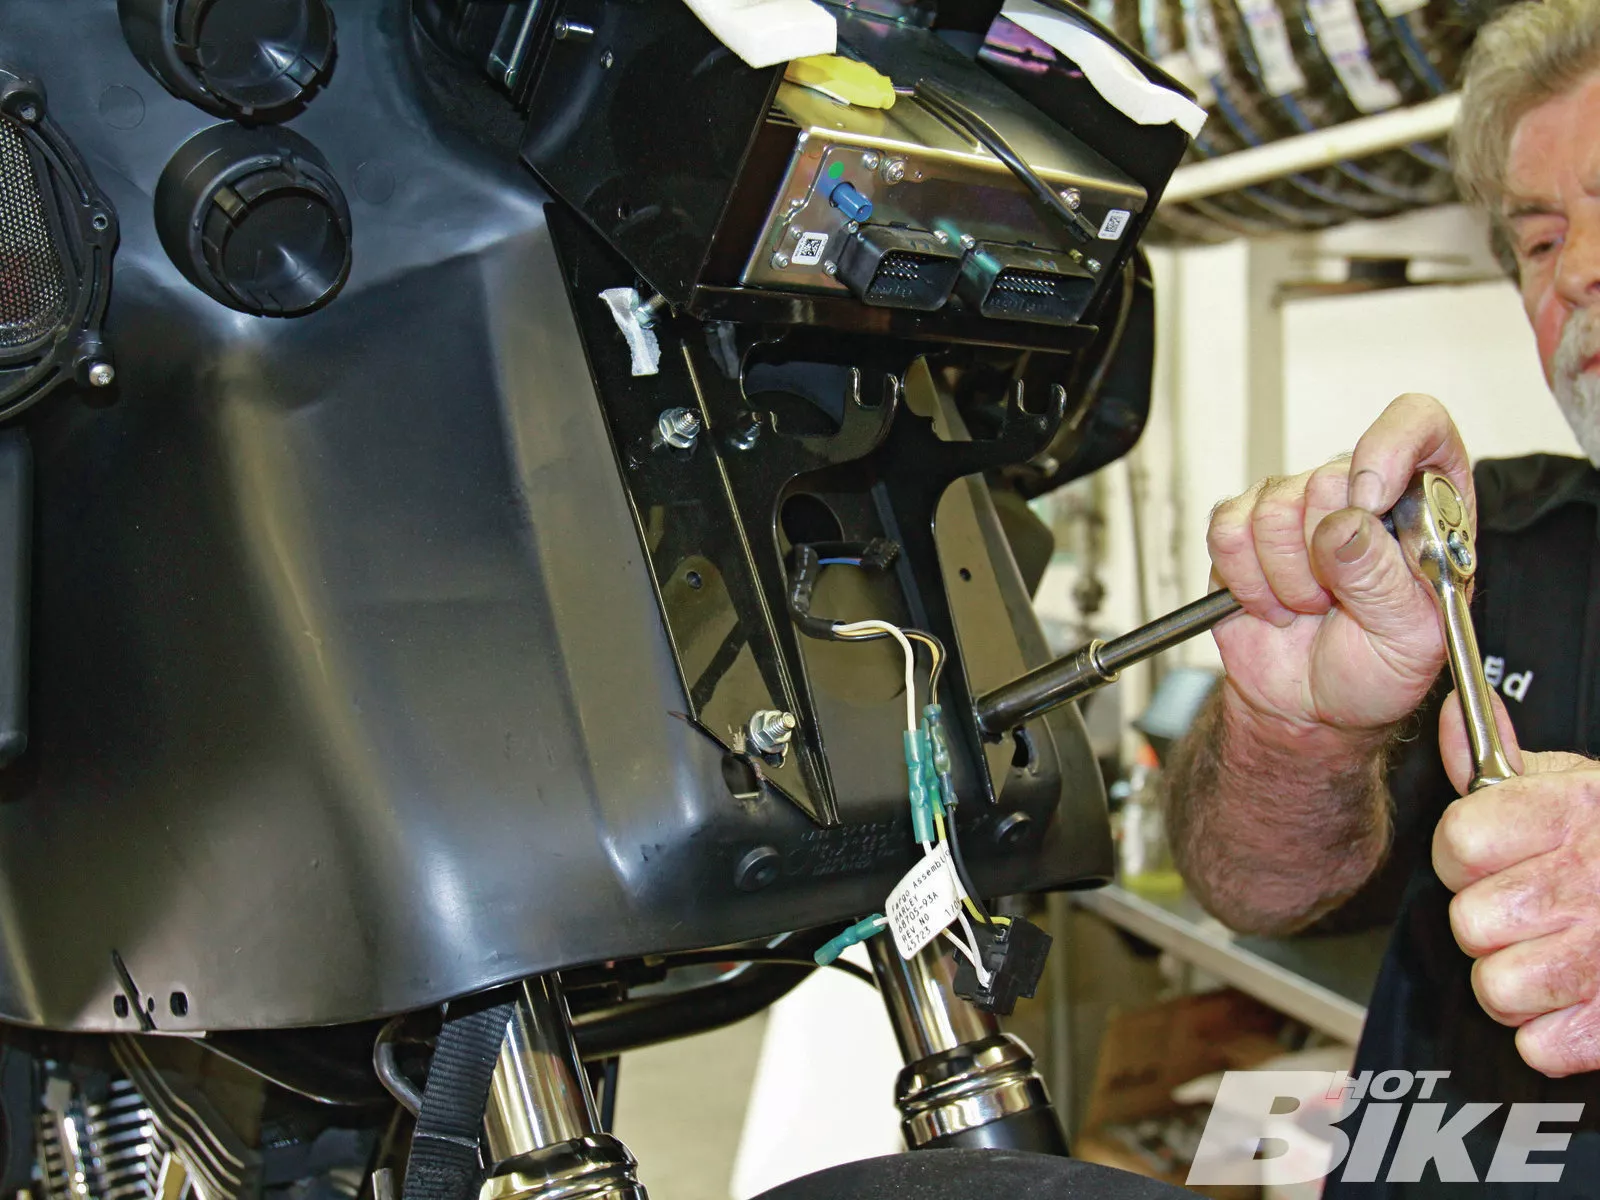
04. Brad removed the stock headlamp and extended its wiring about 10 inches in order to reach the new Road Glide headlight assembly. The stock lamp will not be reused, but it makes a nice Christmas tree ornament. Once that was done, Brad removed the electrical harness shield on the bottom of the backbone where it meets the neck, then he installed the lower support bracket in order to slide the left and right side fairing mounts in place.
05. Brad installed the left side fairing mount to the lower support bracket, and also to the frame where the electrical harness shield cavity is (yellow arrows), and front gas tank mount (red arrows). He followed that up by installing the right-side fairing mount.

06. With the fairing mounts hooked up to the top and bottom support brackets, Brad then tightened the lower bracket to the left/right side fairing mounts; followed by tightening the left/right side mounts together (arrow).
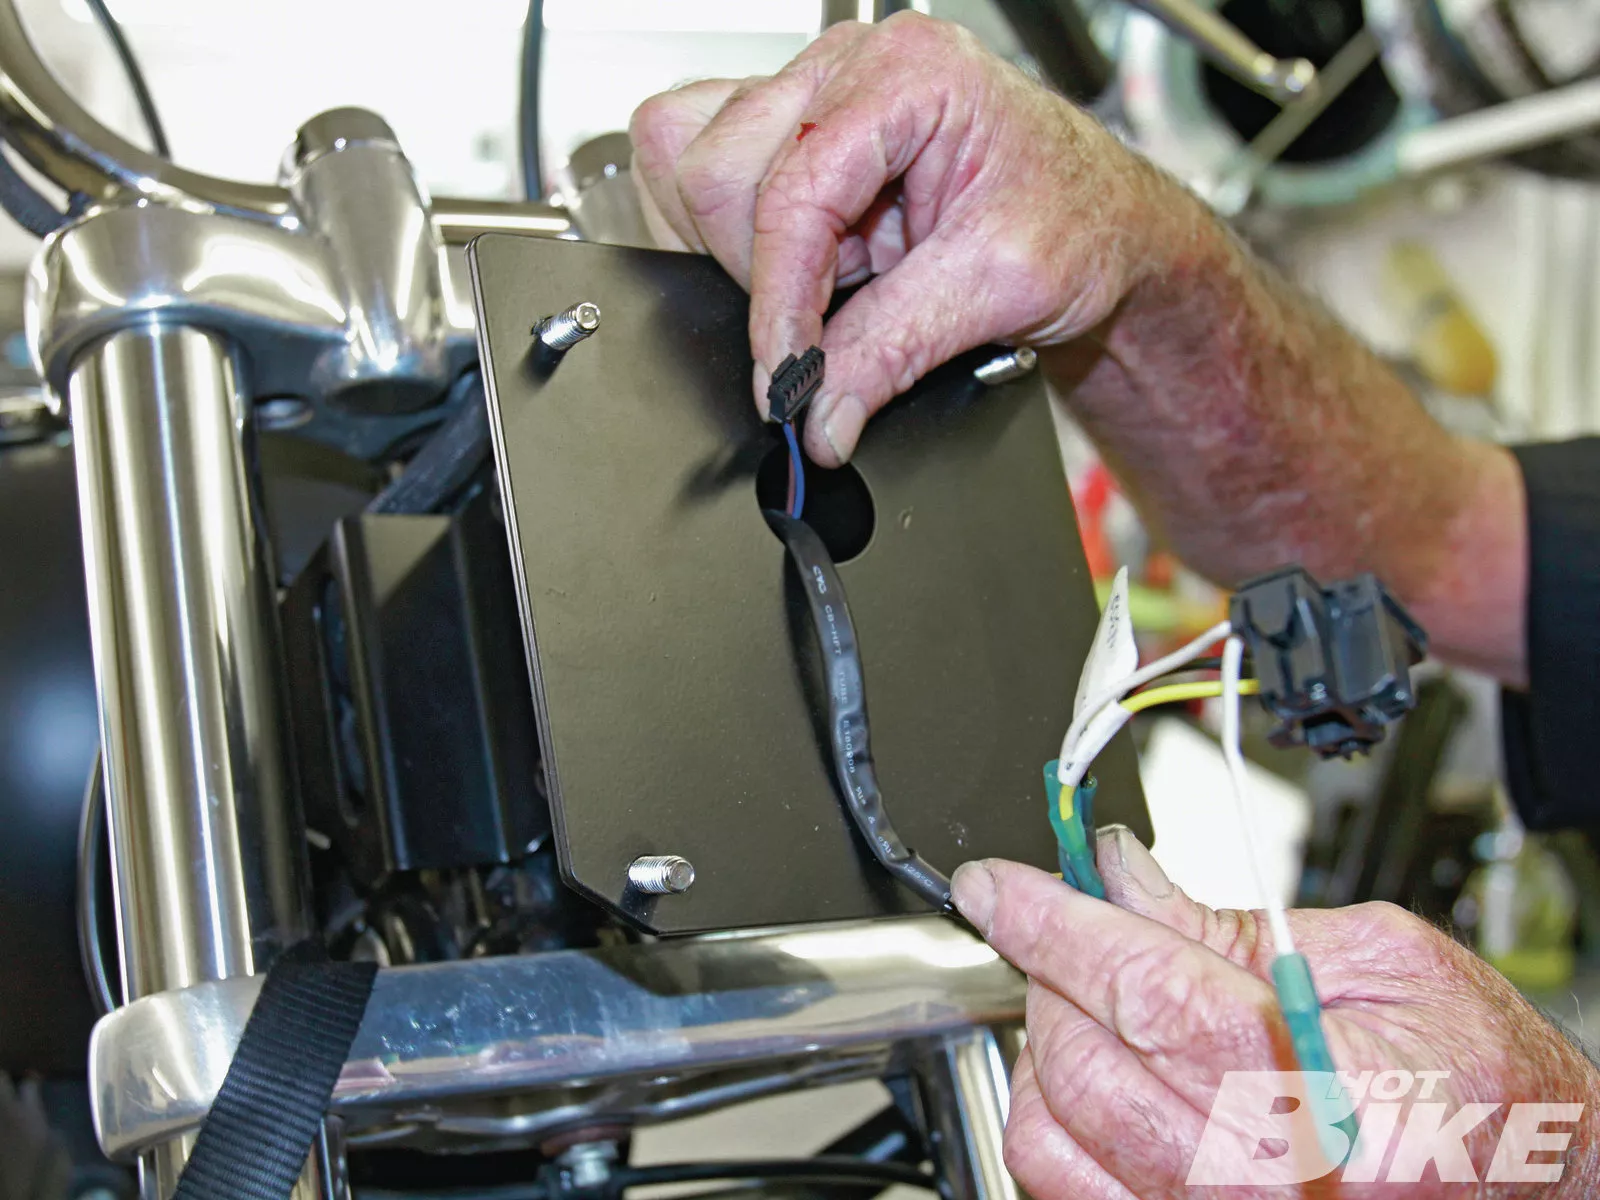
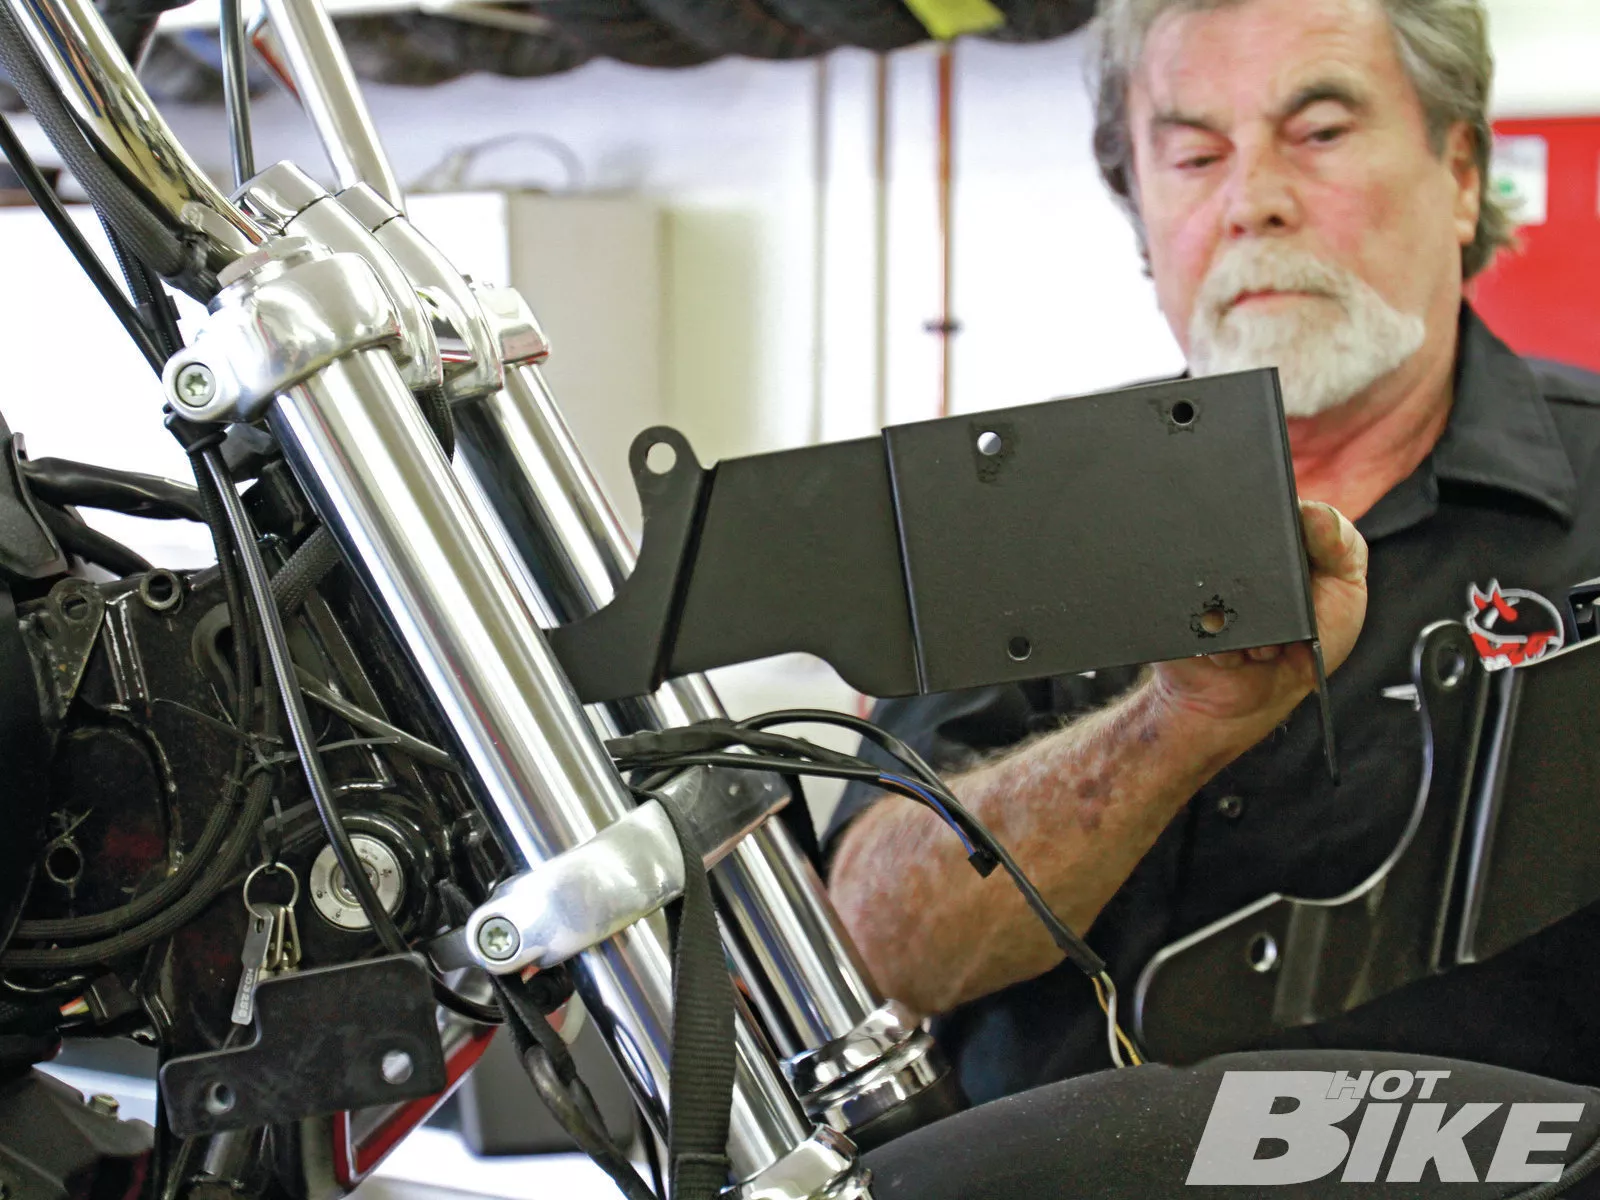
07. The fairing mount plate was then installed and the extended headlamp wiring was fished through its port to be hooked up with the new Road Glide headlamp. After tightening up the Faring Mount, it was time to install the fairing.
08. The inner fairing went on next…
09. …and it was tightened down to the Fairing Mount after Brad fished the headlamp wiring through. This fairing has been outfitted with a stock Harley stereo, but we’re not focusing on that for this install.
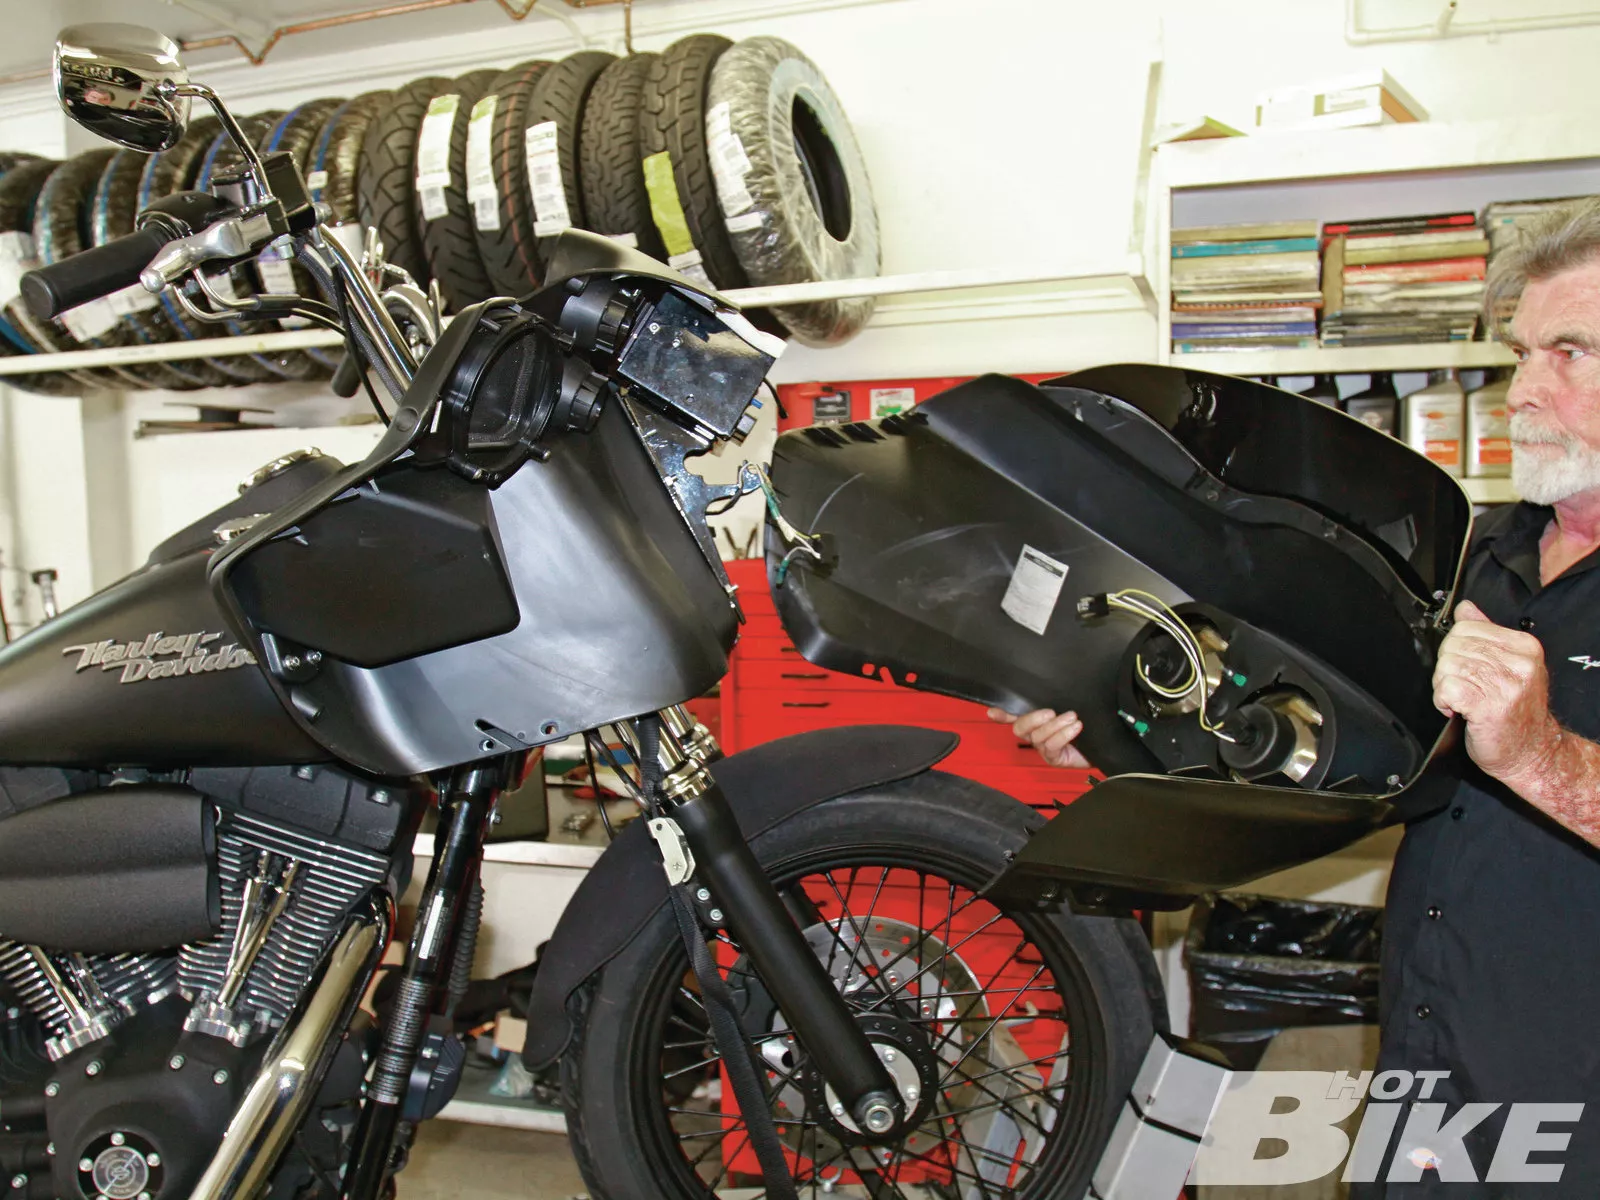
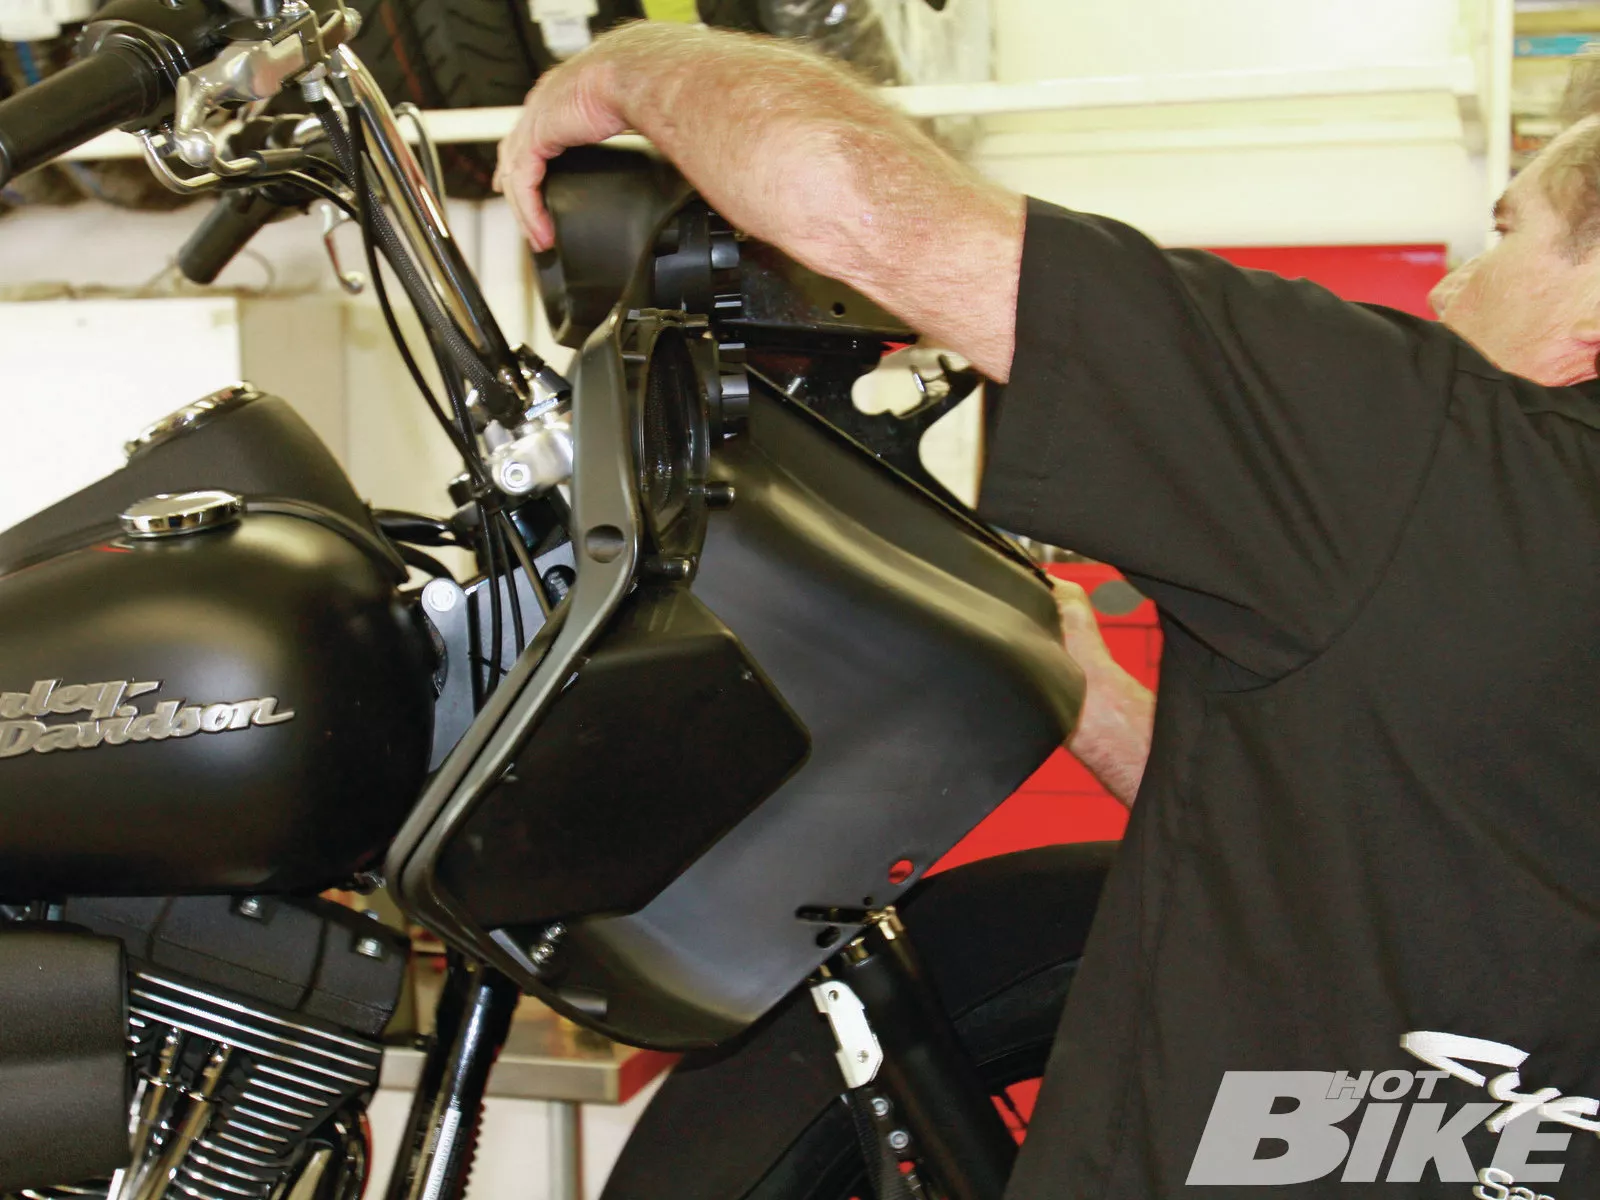
10. Brad then installed the outer fairing and connected the headlamp plugs.
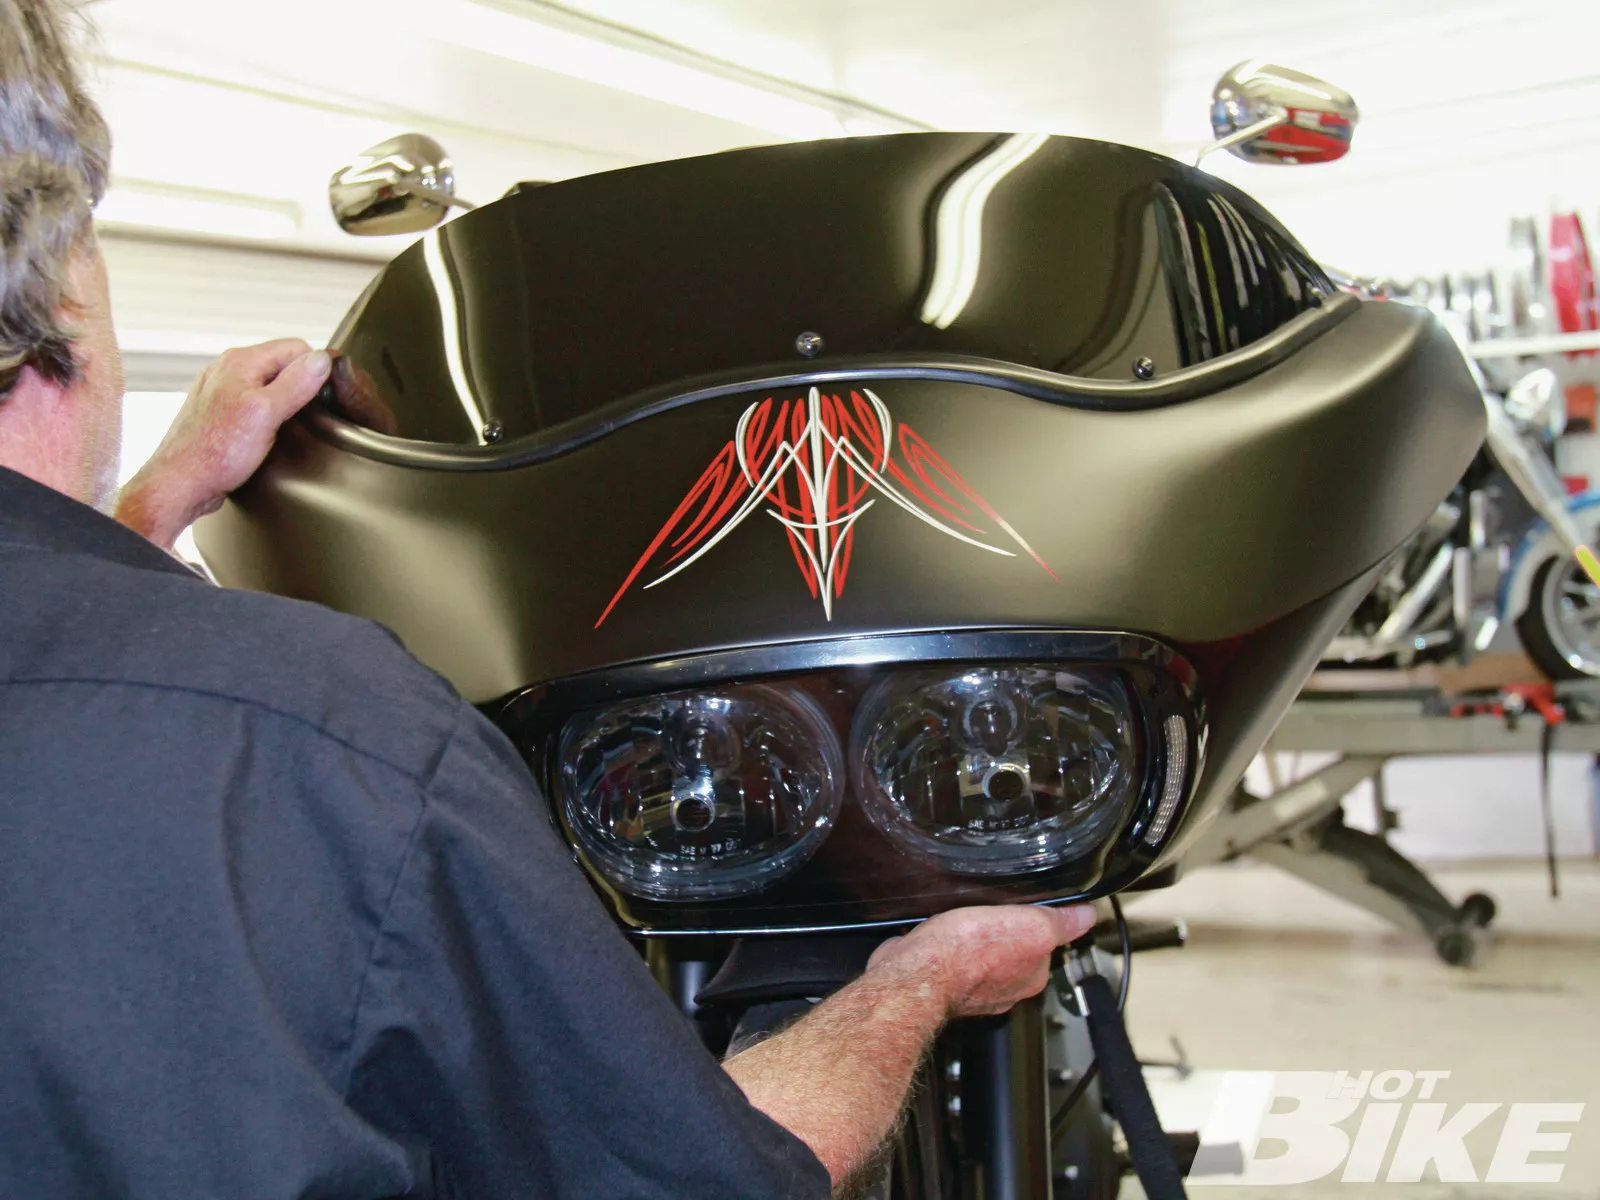
11. After tightening everything down and hooking up the rest of the fairing’s components: windshield, headlamp snap ring, etc., the fairing installation was complete at this time. Time to move on to the Baggertail installation.
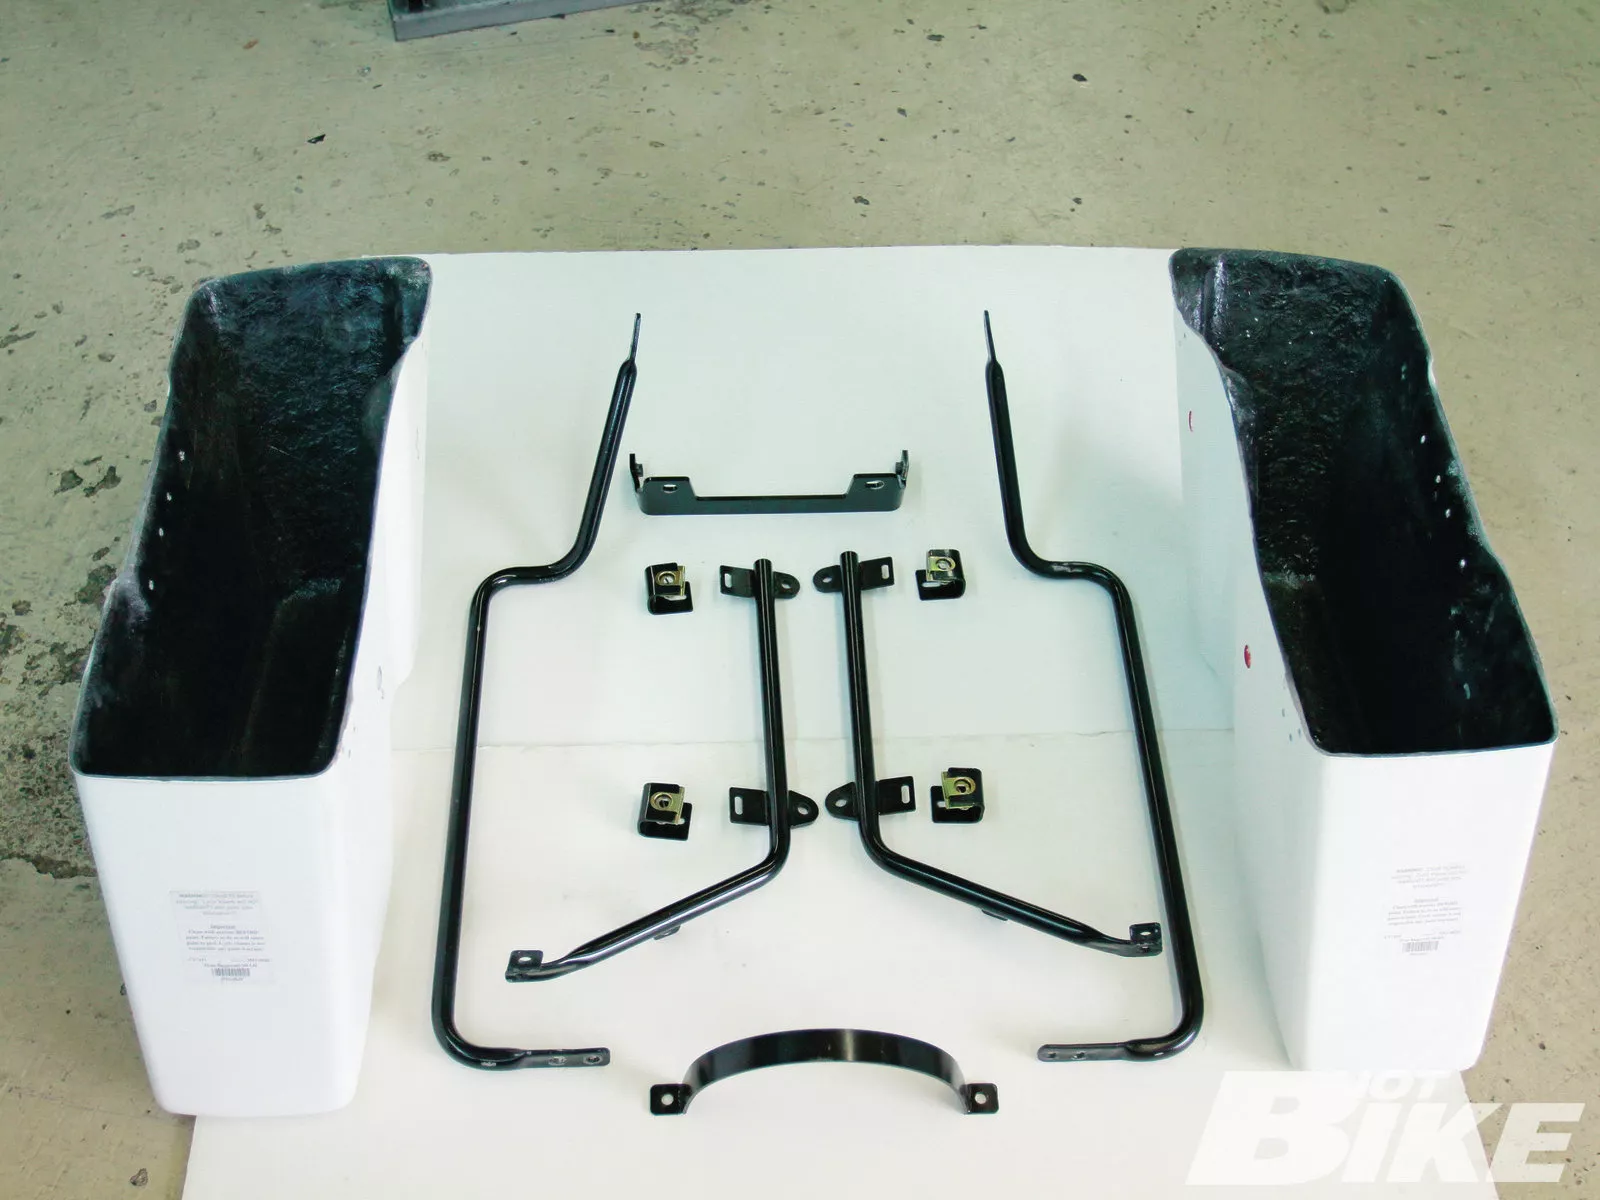
12. Here are the Cycle Visions lower bags (A), which are made of fiberglass gelcoat, but come raw so they need to be painted. We shot these raw bags a week before our paint set arrived. The Baggertail brackets convert your cruiser into a hard-bagged bagger in a matter of minutes. Available in chrome or black (shown), the kit includes: right and left lower rails (B), left and right saddlebag mounting brackets (C), seat support bracket (D), U-shaped support bracket (E), bag mounting tabs (F), thorough instructions, and hardware.
13. Since the seat was already removed, Brad installed the Baggertail support bracket with the supplied thin spacer on the left.
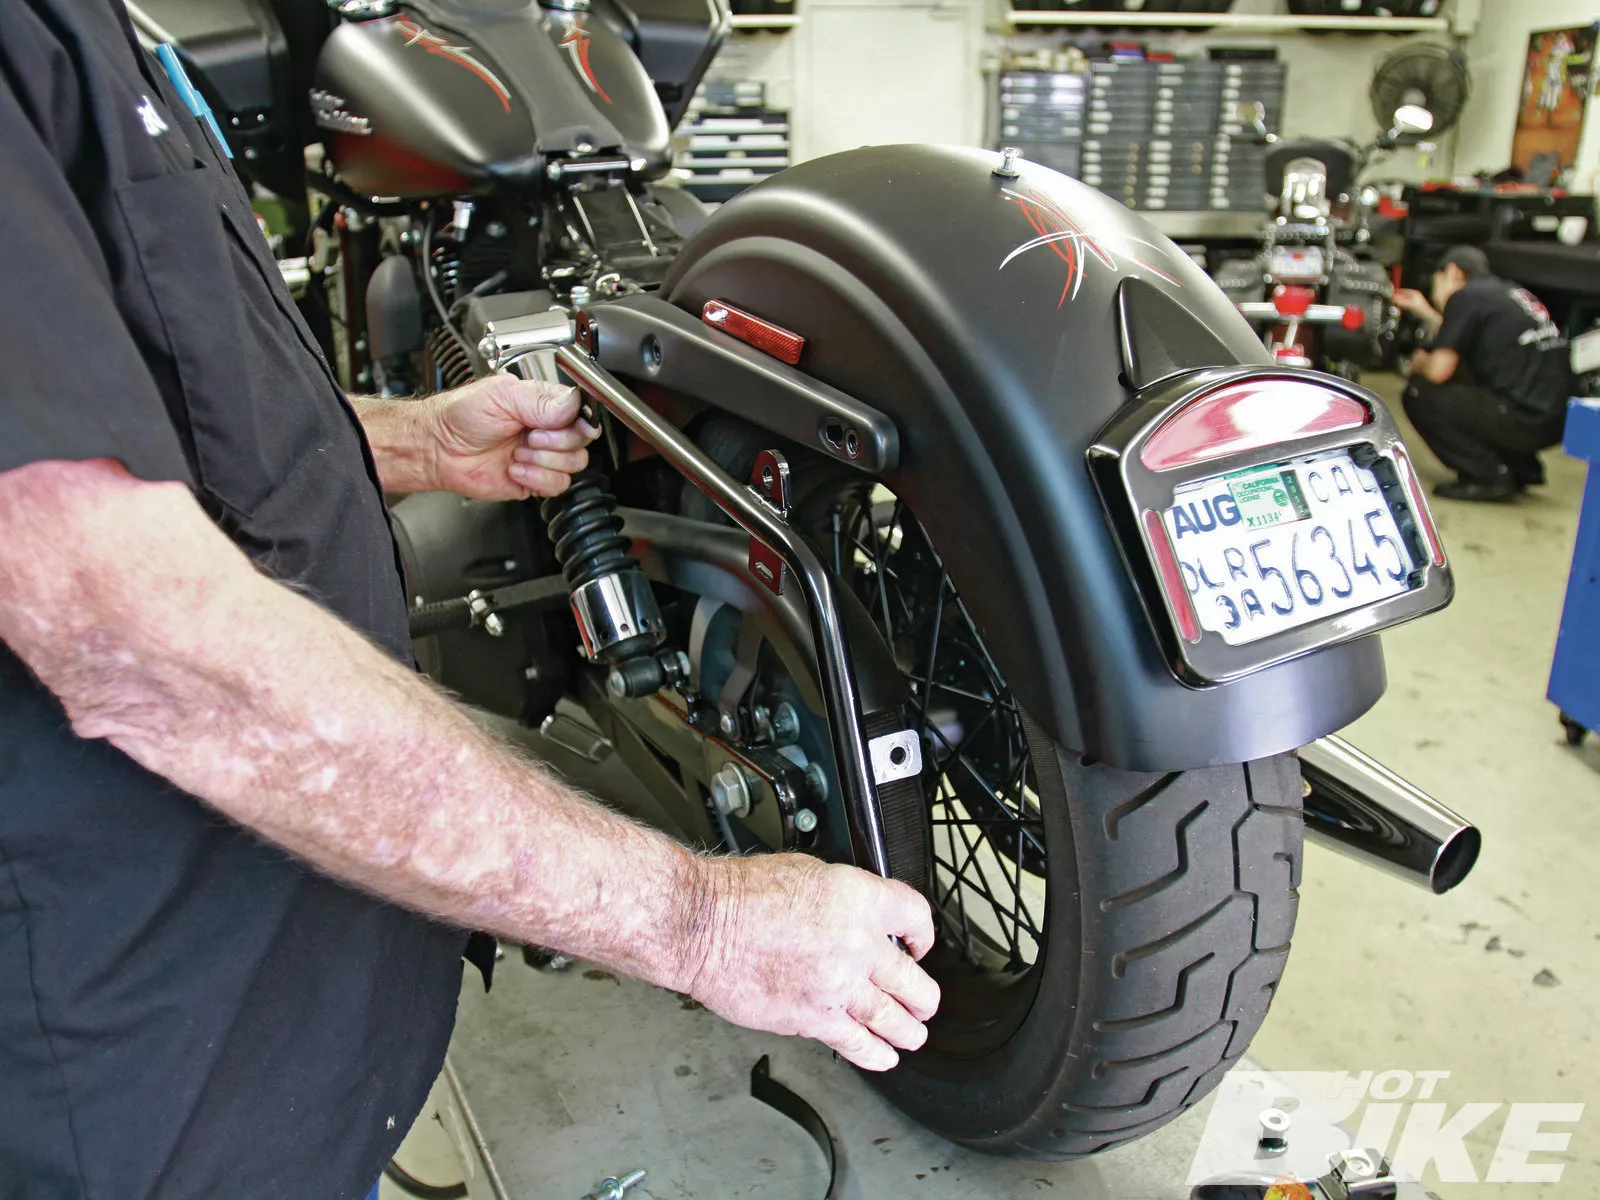
14. Also, because Brad worked diligently in the beginning replacing the stock turn signals with the Eliminator unit, he was able to install the left saddlebag mounting bracket. Brad planned on running a sissy bar at some point, so he tightened the bracket to the fender strut with Harley’s docking hardware.
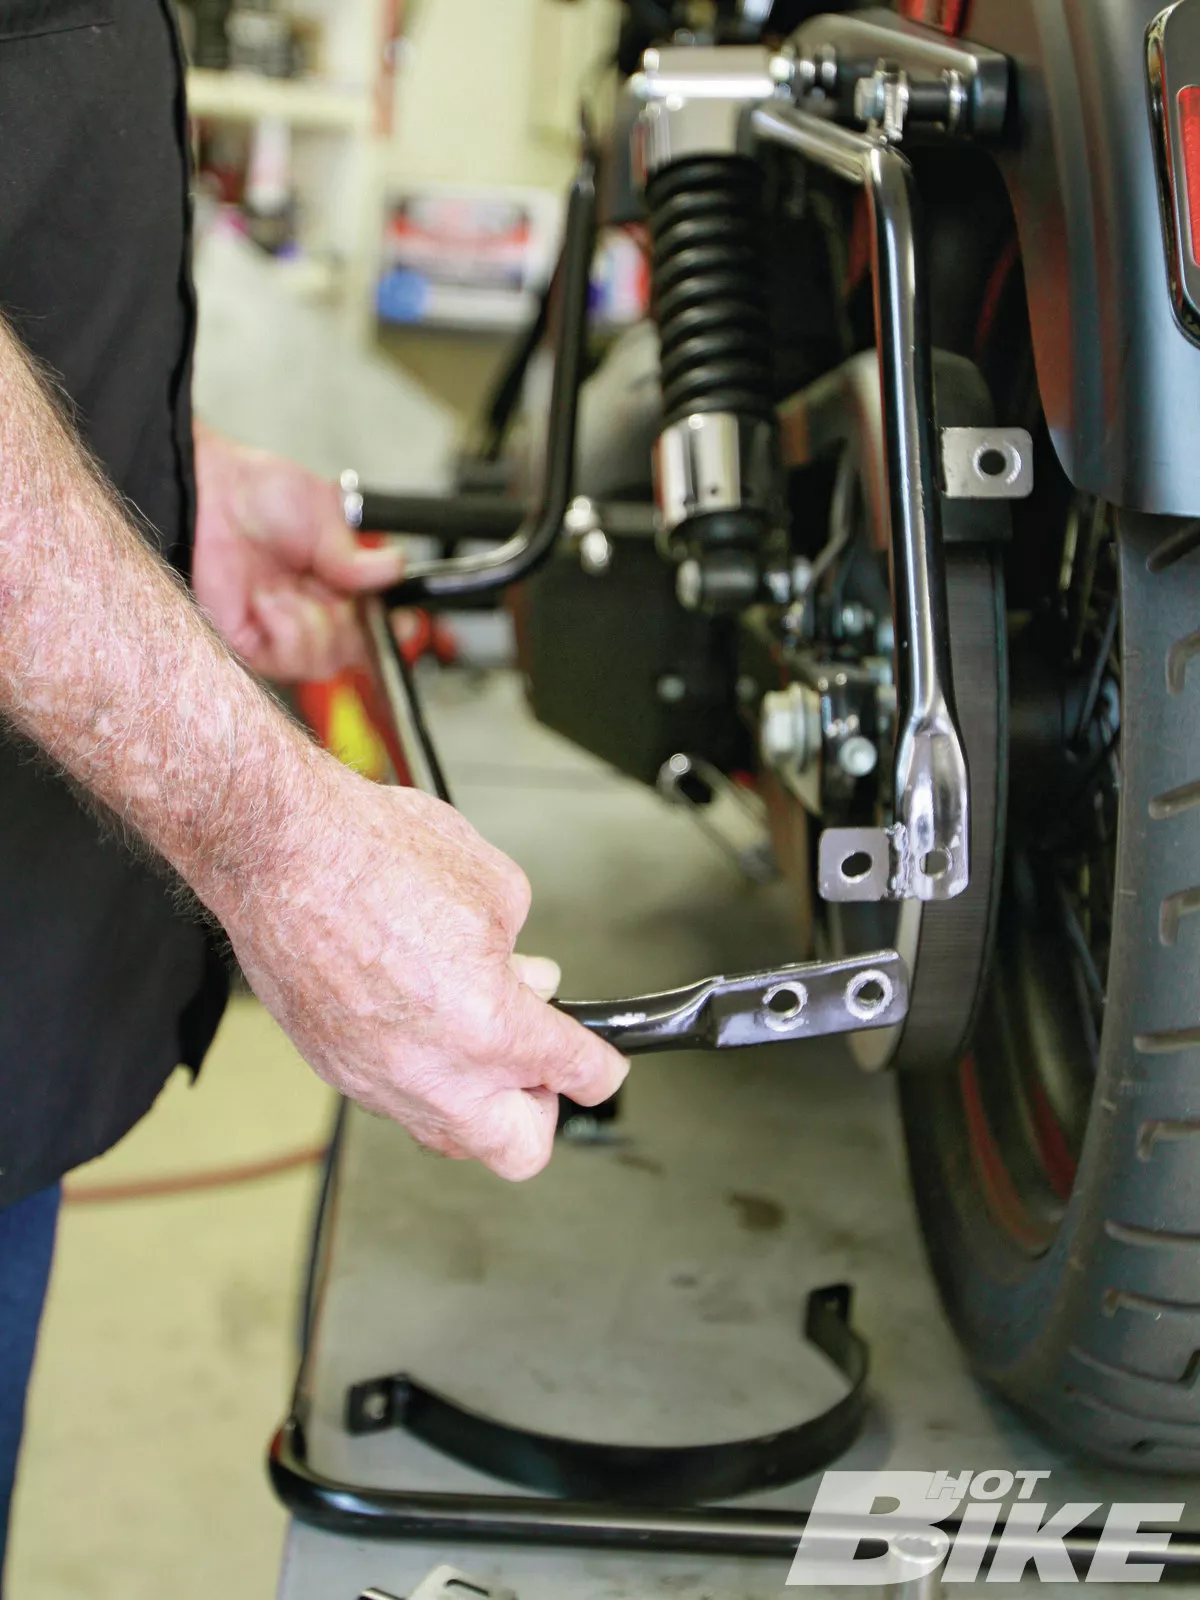
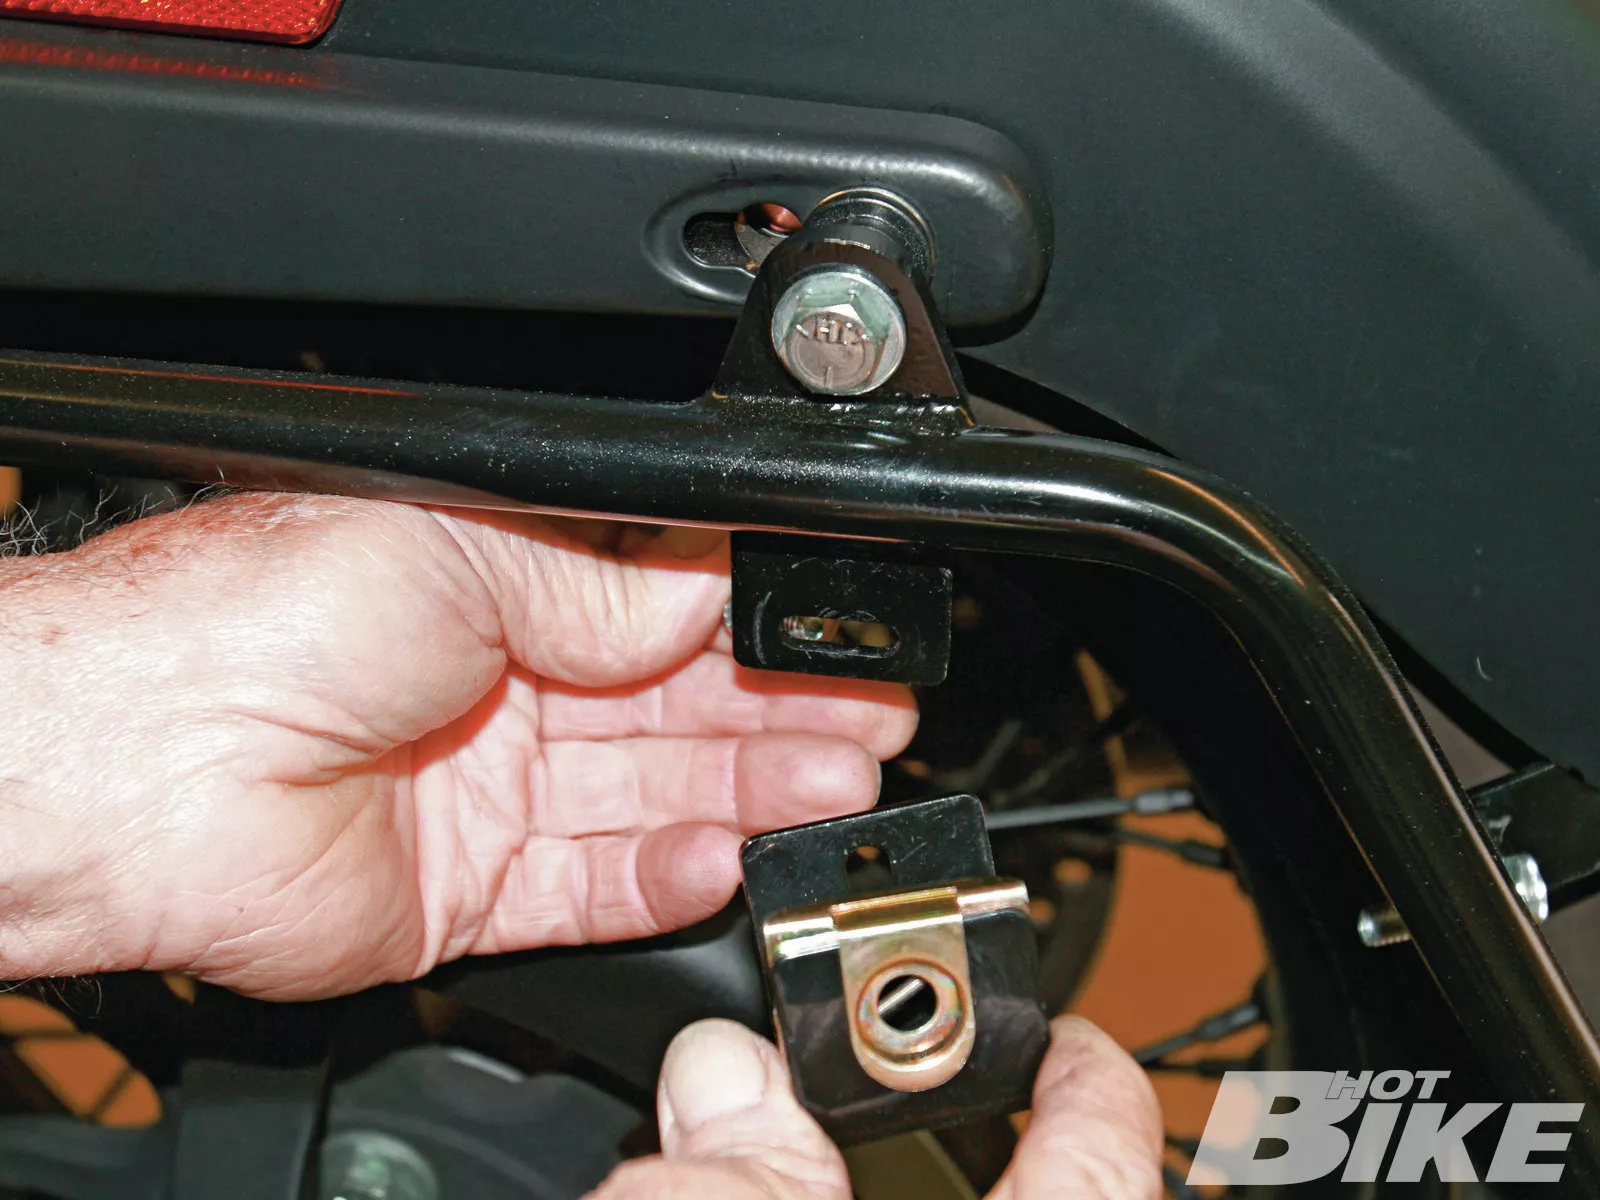
15. Next Brad installed the saddlebag bottom rail to the mounting bracket and tightened it down. Notice the U-shaped bracket on the lift (A). It connects the left and right side bag brackets underneath the bottom of the rear fender (arrow).
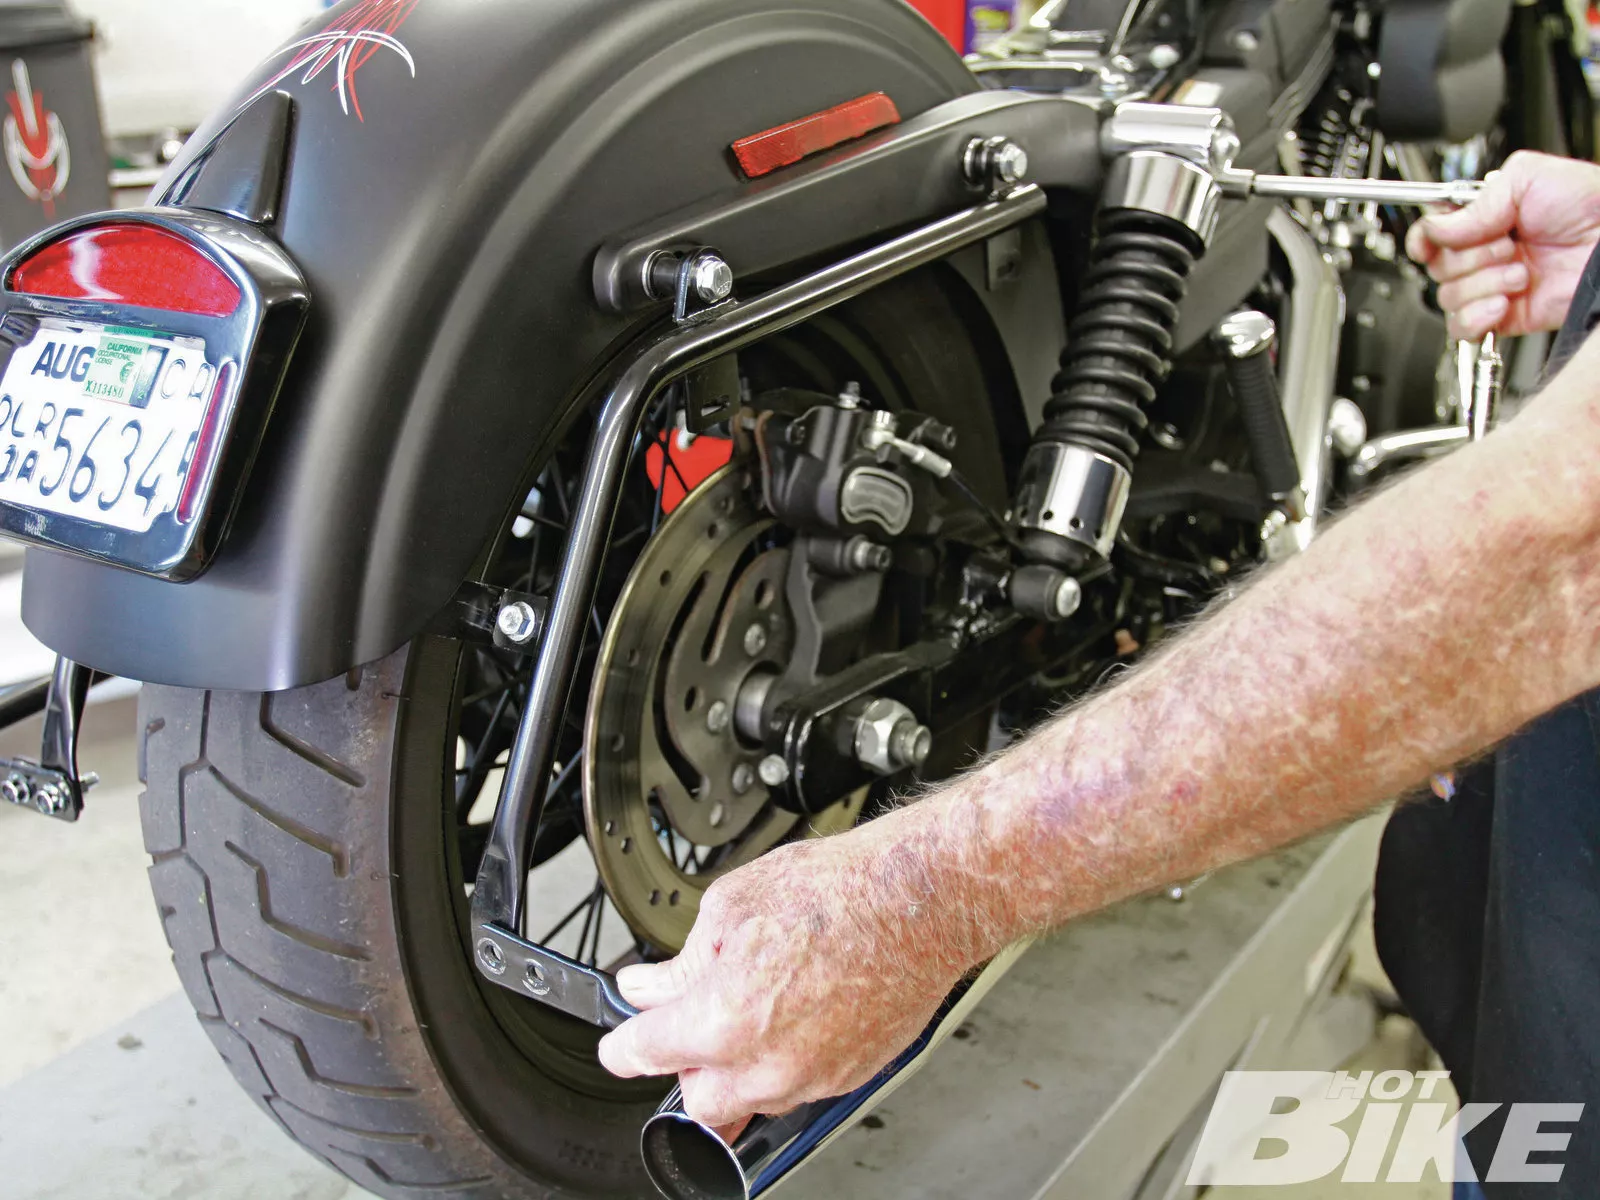
16. Once the left side bracket was mounted, Brad moved on to mounting the right-side bracket in the same fashion. Here’s another angle of where the U-mounting bracket goes (arrow) on the right side.
17. Brad mounted the saddlebag mounting tabs in order to…
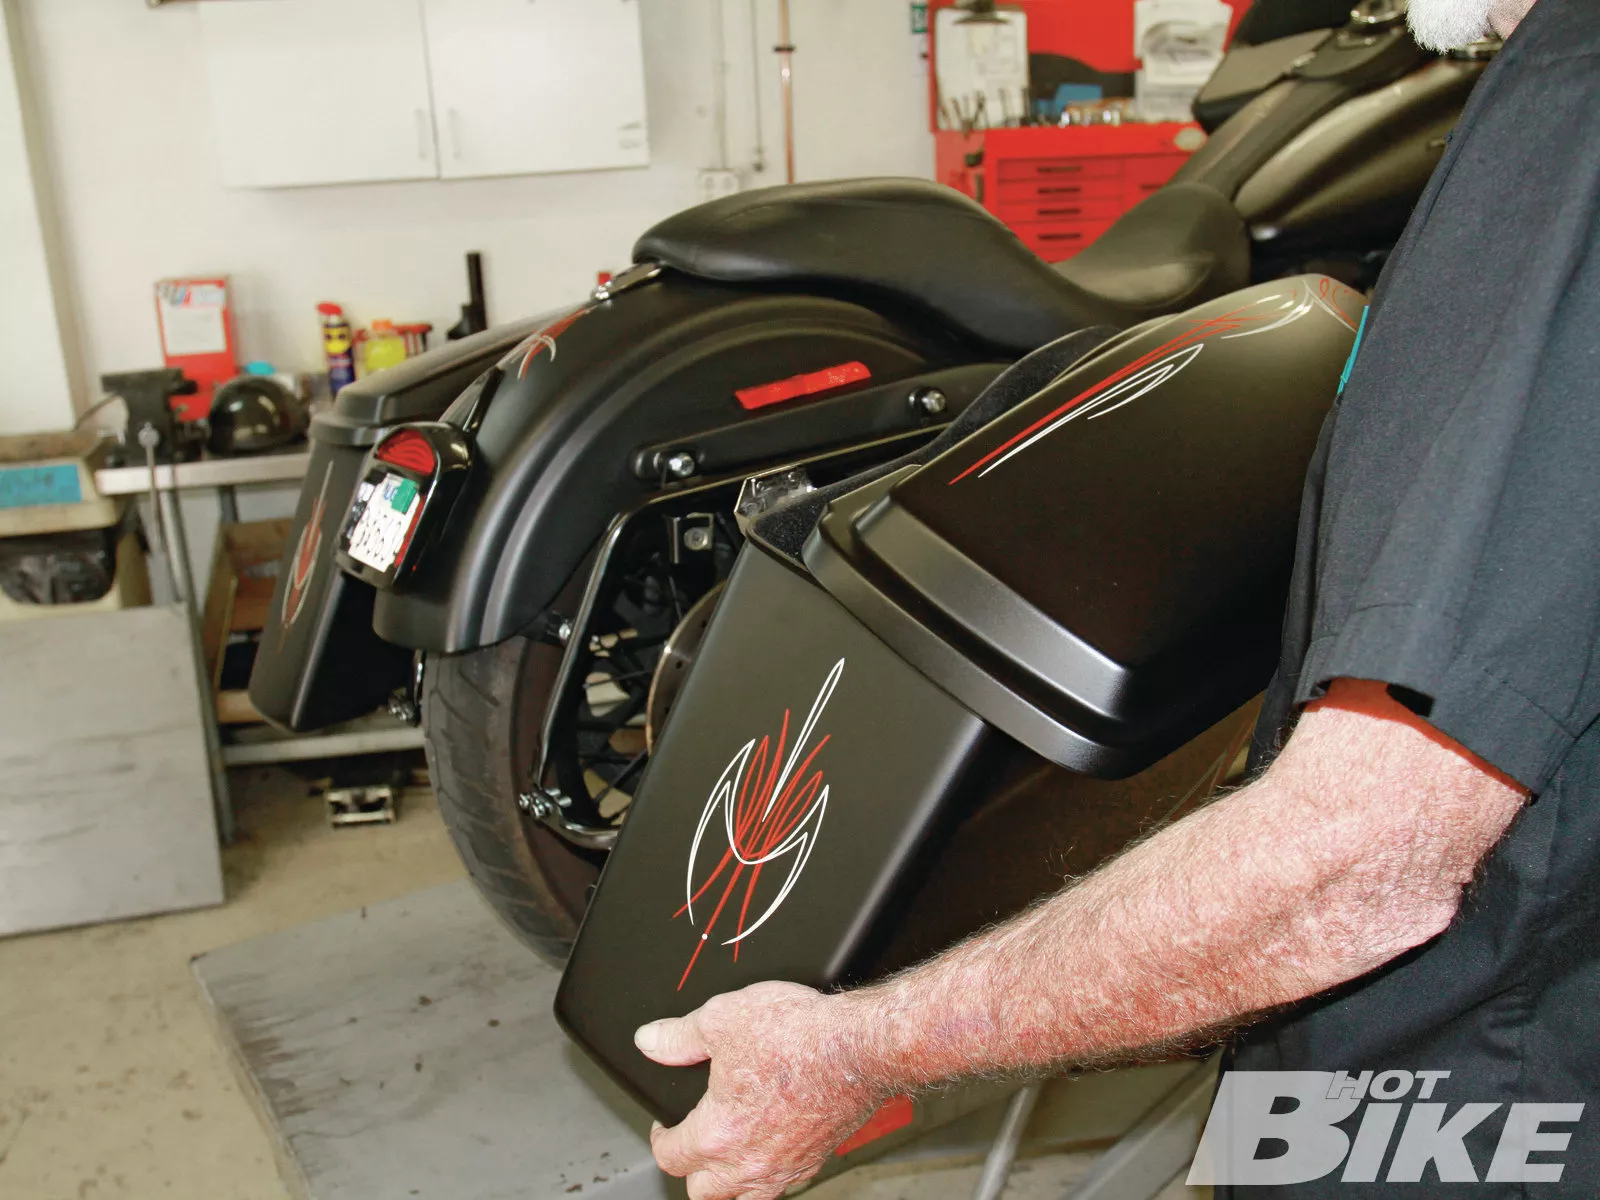
18. …mount the painted left and right side bags. Brad test fit the bags to the new brackets before tightening the bracket hardware down. Once everything was up to snuff, the bags were installed and installation was complete.
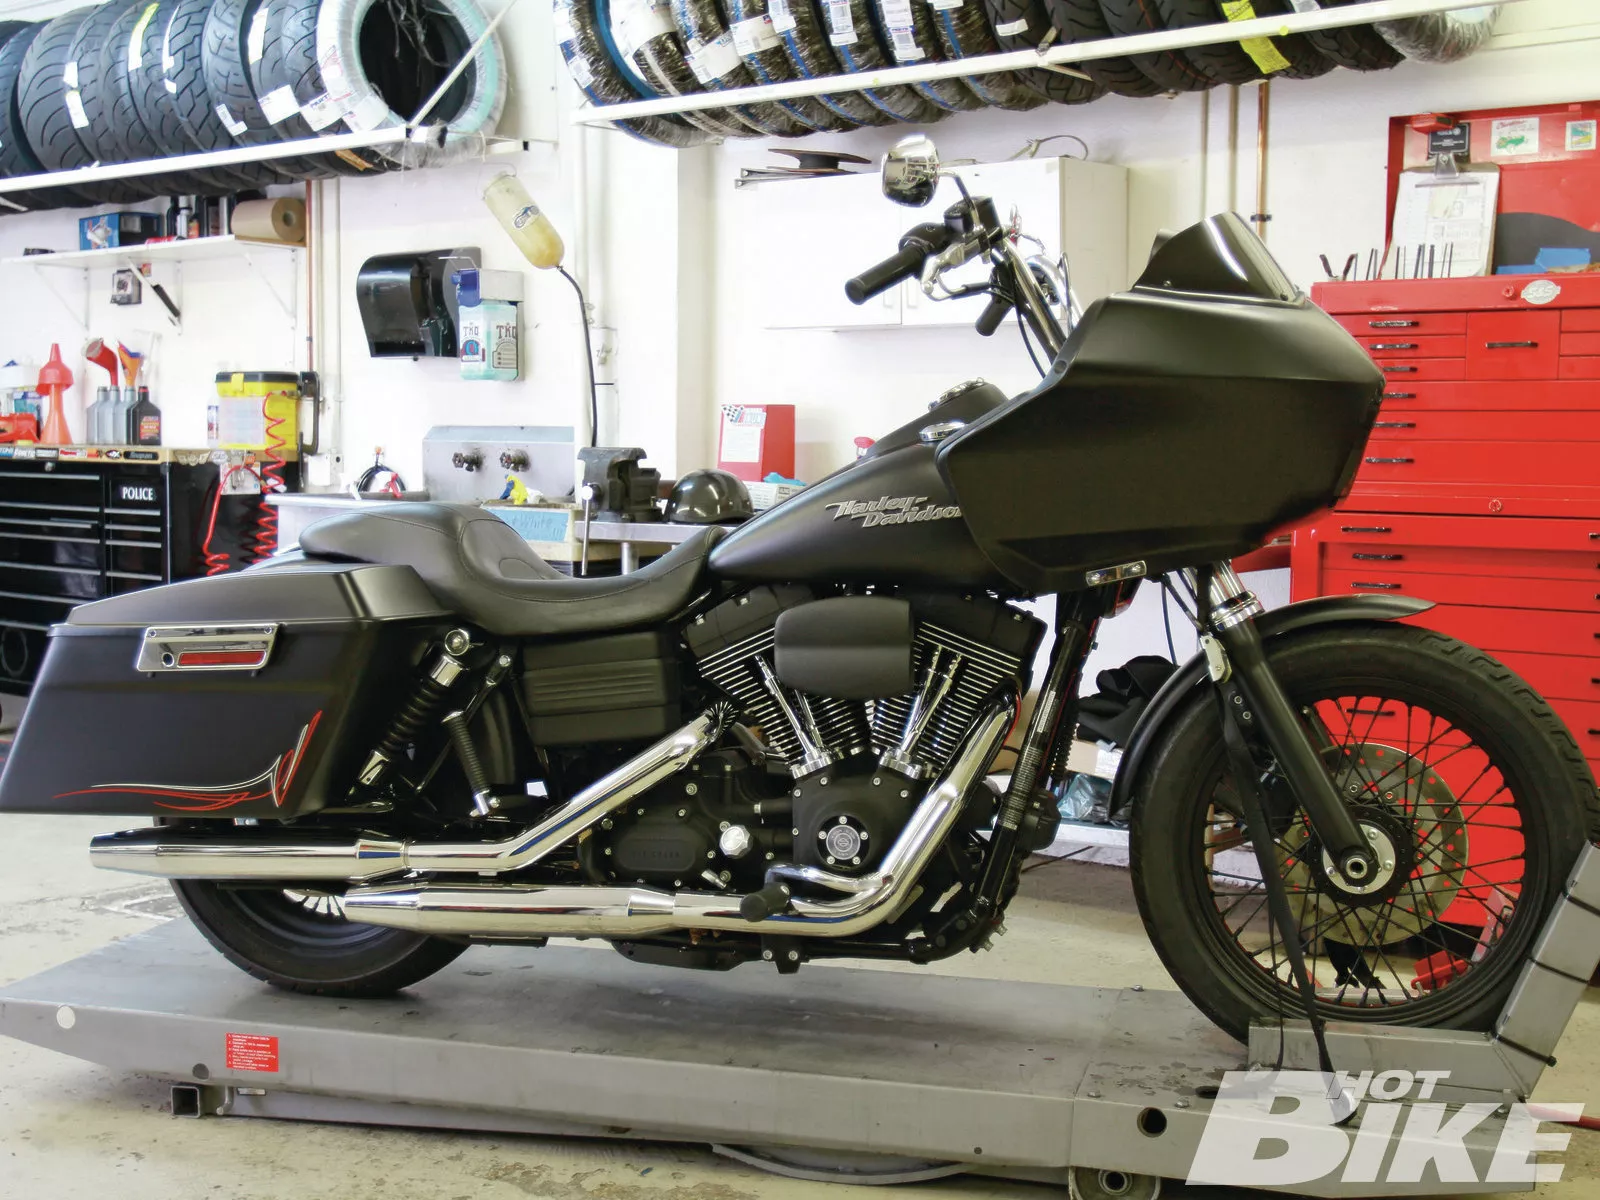
19. In just about two hours, Brad was able to transform the already cool, blacked-out Street Bob into a rugged Road Glide-esque bagger. The best part: installation was a snap so when he wants to switch back to an around-town cruiser, he won’t have that much to do. Overall, the Cycle Visions Baggertail conversion and Fairing Mount conversion is a great, relatively inexpensive transformation that definitely receives HOT BIKE’s approval.
If you ride a cruiser but are looking to break into the bagger world without dropping the cash on a new Touring model, Cycle Visions in San Diego has the cure-all for your plight.
With its line of mounting brackets to mount saddlebags, and OE Road Glide shark-nose fairings, Cycle Visions is your one-stop shop for transforming Softails, Dynas, V-Rods, and even Sportsters into baggers. When we first laid eyes on the company’s bagger-converted Dyna Street Bob, we had to take a second look to realize that it wasn’t a stock Road Glide.
To get your cruiser up to touring speed, for the rear Cycle Visions offers the Baggertail brackets (US Patent 7278560), available in black ($299.99) or chrome ($399.99) for ’06-later Dyna models (except ’09-later Street Bob, and ’08-later Fat Bob and Wide Glide models). The only reason for the exemptions is that Harley’s rear fenders for those model years feature a bobbed rear fender, and the cross-brace that mounts to the fender struts positioned under the fender would be visible. All you’d need to do is purchase a different fender to appease the Baggertail transformation.
Along with the Baggertail brackets, you’ll also need Cycle Visions’ lower bags ($399.99 each), which are constructed from raw fiberglass gelcoat, and will need to be painted to match your bike’s paint scheme. The Baggertail mount also fits multiple Softail models, and of course there are the Bagster brackets for Sportsters, and the Road Rod brackets for V-Rods. For this installation, stock H-D saddlebag lids ($108.99 each) and a saddlebag hardware kit ($424.99) will finish out the bag section of the project.
For the fairing, Cycle Visions offers its Fairing Mount ($399.95), a heavy-duty mount made of black powdercoated steel, and fits ’06-later Dyna models, except Wide Glide and Fat Bob models. This is just the mount—you’ll need to purchase the following from your local Harley dealer: inner Road Glide fairing ($859.99), outer Road Glide fairing ($353.99), Road Glide fairing headlight assembly ($199.99), and Road Glide radio caddy ($62.99), which helps reinforce the inner and outer fairings. If you want to rock some tunes, Cycle Visions has stereo kits available as well. The fairing mount is also available for mounting a shark-nose fairing on Softails and V-Rods, but pricing varies by model.
For this installation, we headed straight to the source, the Cycle Visions compound in San Diego, to have a look-see of just how much was involved to transform an ’07 Dyna Street Bob into a Road Glide–looking bagger. Brad Bradley, product manager for Cycle Visions, had the swap done in no time at all. HB
Parts
The following H-D parts are needed to run fairing:
| Inner fairing(PN 58735-98A) | Well nut (5) | (PN 5207) | |
| Outer fairing | (PN 58733-98A) | Washer (4) | (PN 6716) |
| Dual headlamp assembly | (PN 67775-01A) | Screw (2) | (PN 2995) |
| Speaker grille LH | (PN 77022-98) | Screw (10) | (PN 3732) |
| Speaker grille RH | (PN 77021-98) | Windshield | (PN 57958-98) |
| Stud plate (2) | (PN 31733-98)) | Windshield trim | (PN 58705-98A) |
| Radio caddy | (PN 77078-98) | Windshield screws | (5) (PN 933) |
| Cover plate (2) | (PN 31735-98) | Windshield washers | (5) (PN 6054) |
| Acorn nut (4) | (PN 31589-80) | Lamp plug | (PN 68705-93A) |
Source:
Cycle Visions
(619) 295-7800 | cyclevisions.com
Harley-Davidson
Contact your local dealer | harley-davidson.com

")


