
Sweet Tracker | Stock Sportster to Dirt Track Racer
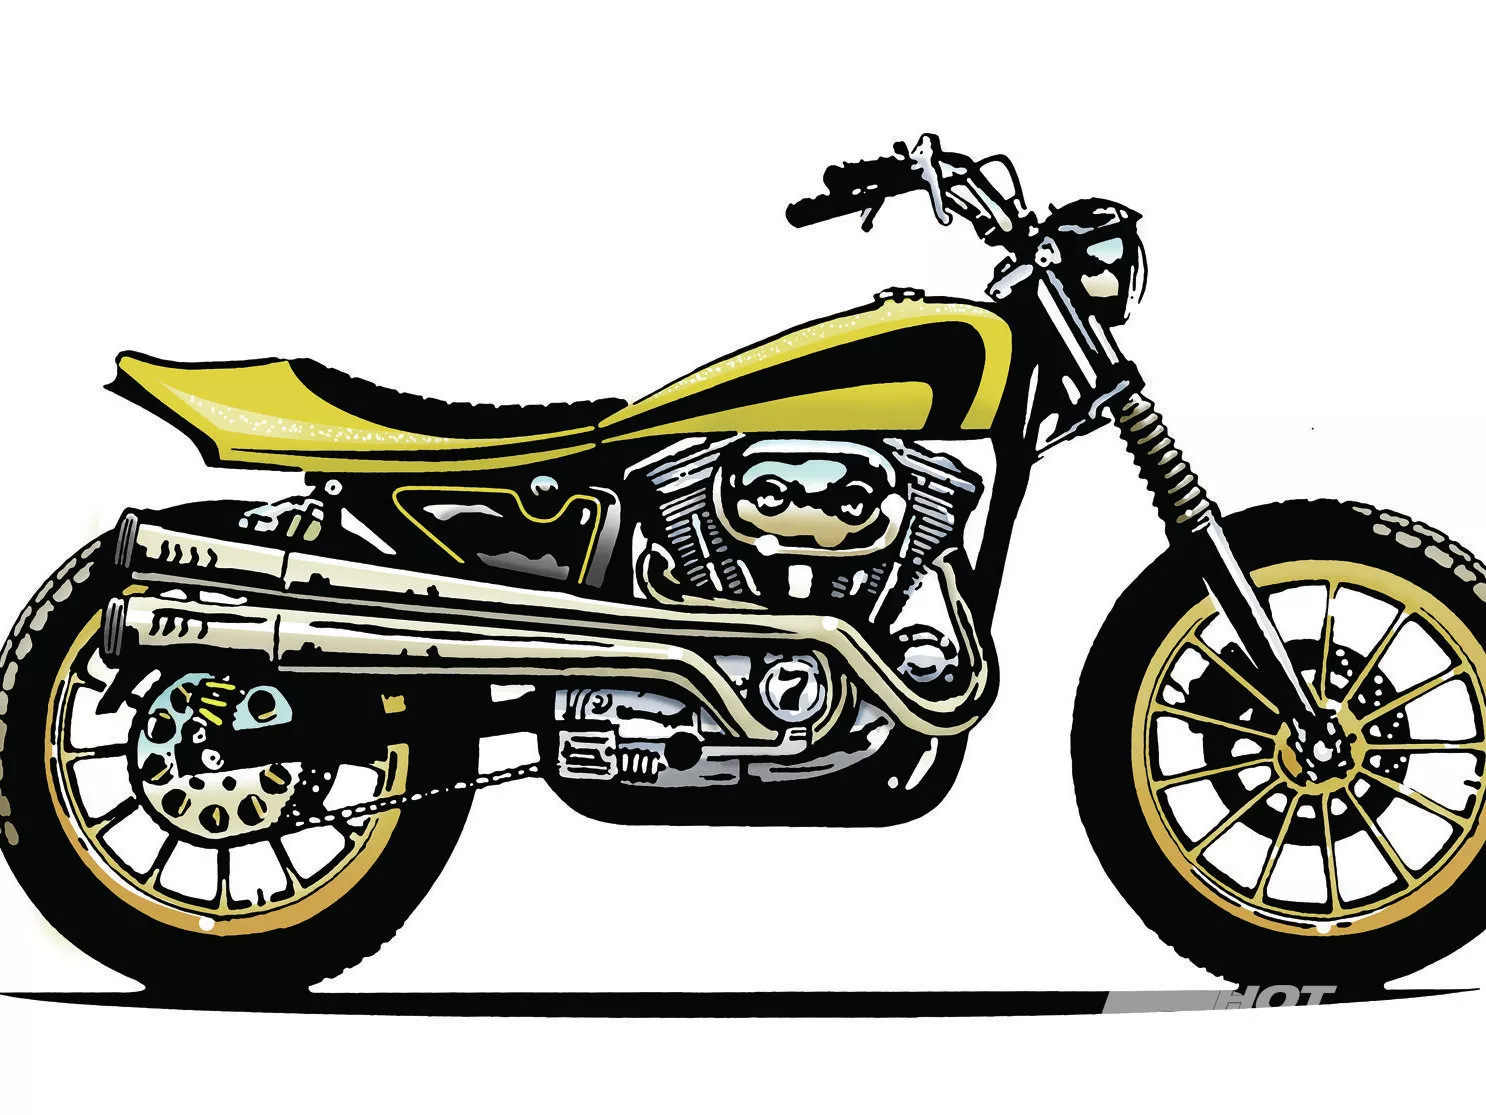
Here’s the original rendering that The Harpoon did for me. In no time at all we’ll be pretty close to achieving this look. The paint scheme may vary slightly, but you get the overall idea.
Here’s the original rendering that The Harpoon did for me. In no time at all we’ll be pretty close to achieving this look. The paint scheme may vary slightly, but you get the overall idea.
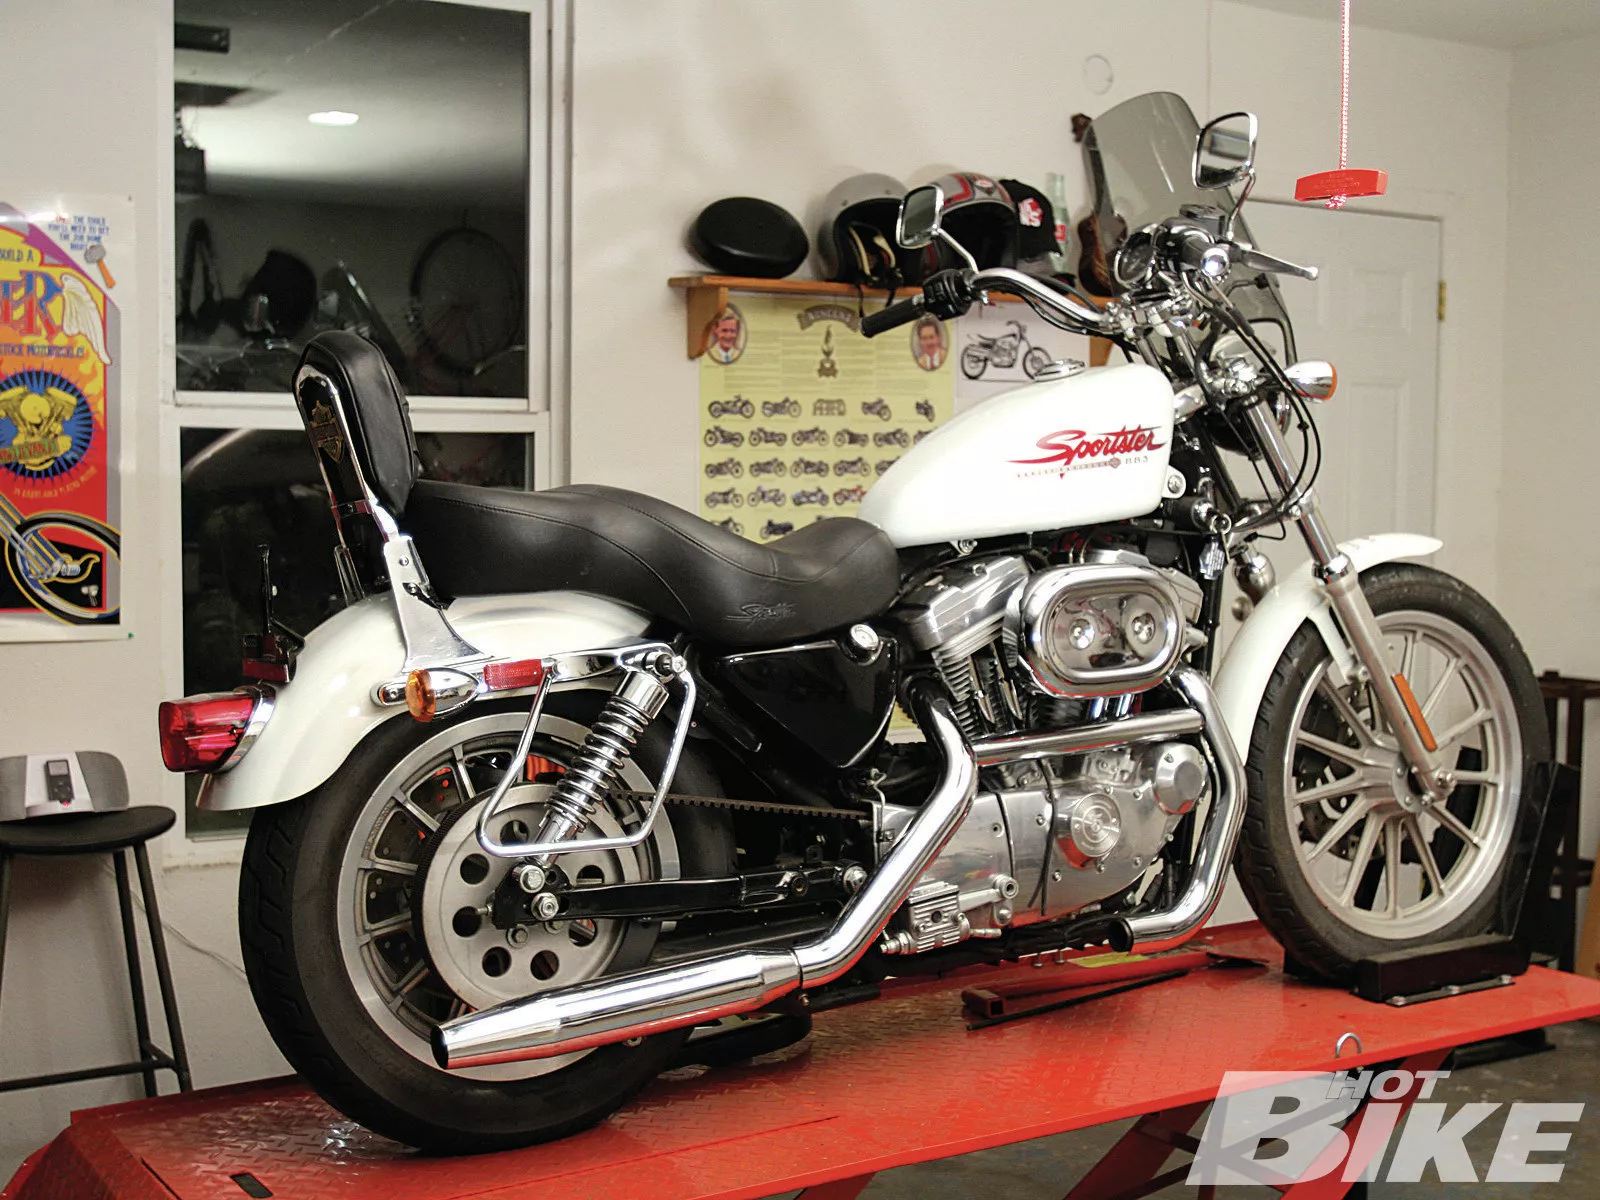
**01. **This Sportster was used at the dealership as a parts mule for other bikes so there were some items missing. Not to worry since pretty much everything would be coming off anyway. Once I got it home, I rolled the bike onto the lift and started stripping.
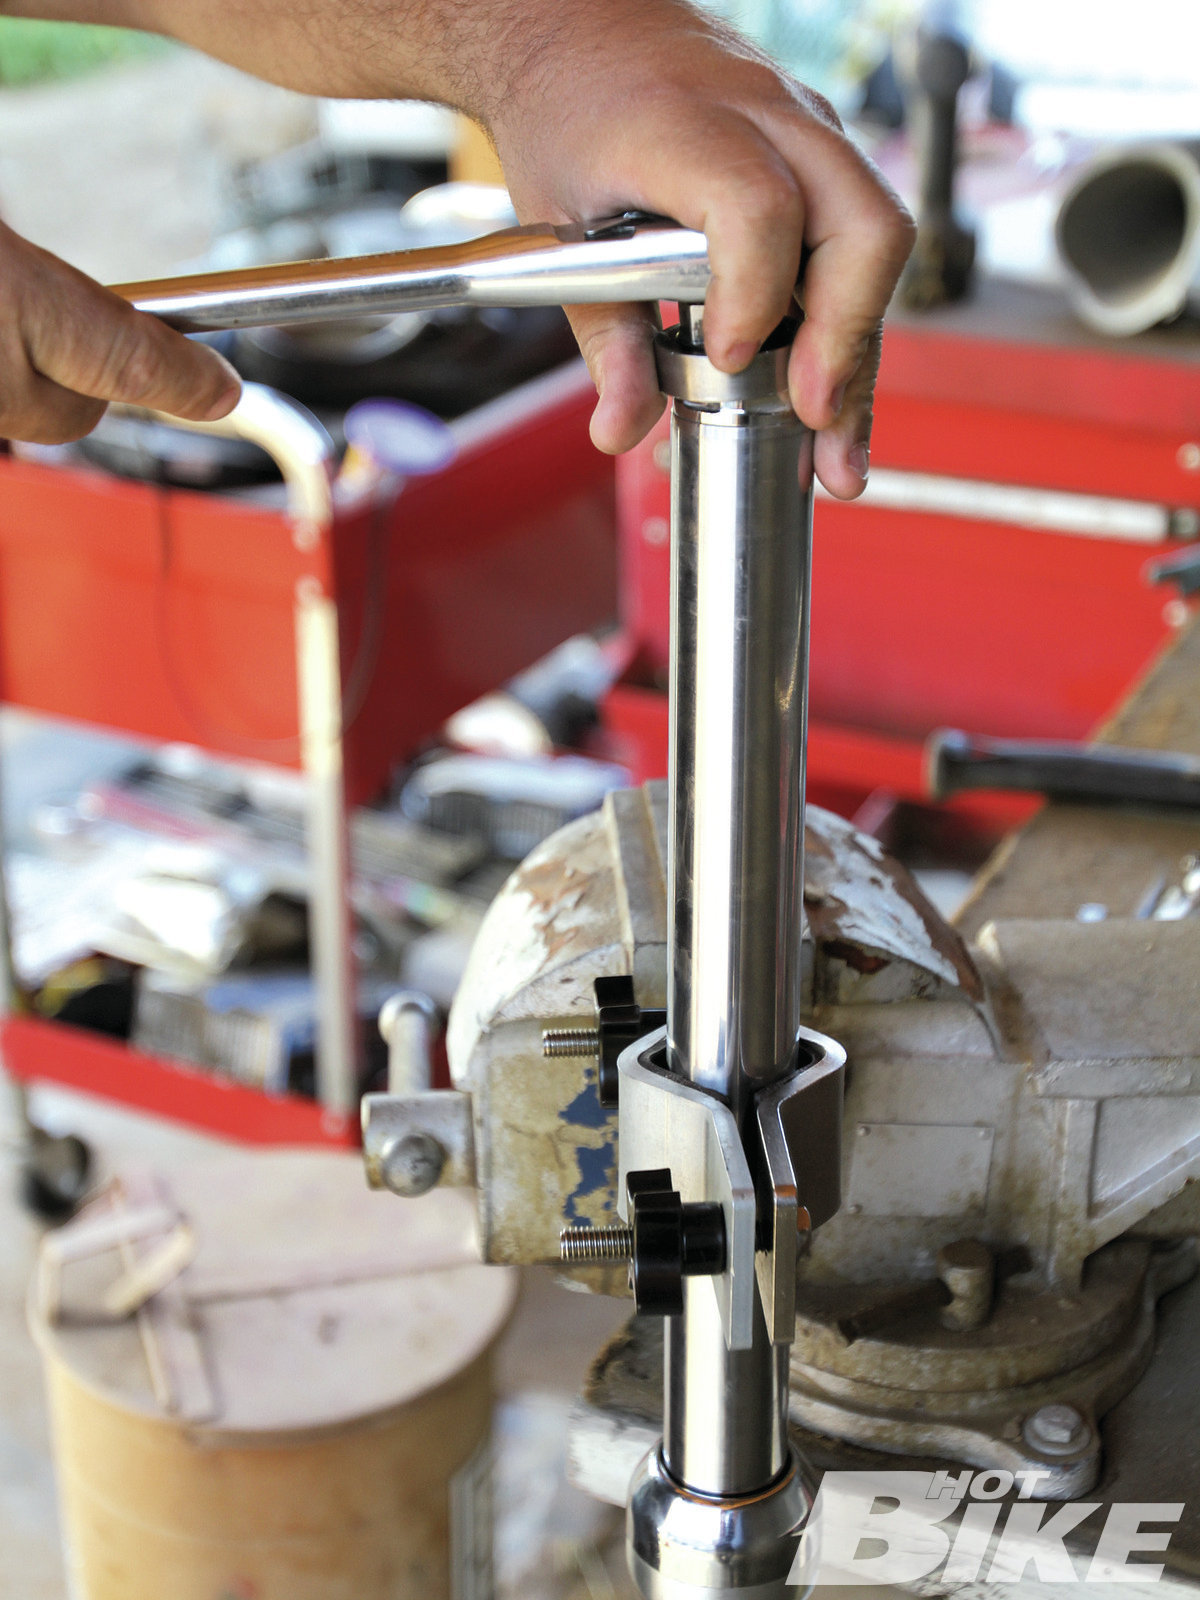
**02. ** I removed the frontend, most importantly the fork tubes so that I could get the lowers off and out to Wargasser Speed Shop to have the fender mounts shaved. Once they were shaved, they were powdercoated satin black and sent back to me.
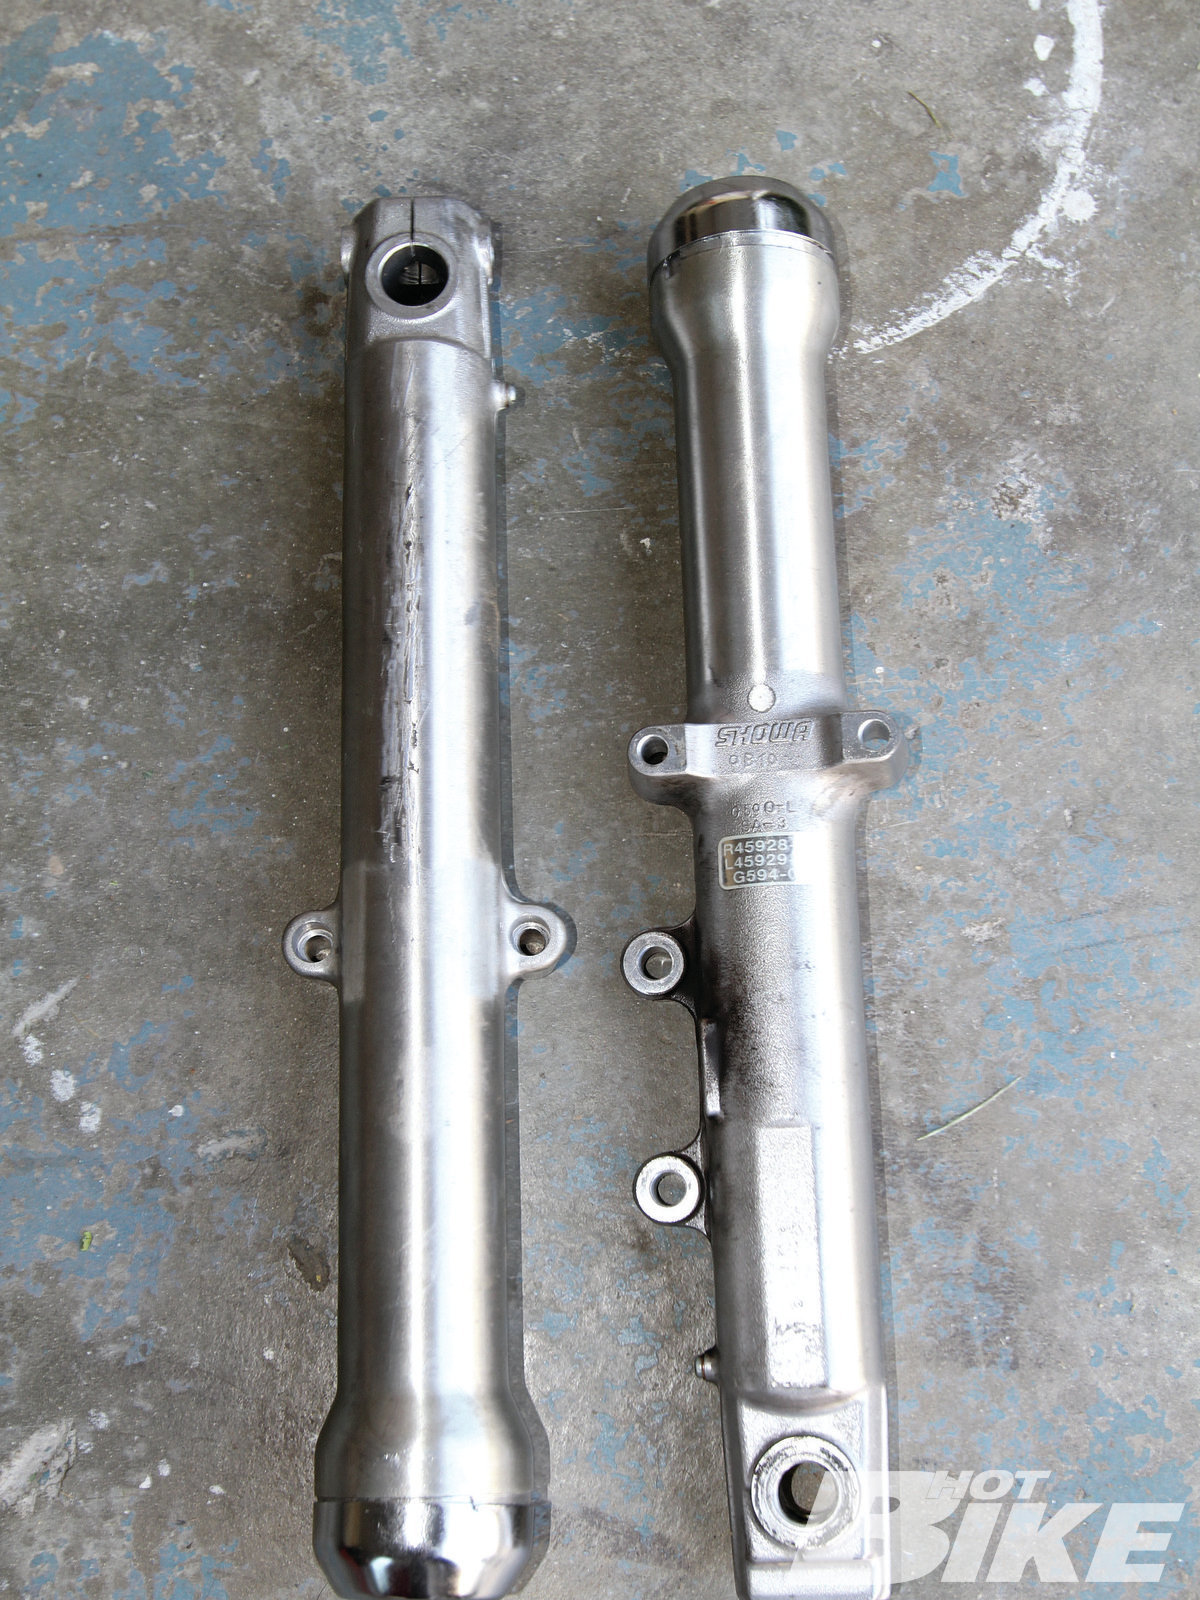
**03. ** Before…
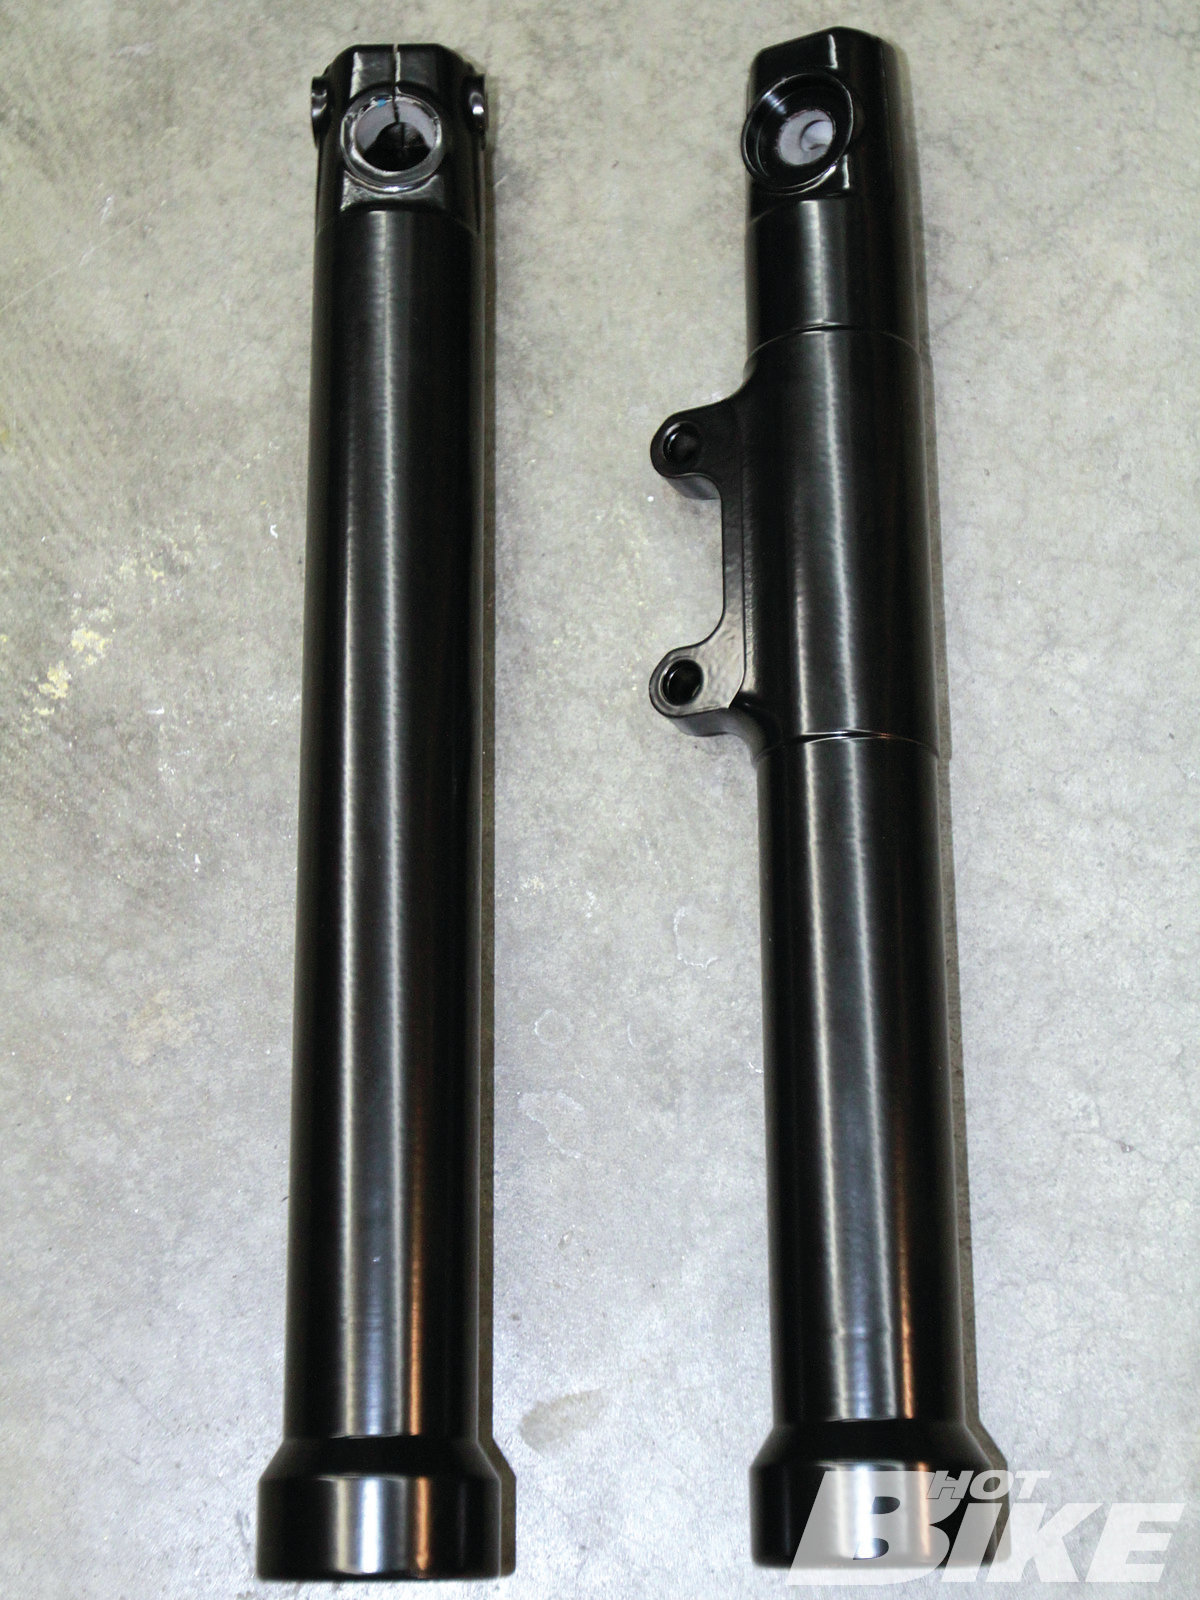
04. …After. The lowers are much nicer now that they’ve been given a clean shave.
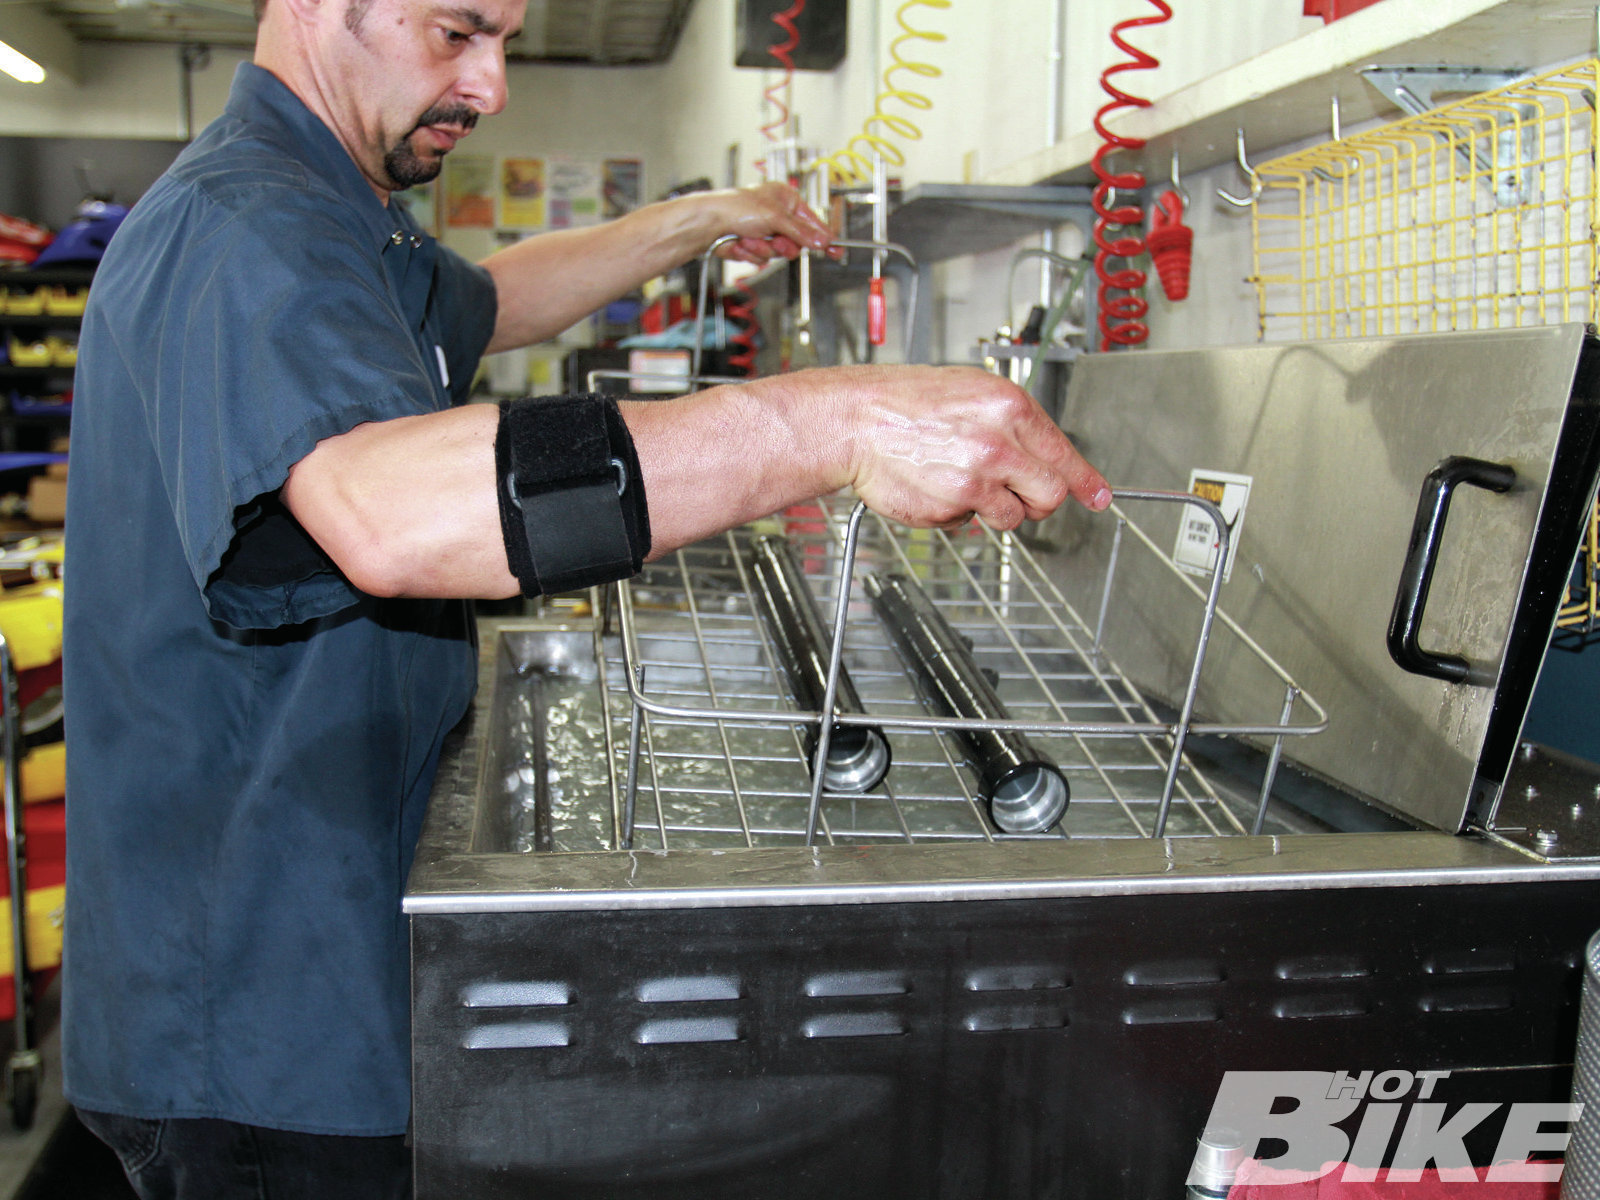
05. With the lower legs back from Wargasser, and the box of fork guts, I headed over to Race Tech in Corona, California, to get tuned up. Tony Marasco, Race Tech’s resident genius would transform the stock fork internals to a much racier setup thanks to new springs and the Gold Valve Emulators. When I arrived, Tony made sure to thoroughly clean all the parts in the ultrasonic parts washer that uses sound waves to remove tiny particles that other parts washers can’t get at.
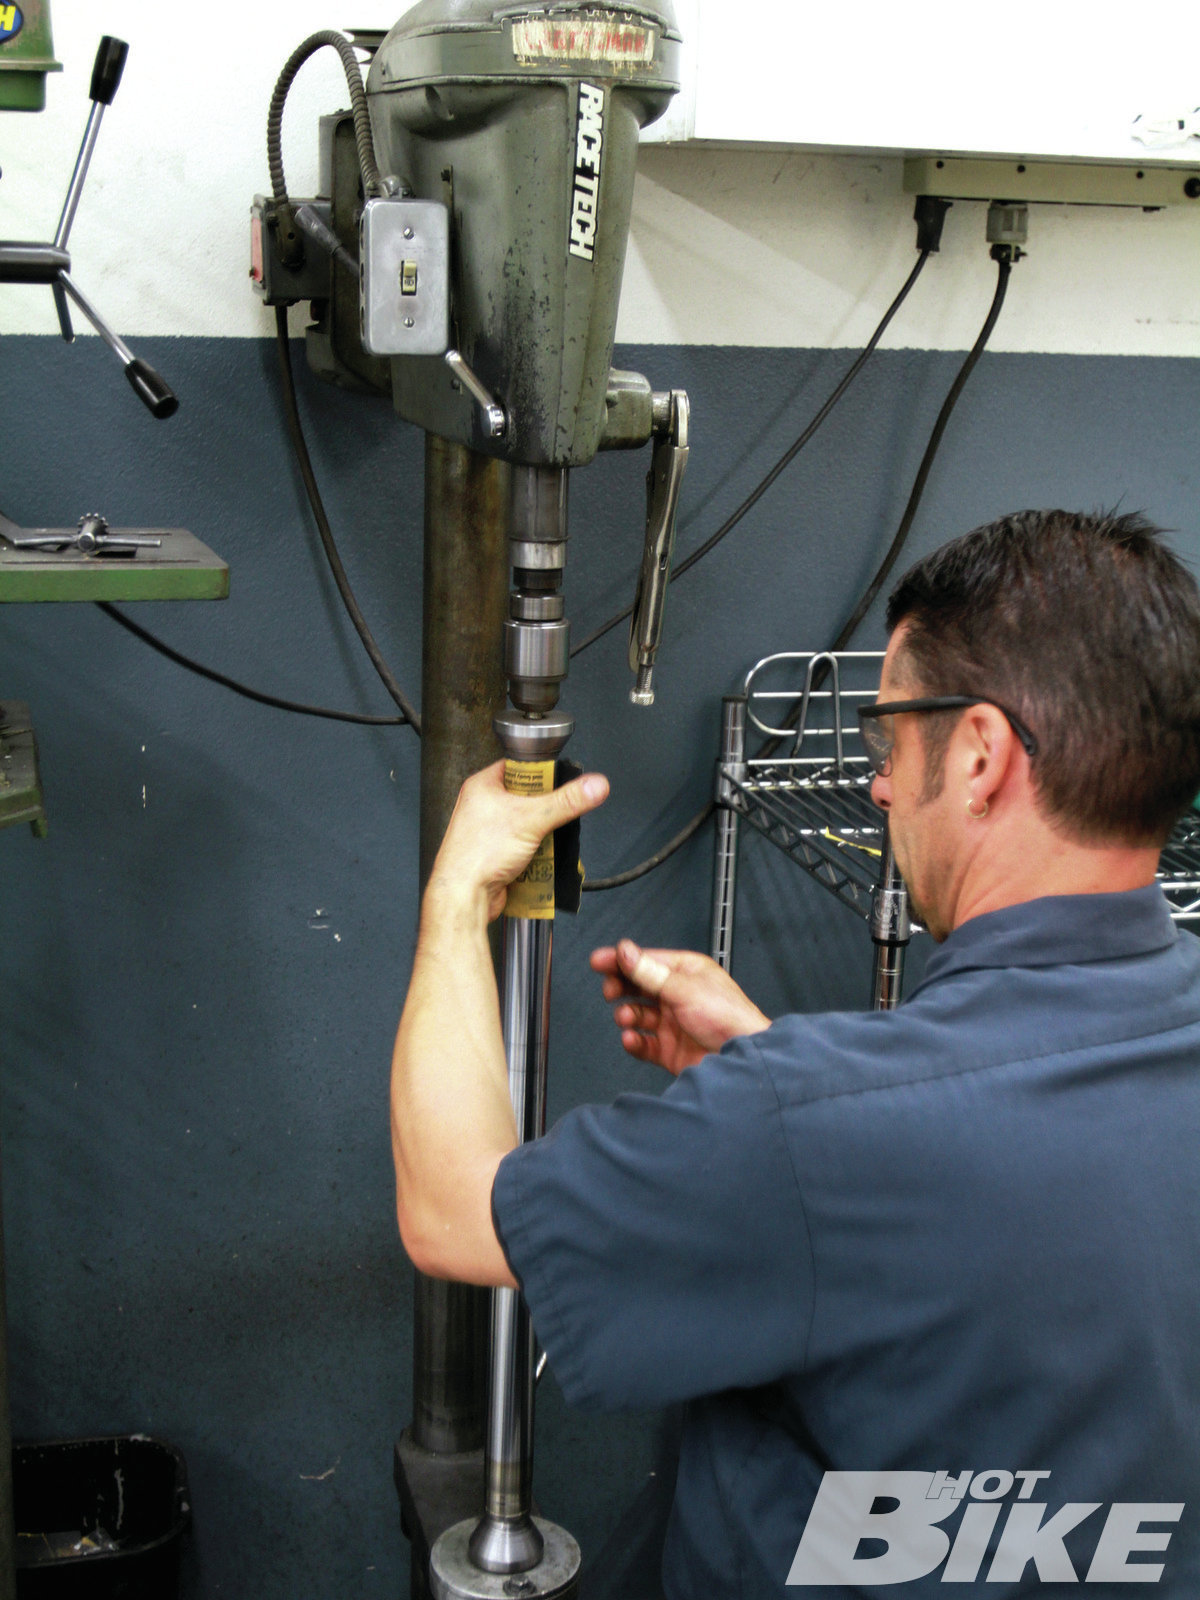
**06. **After the parts were cleaned, Tony then placed the fork tubes one at a time on a modified drill press with special cone attachments that act as fork caps in order to spin them at high speeds while he works his way up and down the fork tubes with sandpaper. This is done to create a cross-hatch pattern on the tubes in order to trap fork oil in the peaks and valleys created by this process.
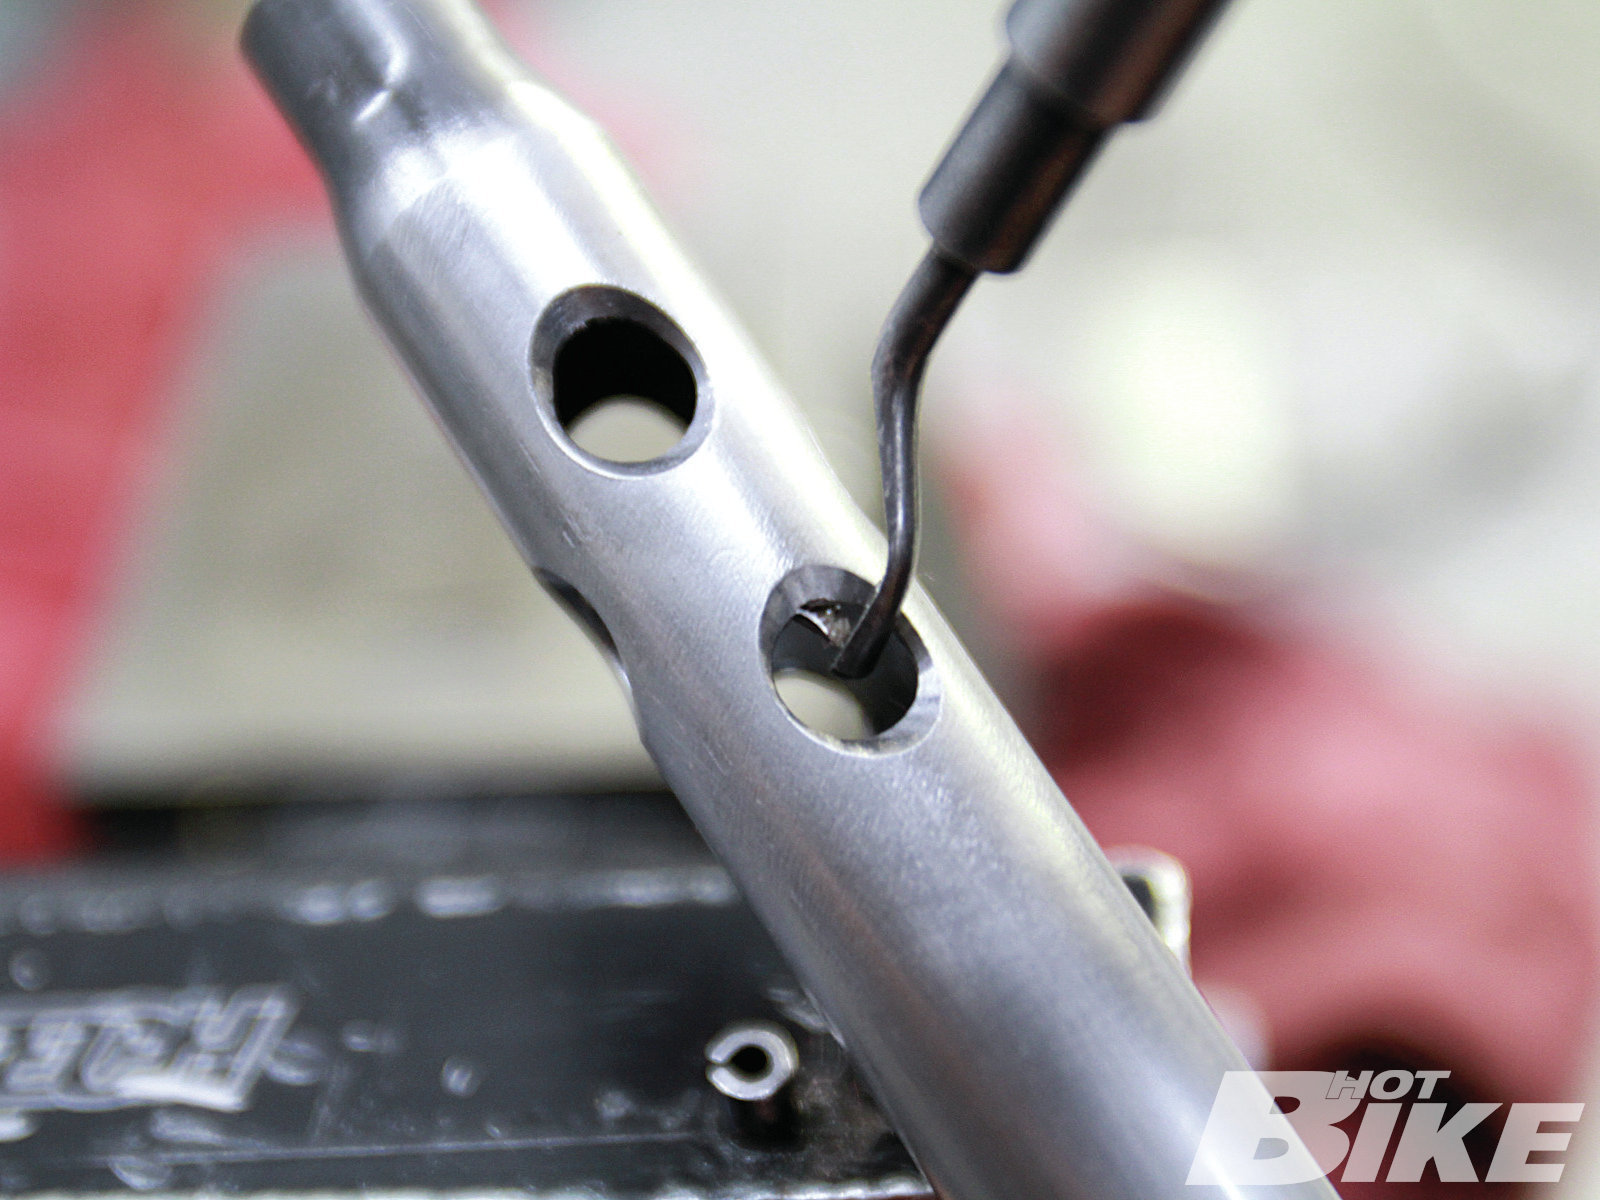
**07. **Once that was done, back in the washer they went to remove any loose debris. Tony then drilled two 5/16 compression holes in each damping rod and bored the stock holes to 5/16 as well, totaling six holes (three sets of two holes). Tony chamfered and de-burred the fresh bores to remove any metal shavings and the damping rods were cleaned and ready to be re-installed.
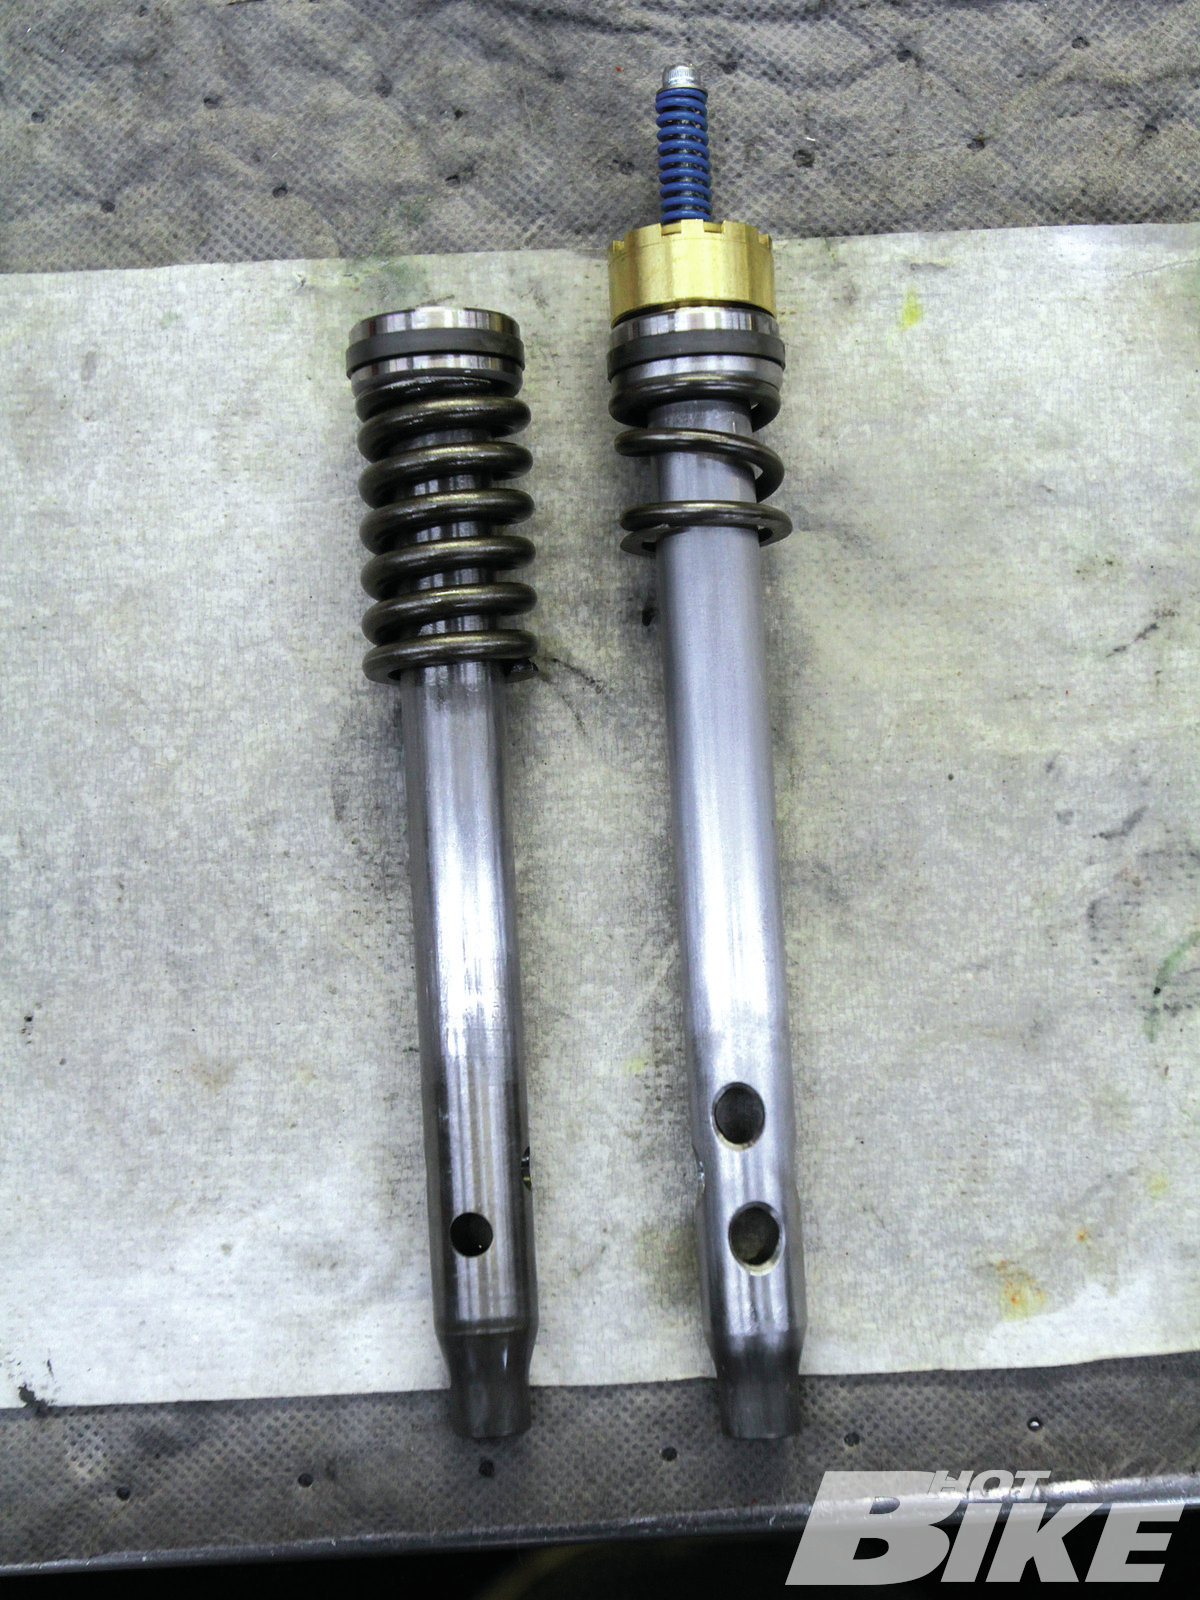
**08. **Here’s a shot of the modified damping rod outfitted with a Gold Valve Emulator (right). Notice the bottom of both damping rods. The stock rod (left) only features four compression holes, which are smaller in diameter. The modified rod features six holes that not only flow more oil, but the larger bores allow it to flow more freely so that when encountering harsh bumps the fork is able to compress at a much faster rate.
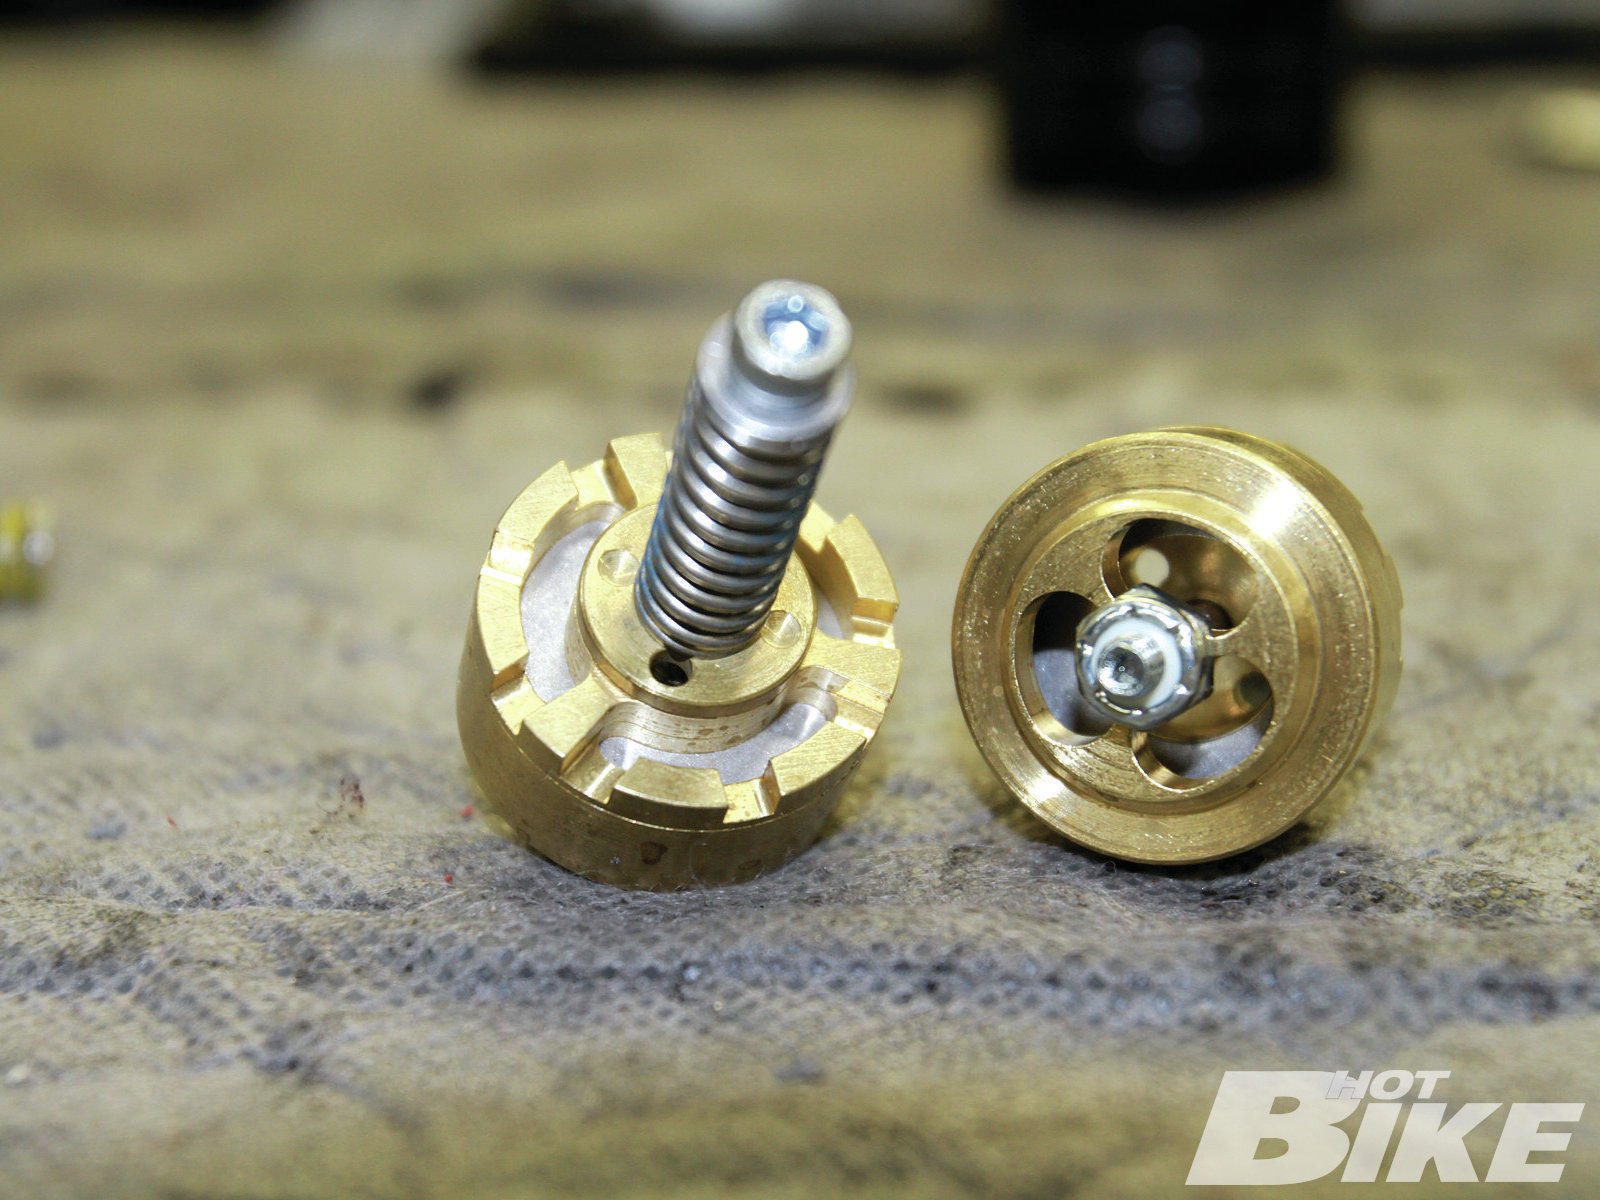
**09. **The Gold Valve Emulators flow more oil throughout the fork in more of an unobstructed manner. Since oil can flow more freely, it too allows the fork to compress and rebound at a much faster rate than stock, ultimately leaving the rider with more of a firm, yet plush ride.
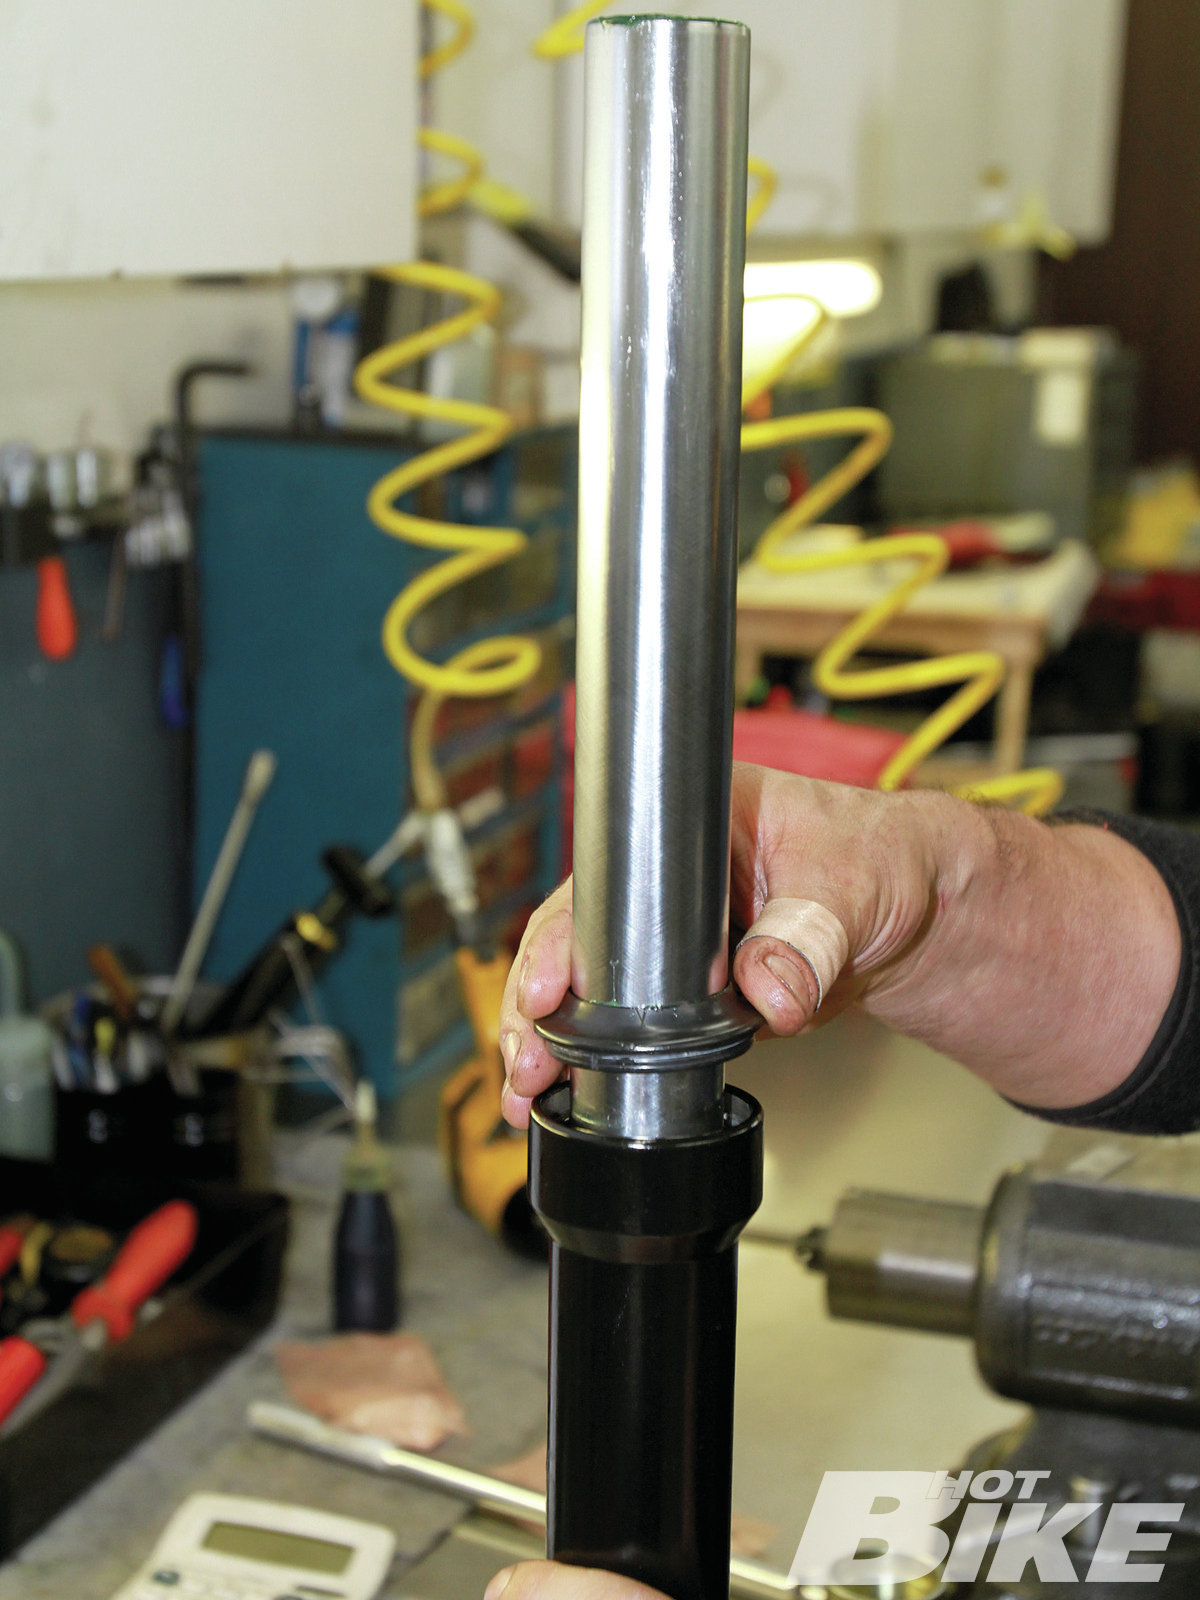
**10. ** Tony prepped the forks for installation by re-installing the lower legs with the proper bushings, seals, circlips, and dust covers.
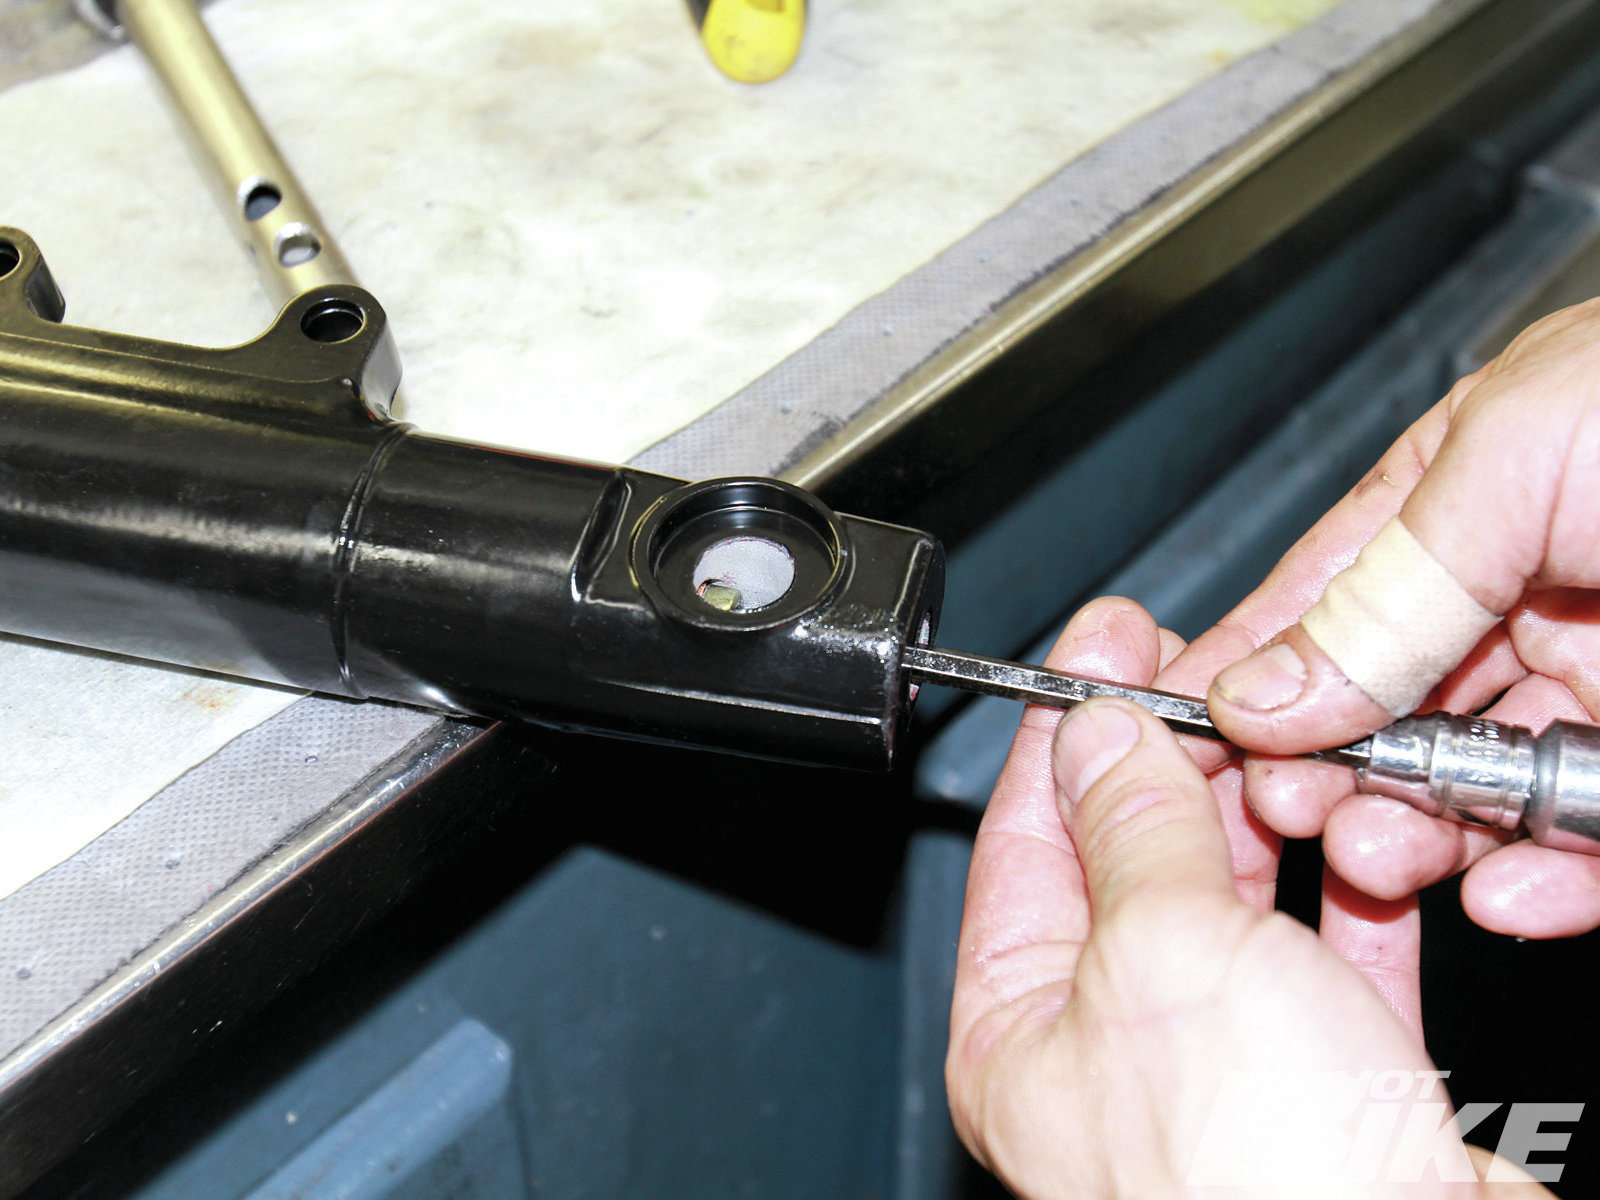
**11. ** Then the modified damping rods were installed in each fork tube and tightened down at the bottom of the legs.
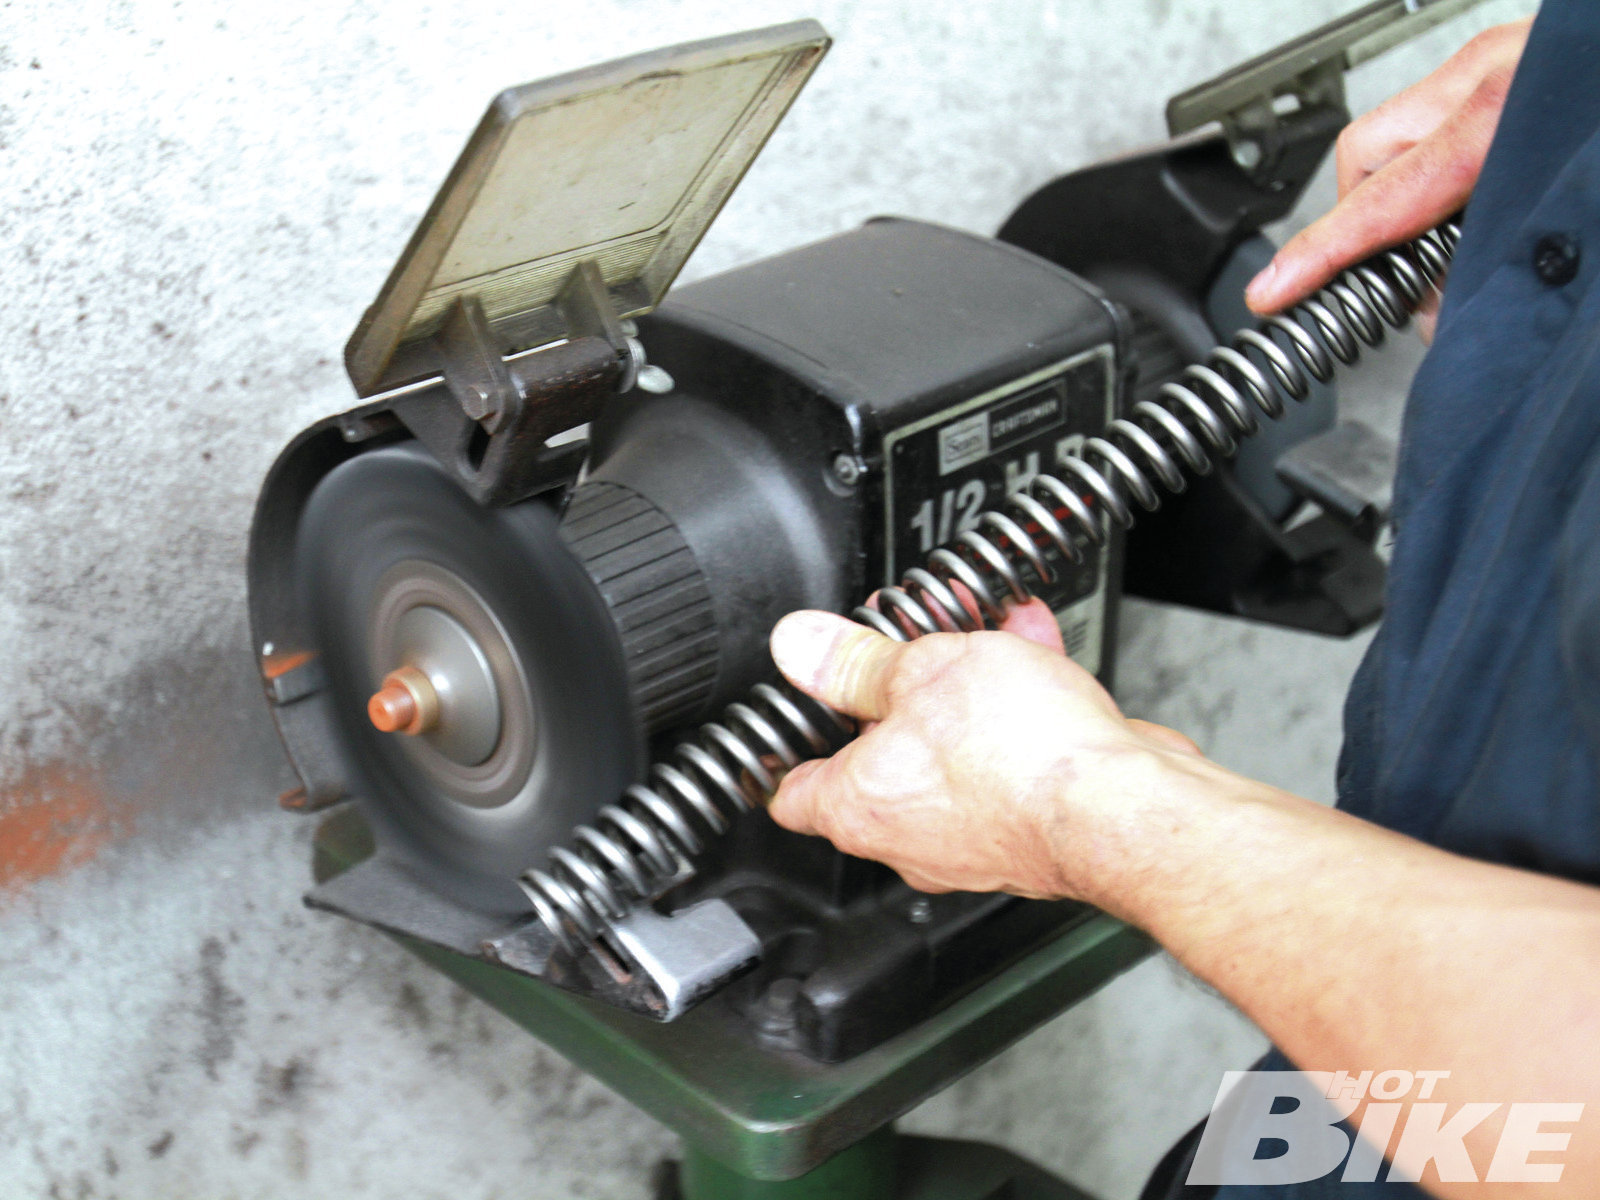
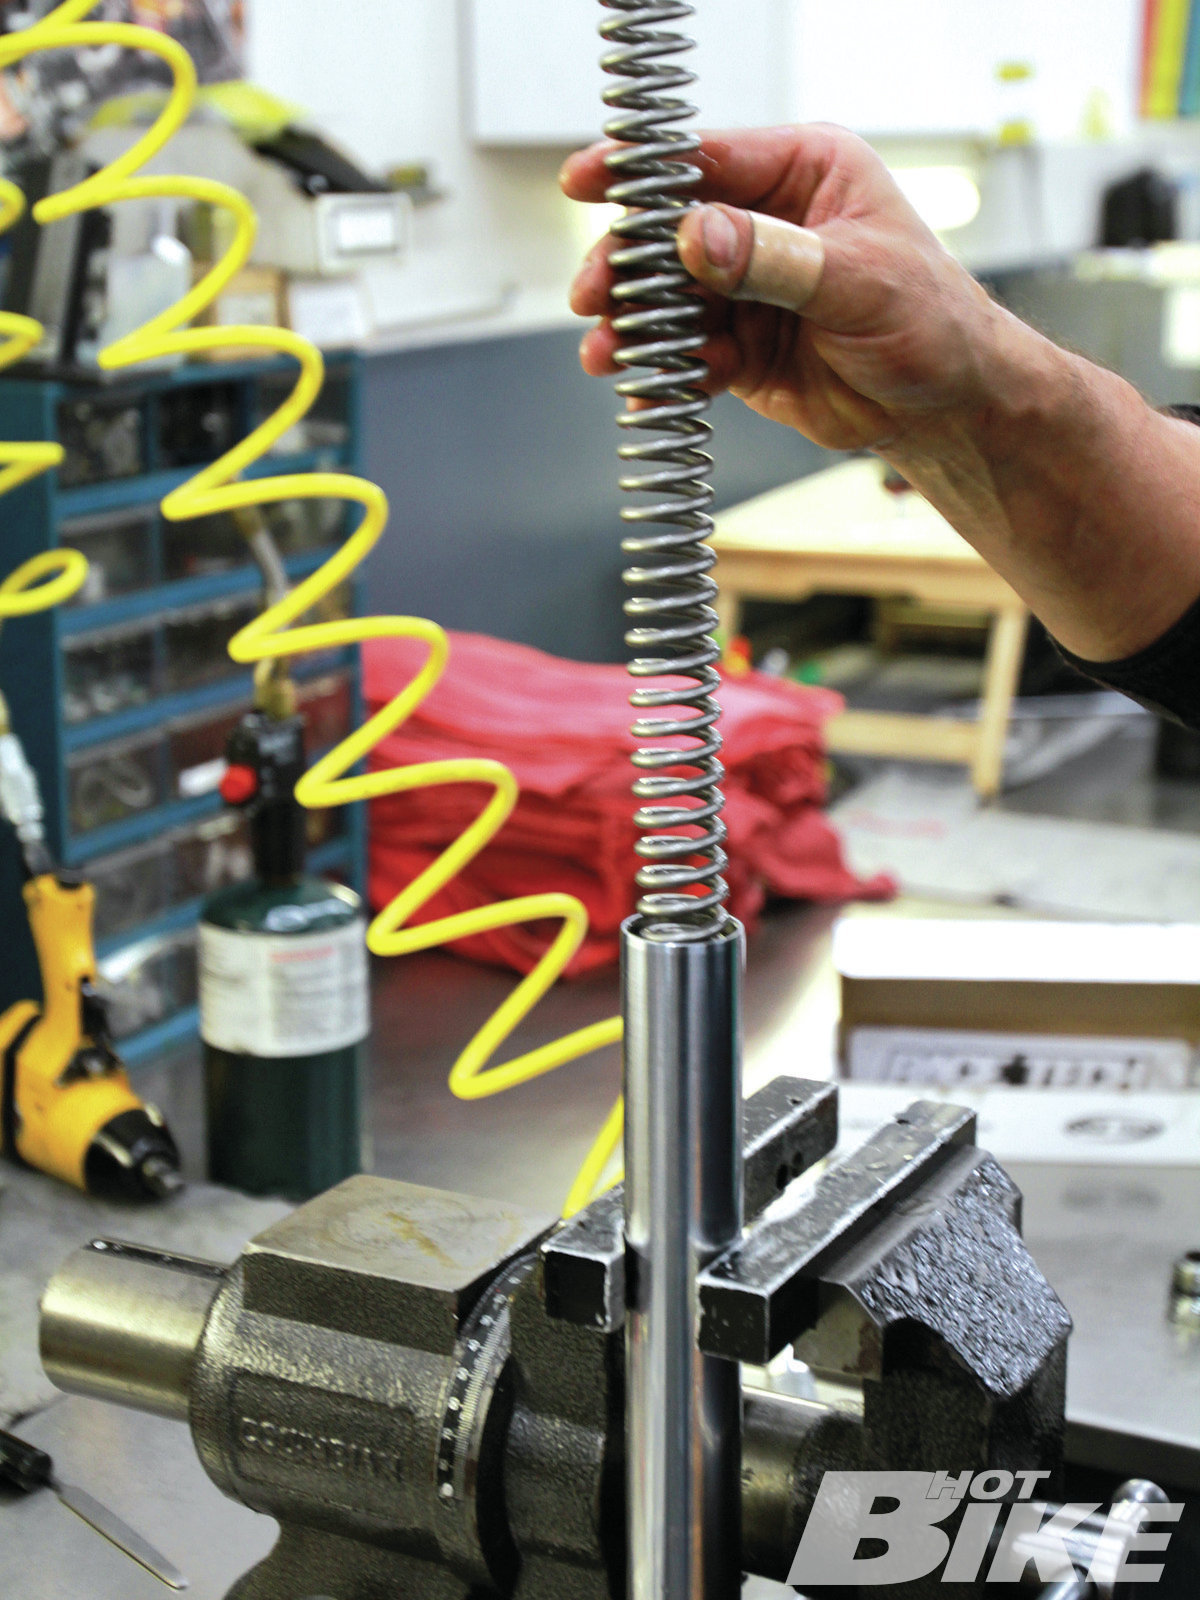
**12. ** Tony runs a tight ship and makes sure everything is in top-notch condition before it’s installed. Here, he turns the new springs on a wire wheel to make sure there are no high spots that could inhibit performance. They were then washed and ready to be installed.
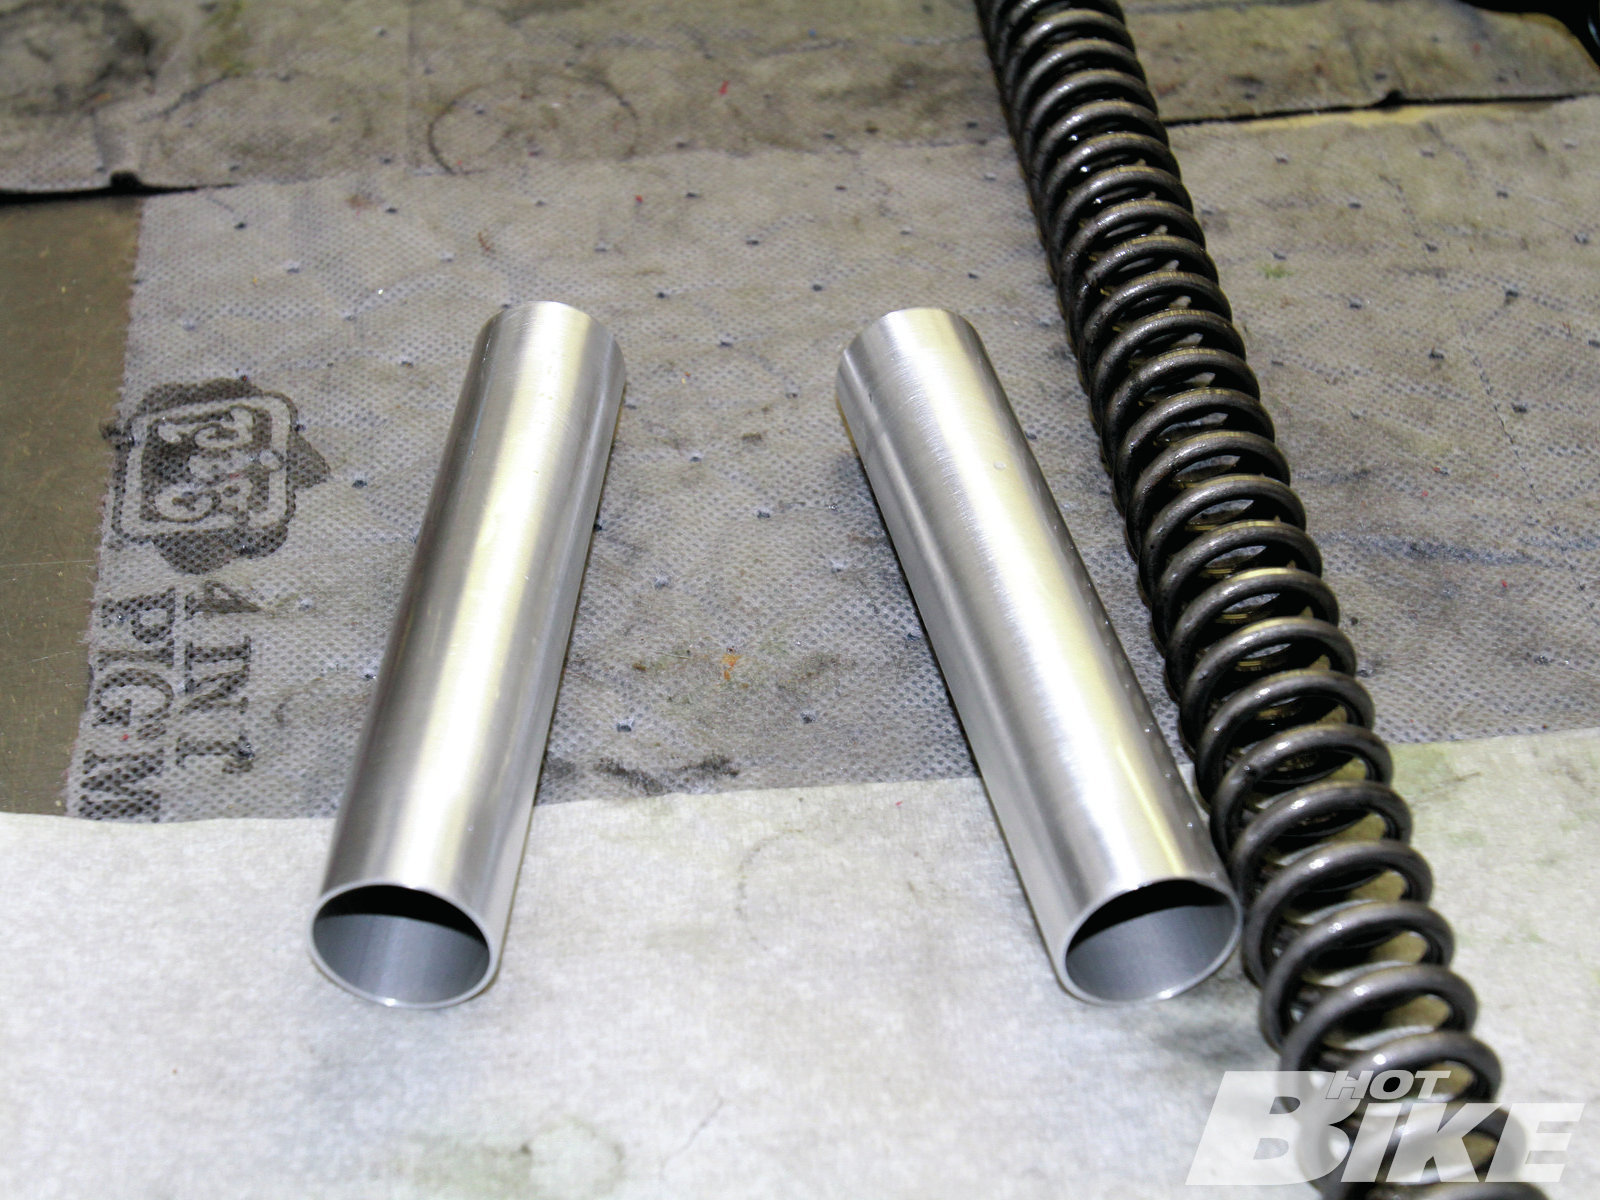
**13. **Next, Tony measured how long the spacers needed to be and cut them accordingly.
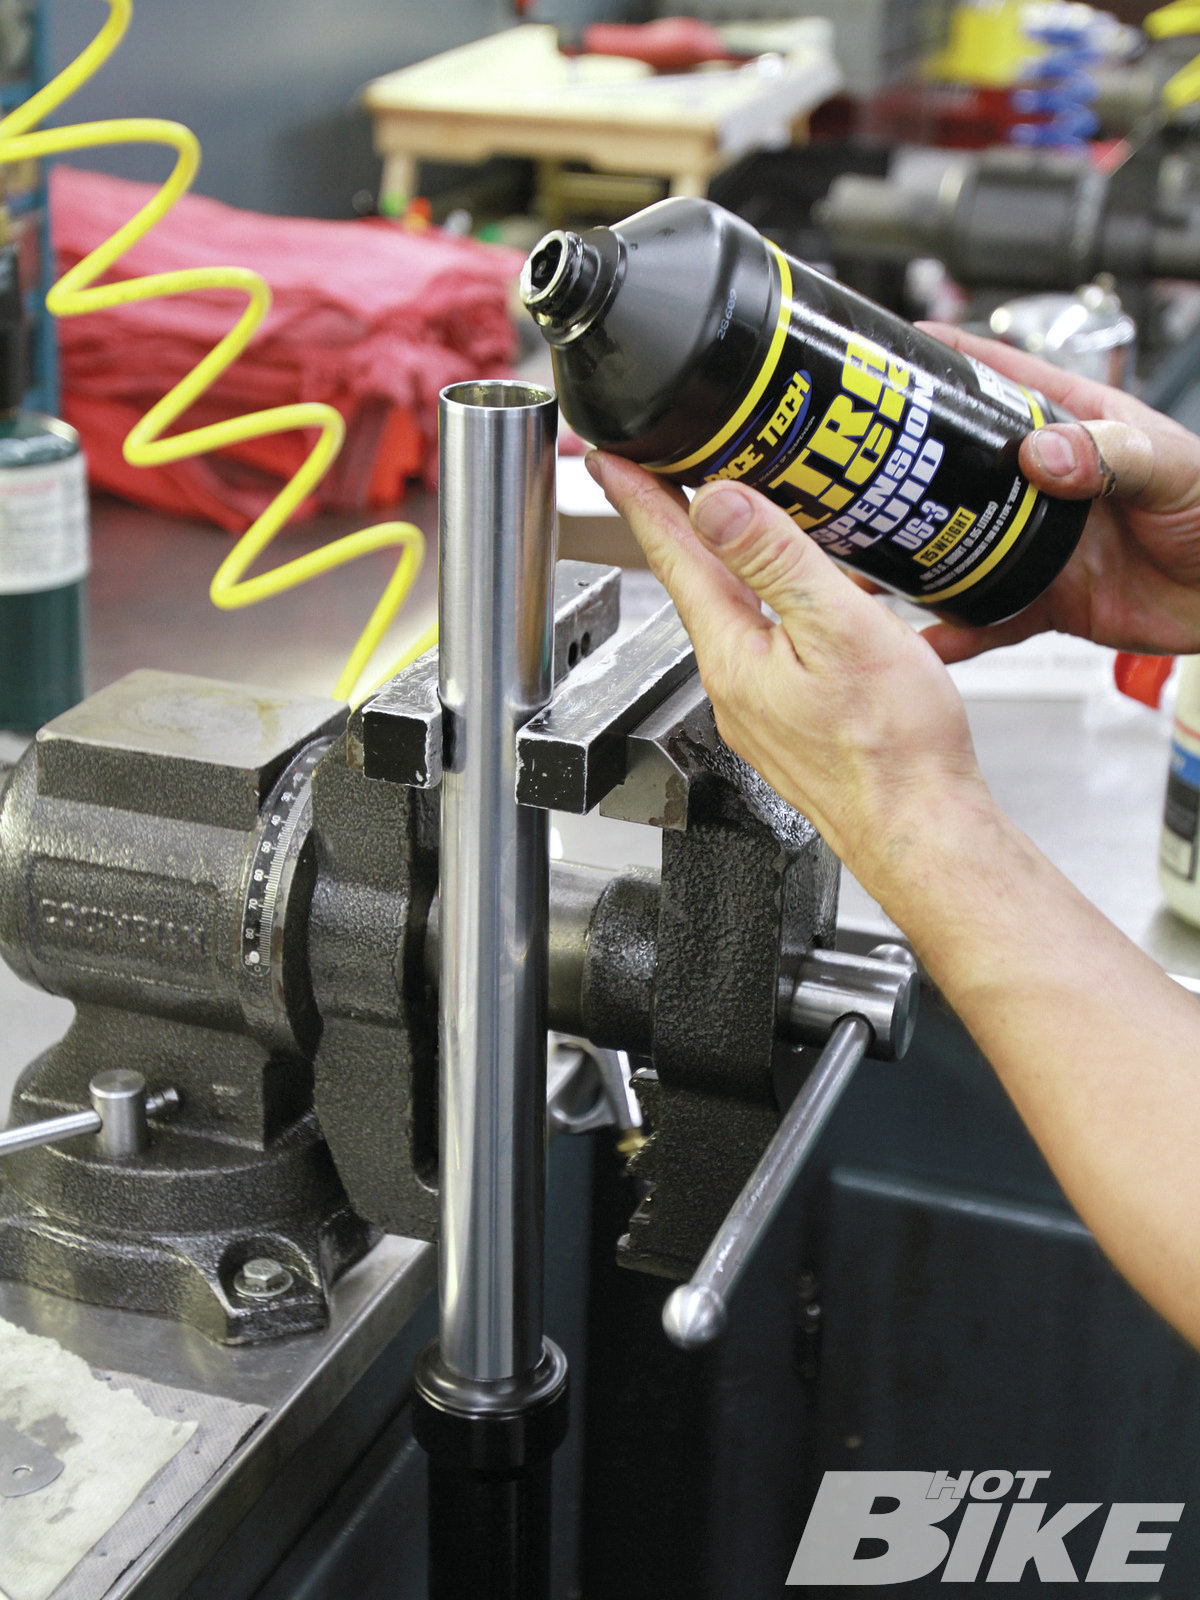
**14. **Tony did a thorough test fit in both fork tubes to make sure everything lined up and fit just right. Now it was time for final assembly. Tony added Race Tech’s Ultra Slick fork oil with the slider completely collapsed.
**15. ** Then the Emulators were installed and the excess fork oil was removed via a fluid evacuation tool.
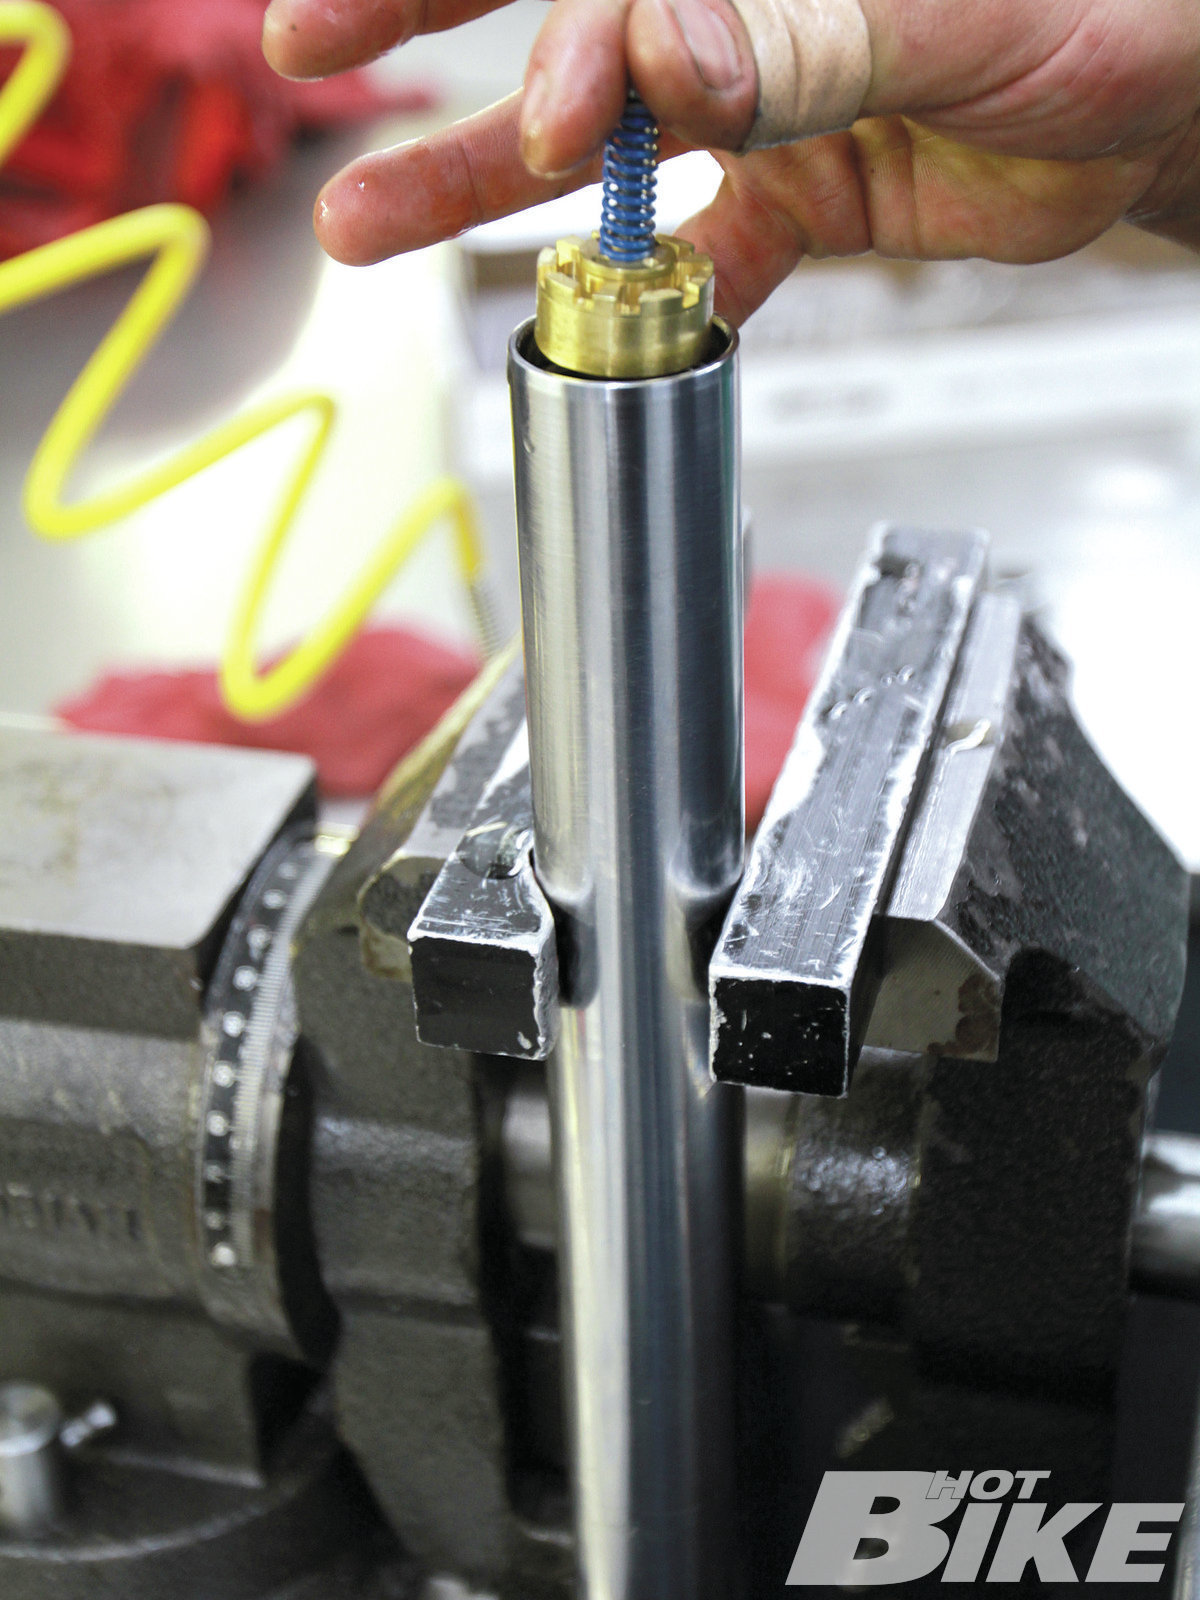
**16. **Tony popped the springs, spacers, and washers in the tubes and installation was almost complete.
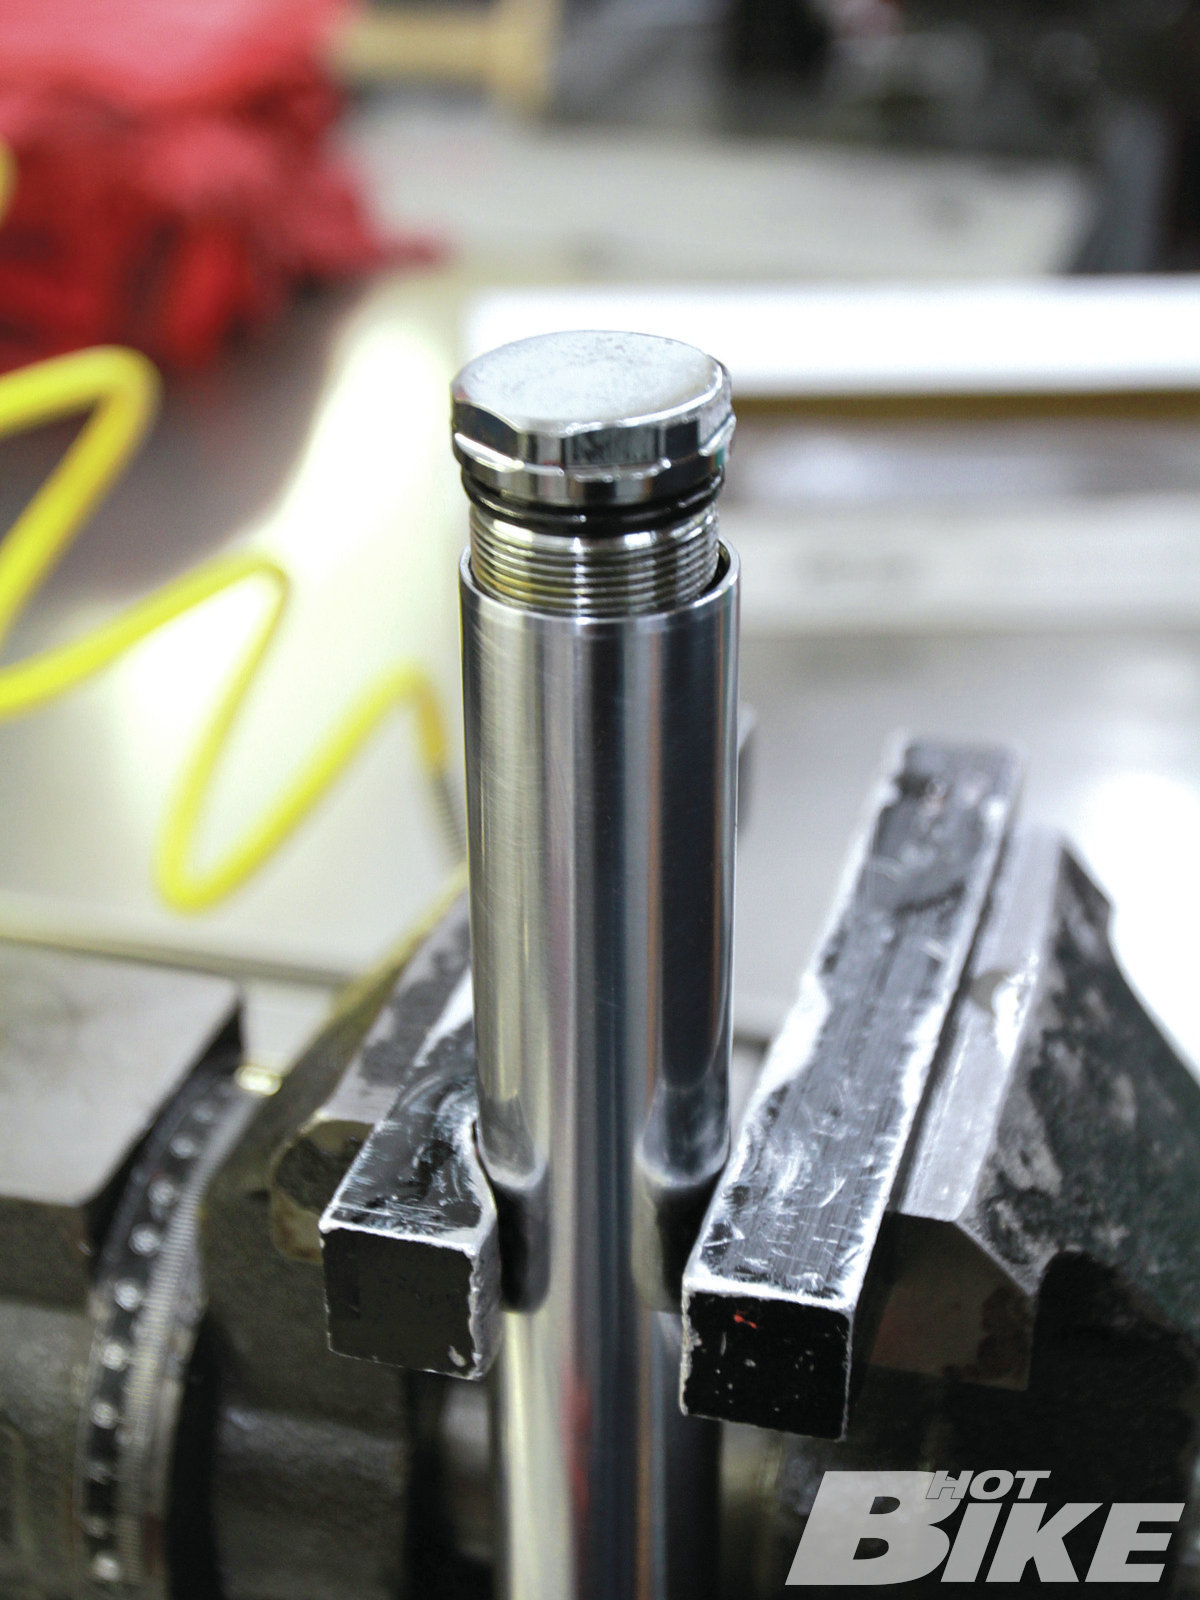
**17. **Just a quick turn of the fork tube caps and Tony checked the tubes by compressing them on the ground to make sure there was no drag or bind to make sure the Emulators were properly seated. After that, it was time to take the new Race Tech revamped forks home and get them back on the bike and ready for Wheel Works.

**18. **With the forks completed, and the triple trees back from being powdercoated satin black to match the fork lowers, I reinstalled the entire frontend in order to wheel the bike on over to Wheel Works for the 19-inch front-to-rear wheel conversion, and the belt-to-chain conversion.
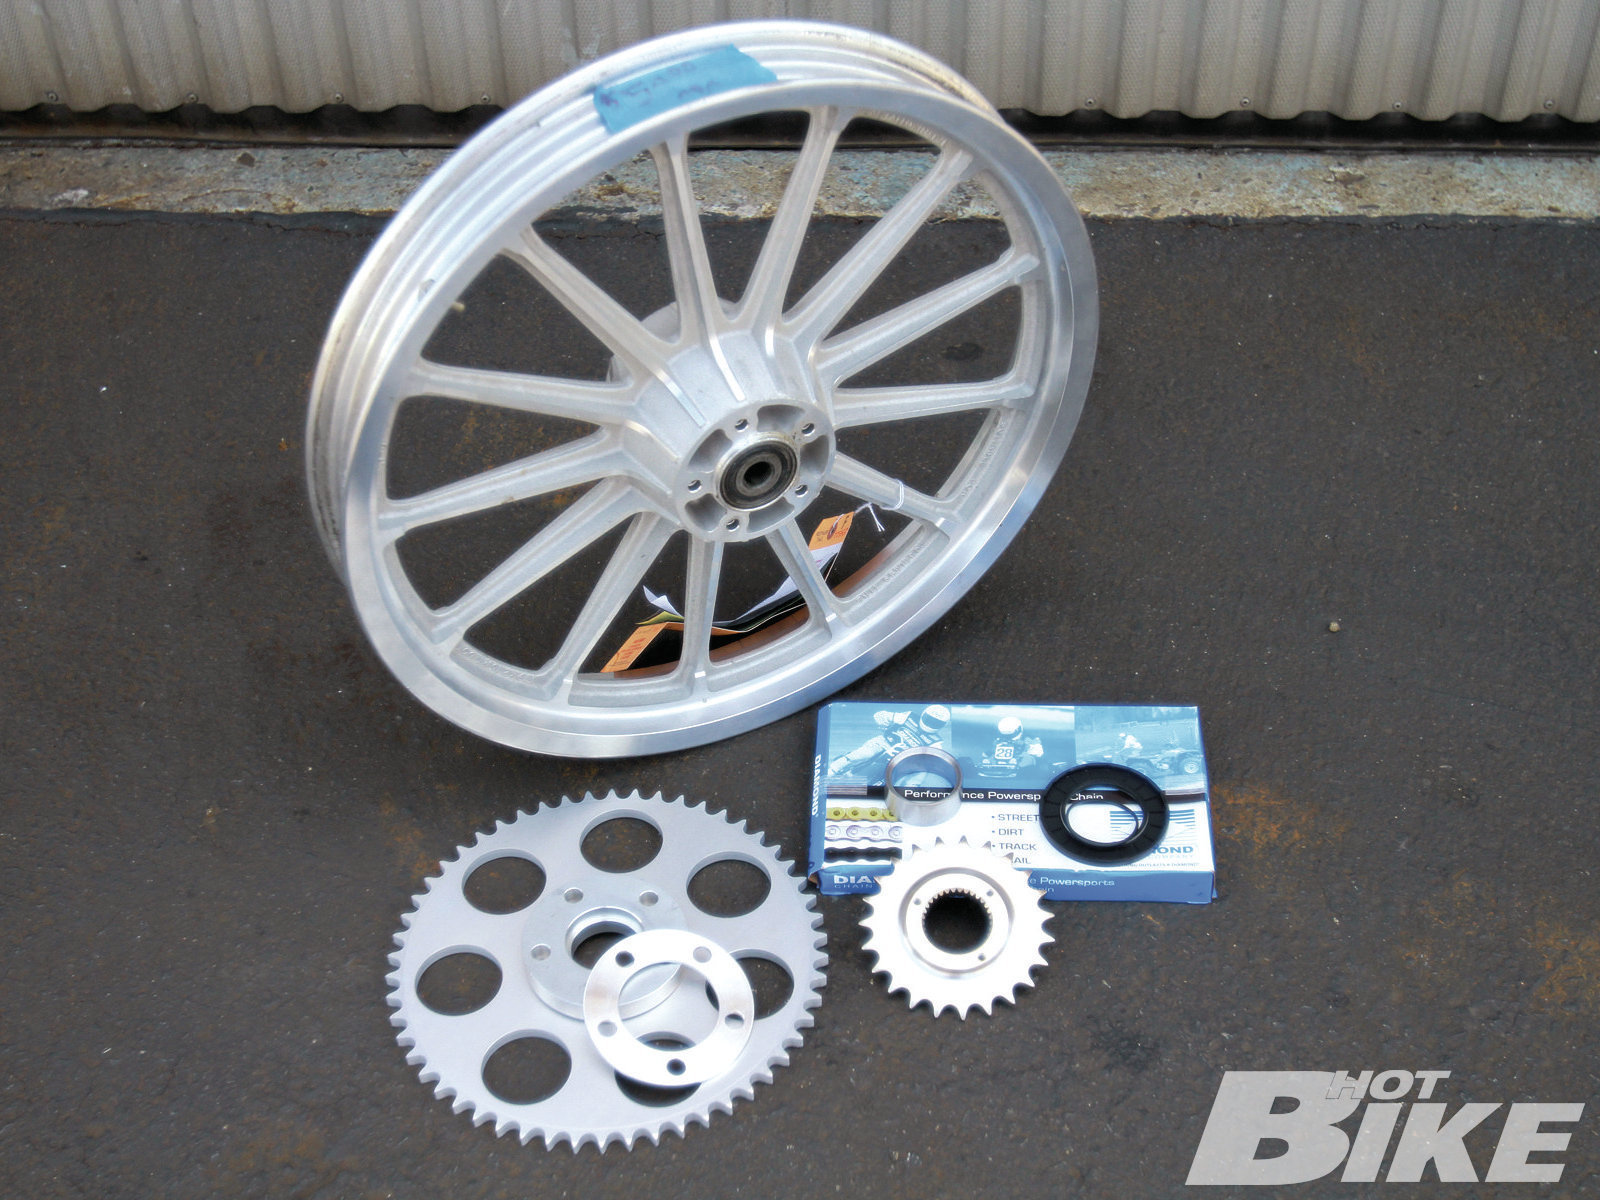
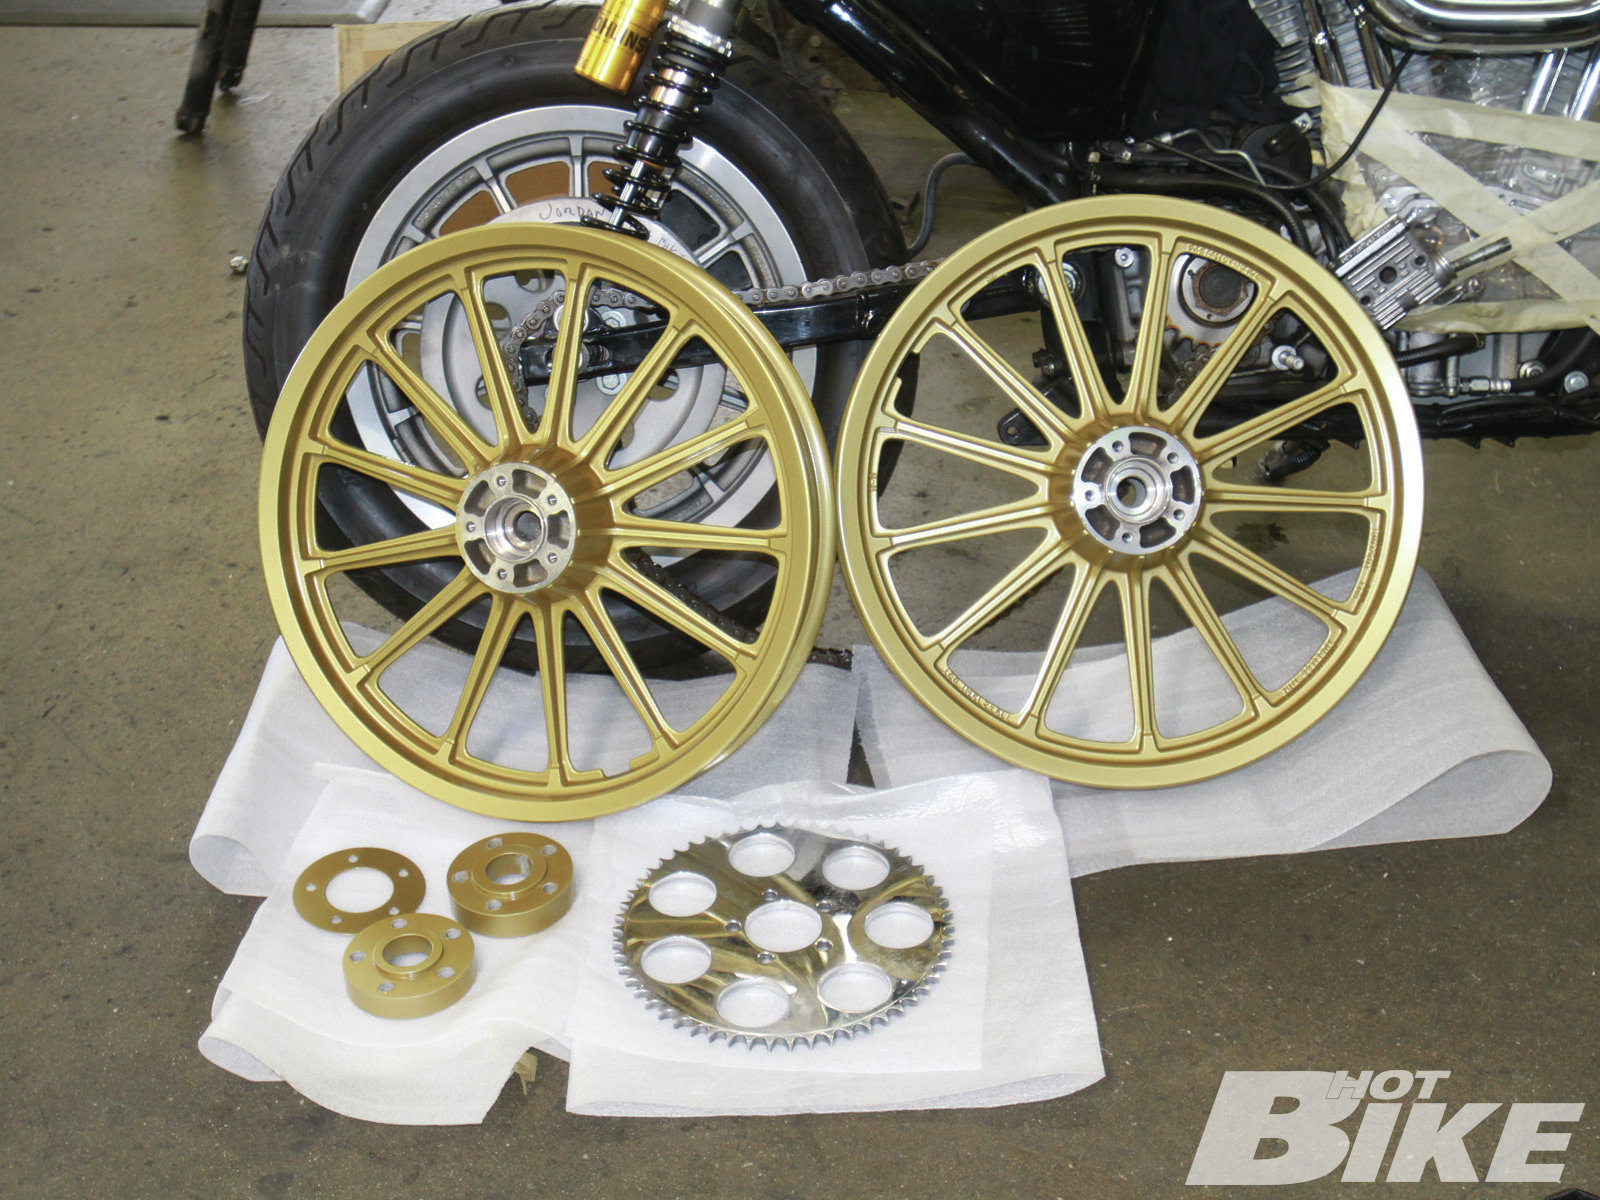
**19. **Here’s the front 13-spoke wheel I scored from Craigslist for $50. Also pictured is the Baker wheel and trans sprockets, the chain, and spacer for the trans sprocket. Baker also sent wheel spacer blocks to mimic the stock rear wheel width; however, they were too small so Wheel Works had some new ones machined that fit like a glove. The spacer blocks were drilled and each side of the wheel hubs had to be re-drilled and tapped to fit the new spacer blocks and new hardware.
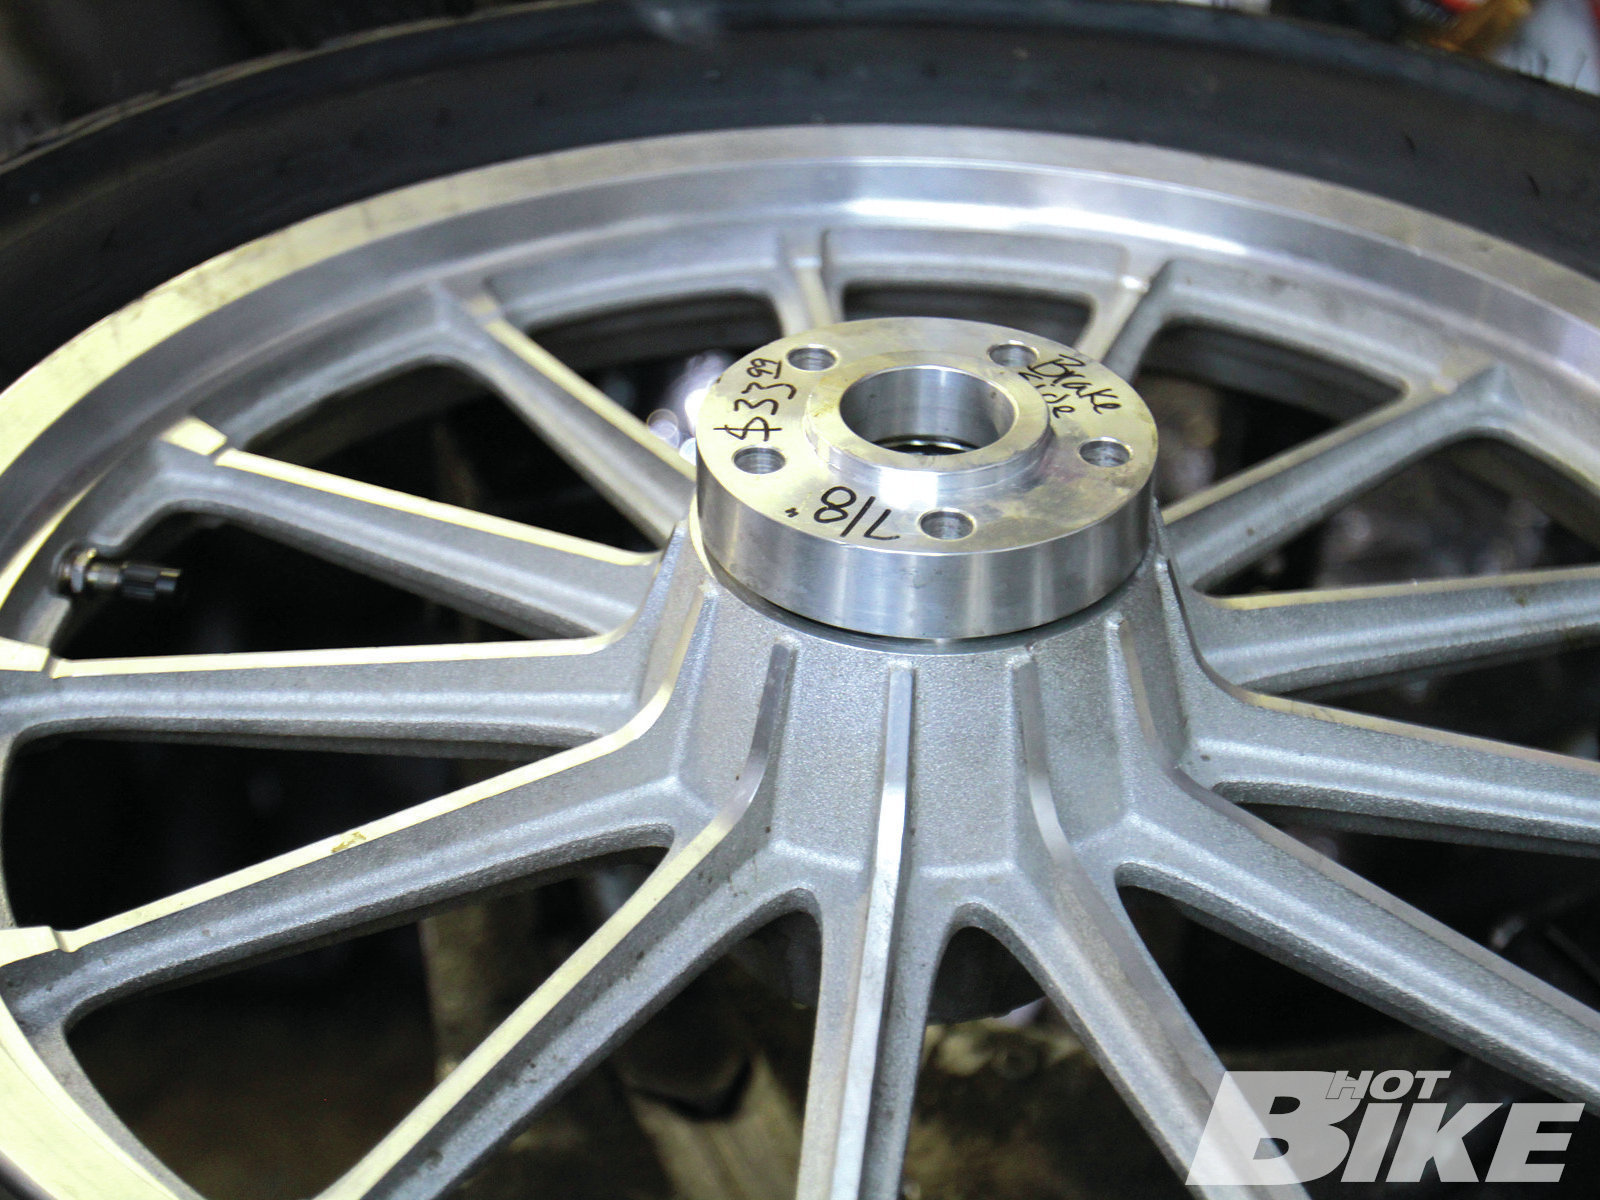
**20. **The sprocket side spacer was attached and the wheel sprocket was mocked up to check for fitment of the chain drive with the new wheel setup.
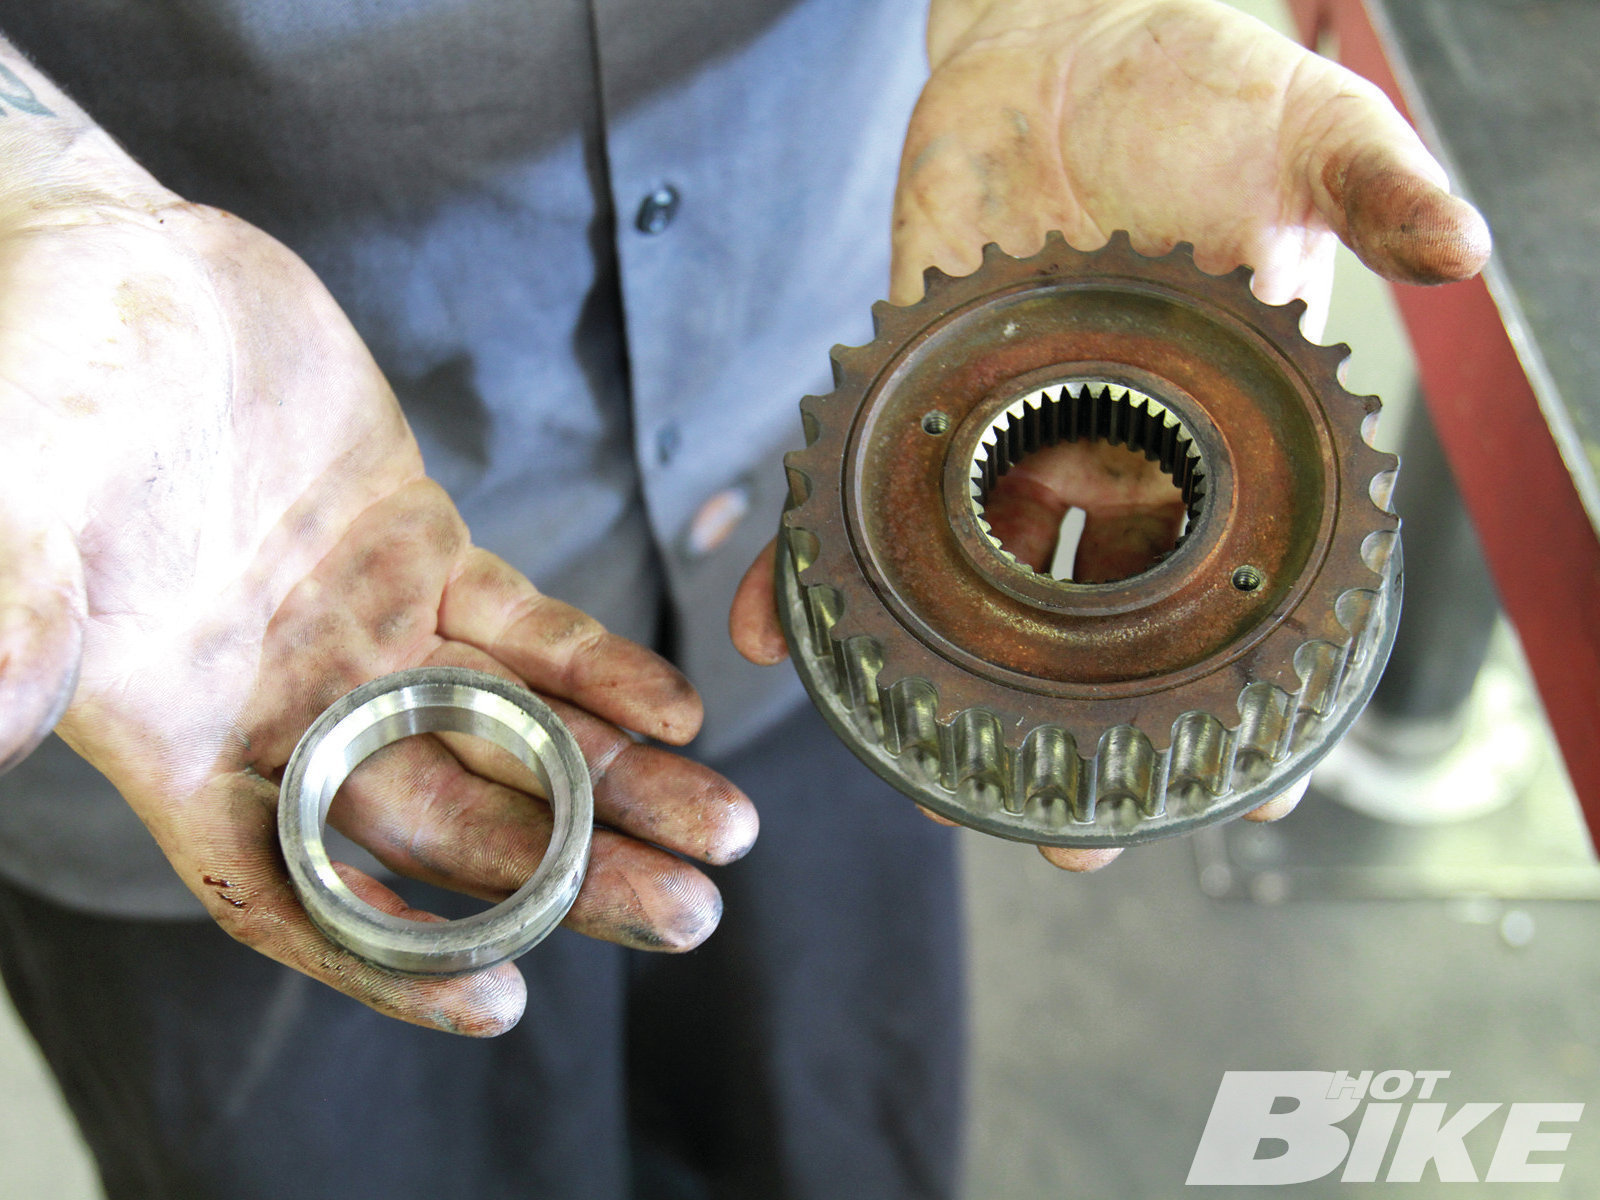
**21. **Off came the stock trans pulley and spacer…
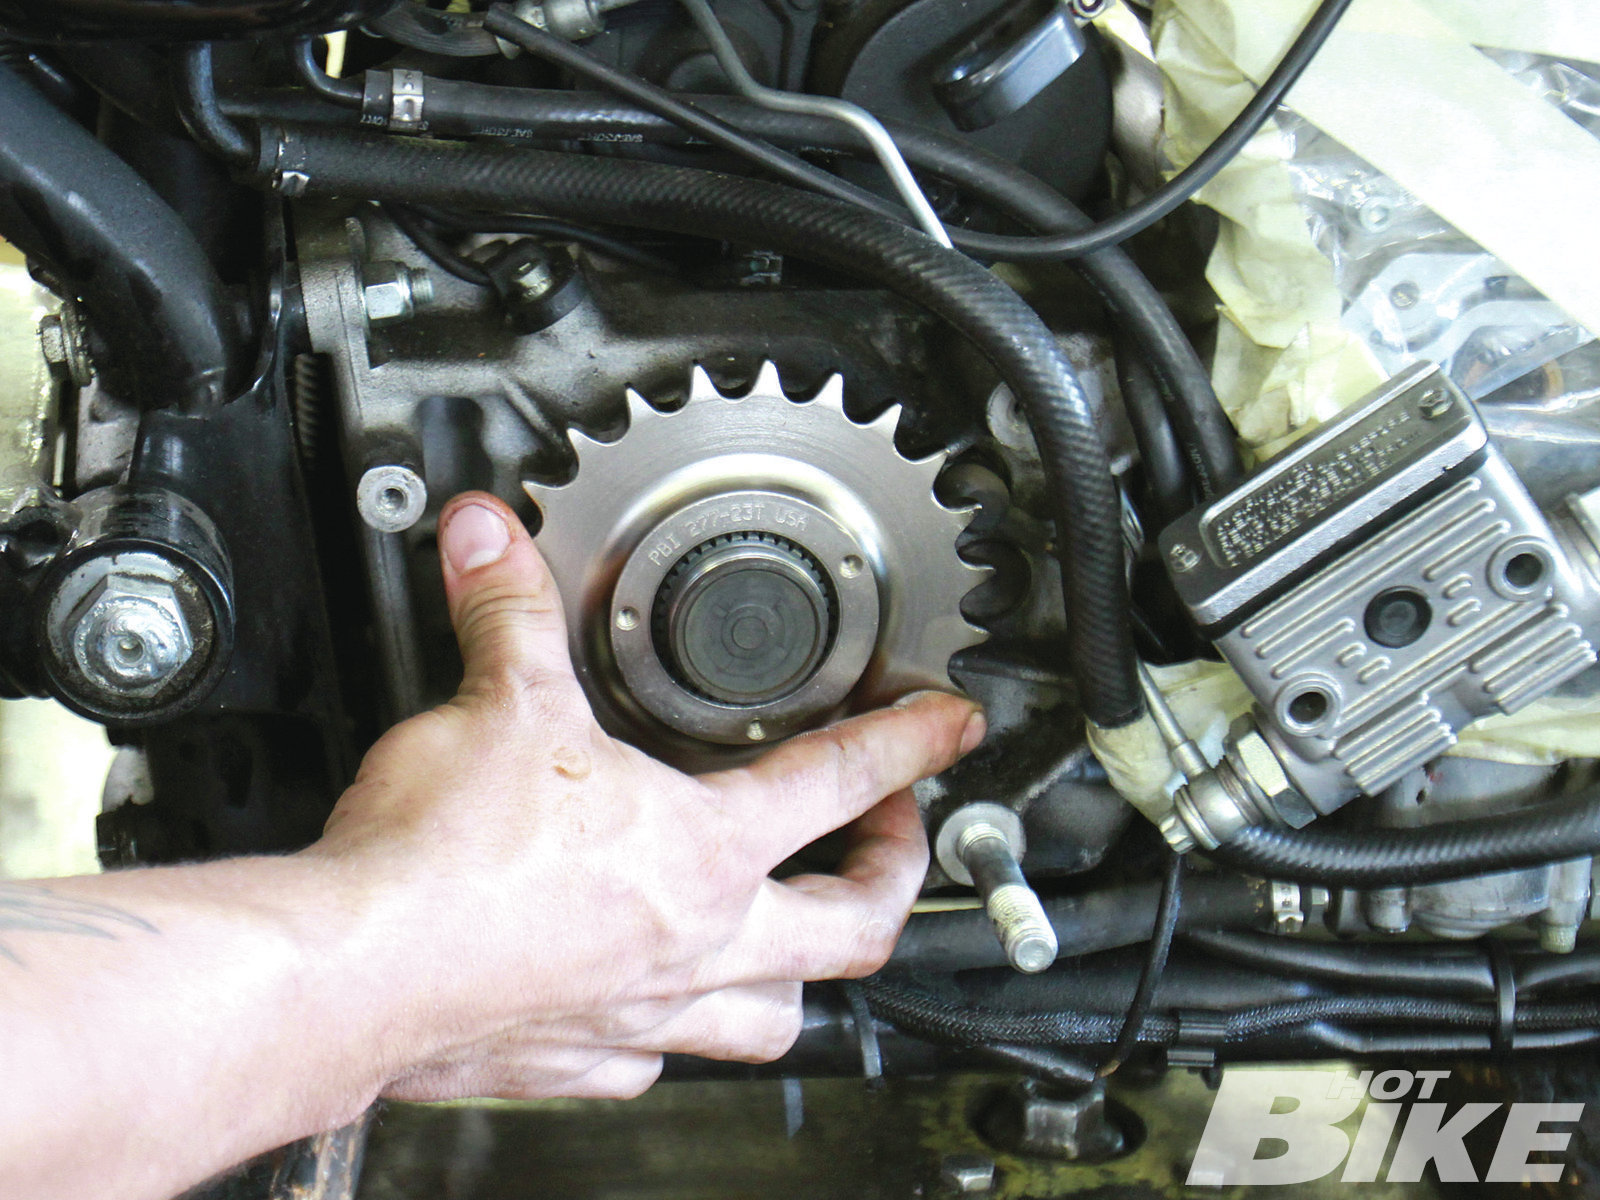
**22. ** …On went the new trans sprocket.
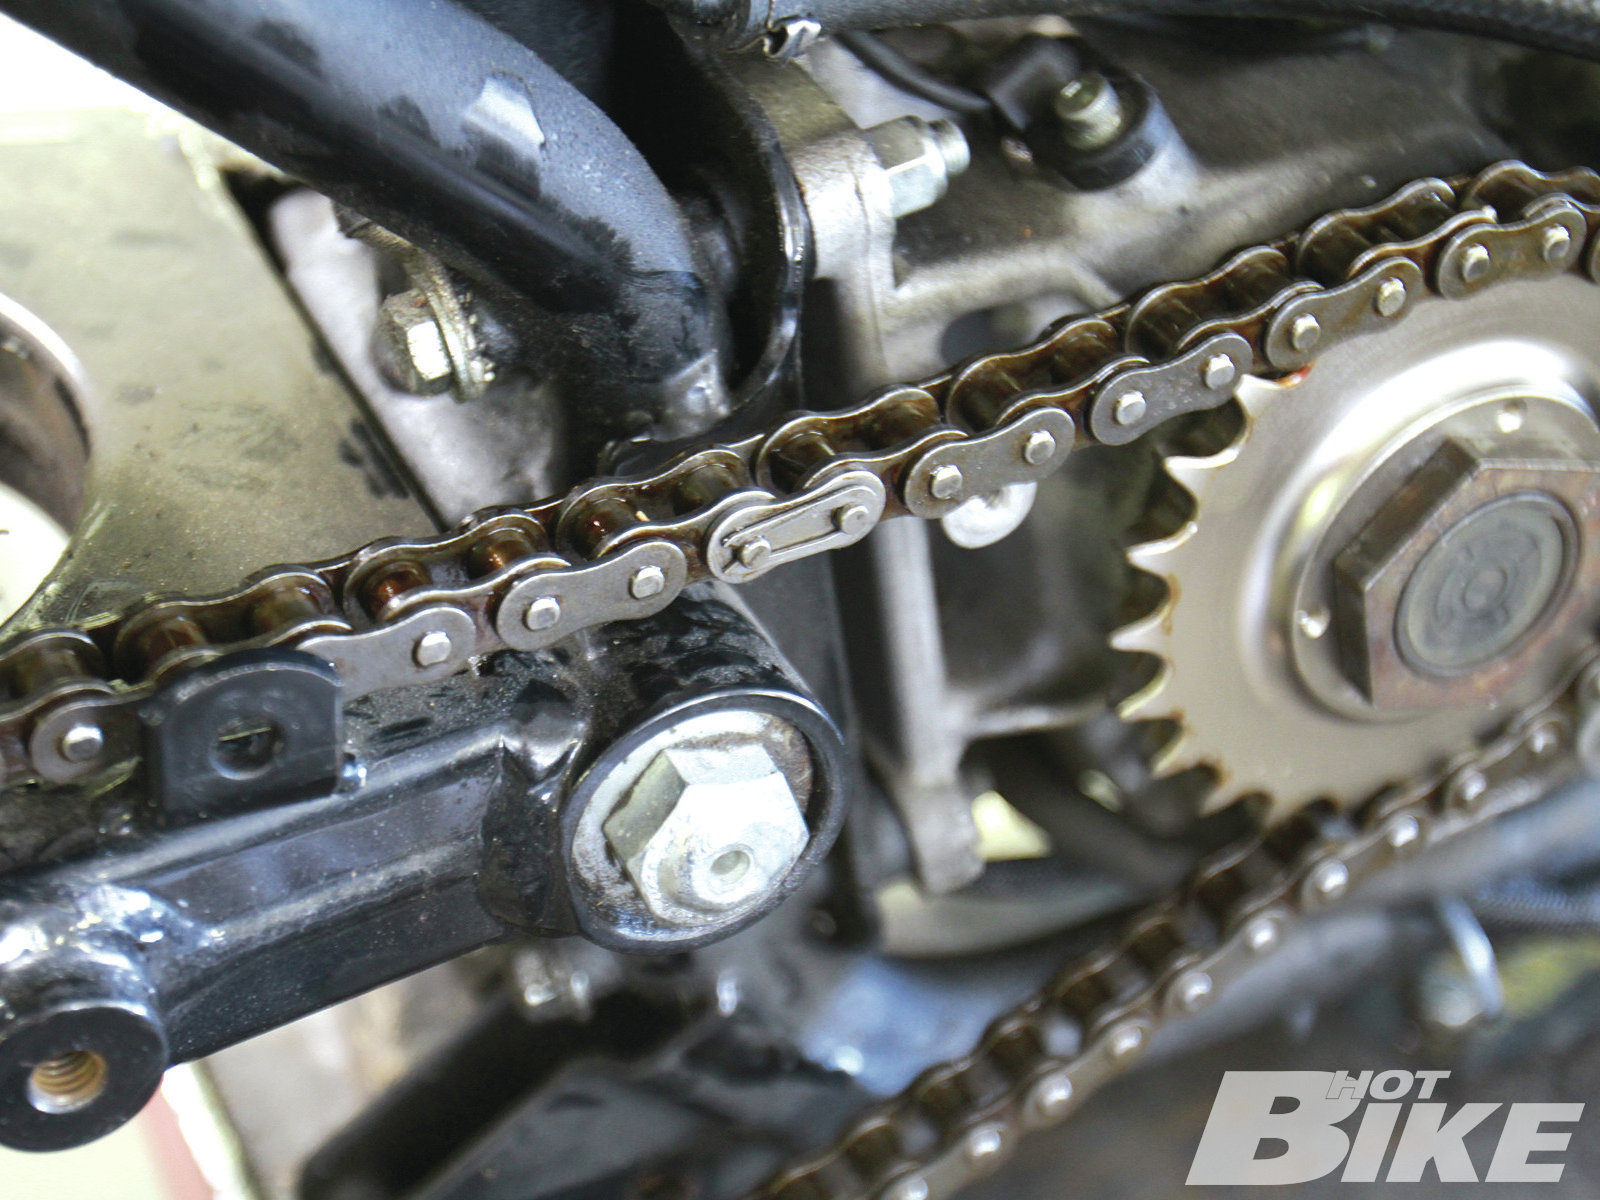
**23. ** The chain was looped around the trans sprocket and was ready for the wheel to be installed so it could fit around the wheel sprocket.
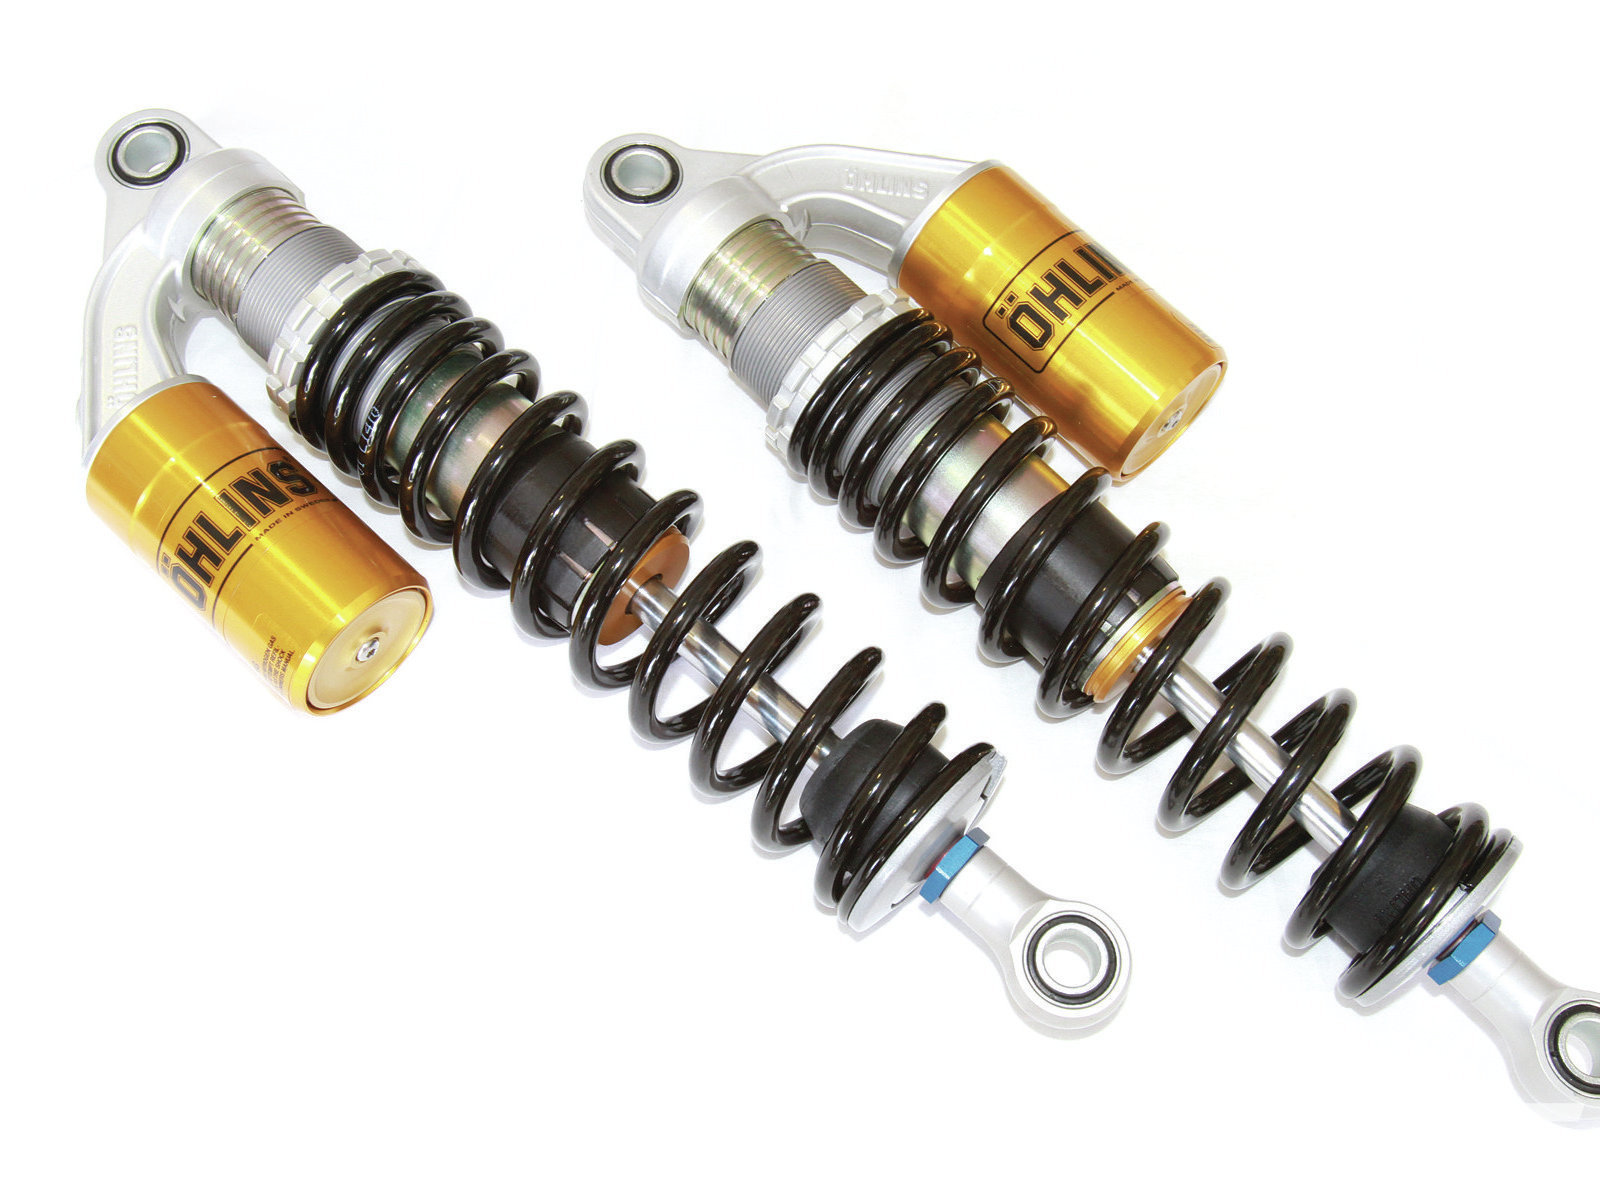
**24. ** But first, the Öhlins S36PL shocks were to be installed. As mentioned earlier, S36PL is a high-tech, high-quality racing style shock that allows users to adjust preload, compression, and rebound.
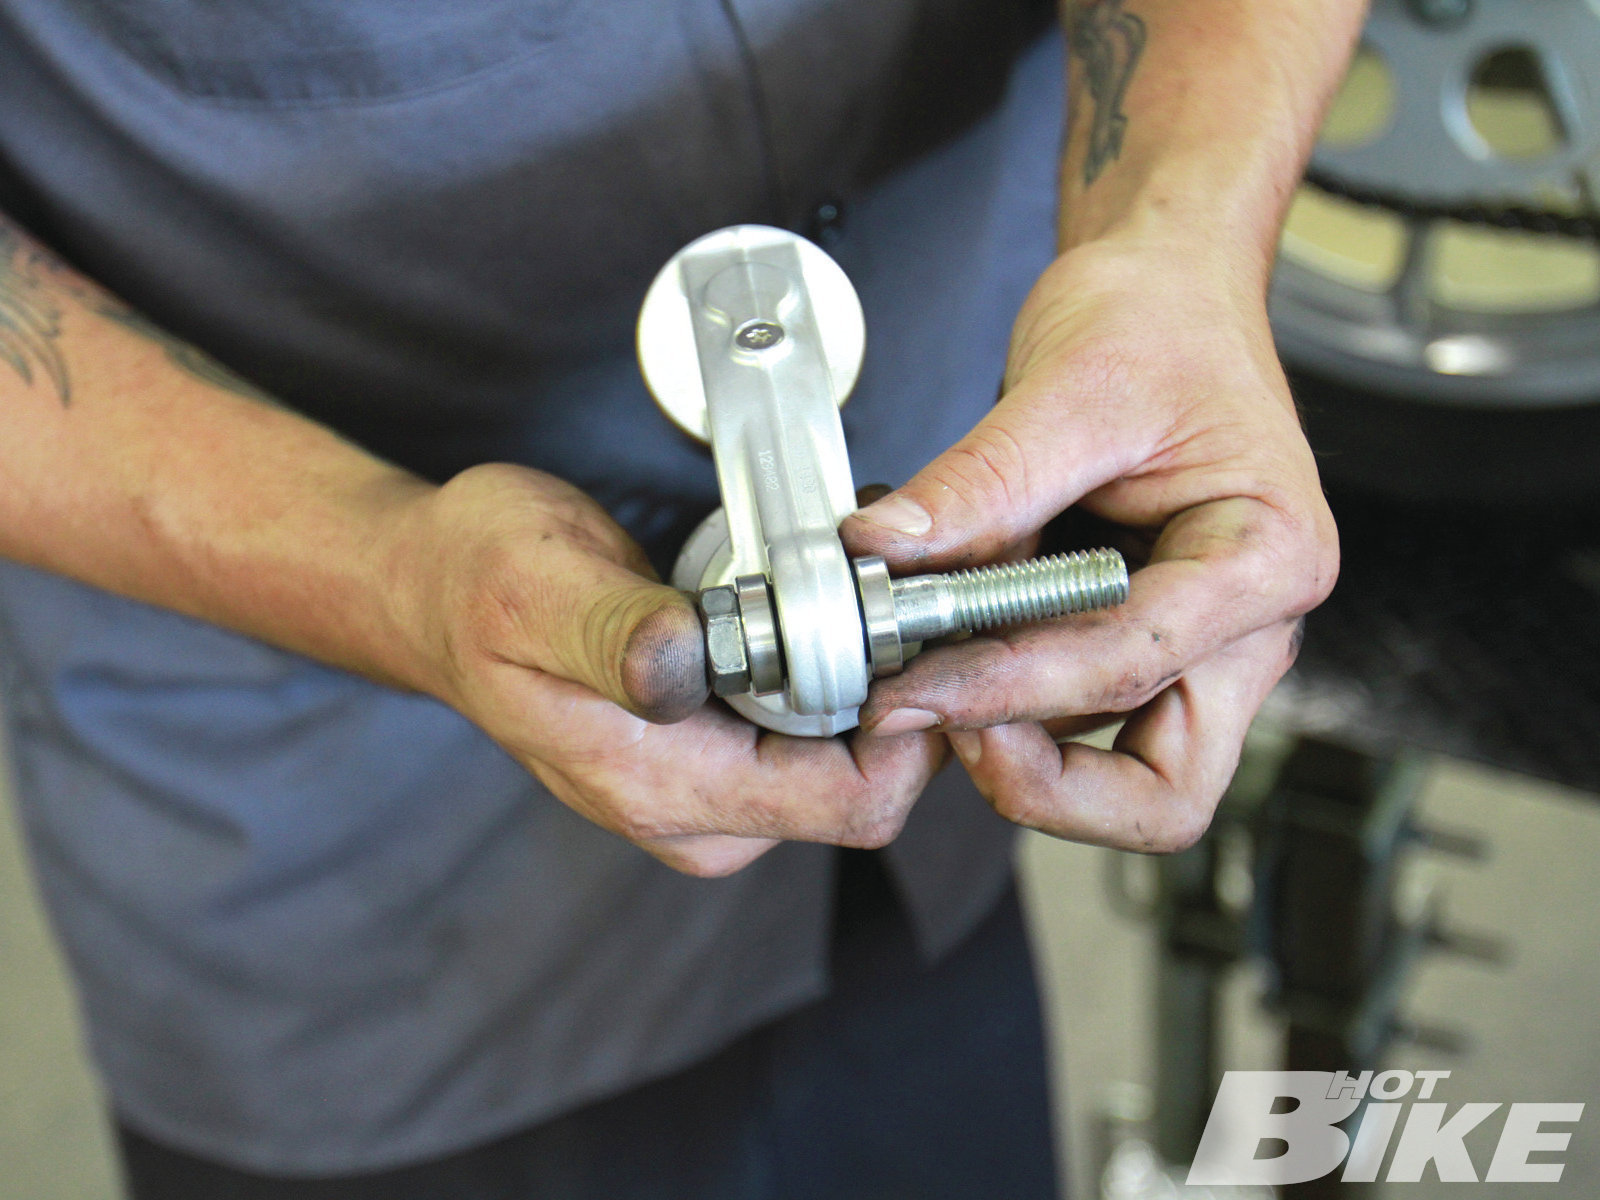
**25. **The shocks come with sleeves that mount inside each eyelet on the top and bottom of each shock, and washers that mount on the outsides of each shock. The amount of washers needed vary by application, but in this case two washers per bolt were used for each shock (eight total). The sleeve was placed inside the eyelet, then a washer, the bolt, and the last washer.
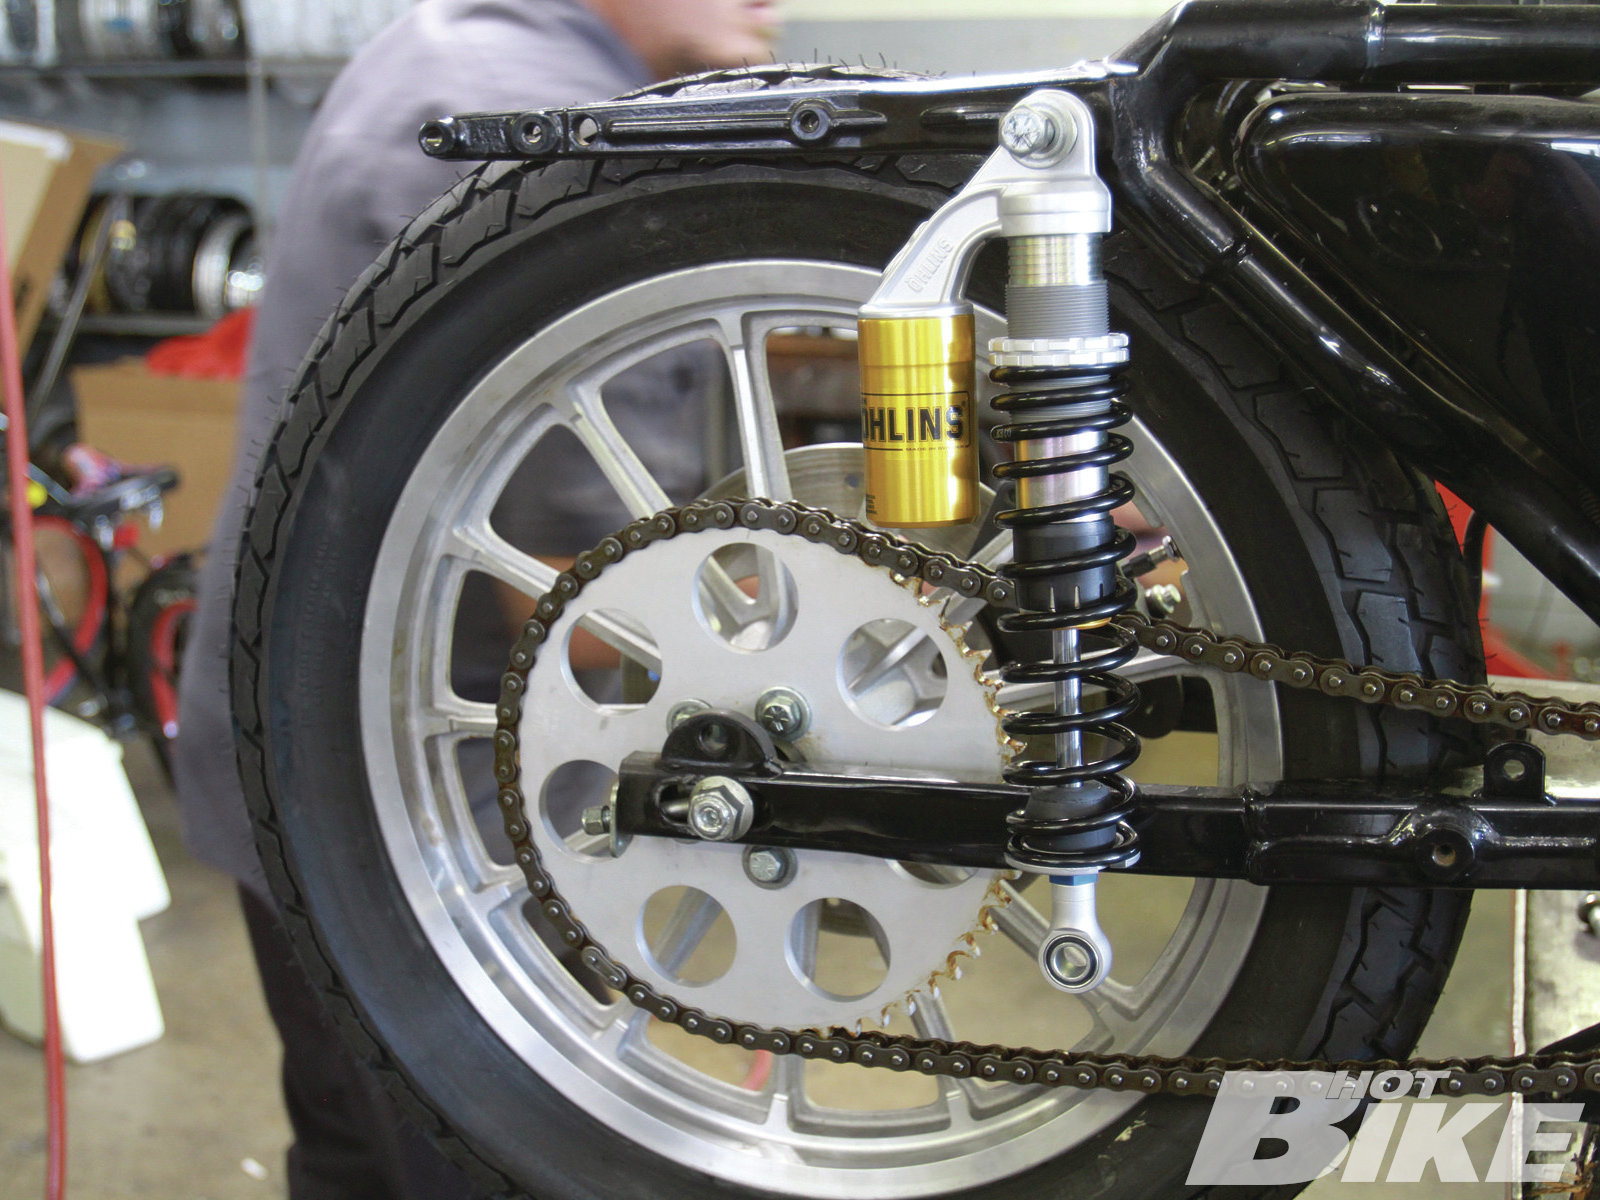
**26. **The wheel and sprocket were installed and the chain was attached to the sprocket. Then the shocks were attached one at a time starting with the right side. Once the top shock bolt was tightened down…
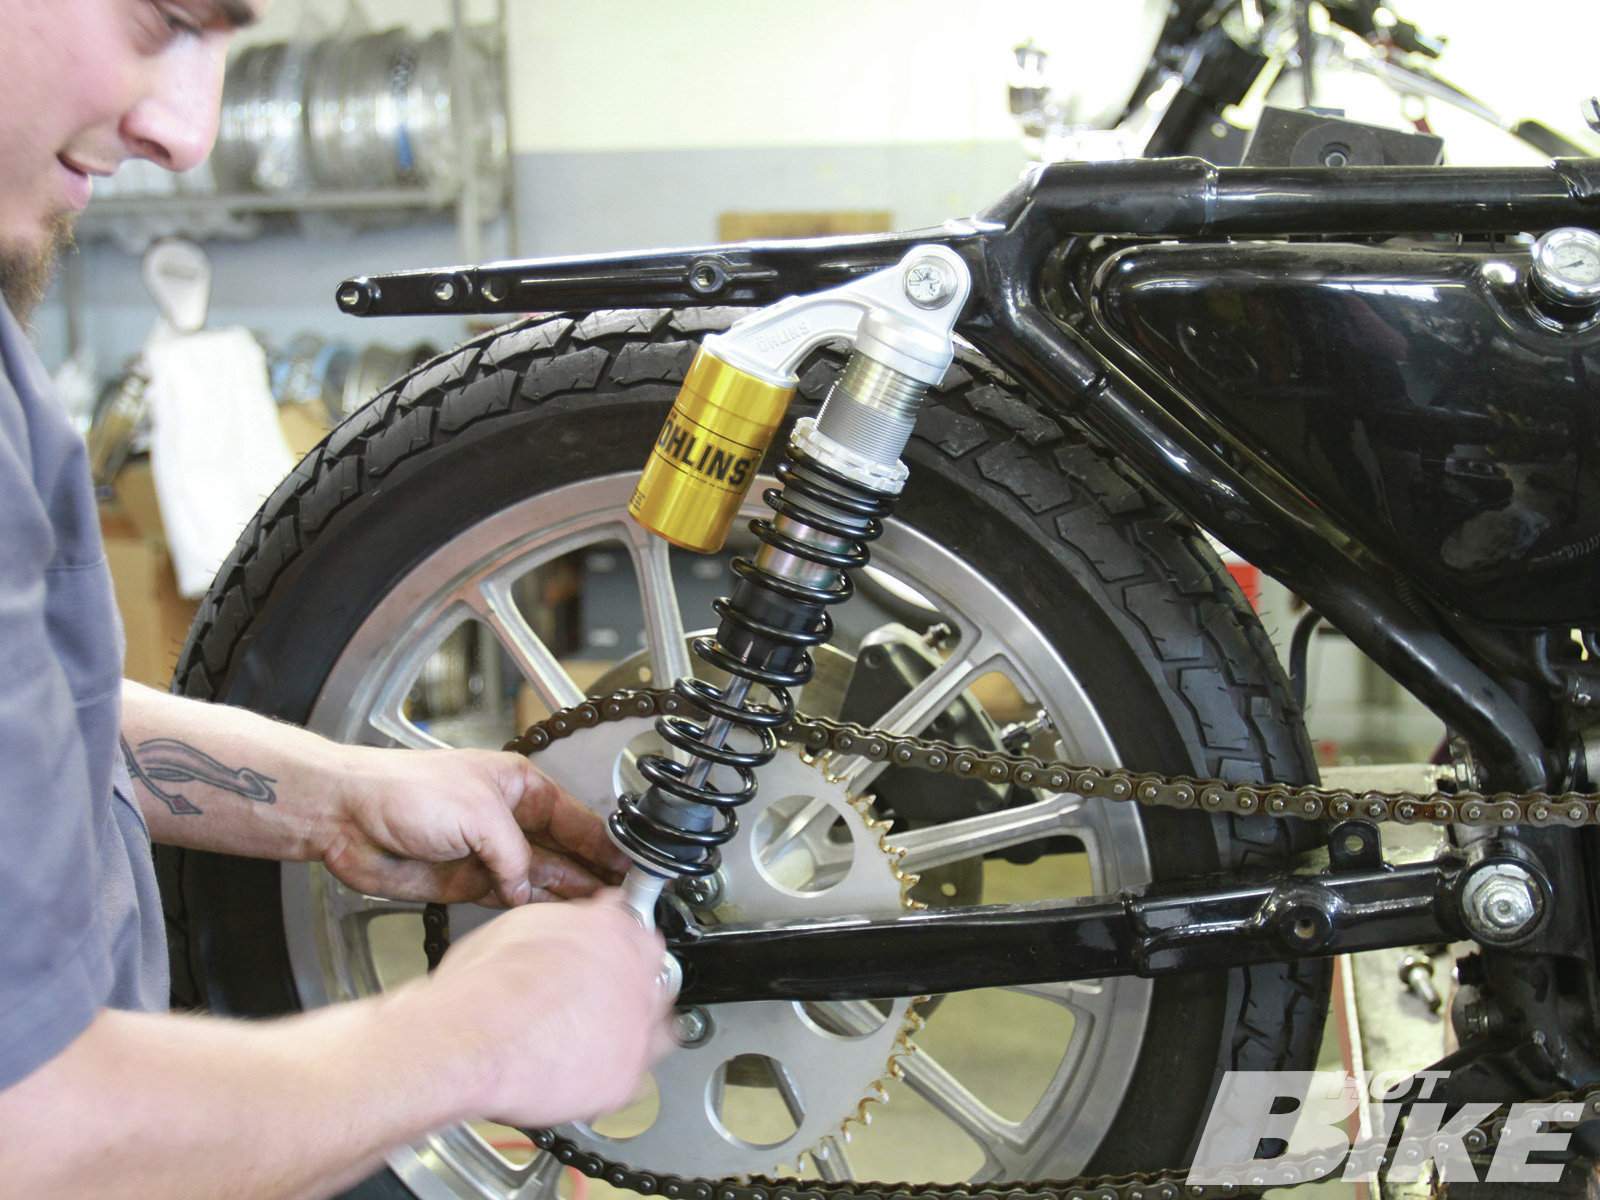
**27. ** …The bottom bolt with washers and sleeve were then tightened down. The left side shock installation was repeated and the shock, wheel, chain drive mock-up was complete.
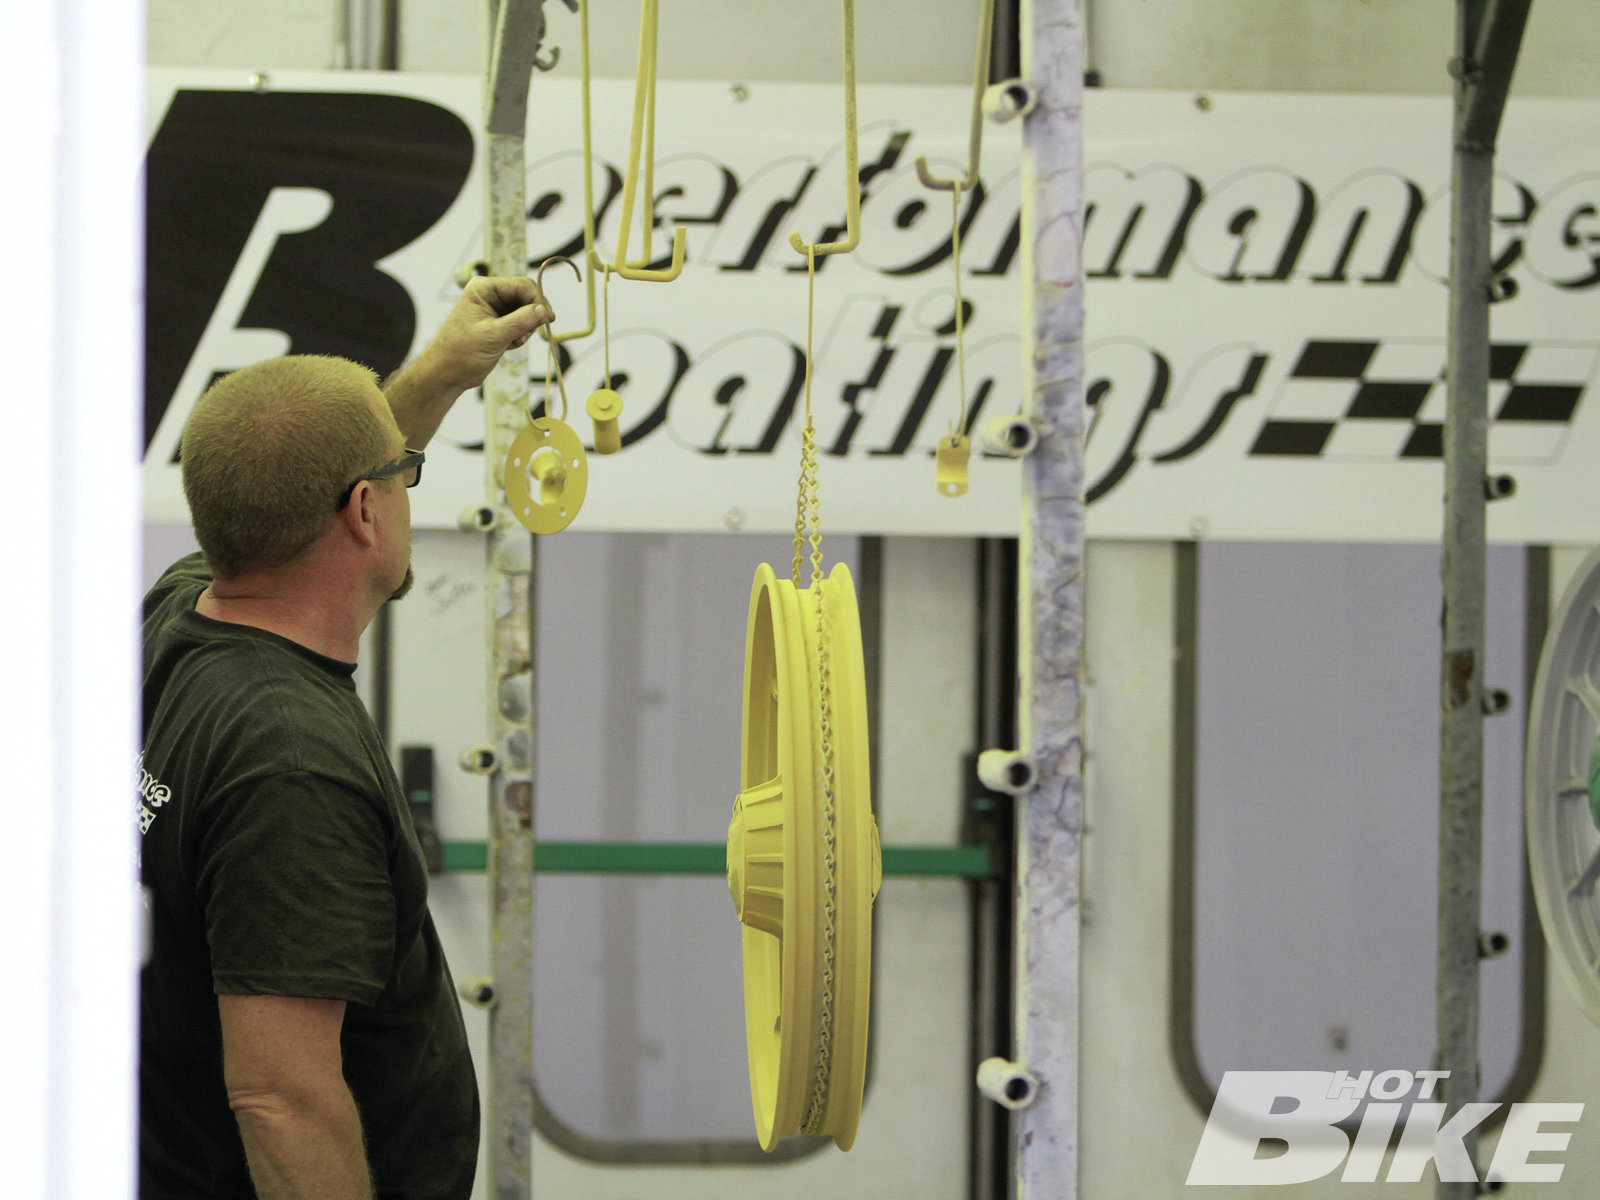
**28. ** Now, it was time for some fresh gold powdercoat for the wheels. I headed over to HB Performance Coatings in Anaheim, California to have the wheels powdercoated gold. For an in-depth video of the powdercoating process, check out hotbikeweb.com.
**29. ** With the wheels powdercoated, and the sprocket polished to a mirror shine, it was time for final installation of all the parts at Wheel Works.

**30. ** Mat started by installing the Lowbrow Customs Fork Gaiters to the frontend. We saved this step for final assembly since the Gaiters are tightened down with zip-ties.
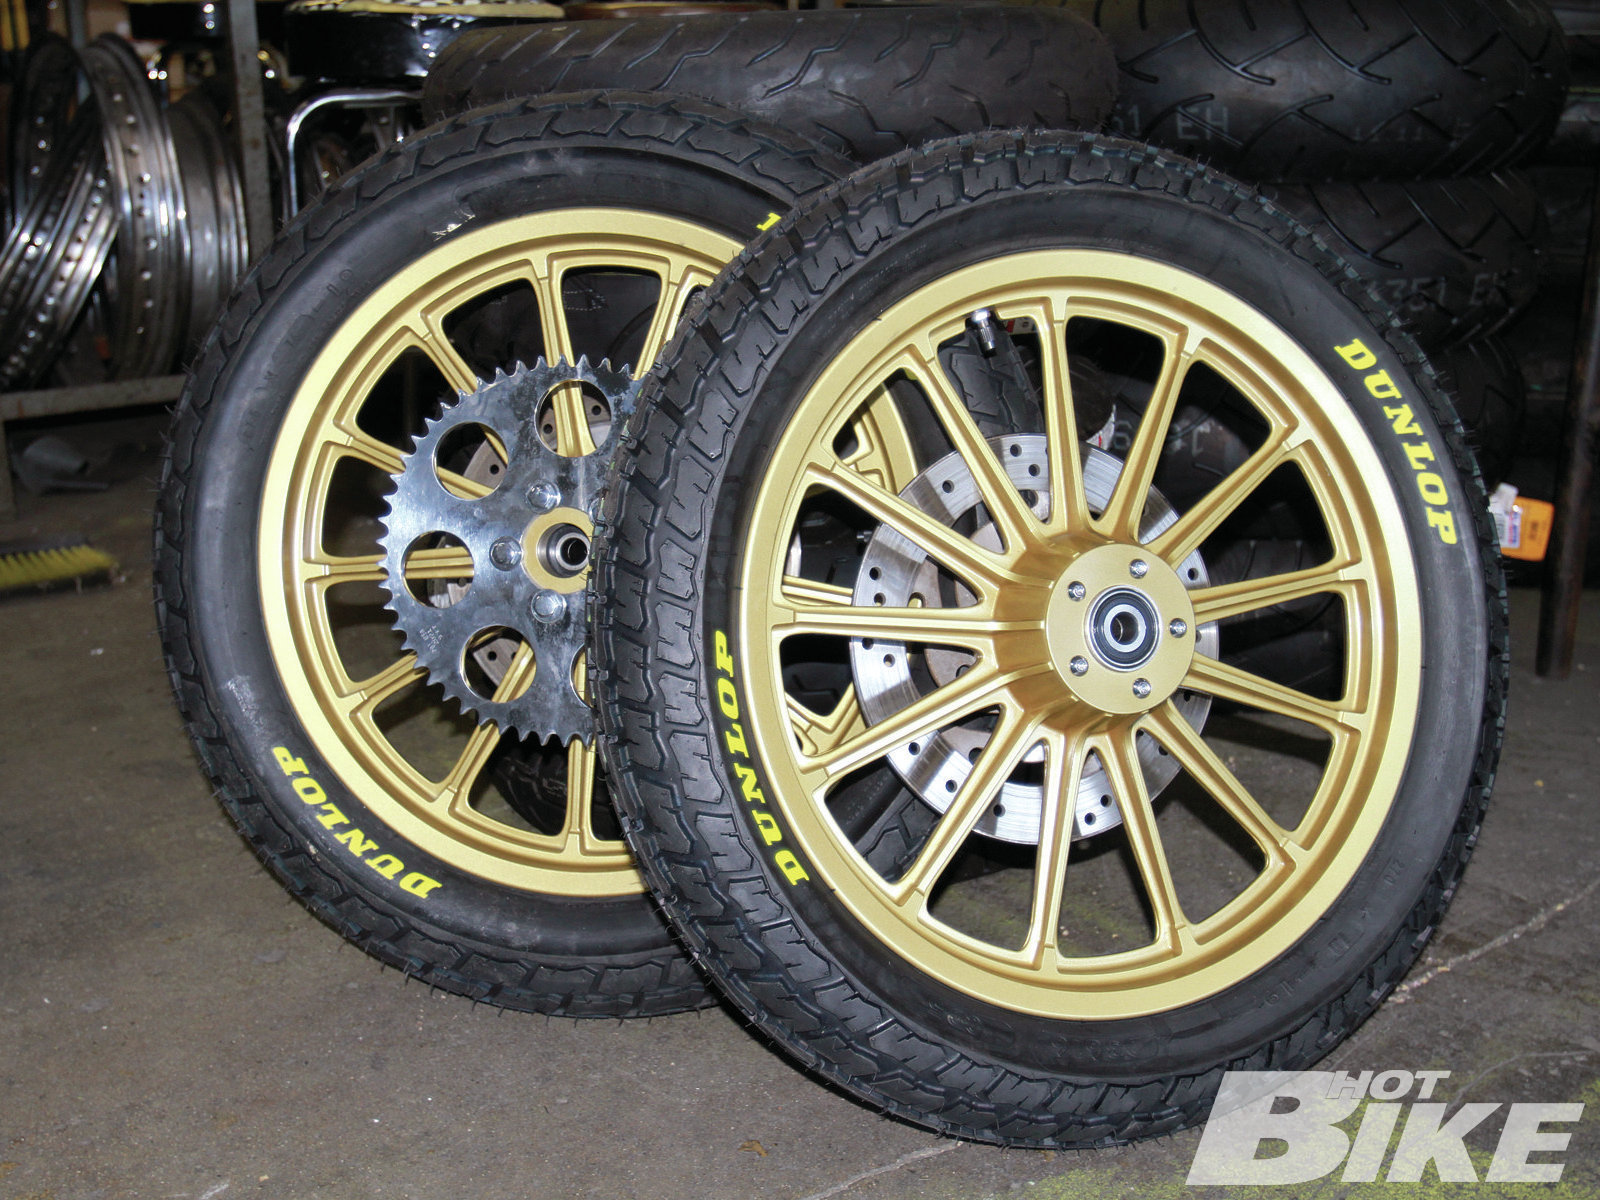
**31. ** Then he mounted the Dunlop CD5 dirt track tires to the freshly coated wheels, and applied the gold Dunlop decals. Next up, the spacer blocks were attached to both sides of the new 19-inch rear wheel, and then the sprocket and rotor was reattached to the rear, and the rotor reattached to the front. Lastly, the wheels were balanced and ready to roll.
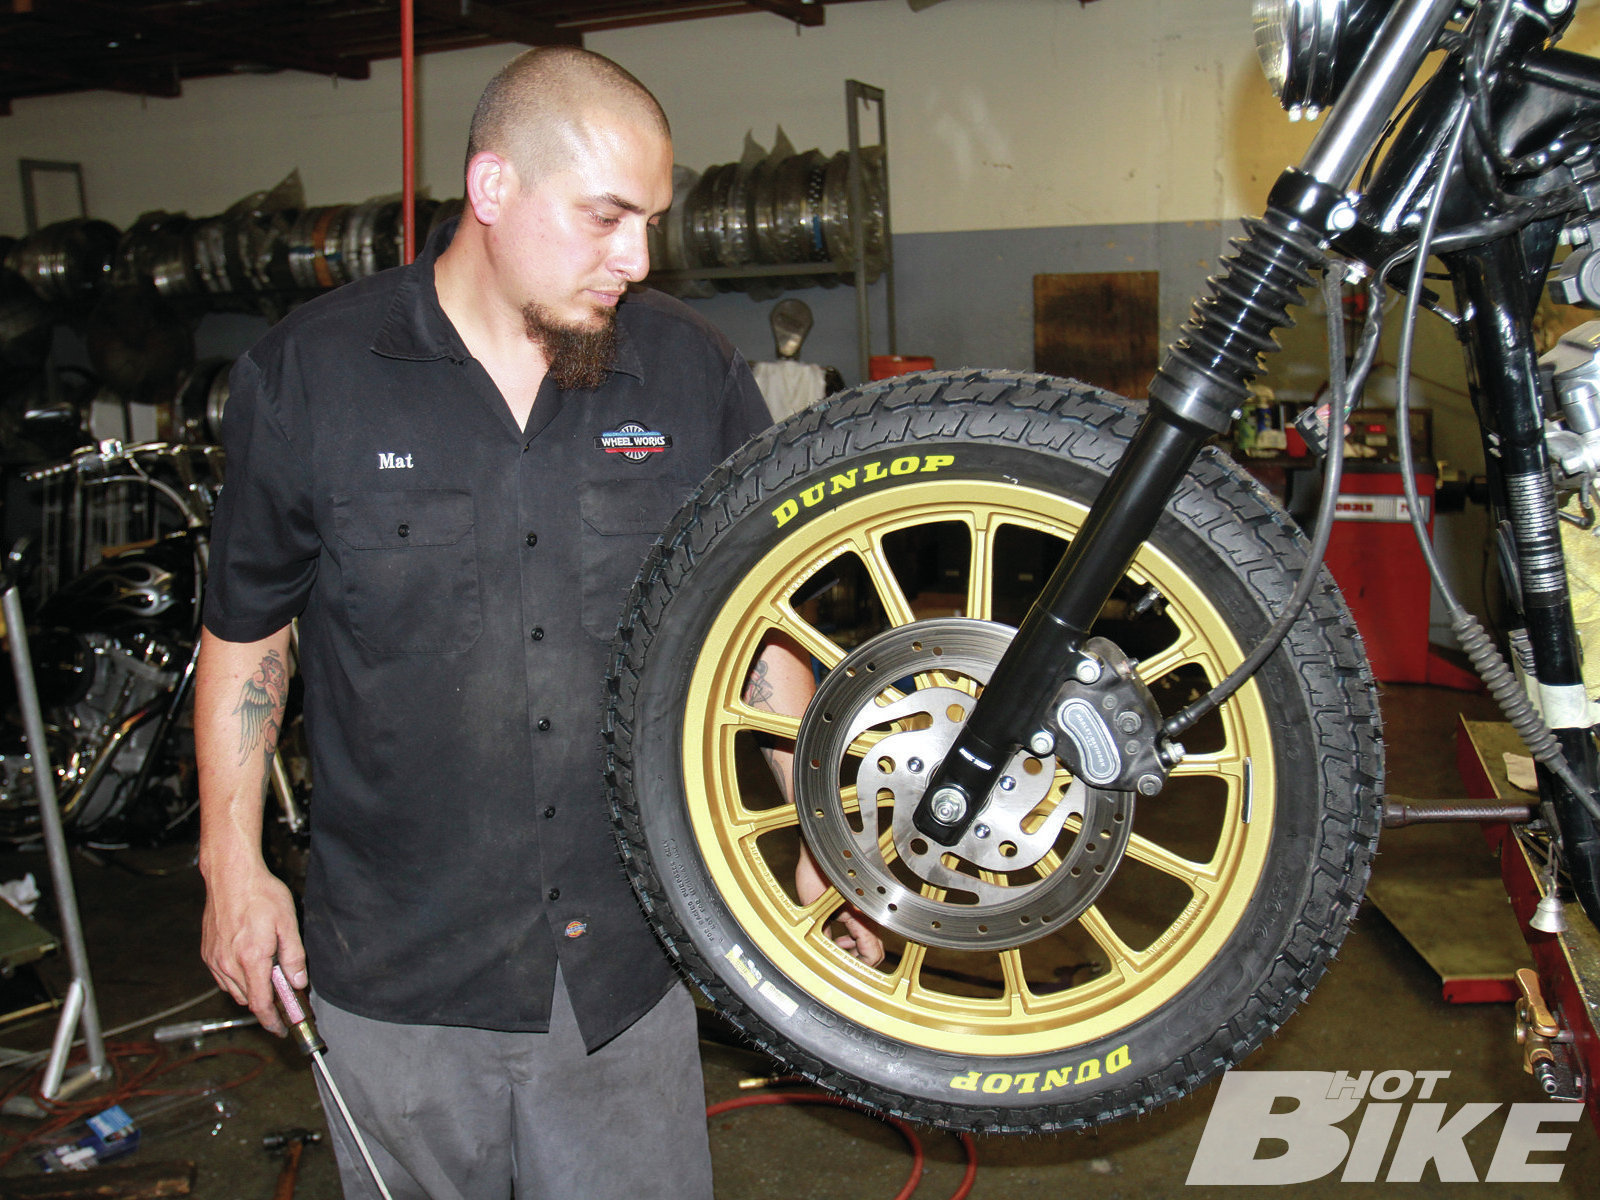
**32. ** Up front the new wheel slid in place like a glove.
**33. ** Same went for the new rear wheel. Once the wheel was in place, the chain was hooked up to the sprocket and everything was tightened down. Installation of the rear wheel conversion, the chain conversion, and the front and rear suspension upgrade was now complete.

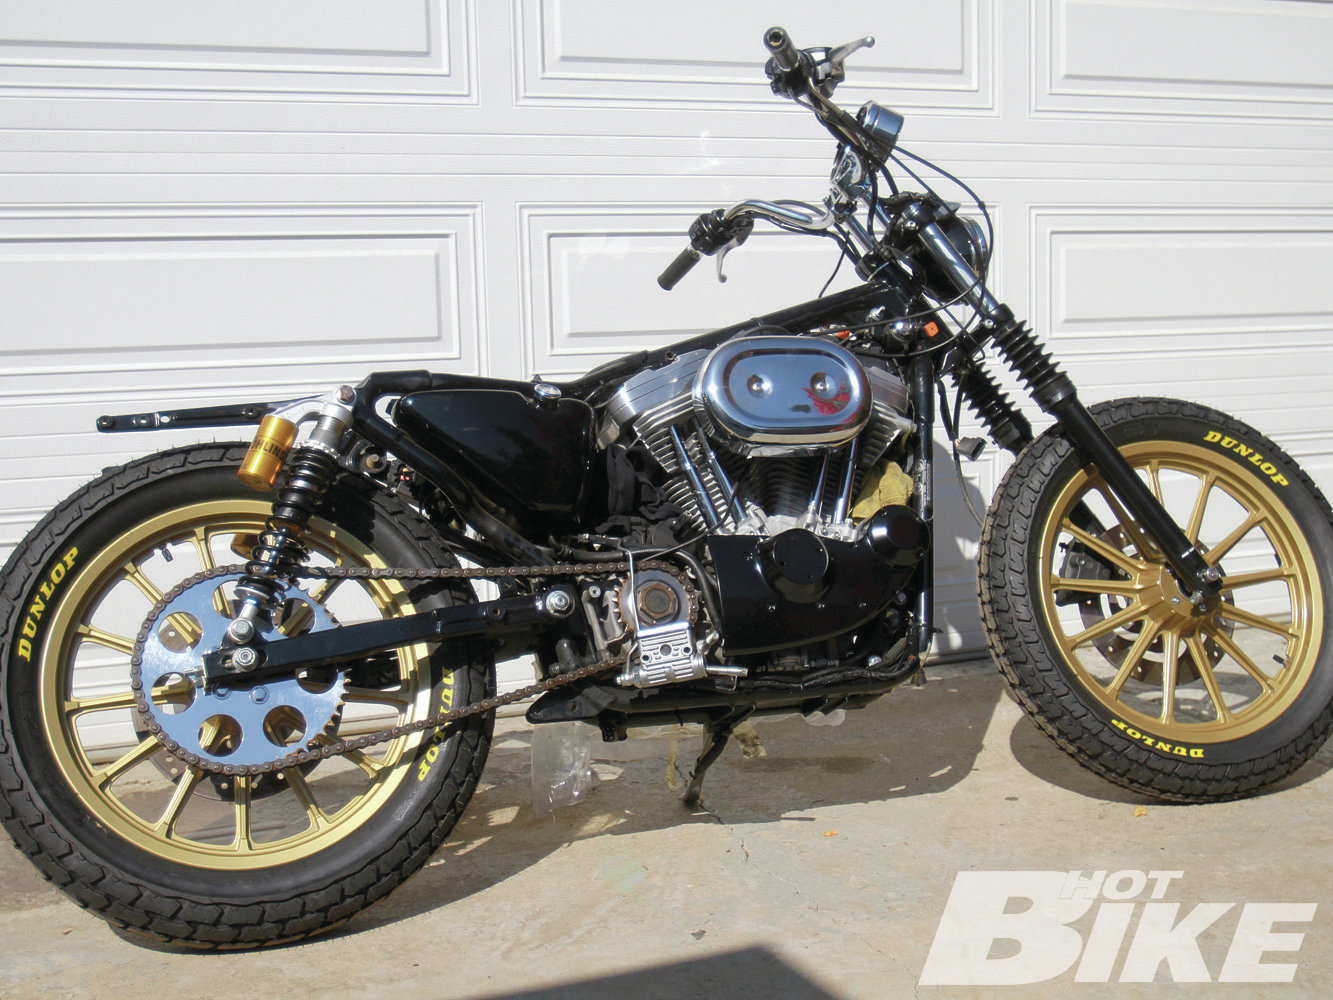
**34. ** Here’s a shot of the converted product. The dual 19s provide the proper dirt track racer look and the black and gold theme is just how I want it. I can’t wait to move on to phase two of the Sweet Tracker build, whatever that may be. Stay tuned.
A few issues back I dedicated my monthly column to converting a stock Sportster into a street tracker, a dirt track racing replica (picture Harley’s XR-750), but able to be legally ridden on the street. The Harpoon drew up a rendering of what the bike was to be, with the only instructions being that I wanted a black and gold theme. He nailed it. I got to thinking though… A street tracker limits you to only being able to ride on the street. I wanted the option to ride around the oval at Costa Mesa Speedway in Orange County, California, with proper dirt track tires as well. I’ve become a huge fan of flat-track racing, and it has been a goal of mine to race flat track. Why not have both? I struck a deal on a 2000 XL883 Hugger Sportster at Skip-Fordyce Harley-Davidson in Riverside, California and once I got the bike home I stripped all the crap off that would inhibit its ability to haul ass and look cool.
To start the project, I needed a proper roller, fit for the dirt track style. In order to do so, I’d need dual 19-inch wheels to fit the iconic 19-inch Dunlop CD5 dirt track tires ($165 ea). These tires have been rolling racers around tracks for years so it was only natural to use them for this project. They are not DOT approved however, and are only meant to be ridden on the dirt. The rubber compound simply won’t hold up on ashphalt, according to Dunlop. They’re only available in 19-inch diameters with varying widths so do some research on fitment specs. When I’m ready to ride the bike on the street I’ll have to get some street tires.
To save a buck on wheels, I converted a front 13-spoke, 19×2.15-inch cast wheel into a rear that I found on Craigslist for $50 using a couple of machined spacer blocks attached to the outsides of the hub in order to mimic the stock wheel width (one in between the wheel and sprocket, one in between the wheel and brake rotor). I knew that Wheel Works in Garden Grove, California, was up to the challenge since they’re the local gurus in Orange County.
I also wanted to convert the final drive from being belt driven to chain driven since no respectable dirt track racer runs a belt. Baker Drivetrain has the goods when it comes to trans and wheel sprockets, chains, etc. And since this was a special application, I selected parts on more of an a la carte basis. The company does offer all-in-one belt-to-chain kits though so just give them a call and they’ll hook you up. In this case, since the converted 19-inch rear wheel is 3 inches taller than stock, the trans/wheel sprocket ratio had to go from the standard 27/61 teeth configuration to 23/52 in order to mimic the stock gearing. I ordered up a 52-teeth wheel sprocket (raw $135), a 23-teeth trans sprocket ($65), and a chain ($90).
With the frontend removed, I wanted to send the lower fork legs to Wargasser Speed Shop in Simi Valley, California to have the fender mounts shaved since I won’t be running a front fender (the service is $100 if you ship your set, for a new set it’s $150.). Wargasser does some really trick stuff for hot rods and motorcycles and they’re good guys.
To go with the legs, I ordered a set of Fork Gaiters ($39.95) from Lowbrow Customs. The Gaiters fit 39mm fork tubes and come in black, and 35mm and 41mm Gaiters are also available. With a subtle amount of sheen from the satin lowers and the dirt-inspired fork Gaiters, the Sweet Tracker should be right where I want it once everything’s complete.
With the front and rear wheels coming off, it was the right time to upgrade the front and rear suspension. Race Tech’s FLEK S3590 Fork Suspension Kit ($259.99) with Gold Valve Emulator technology emulates a cartridge style suspension setup. First of all, Race Tech drills more holes in the stock damping rod to flow more fork oil, which ultimately aids in better, more controlled oil flow and damping. The holes on the gold valves are also larger than stock to flow more oil in more of an unobstructed manner. The tunable gold valves sit atop the modified-stock damping rods inside the fork tubes and are held in place with the main springs. Once the fork oil passes through the modified damping rod, it reaches the Emulator’s bypass valve in the check plate, which provides a firmer, more controlled feel for the rider when encountering bumps. Since the gold valves are adjustable, riders can make adjustments by adding different springs to the gold valves to better fit rider preference and riding conditions. Race Tech offers multiple front and rear suspension kits for all Harley models.
Since I grew up around dirt bikes, I’ve always had a place in my heart for Öhlins shocks, and its unmistakable gold piggyback reservoirs. Öhlins is based in Sweden with many distributors around the world manufacturing shocks for multiple powersports industries. The company is making a push to offer more products for the American V-twin market and offers shocks for all the twin-shock Harleys (excluding Softails). With that said, the HD 141 S36PL shocks ($909) were the perfect fit for the style I’m after. S=Single tube, 36=Piston diameter, P=Gas-type with piggyback reservoir, and L=Adjustable length. Not only is the preload adjustable, but also the shock height can be adjusted to boot. The S36PL shocks are lightweight, brilliantly machined from aluminum, and are very easy on the eyes.
That about wraps it up for this installment of the Sweet Tracker. I have to thank the Wheel Works crew (Dave, Gary, Mat, and Adam) for helping me get the project multiple steps closer to getting it done. Stay up to date with the build process via hotbikeweb.com, facebook.com/hotbike, and twitter.com/hotbikemagazine. Also, there will be more in-depth build articles of the Sweet Tracker in future HOT BIKE issues and you don’t want to miss out, because as Ricky Bobby says, “If you’re not first, you’re last!” HB
Source:
Baker Drivetrain
(877) 640-2004 | bakerdrivetrain.com
Dunlop Tires
(800) 321-2136 | dunloptires.com
HB Performance Coatings
hbperformancecoatings.com
Lowbrow Customs
(440) 479-8129 | lowbrowcustoms.com
Öhlins USA
(828) 692-4525 | ohlinsusa.com
Race Tech
(951) 279-6655 | racetech.com
Wargasser
(805) 527-9899 | wargasser.com
Wheel Works
(714) 530-6681 | wheel-works.com


