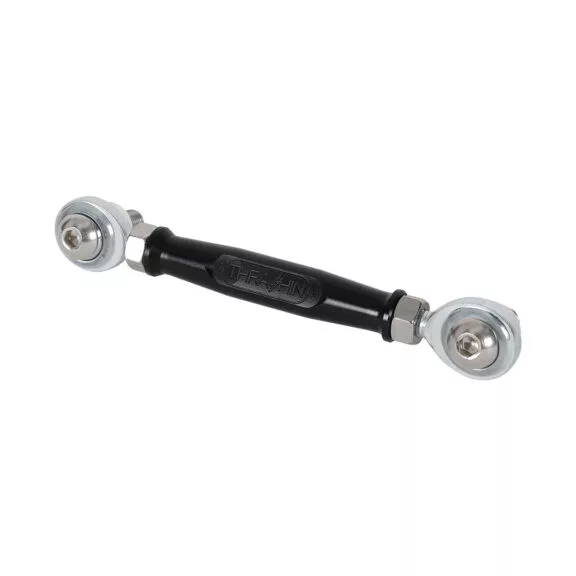
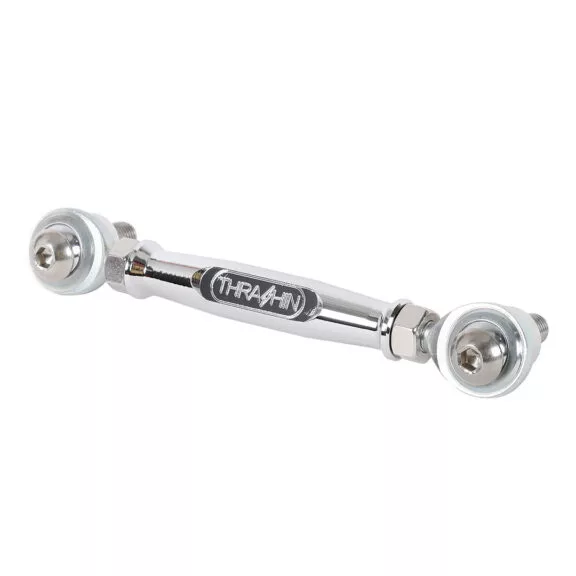
The Thrashin’ Supply crew spends a lot of seat time on Harley-Davidson FXRs, Baggers, and Milwaukee-Eight Softails. When you ride as much as they do, you get creative with how to make tweaks in making your motorcycle fit you best. Thrashin’ Supply’s Adjustable Brake Linkage was one such modification that made sense for the crew to develop for Harley’s Milwaukee-Eight Softail models.
The Thrashin’ brake linkage allows you to fine-tune the height of your brake arm without having to remove the linkage from your bike. It fits Milwaukee-Eight Softails with mid-controls and includes all necessary mounting hardware. You can also choose black anodized or chrome finish, depending on your style.
Choose black…
…Or Chrome
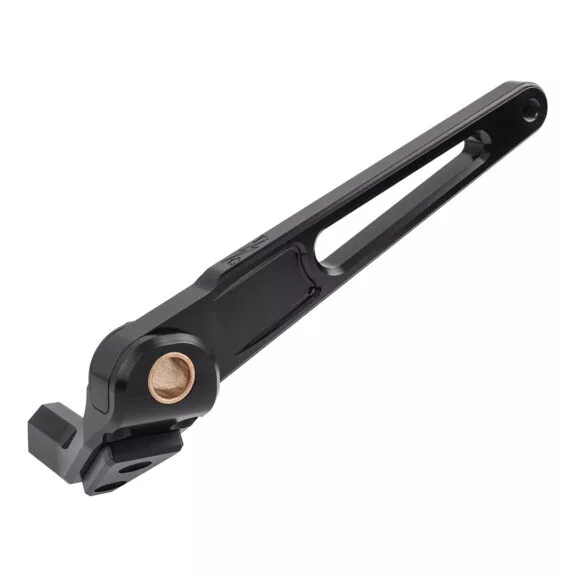
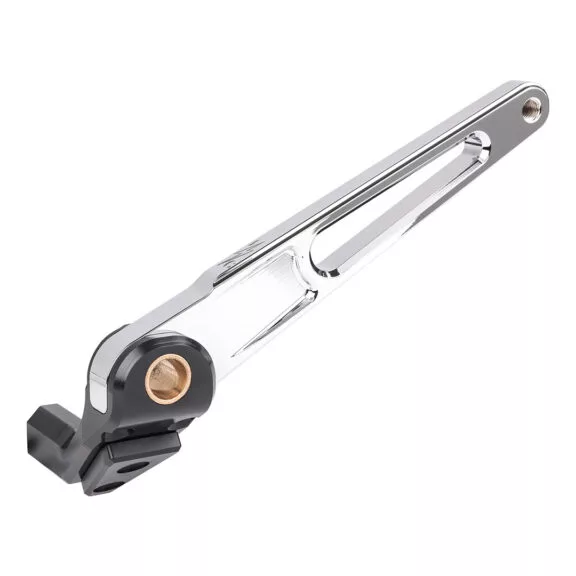
And if you’re going to go that route, you might as well update the brake arm itself with one of Thrashin’s new Softail Brake Arms, too (below). The new Softail Brake Arm is made from billet aluminum and comes in a black-anodized finish to increase lean angle over your stock application. The Brake Arm fits 2018–2023 Harley-Davidson Softail models with mid-controls.
Also in black…
…Or Chrome
We popped over to the Thrashin’ Headquarters in Moorpark, California, to get a glimpse into how these new brake bits function on an M-8 Softail and to see how they were installed. Thrashin’s Juan Arceo walked us through the step-by-step installation.
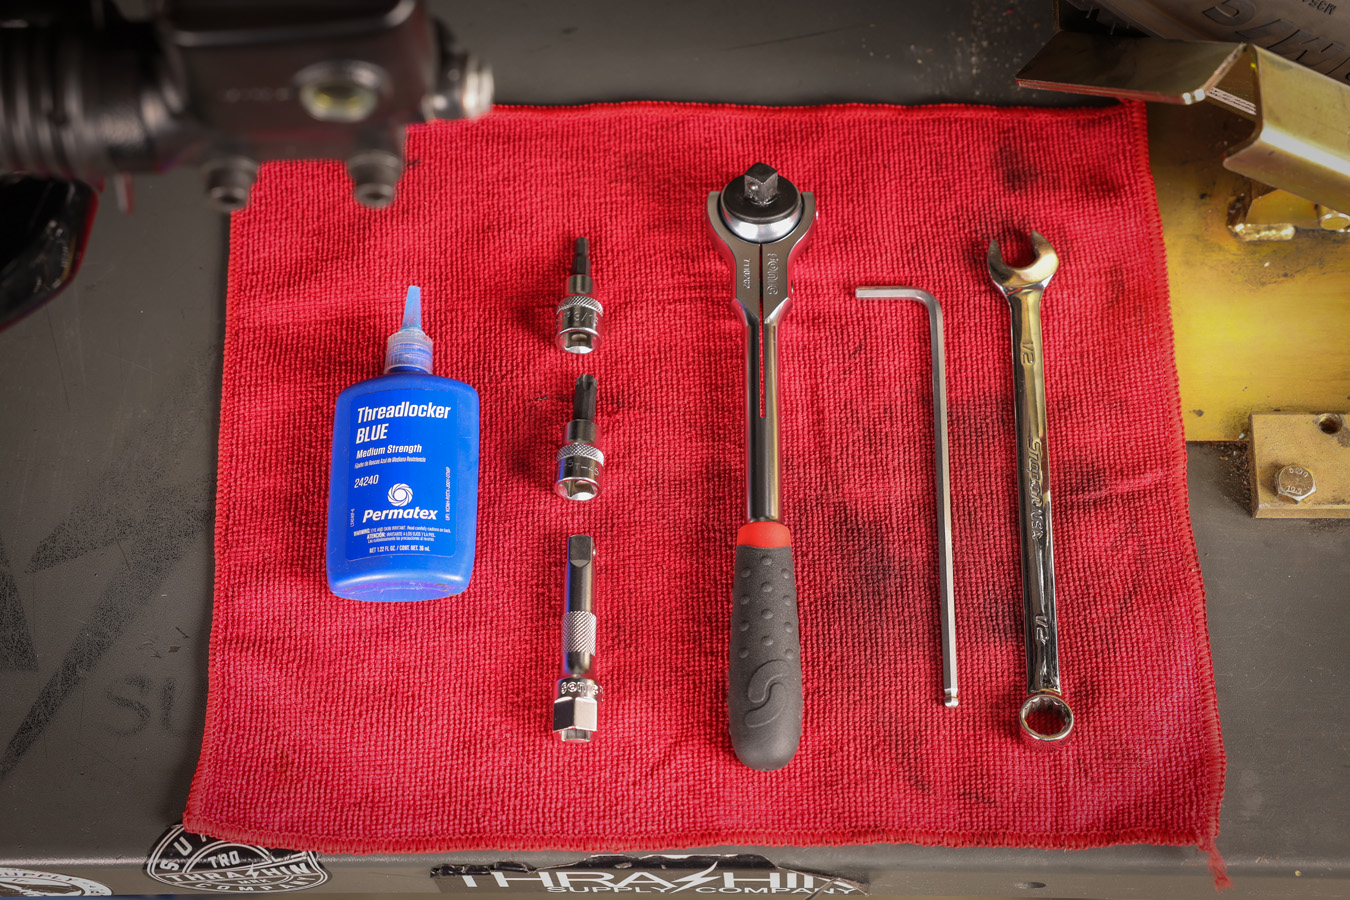
Tools: You’re gonna need a 1/4-inch drive socket, 1/2-inch open end wrench, 5/16-inch deep socket, 3/16-inch Allen bit, a T-27 Torx bit, and some blue threadlocking compound for the new supplied hardware.
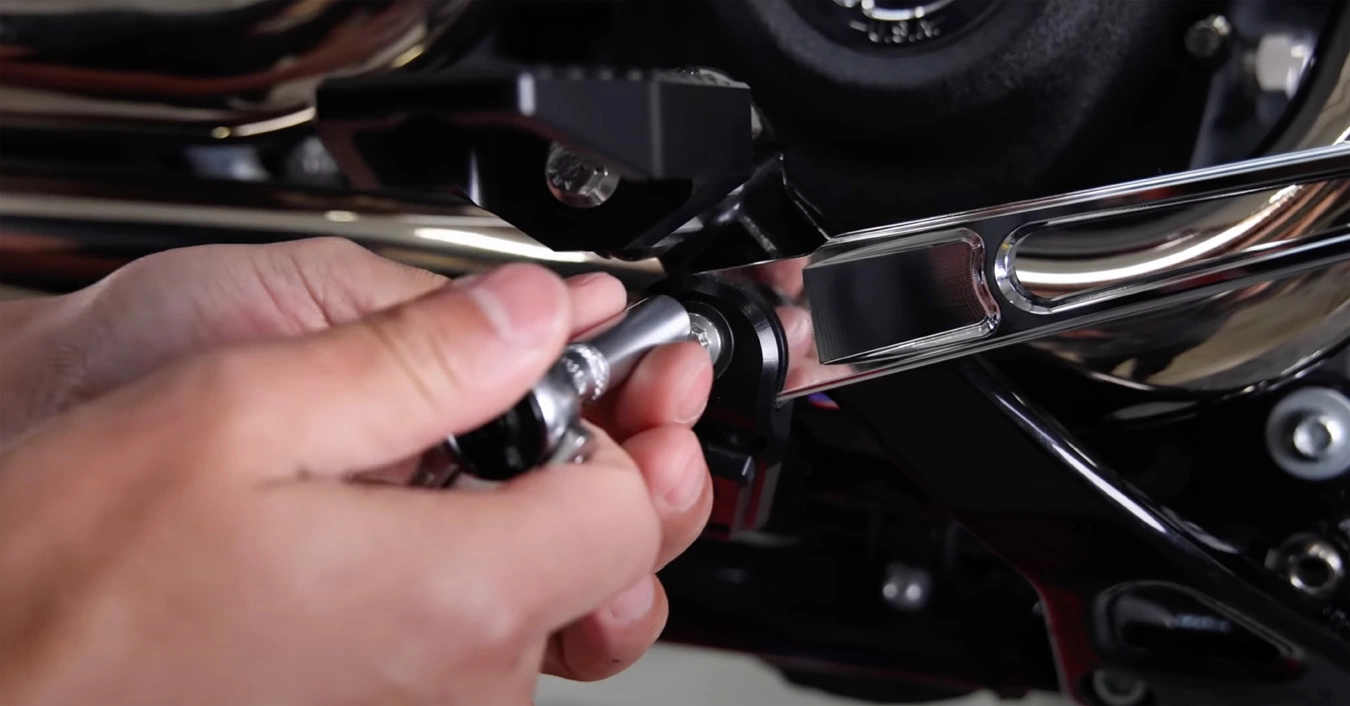
Juan started by removing the factory linkage’s 3/16 Allen bolt up front. Notice the Thrashin’ Brake Arm was already installed.
…And then Juan removed the rear aluminum ARP bolt from the Thrashin’ Brake Arm (which will be a T-27 Torx for stock applications).
Juan was able to remove the brake arm and linkage as one unit, but he had one bolt left to remove, the 3/16 Allen socket. Note: Be mindful of the stock linkage’s orientation to the brake arm. You’ll want to mirror that setup when installing the Thrashin’ Linkage and the supplied spacers in place.
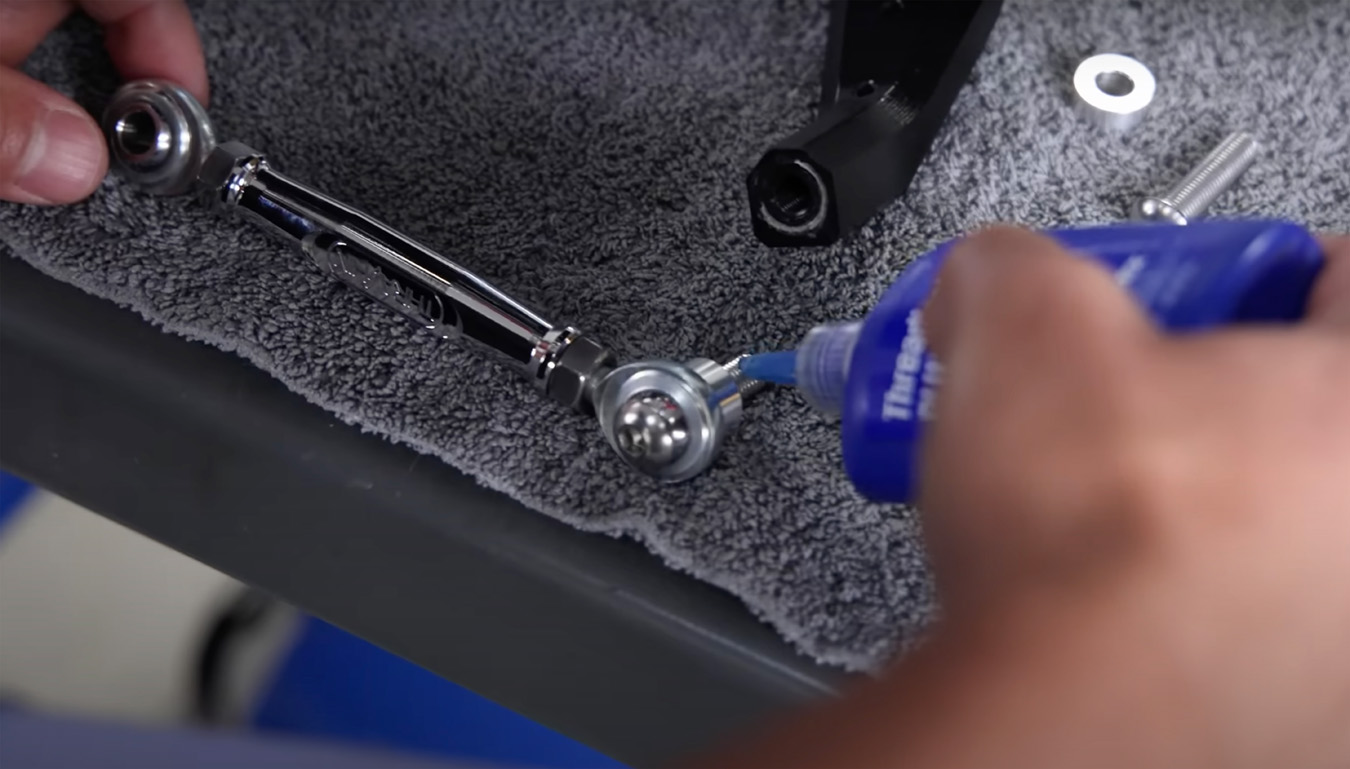
Make sure you use some blue threadlocker when installing the new Thrashin’ Linkage. You’ll also want to make sure that the supplied Thrashin’ spacers go on the inside of the linkage when installing the bolts.
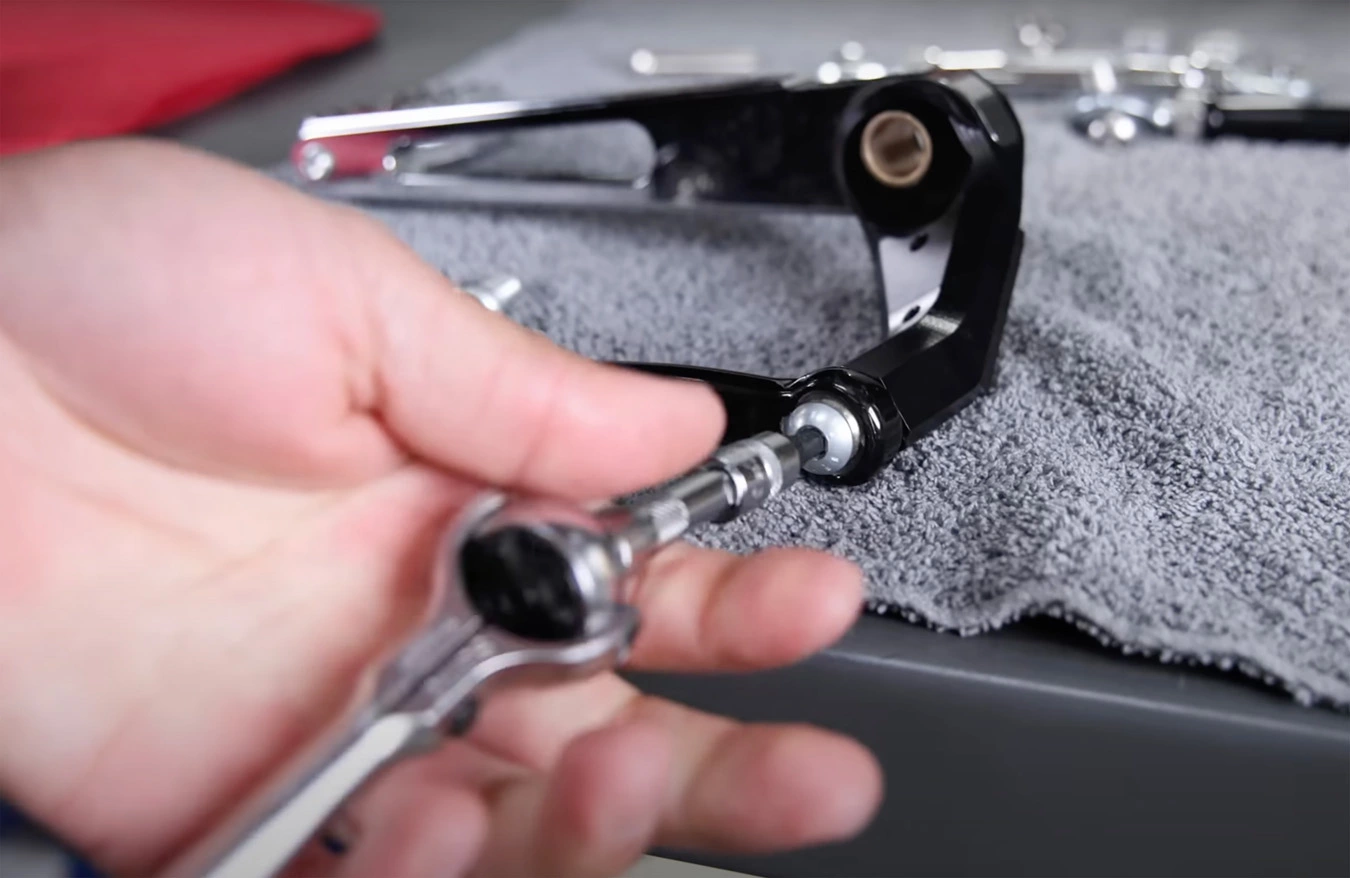
Starting with the front 3/16 Allen bolt, Juan installed the new Linkage in place with the spacers behind the heim joints.
Juan then reinstalled the Thrashin’ Brake Arm using the 12-point ARP hardware and threadlocker from before.
Once everything was installed…
…Juan was able to make adjustments to the Brake Arm height with one hand before tightening down the jam nuts.
Once he found the desired location for his riding position, Juan checked for any clearance issues, and also that he had full range of motion of the brake arm. Once that checked out, he tightened down the front heim joint jam nut.
And finally, he tightened down the rear heim joint jam nut and installation was complete.
Here’s a different view of both new components installed after being set to the desired location. All in all, a simple installation that allows you so much needed options based on your riding positioning.
We use cookies on our website to give you the most relevant experience by remembering your preferences and repeat visits. By clicking “Accept”, you consent to the use of ALL the cookies.
This website uses cookies to improve your experience while you navigate through the website. Out of these, the cookies that are categorized as necessary are stored on your browser as they are essential for the working of basic functionalities of the website. We also use third-party cookies that help us analyze and understand how you use this website. These cookies will be stored in your browser only with your consent. You also have the option to opt-out of these cookies. But opting out of some of these cookies may affect your browsing experience.
Necessary cookies are absolutely essential for the website to function properly. These cookies ensure basic functionalities and security features of the website, anonymously.
Cookie
Duration
Description
cookielawinfo-checkbox-analytics
11 months
This cookie is set by GDPR Cookie Consent plugin. The cookie is used to store the user consent for the cookies in the category "Analytics".
cookielawinfo-checkbox-functional
11 months
The cookie is set by GDPR cookie consent to record the user consent for the cookies in the category "Functional".
cookielawinfo-checkbox-necessary
11 months
This cookie is set by GDPR Cookie Consent plugin. The cookies is used to store the user consent for the cookies in the category "Necessary".
cookielawinfo-checkbox-others
11 months
This cookie is set by GDPR Cookie Consent plugin. The cookie is used to store the user consent for the cookies in the category "Other.
cookielawinfo-checkbox-performance
11 months
This cookie is set by GDPR Cookie Consent plugin. The cookie is used to store the user consent for the cookies in the category "Performance".
viewed_cookie_policy
11 months
The cookie is set by the GDPR Cookie Consent plugin and is used to store whether or not user has consented to the use of cookies. It does not store any personal data.
Functional cookies help to perform certain functionalities like sharing the content of the website on social media platforms, collect feedbacks, and other third-party features.
Performance cookies are used to understand and analyze the key performance indexes of the website which helps in delivering a better user experience for the visitors.
Analytical cookies are used to understand how visitors interact with the website. These cookies help provide information on metrics the number of visitors, bounce rate, traffic source, etc.
Advertisement cookies are used to provide visitors with relevant ads and marketing campaigns. These cookies track visitors across websites and collect information to provide customized ads.