
Add Roar To To A Road King
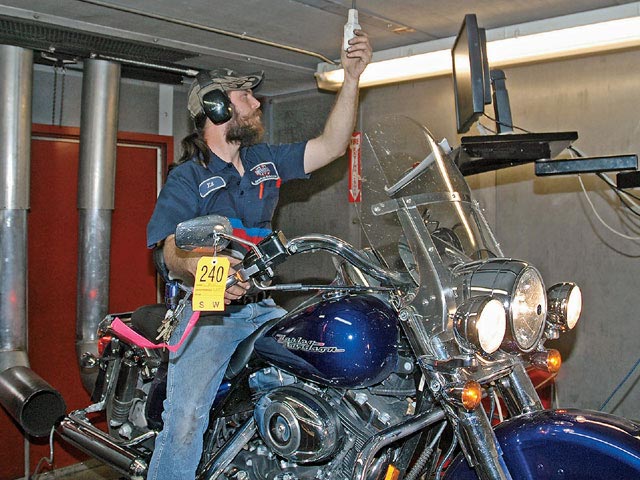
1. We started at Mancuso’s Harley-Davidson Crossroads, where Ed Mills dyno’ed our completely stock Road King. Ed warmed up the bike and made four passes, with the last one turning in 66.81 hp and 82.66 lb-ft of torque.
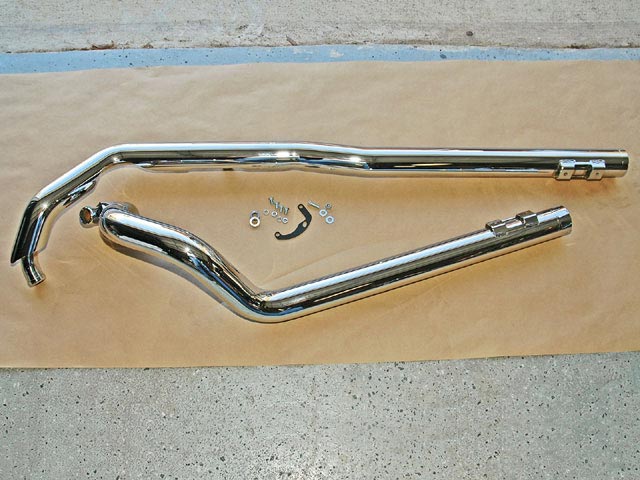
2. Back at the garage, we examined the T-Rex. Resembling the chromed leg bones of a long-dead dinosaur, these pipes are big and heavy. Construction is top rate and complete. The nuts for the rear hanger are welded in. Hard Krome includes a small bag of installation hardware. Without instructions we weren’t sure of each part’s use. We’ll tell you why later.
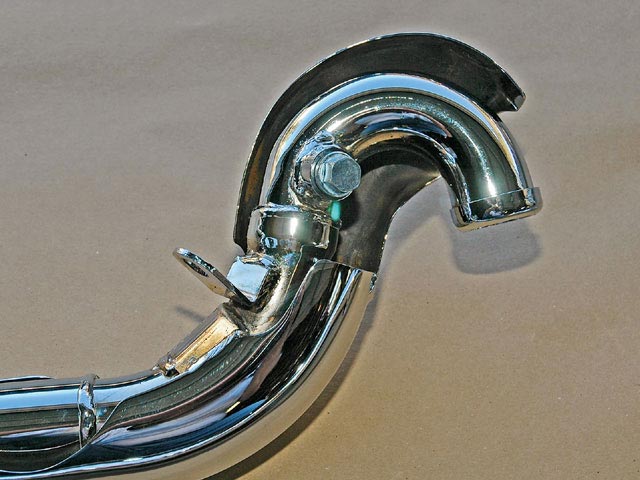
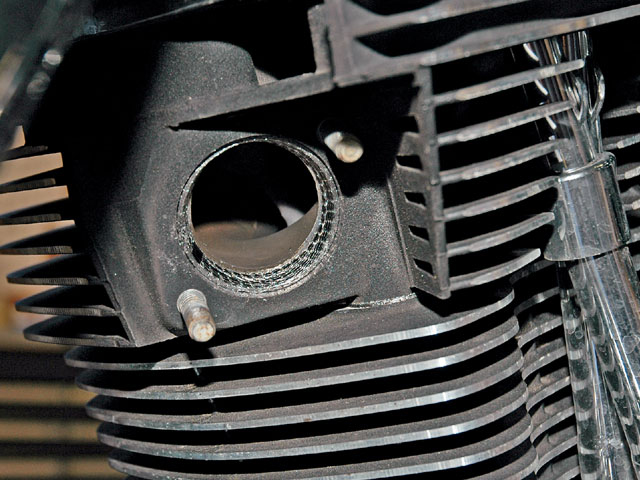
3. Here’s a close-up photo of the header for the rear cylinder. Notice the thick welds, nice air space between the inner pipe and heat shield, and the quality chrome. On 2007 and later models, Hard Krome includes O2 sensor bungs and plugs.
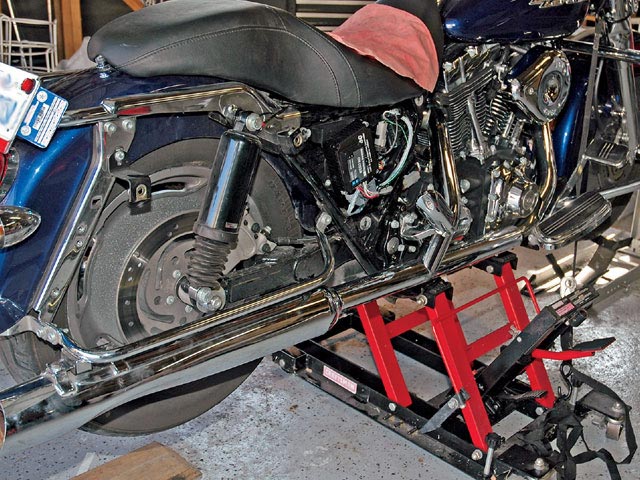
4. To begin the install and to make it easy on our aching back and knees, we jacked the bike up on our Craftsman lift and strapped it down.
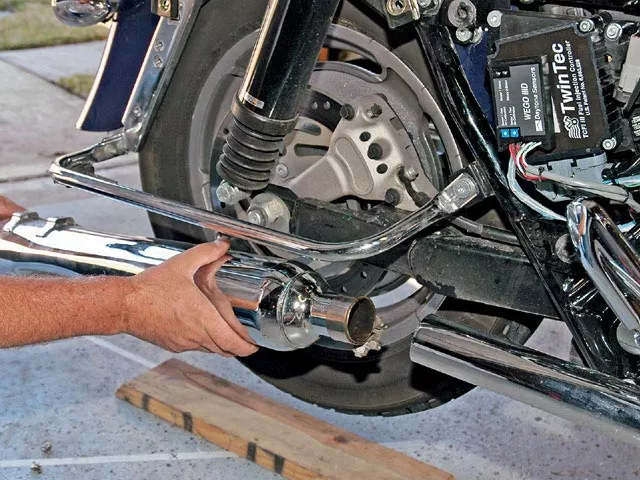
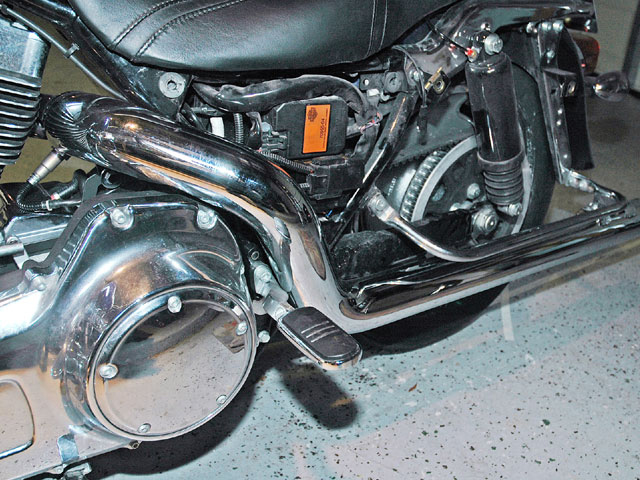
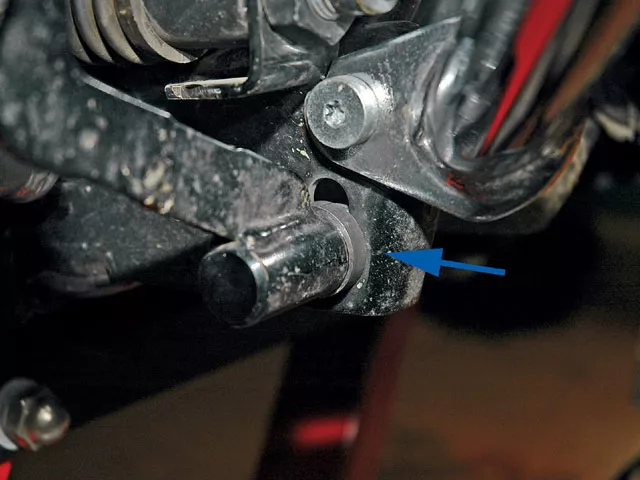
5. It would be nice if you could remove each stock pipe as one piece, but you can’t. We had to loosen nearly every joint and all the heat shields. We started with the slip-on mufflers and removed the rear bracket screws and loosened the pipe clamp to the header pipe. Adding a shot of Liquid Wrench or WD40 into the joints helped with separation. Next we removed the nuts from the front and rear cylinder head exhaust studs, and then removed all the bolts holding the pipes to the stock mounting brackets. We disconnected the crossover tube between the front and rear headers.
6. With some jiggling, we pulled the head pipes off the studs and wiggled the front pipe between the right engine cover and the right floorboard. Here’s one of our lessons learned: we should have first removed the right floorboard because we had to remove it anyway to install the fat T-Rex pipe, and because the two thick washers in the hardware bag are spacers to move the floorboard out and clear the T-Rex.
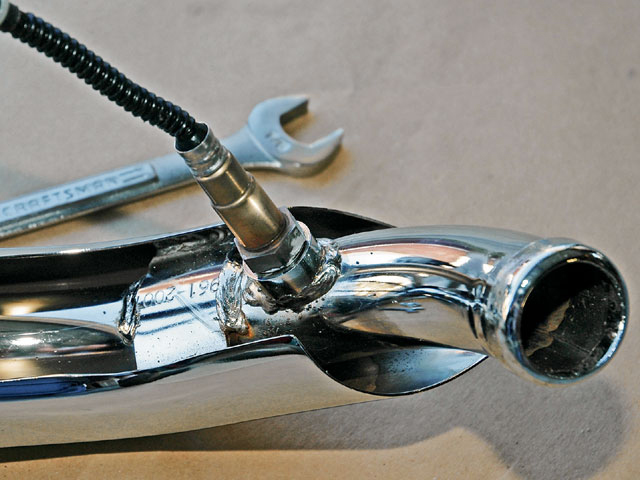
7. With the stock pipes removed, we transferred parts to the T-Rex. We installed the O2 sensors on the pipes with a 7/8-inch wrench and a little anti-seize. OK, second lesson. At first it seemed so much easier to install the sensors off the bike, but that’s not so good to do. They interfered as we later tried to maneuver the thick pipes into tight places. We had to remove the sensors and later re-install with the pipes on the bike.
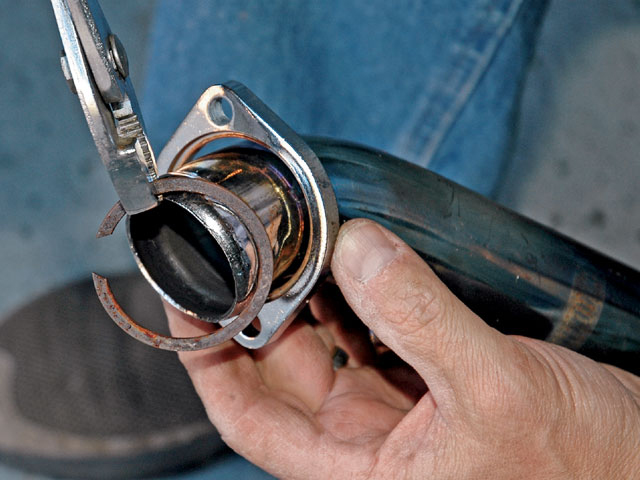
8. Using a set of pliers, we slipped the flanges and retaining clips onto the T-Rex ends. We also took a second to wipe down both pipes with non-residue cleaner (Windex works fine).
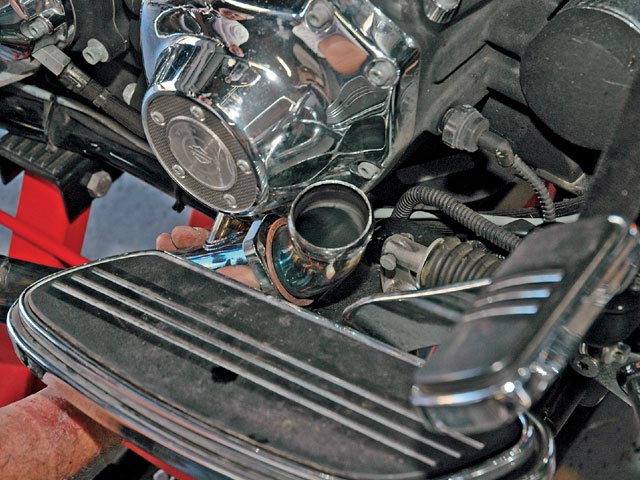
9. The Hard Krome kit doesn’t include new exhaust gaskets, so be sure to have a set on hand. You can use either the stock, cone-shaped gaskets or the SE flat gaskets. Both work fine as long as you properly torque the exhaust stud nuts. We had a set of stock gaskets in our parts box and used those. We carefully removed the old, squashed gaskets and pushed in the new ones.
10. The bulk of the T-Rex makes for a tight fit. It felt like a huge, twisted metal puzzle getting the header ends into the exhaust port and the pipes in position. With them in place, we slipped on the flanges and started the exhaust stud nuts to hold the front of the pipe. Then we added a screw to the rear hangers to hold up the back. Next, by grasping the pipes, we pushed the ends into the exhaust port to contact the gasket and finger-tightened the stud nuts.
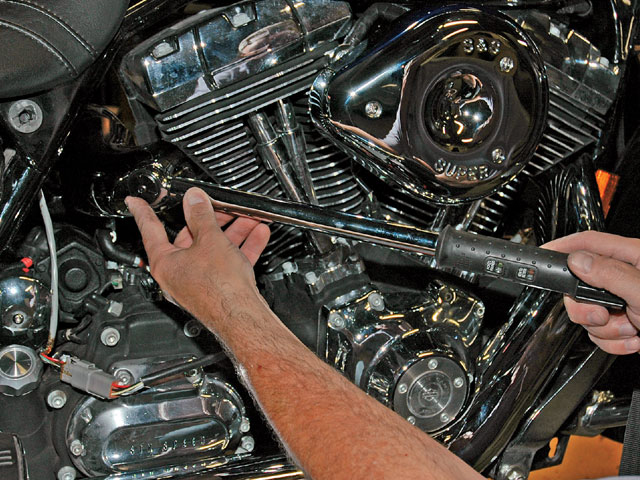
11. With the pipes aligned but loose, we torqued each head nut to 40 lb-in, and then torqued each stud nut to 80 lb-in. This sequence properly aligned the header end with the port and compressed the gasket for a good seal. Note: Do not over tighten these nuts; 80 lb-in is equivalent to only 6.6 lb-ft.
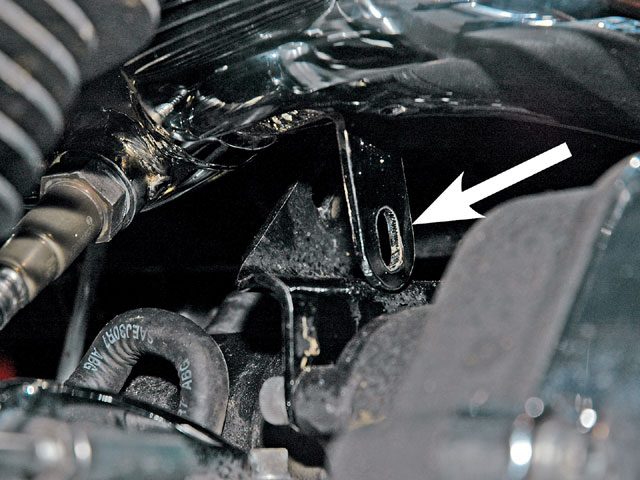
12. Here’s our third lesson. When the T-Rex rear cylinder pipe’s top mounting bracket didn’t match up with the stock bracket on top of the transmission, we realized that the little black bracket in the hardware sack is supposed to replace the stock one. It’s a good idea to back up and install the new bracket before fitting the pipe. Finally we tightened all the support bolts.
13 To finish we re-installed the right floorboard, inserting the spacers between the floorboard bracket and frame.
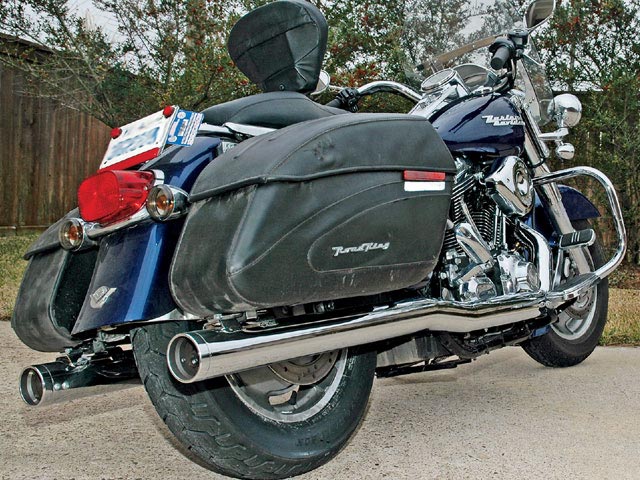
14. Here’s the completed install with the Hard Krome T-Rex True Duals enhancing the Road King. They look and sound awesome, like a King should. We also ran back to Mancuso’s for a final dyno test. Our performance numbers weren’t spectacular: 68.50 hp and 83.78 lb-ft. But as we explained, we’re pleased with the solid appearance and the meaty sound of the T-Rex and we anticipate teasing out some more horses as we fine-tune the TCFI III.
We were tired of the calm putt-putt and bland looks of the stock exhaust on our muscular ’07 Road King Custom. So, given the opportunity, we were excited to install a set of Hard Krome T-Rex 3-inch True Duals (Part No 961-2007 MSRP $824.95). Hard Krome markets the T-Rex as the largest true dual exhaust system in the industry. The 3-inch diameter outer pipe creates a massive-looking flow of chrome from header to rear fender. While we know that true duals aren’t the best choice for maximum street performance, we can’t resist the balanced look of individual pipes blasting a healthy beat out the back, and they feel so natural on a Road King.
These pipes will never blue because of their patented double-wall construction. The inner pipe is a progressive stepped header design beginning with a 1.75-inch diameter pipe at the exhaust port that steps to a 1.875-inch diameter, and then to a 2-inch diameter and terminates into 2.25-inch diameter removable baffle. It’s all surrounded by a chrome 3-inch outer wall, which ends with a chrome 3-inch billet aluminum end cap. All 2007 and up models have dual O2 sensor ports.
Installation of the T-Rex set was straightforward, complicated only by the lack of instructions. Without those, we stumbled a couple times, but if you read our story then you can benefit from our experience. The hardest part was removing the multi-jointed stock exhausts. Plus, with the T-Rex built-in heat shields, the pipes were heavy and bulky to handle.
Prior to adding these pipes, we installed a Daytona Twin Tec TCFI III kit (see HOT BIKE Vol. 40, No. 5). Since this is the configuration we’re going to run for a while, we performed a more thorough tuning by carefully following the steps in the Twin Tec TCFI III FI System Tuning Manual.
With those changes, the bike really rode and sounded great. We headed to Mancuso’s Harley-Davidson Crossroads in Houston, Texas, for a final dyno run. While a dyno is not required to tune the TCFI III, these dyno numbers did give us valuable information to compare before and after performance and to verify that our off-dyno tuning was accurate. We did not attempt to adjust the TCFI III during the dyno runs.
Although the dyno numbers don’t show a substantial performance gain over stock, we are satisfied with our own butt-dyno experience. More importantly, the T-Rex pipes met our criteria for stunning looks and throbbing sounds. To measure that exhaust throb, we used a stationary sound test procedure (see HOT BIKE Vol 40, No 7). At half throttle the stock pipes yielded a docile 98 decibels (dB), while the T-Rex produced a thumping 116 dB. Now that’s a roar fit for a king. HB


