
Auto Meter Klock Werks Gauge Install
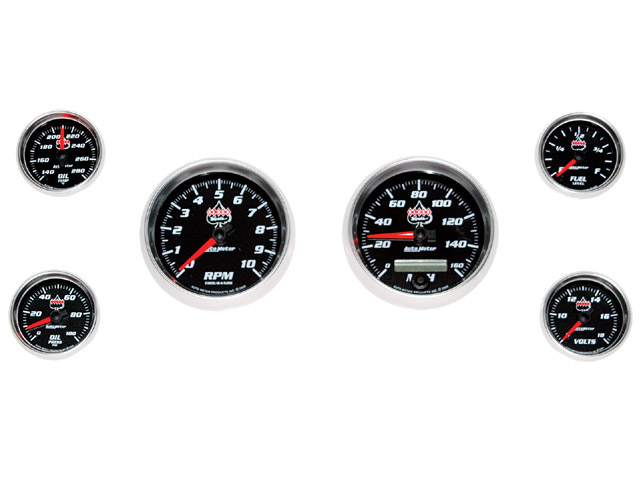
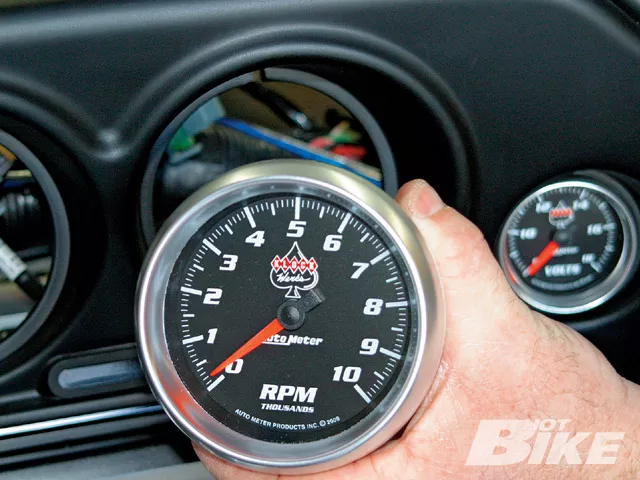
1. The kit includes six gauges (oil temp, oil pressure, tachometer, speedometer, voltmeter, and fuel indicator). These are the Cobalt gauges, which have a black face with white lettering and illuminate blue.
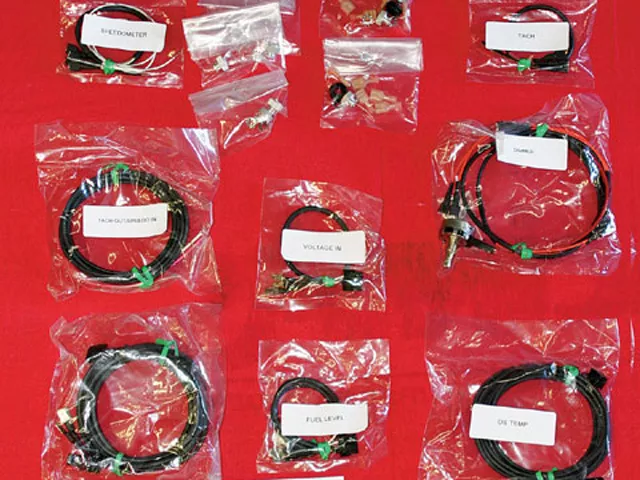
2. Here are the individually packaged wiring components that are clearly labeled to be mated with their respective gauges, which include a dimmer switch for all gauges, and oil temp sending unit and oil pressure sending unit with proper NPT reducers for both. Also included is a set of model year specific installation instructions.
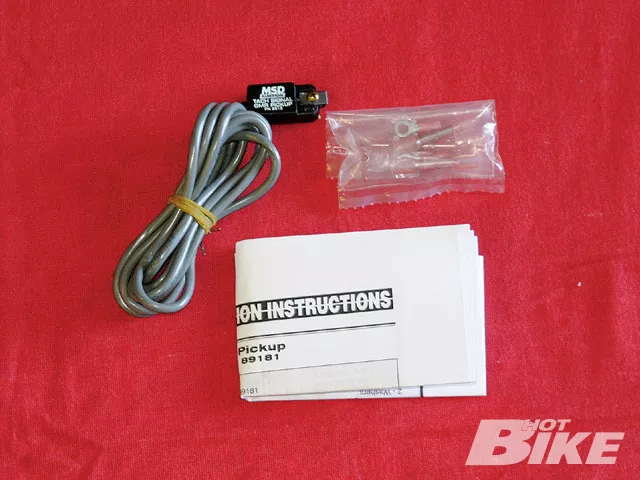
3. For this install, we needed this MSD Ignition tach signal GMR pickup (not included, but available from Drag Specialties). The GMR inductive type pickup senses the high current draw in the 12-volt power wire of the ignition coil. The sudden rush of current pulse is sensed by the GMR adapter, which produces a 12-volt square wave signal to trigger a tach or rpm device, according to Doug.
4. When we showed up to the Fineline Cycles shop, the Glide had already been stripped down and the gas tank, outer fairing, saddle bags, and side covers were removed, and the battery was disconnected. Doug got started by unplugging the factory oil pressure switch (arrow) and he then removed the stock oil sending unit from the crankcase.
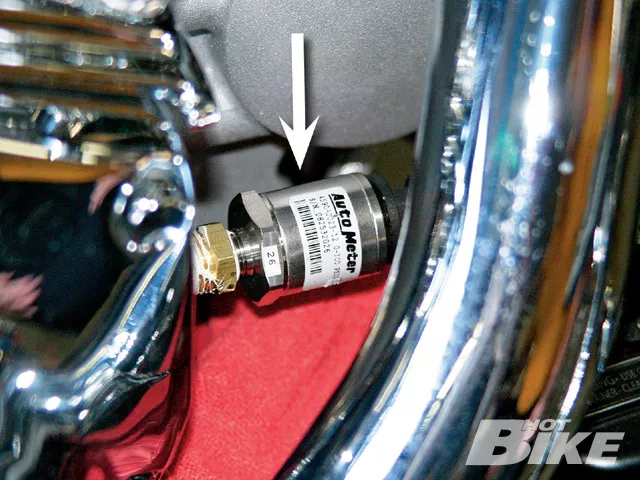
5. The Auto Meter oil pressure sending unit (arrow) was installed next. It plugged right in with incuded NPT reducer. Teflon sealant was spread all over the threads before it was installed. Then Doug plugged the new oil pressure harness, which was covered in the provided dielectric grease to protect from moisture into the new Auto Meter sending unit and routed it up to the oil pressure gauge location.
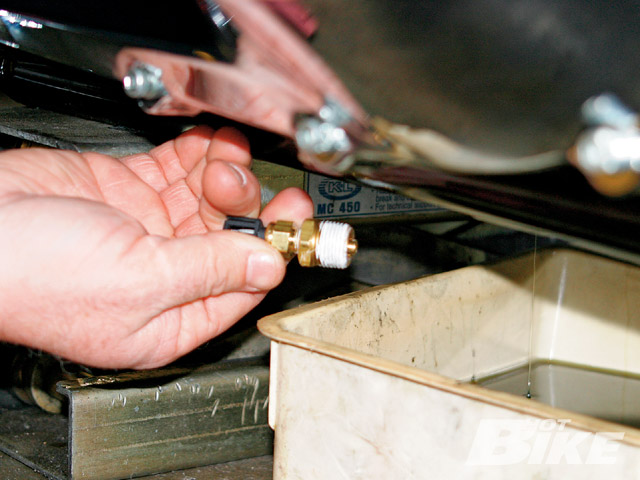
6. After Doug drained the oil from the pan, he installed the new oil temperature sending unit with the 3/8-inch to 1/8-inch NPT reducer attached with Teflon sealant on the threads. After plugging in the supplied oil temp wiring harness to the new sending unit, it was routed up to the where the new oil temp gauge will be housed, which replaces the stock air temperature gauge.
7. With the sending units hooked up, Doug removed all of the stock gauges
8. …and then installed the new gauges into the fairing counter-clockwise starting with the oil pressure indicator, voltmeter, tachometer, speedometer, fuel indicator, and finally the oil temperature gauge. Doug made sure the back of the tach was in two cylinder single pulse mode (both switches in down position).
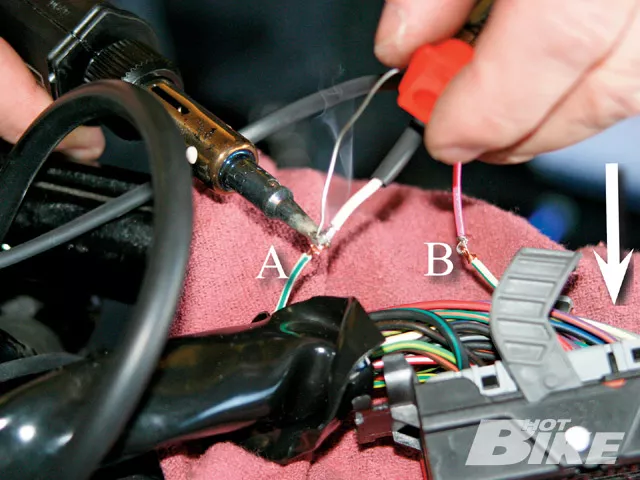
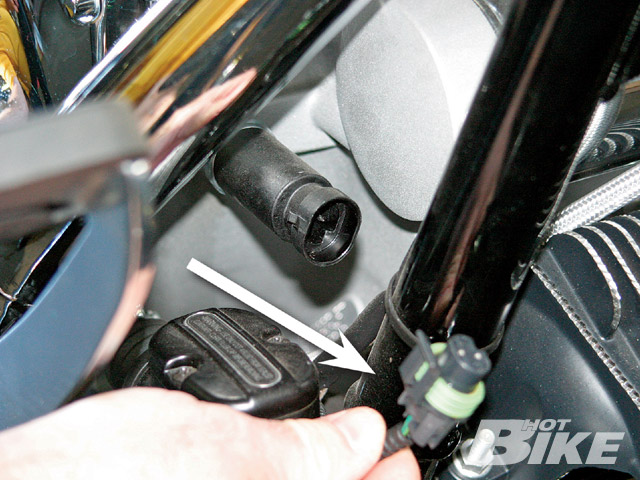
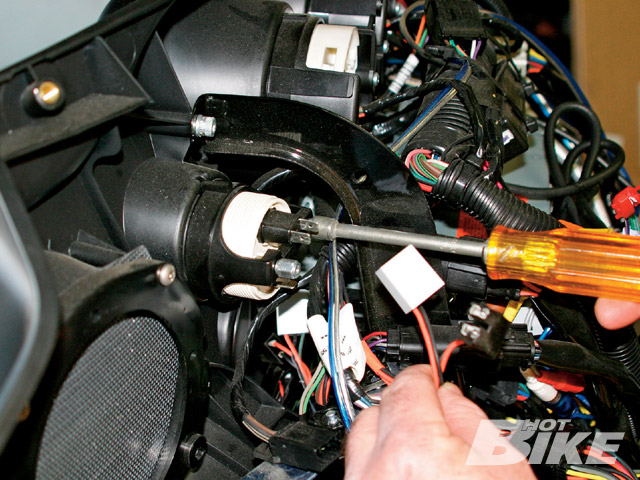
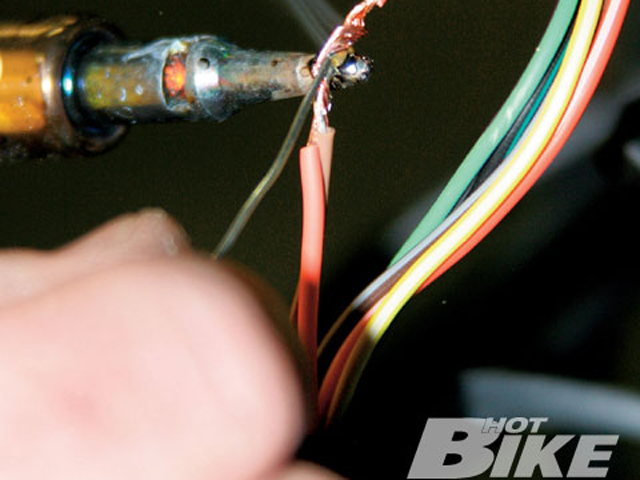
9. Doug located the ECM (arrow) and routed the supplied wiring harness for the tachometer and speedometer up to the fairing from the ECM. With the tachometer and speedometer, Doug started with the supplied tach wiring harness (TWH) and cut the white/green wire from the ECM and soldered one end to the white wire on the TWH (A). The pink wire from the TWH was tapped into the other end of the cut green/white wire (B). Then Doug heated the shrink-wrap for the newly soldered wires and moved on to soldering the speedo wiring harness (SWH) to the ECM.
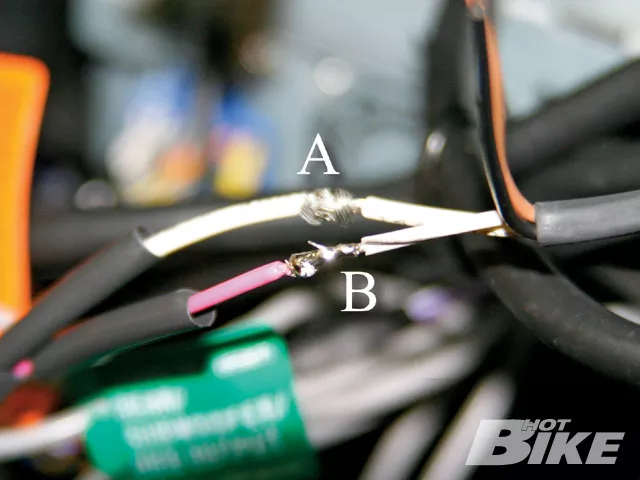
10. For the speedometer, Doug tapped the white wire from the ECM to the white wire from the SWH (A) and then tapped the white/black wiring from the ECM to the pink wire on the SWH (B).
11. After that, Doug connected the brown wire and the orange wire of the SWH to the orange wire of the Factory Speedo Plug (FSP). Then it was time to install the GMR pickup.
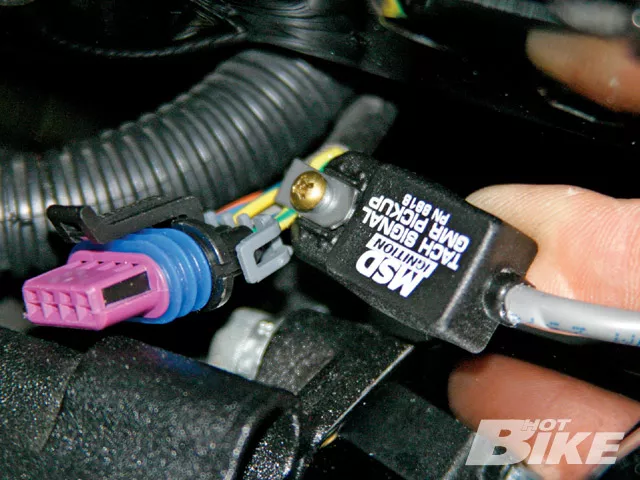
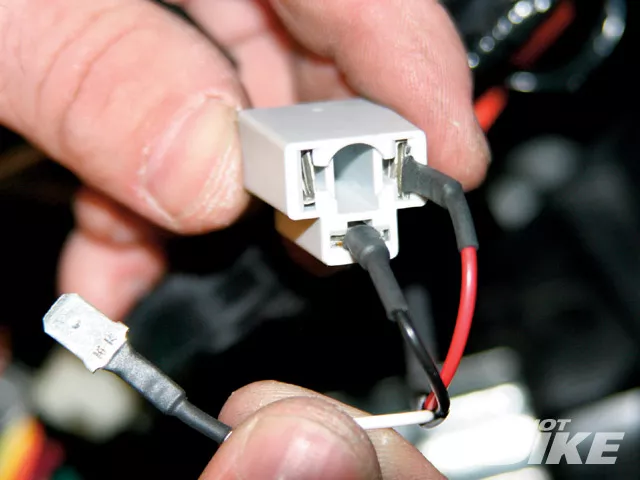
12. To hookup the tach, the GMR pickup needed to be tapped into the green/yellow wire for the coils. The GMR is fitted with green, red, and black wires inside the thicker gauge gray wire. For this model, the green was tapped into the pink of the TWH, which sends a signal to the tach gauges through the coils. The red was tapped into the brown on the tach harness, which goes to the Factory Tach Plug (FTP). And the black (ground) from the GMR goes to the black/green (ground) from the FTP and the black of TWH.
13. Once the speedo and tach were hooked up to the gauges, the remaining four gauges were hooked up next. These four (oil temp, oil pressure, voltmeter, and fuel indicator) are essentially plug and play because the supplied wiring harness hooks up to the stock wiring plugs from the ECM.
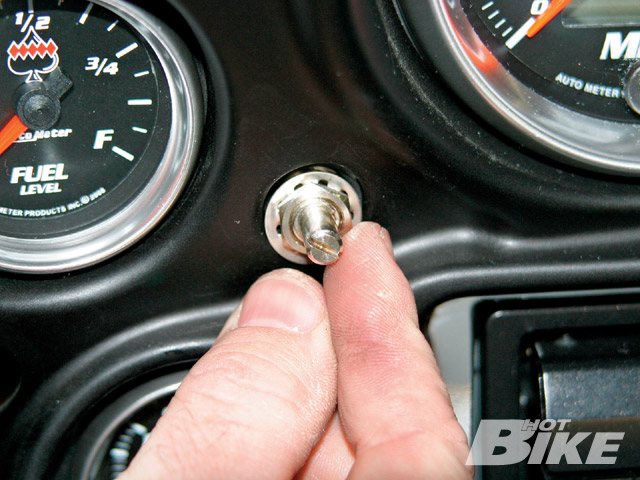
14. The dimmer switch hooked up to where the stock tripmeter was housed. There are a total of six orange female wiring ends on the back of the dimmer, four hook up to the white male ends on the fuel, oil, temp, oil pressure, and voltmeter gauges. The other two female ends hook right into the back of the tach and speedo gauges. To hook up the dimmer’s power, Doug plugged in the last connection into one of the unused power connections from the stock gauges.
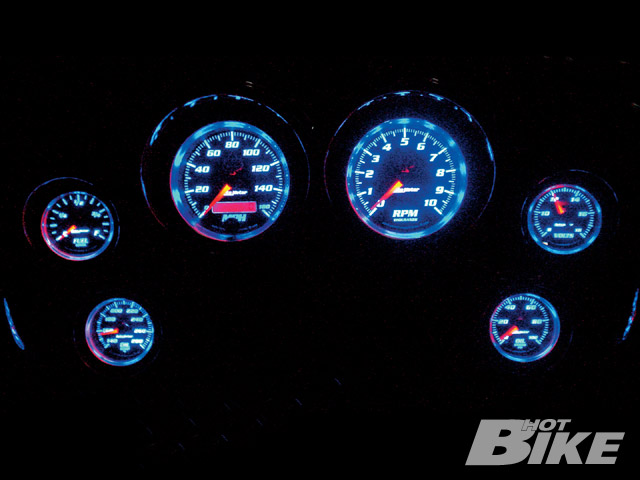
15. Once the gauges were all connected to the proper wiring harnesses. The battery was hooked back up and the ignition was started to check that all of the gauges lit up. They sure did and here they are in all of their blue illuminated brilliance. They really stand out in the dark. After checking the proper wiring connections, Doug moved on to calibrating the gauges. As for gauge calibration, please refer to the instruction manual on how to properly calibrate your Auto Meter/Klock Werks gauges.
New gauges can really give your stock bike a new look, especially on fairing-equipped motorcycles utilizing more than just one gauge. Klock Werks and Auto Meter teamed up to produce bagger gauges that really peaked our interest. With four styles to choose from, these gauges will really set your bike apart. We especially like the race-inspired look. The different model choices available are the Sport Comp II (black face, white lettering, and white light), Phantom II (white face with black lettering during the day, black face with white lettering at night), Cobalt (black face, white lettering, blue light), and C2 (white face, black lettering, blue light). All can be had for $1,300 for your ’00-07 Touring models, and ’08-later Touring models with the purchase of an inductive rpm sensor.
We headed over to Fineline Cycles in Baldwin Park, California, to do the install. Auto Meter sent Scott Crerar and Doug Lemons from the Windy City to install these gauges on a ’09 Street Glide. Scott says that this is a true racing gauge with a lot of response in the needle and that the gauge recalibrates every time you turn the motor on and off.
At the time of this install, this was not a plug-and-play kit. There were many wires that needed to be soldered but we talked to Joe Mielke from Klock Werks, who has updated the wiring harnesses to minimize soldering for this setup. Joe also said that Klock Werks and Auto Meter have discussed making a plug-and-play version of this kit.
(Editor’s Note: Some updates have been made to the wiring process eliminating the need for soldering connections at the gauge. Below is the procedure we followed prior to the updates).


