
Hot Legs and Modular Apes | Ness-essities For Our Fatty
[01]
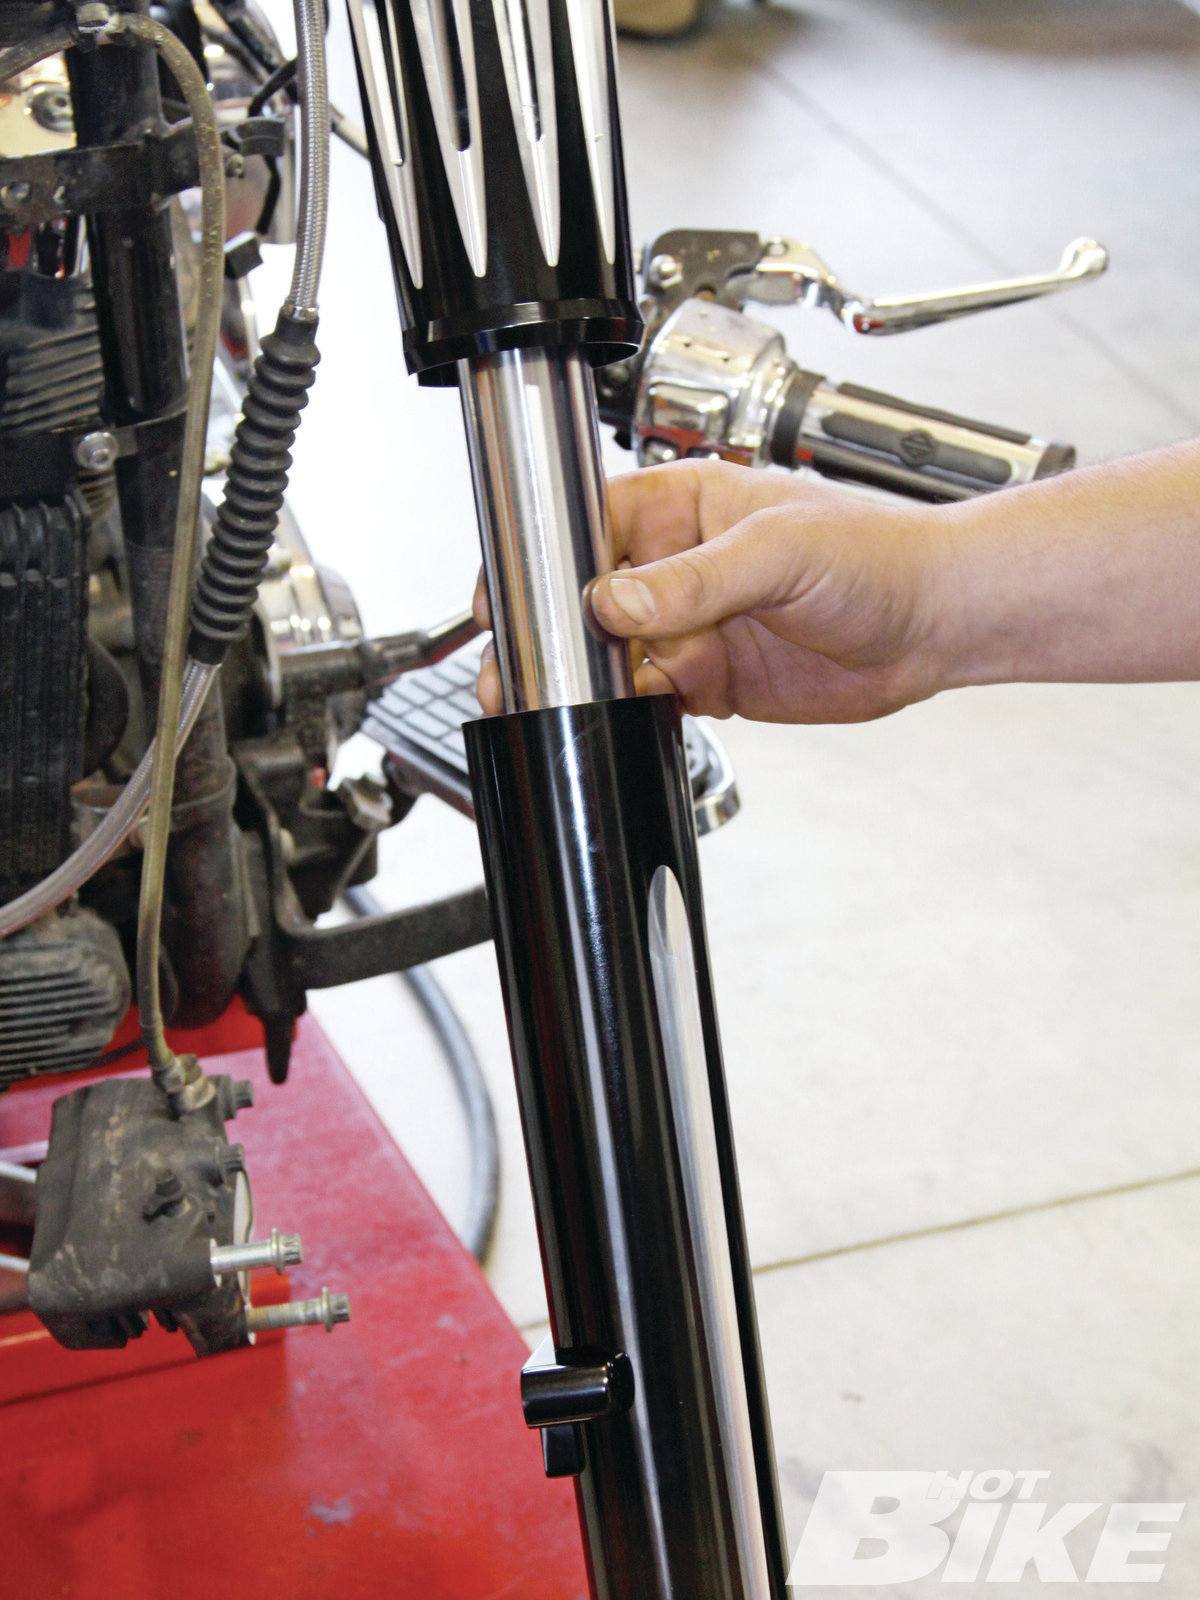
[02]
[03]
[04]
[05]
[06]
[07]
[08]
[09]
[10]
[11]
[12]
[13]
[14]
[15]
[16]
[17]
[18]
[19]
[20]
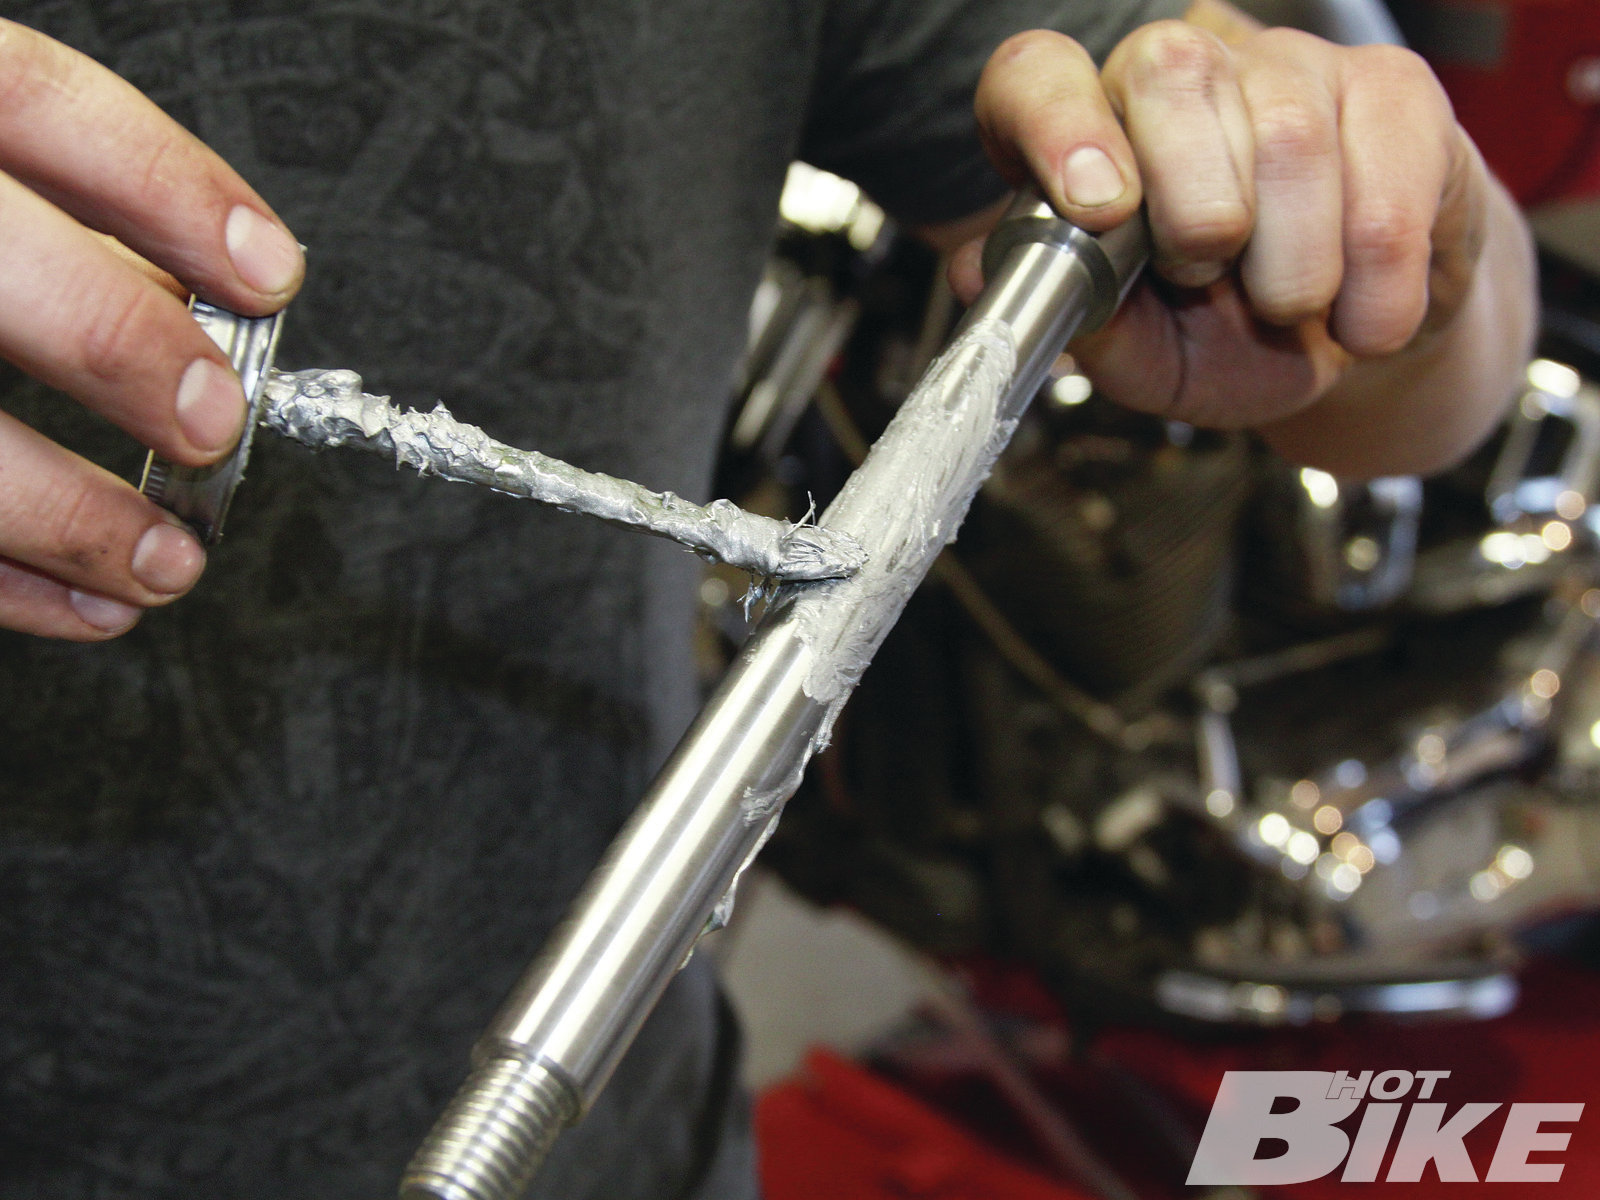
[21]
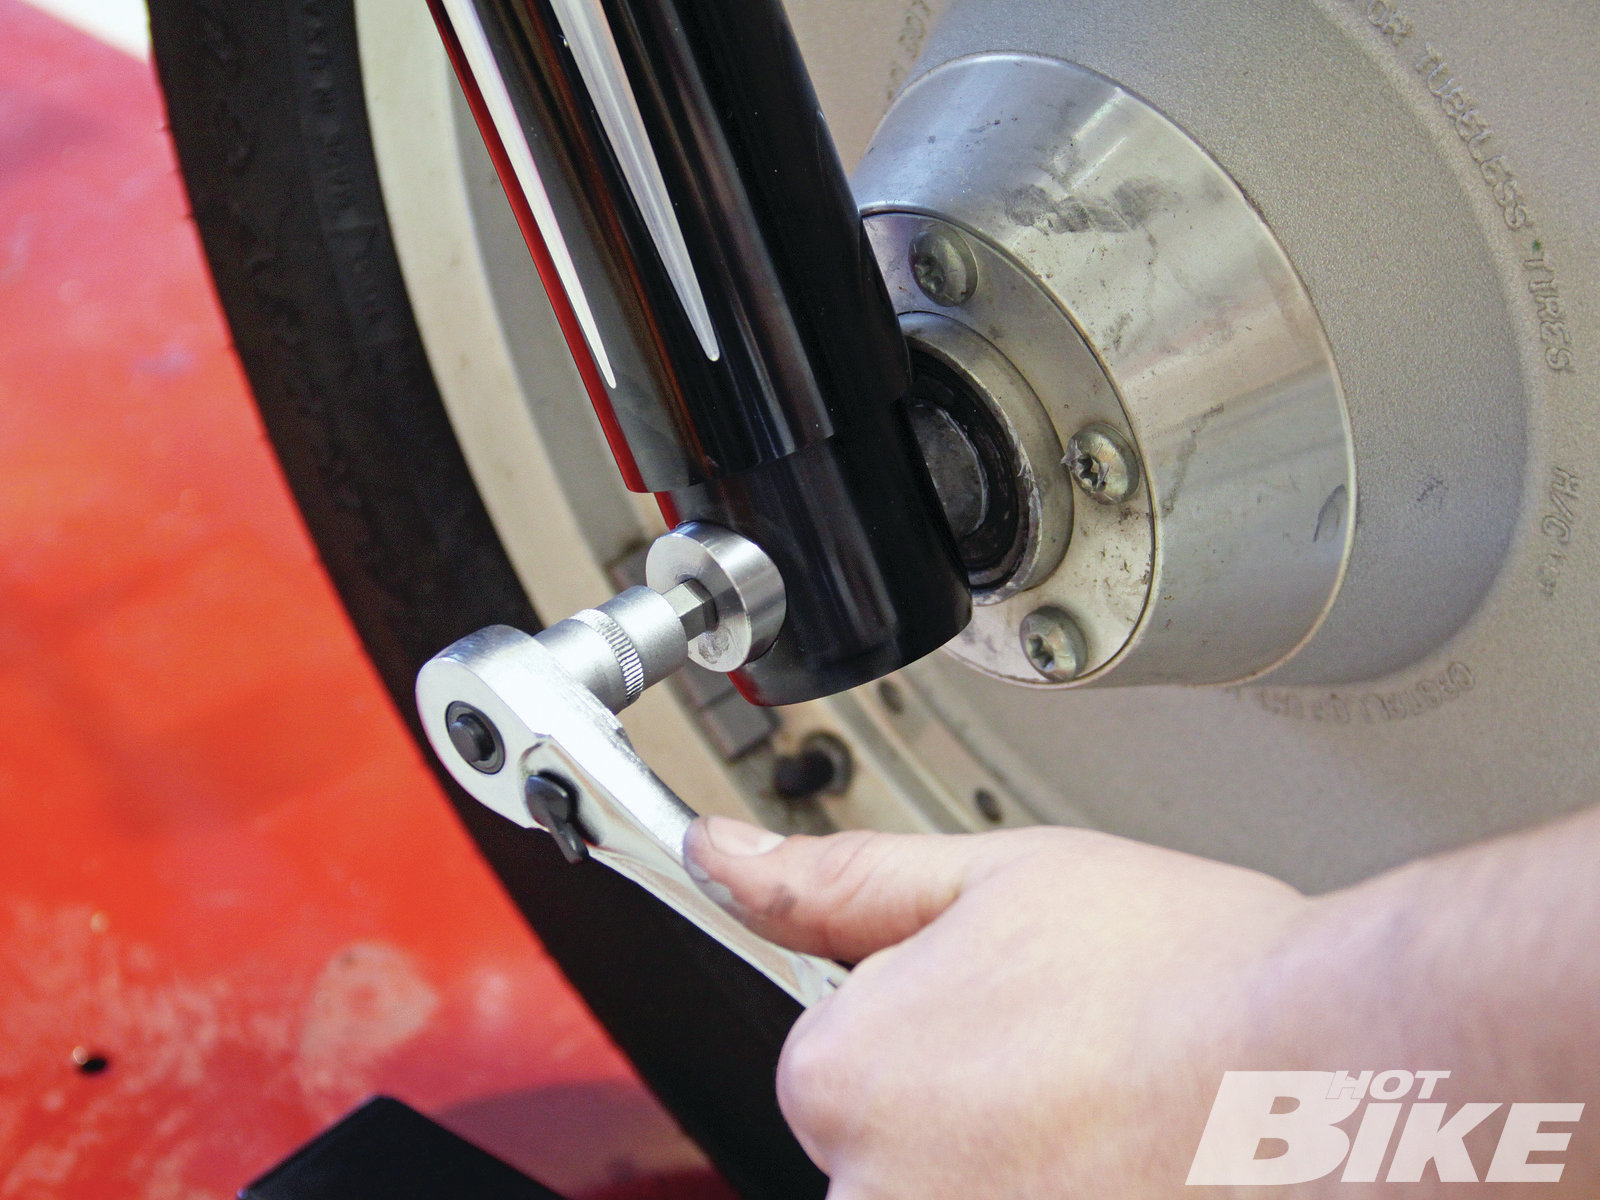
[22]
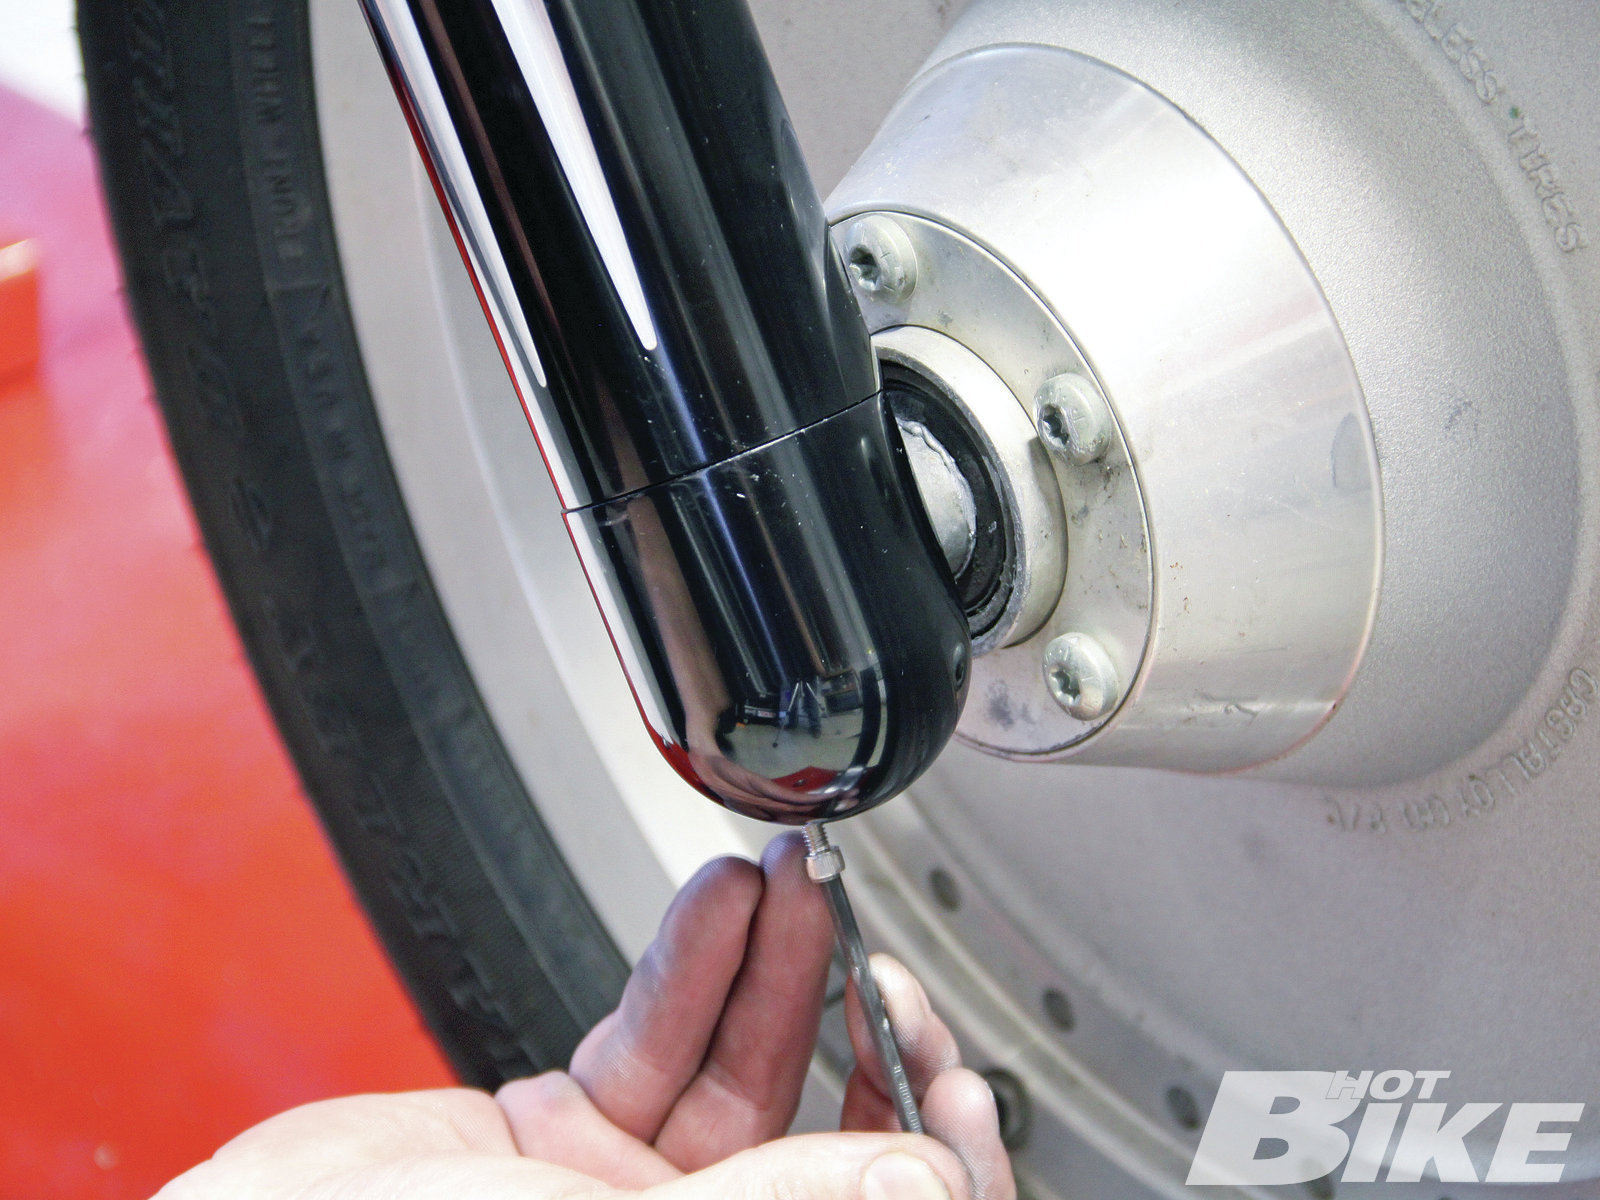
[23]
[24]
[25]

[26]
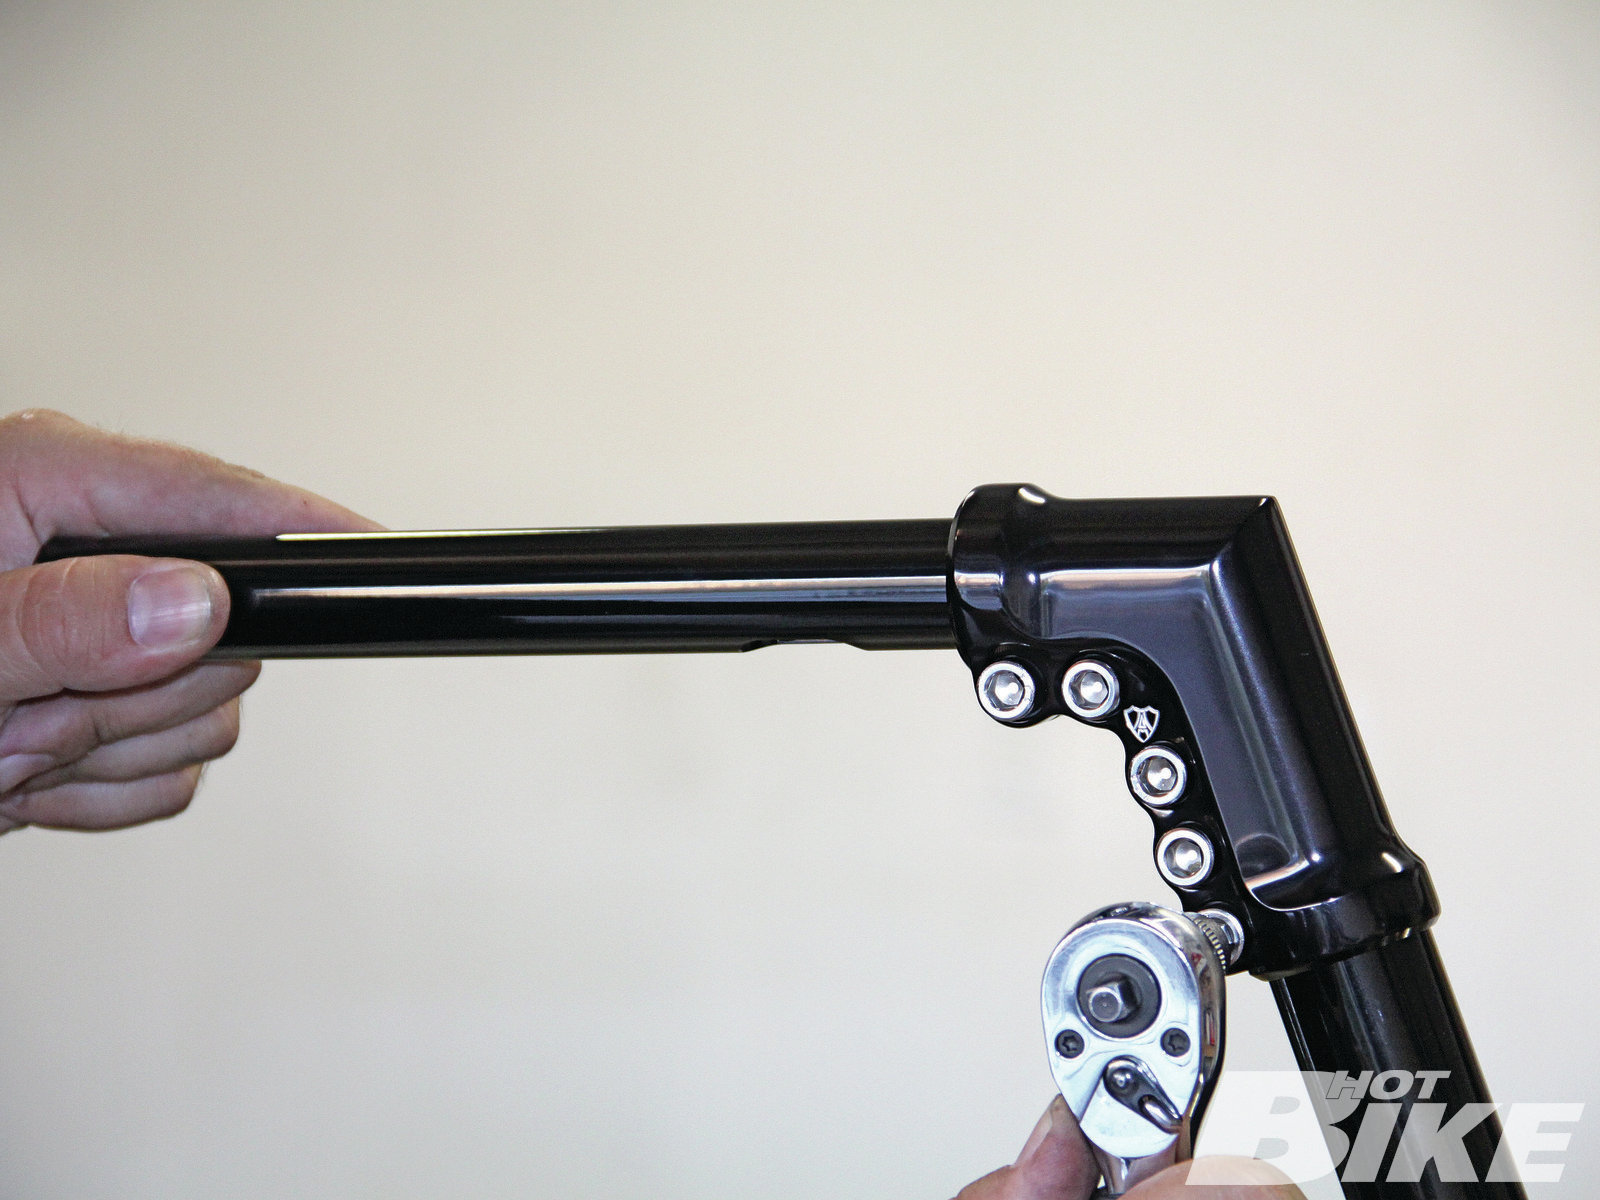
[27]
[28]
[29]
[30]
[31]
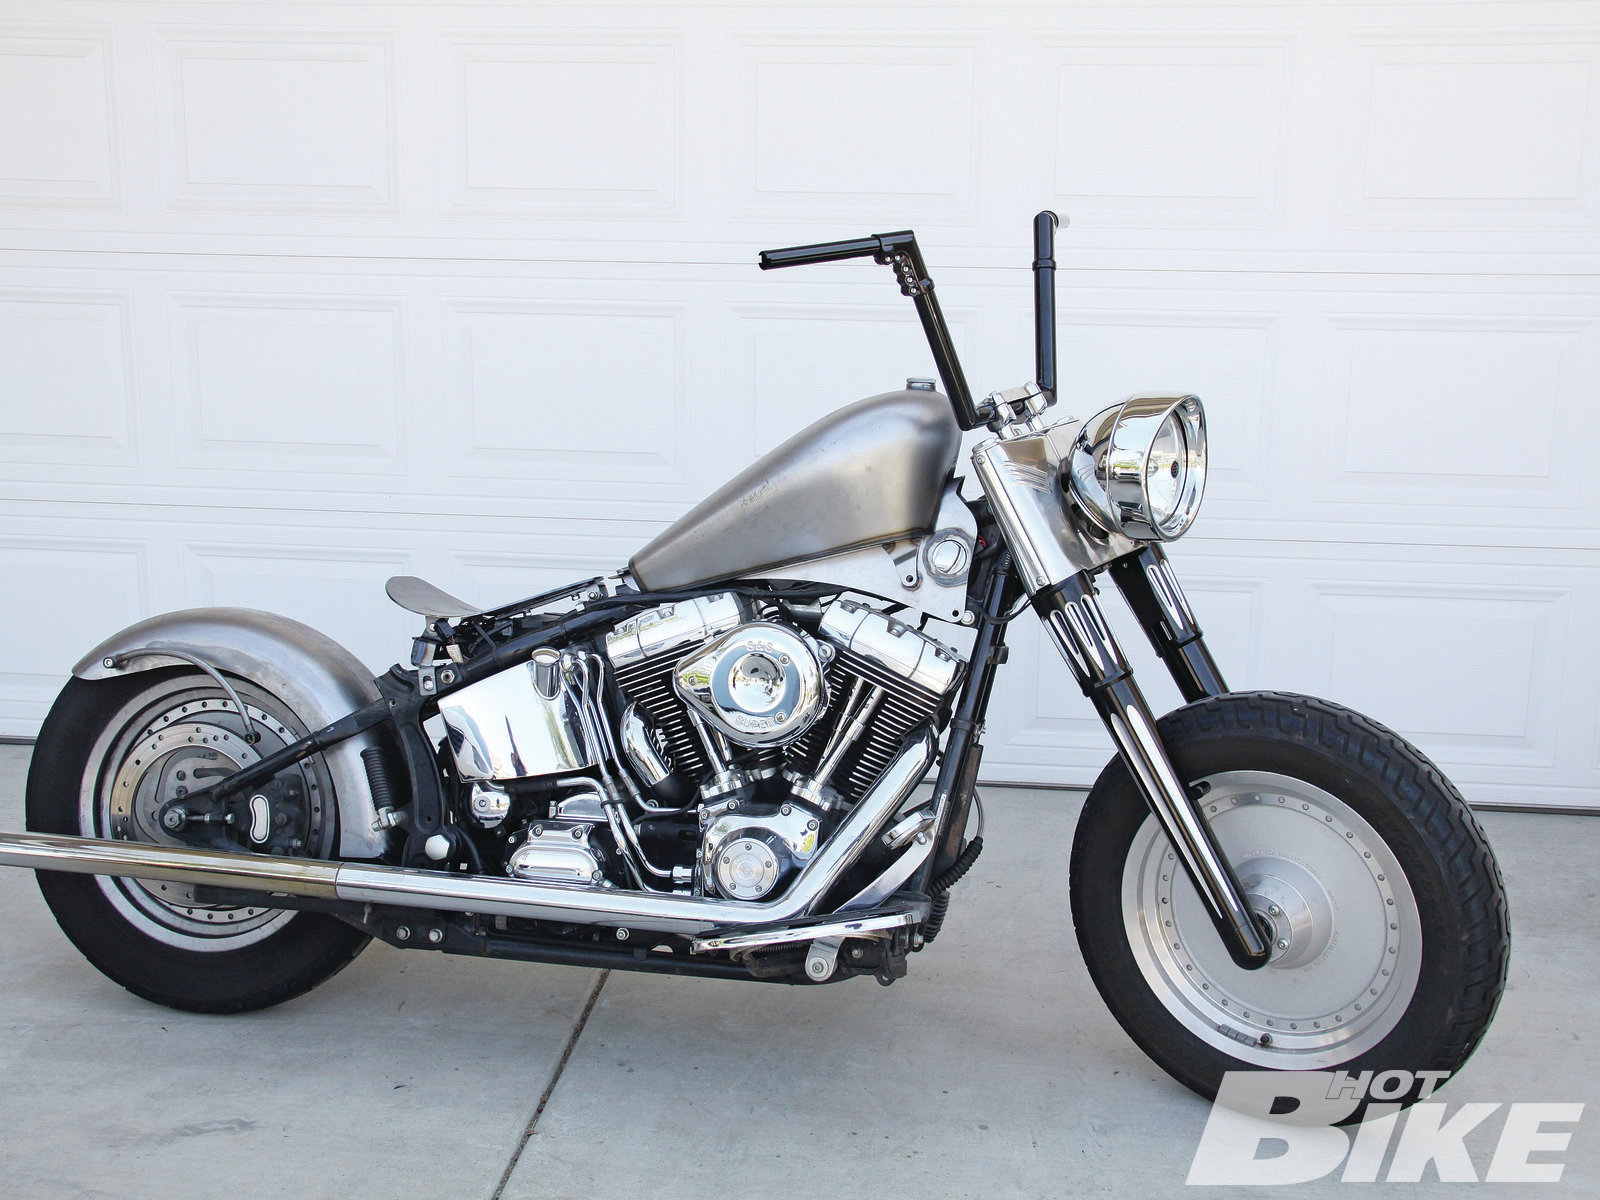
After many long, hard miles and a couple of spills here and there, like many of us, our 2002 project Fat Boy had seen better days. Worn, weathered, and long in the tooth, the old Boy was well overdue for a weight loss regimen and a facelift. The last time we visited this project, we started addressing the excess weight and wrinkled exterior by ditching the scratched and dented sheetmetal in favor of a new tank, seat pan, and rear fender from Custom Chrome’s Lucky Fcker collection. Seeing as this project started life with a set of bulging and sagging saddlebags, we decided to call it the Fat Fcker. Our plan isn’t to turn the Fatty into a frail and anemic Softy. No, our intention is to just shed a few pounds so that it still has the thick look of a Fat Boy, just with a leaner and meaner profile. Getting rid of the saddlebags, FL fenders, and Fat Bob tanks made a dramatic difference and gave the bike a much slimmer silhouette. In this next installment, we are going to address the fork legs and handlebars.
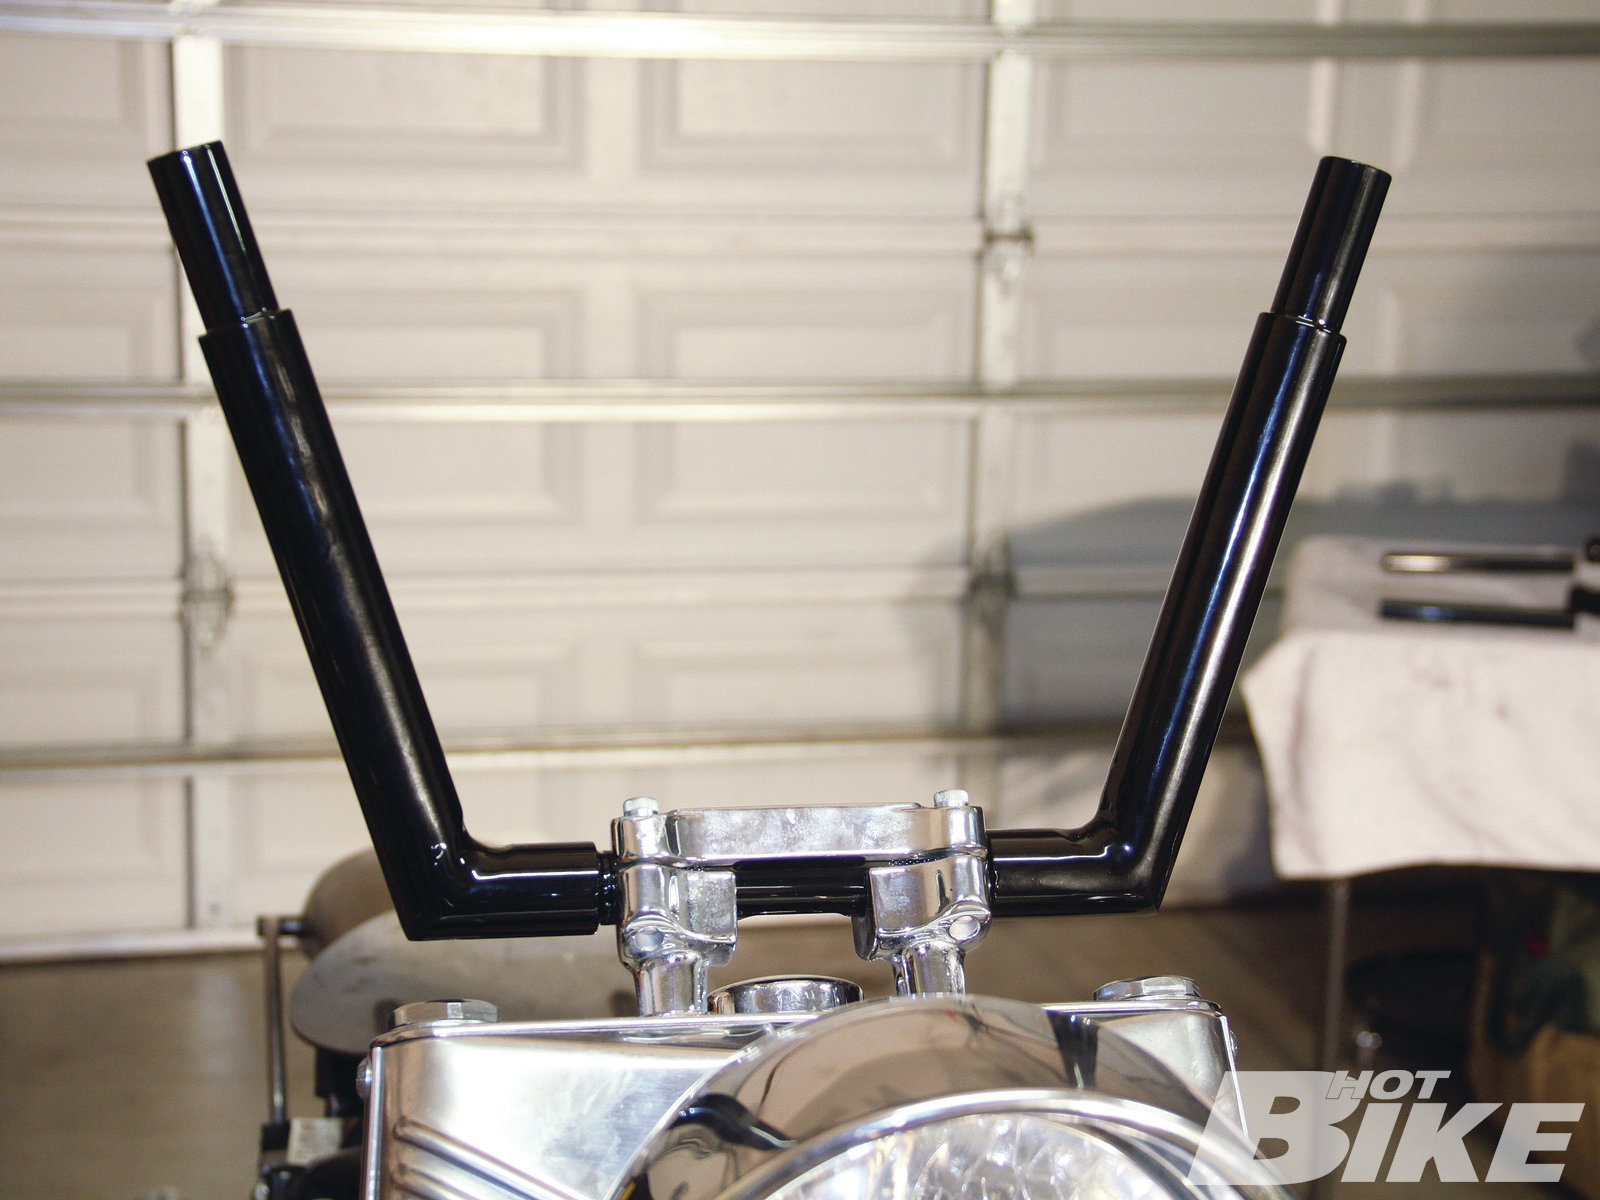
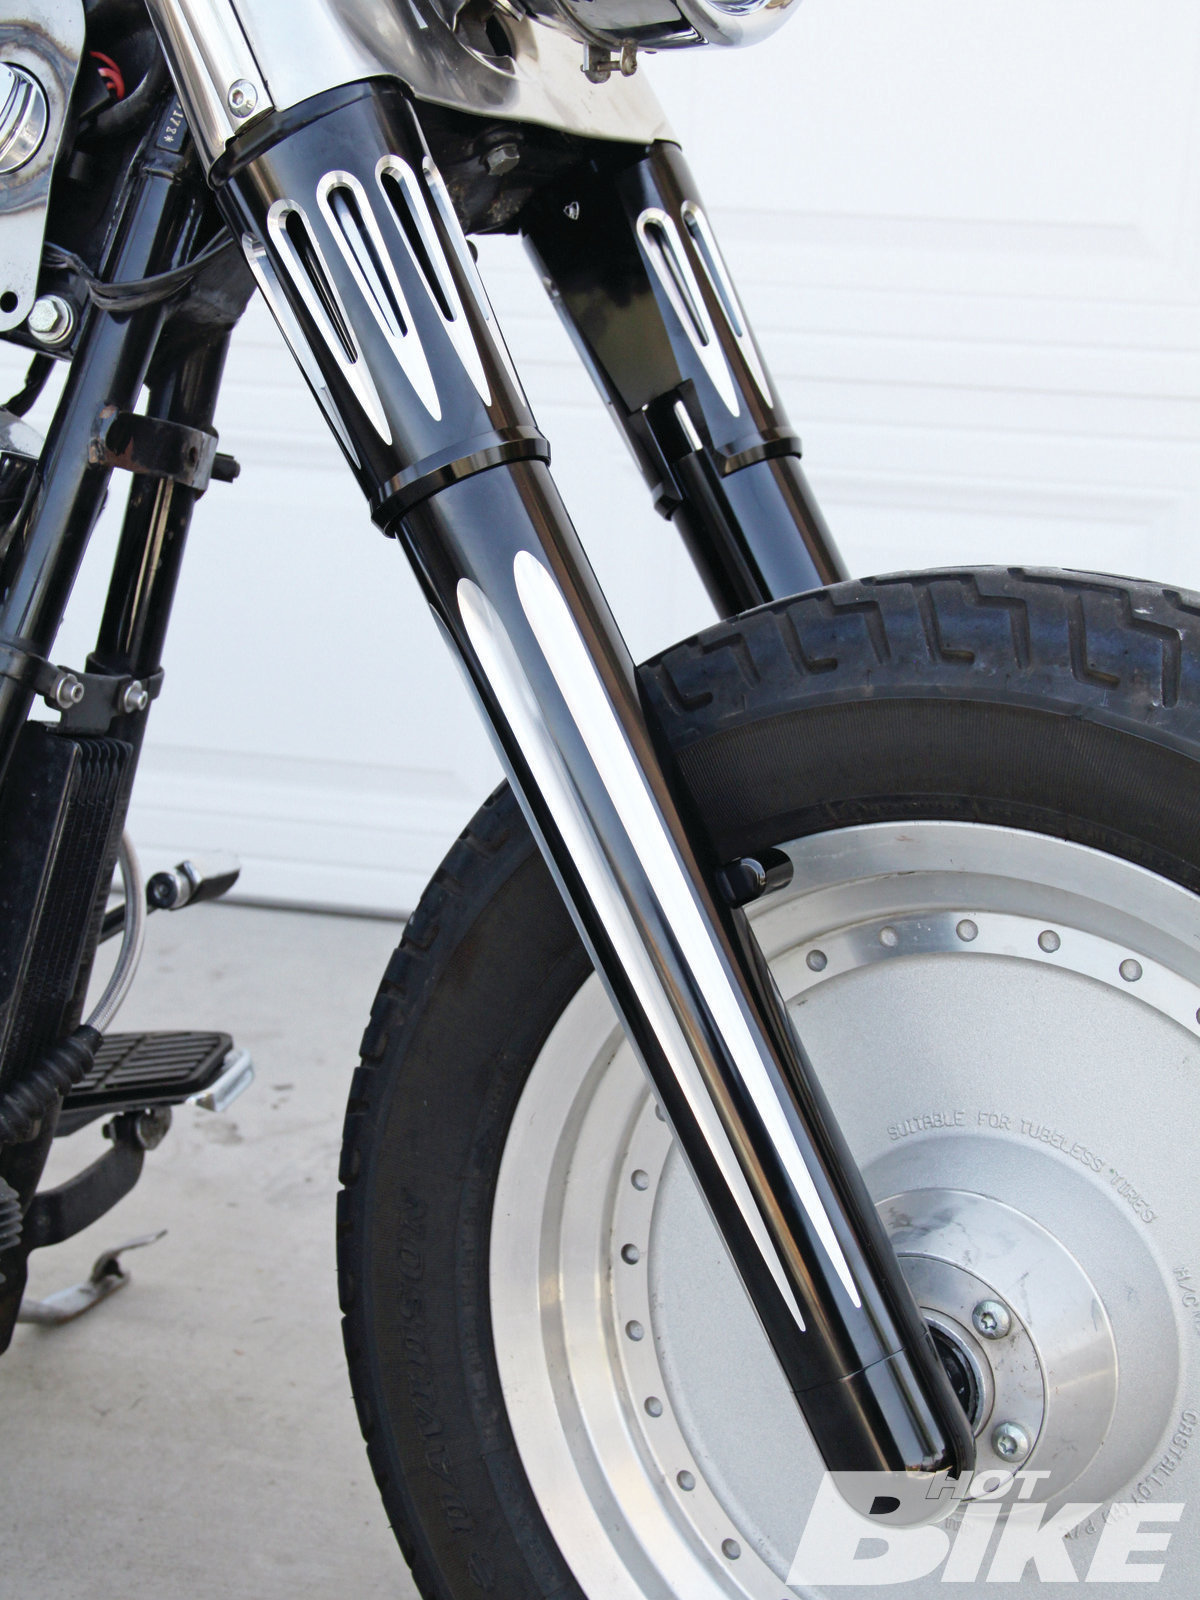
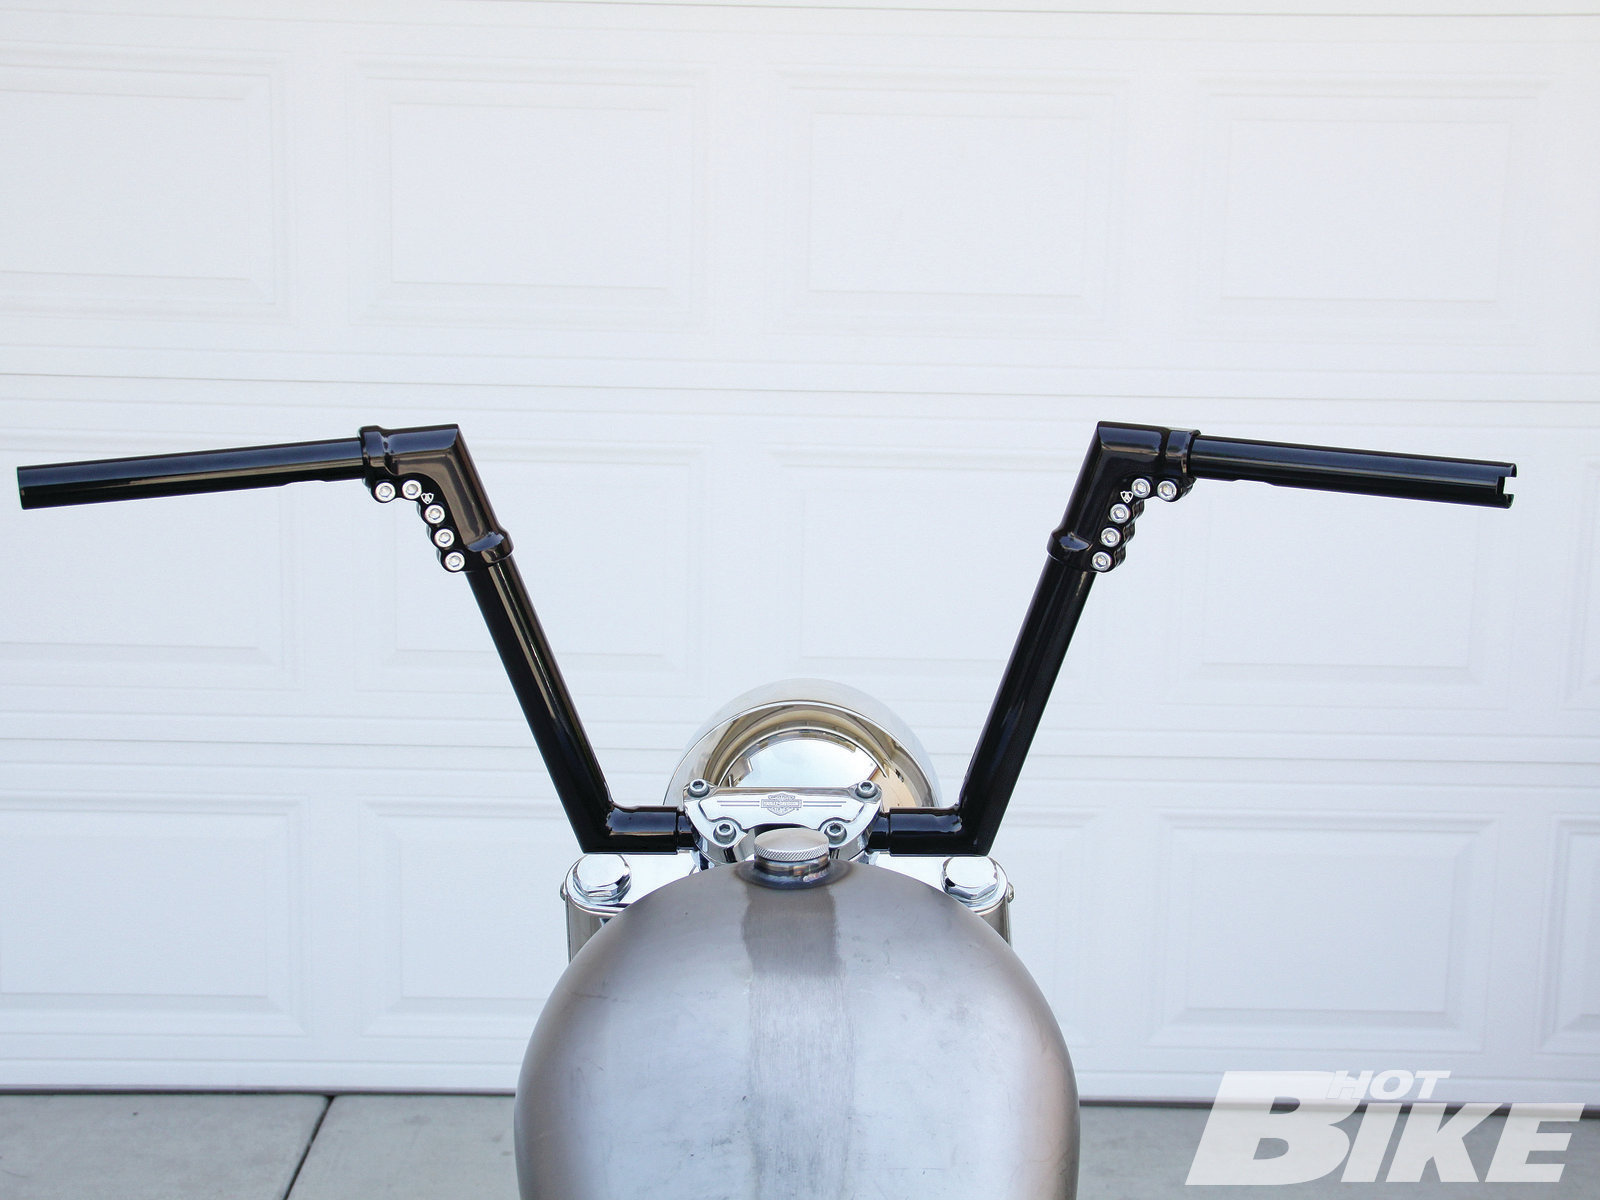
Recently we heard that the Ness clan had come out with a line of its Hot Legs fork sliders for Softail models. Originally released for Touring models, the legs are machined from 6061-T6 billet aluminum and feature a really clean and custom looking hidden axle design. Ness offers the legs in either a chrome or black finish with a smooth or machined Deep Cut design. For the Touring models, the legs are available in either dual disc, custom single disc, or custom single disc dual caliper (two calipers on the same side) and the Softail legs are only available for dual or single disc applications. Another new item in the 2012 Ness catalog is its Modular Handlebars. Mini Apes, Drag Bars, and Bagger Apes, the Ness Modular bars are comprised of a multi-piece design that features billet junction clamps at the top allowing users to adjust the bar ends in or out to fit their exact desired comfort. The Mini Apes are offered with a 10-inch rise, the Bagger Apes come in a 13-inch version, and the Drag Bars are available in either 8- or 12-inch versions. All bars are offered in chrome or black, are drilled and slotted for internal wiring, and work with cable or fly-by-wire applications. Follow along as we add some strength and style to our Fatty with the Ness Hot Legs and Modular Bars.
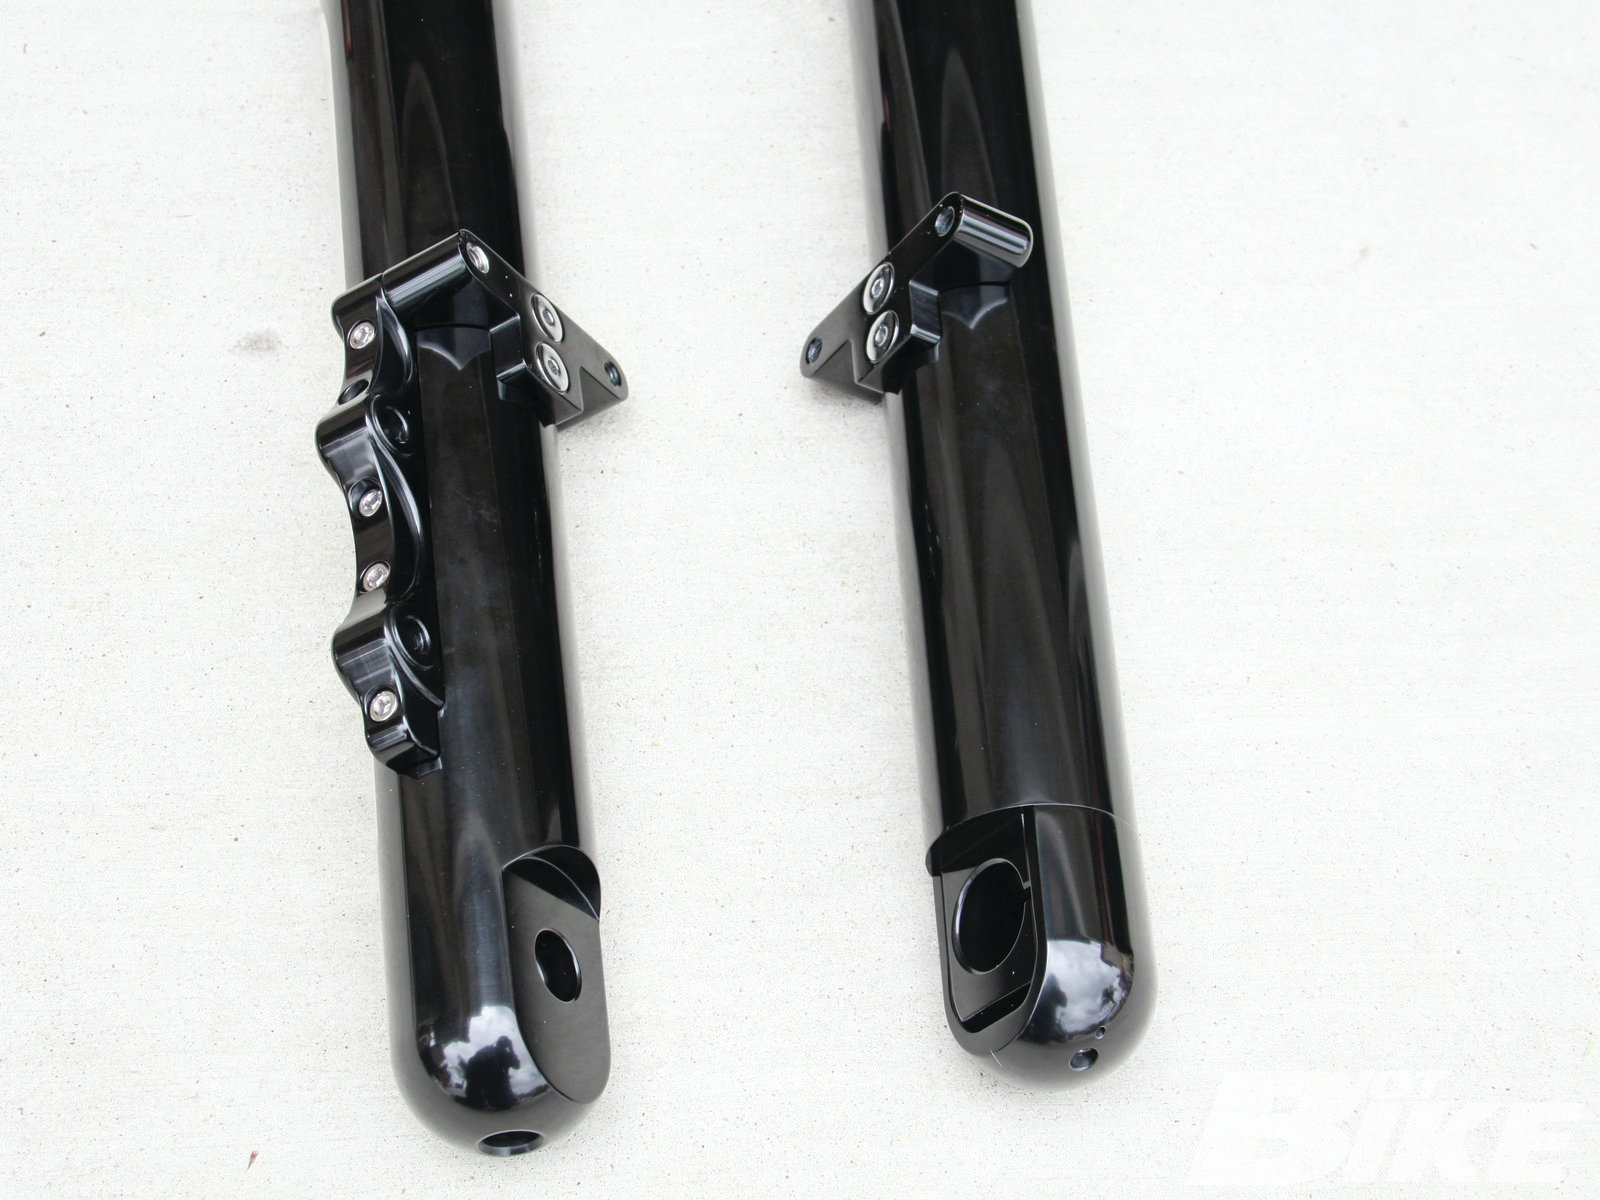
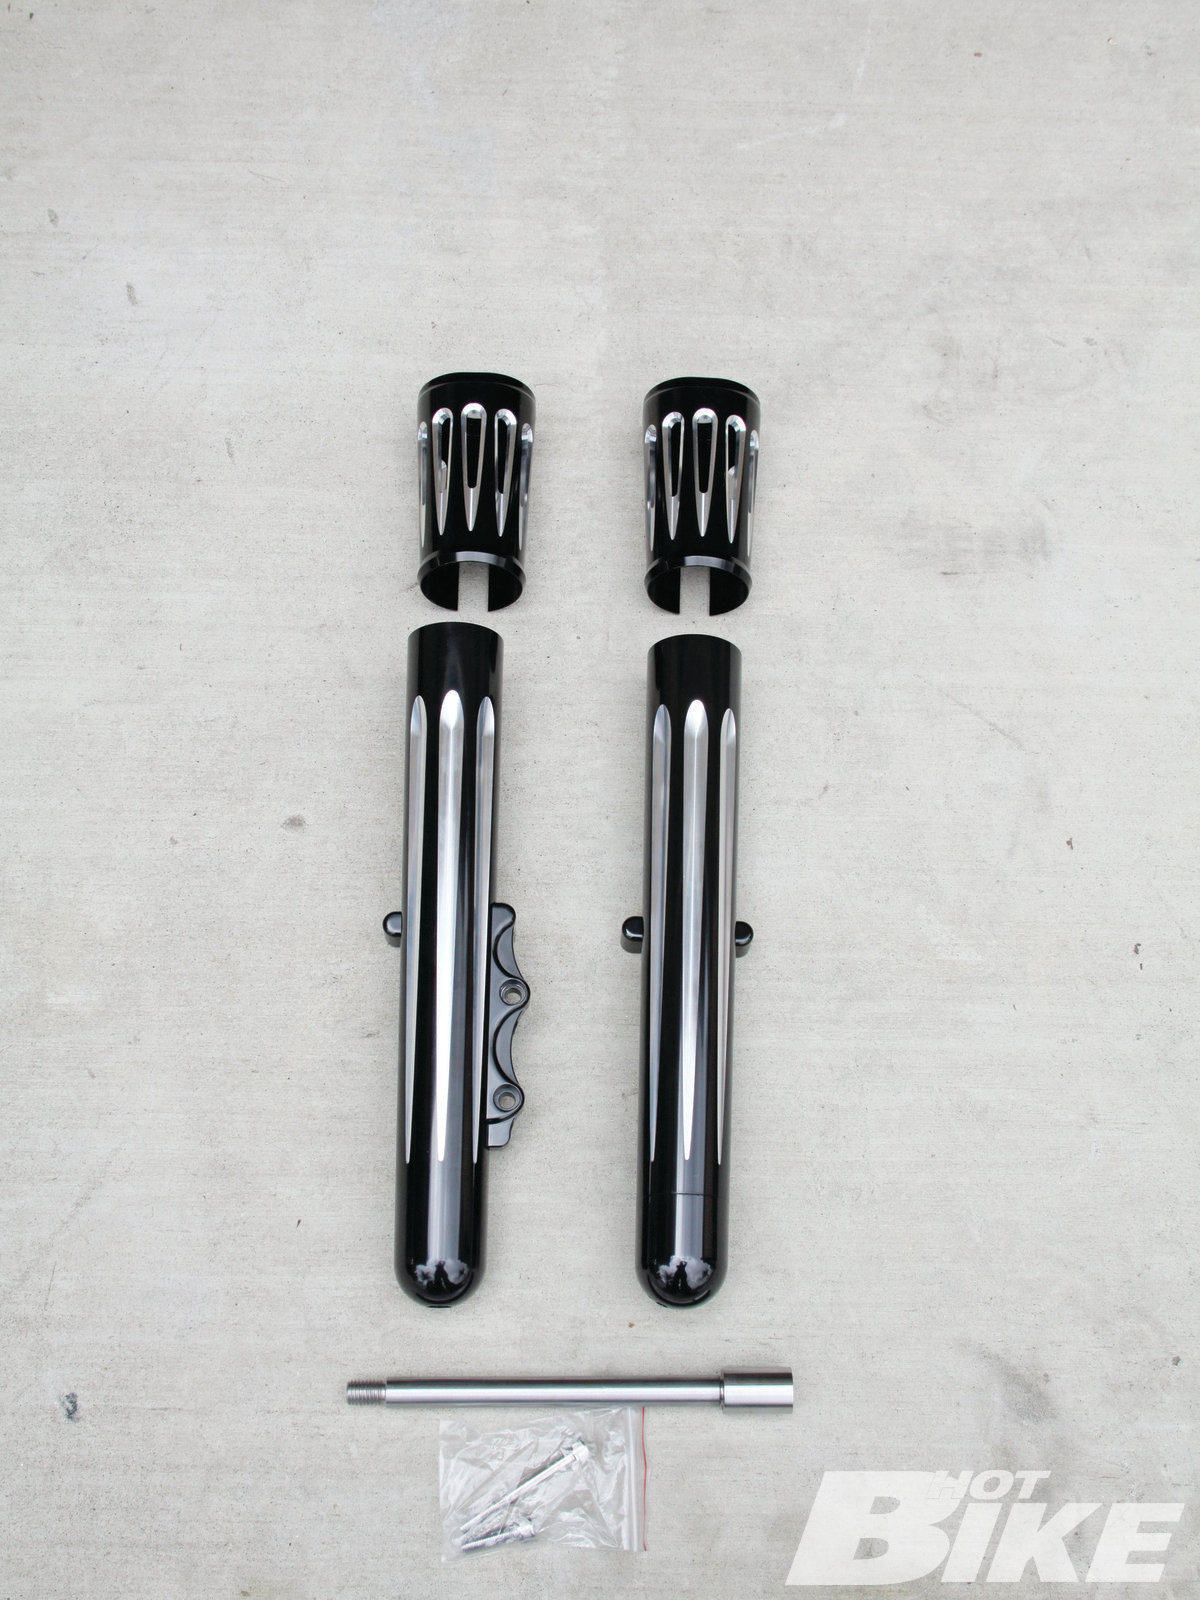
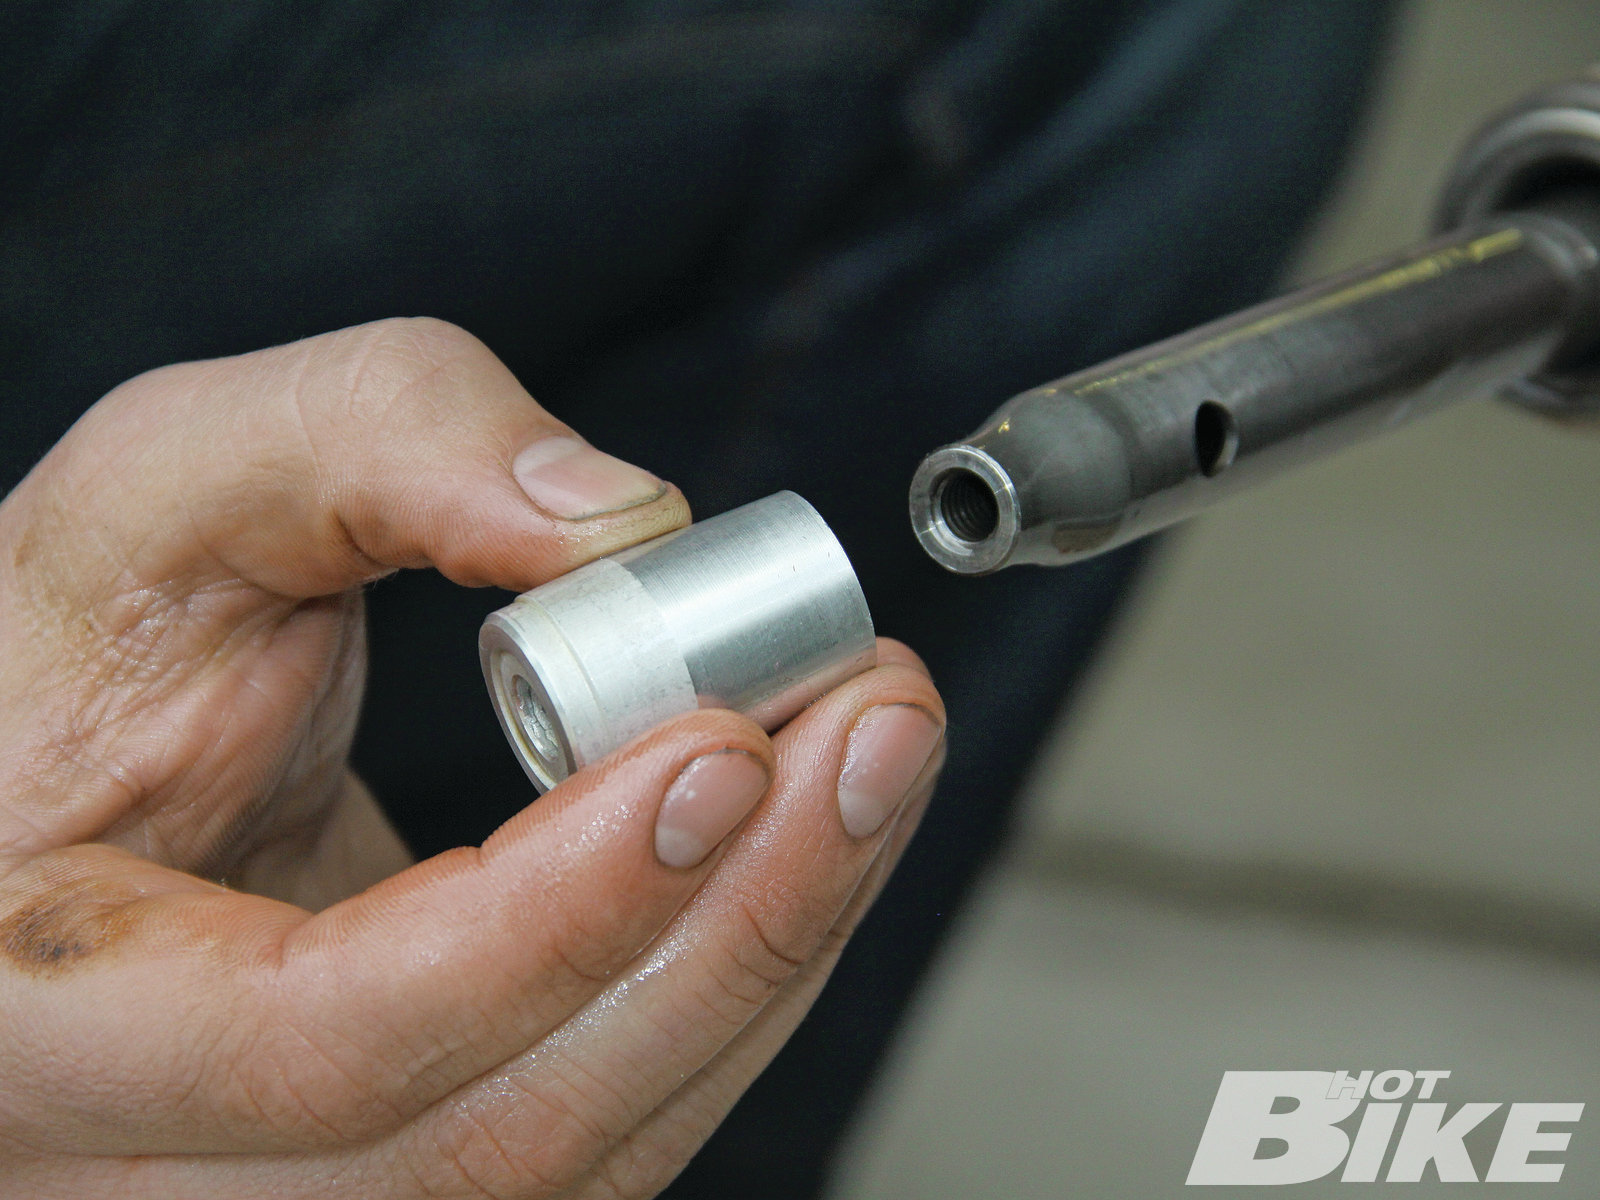
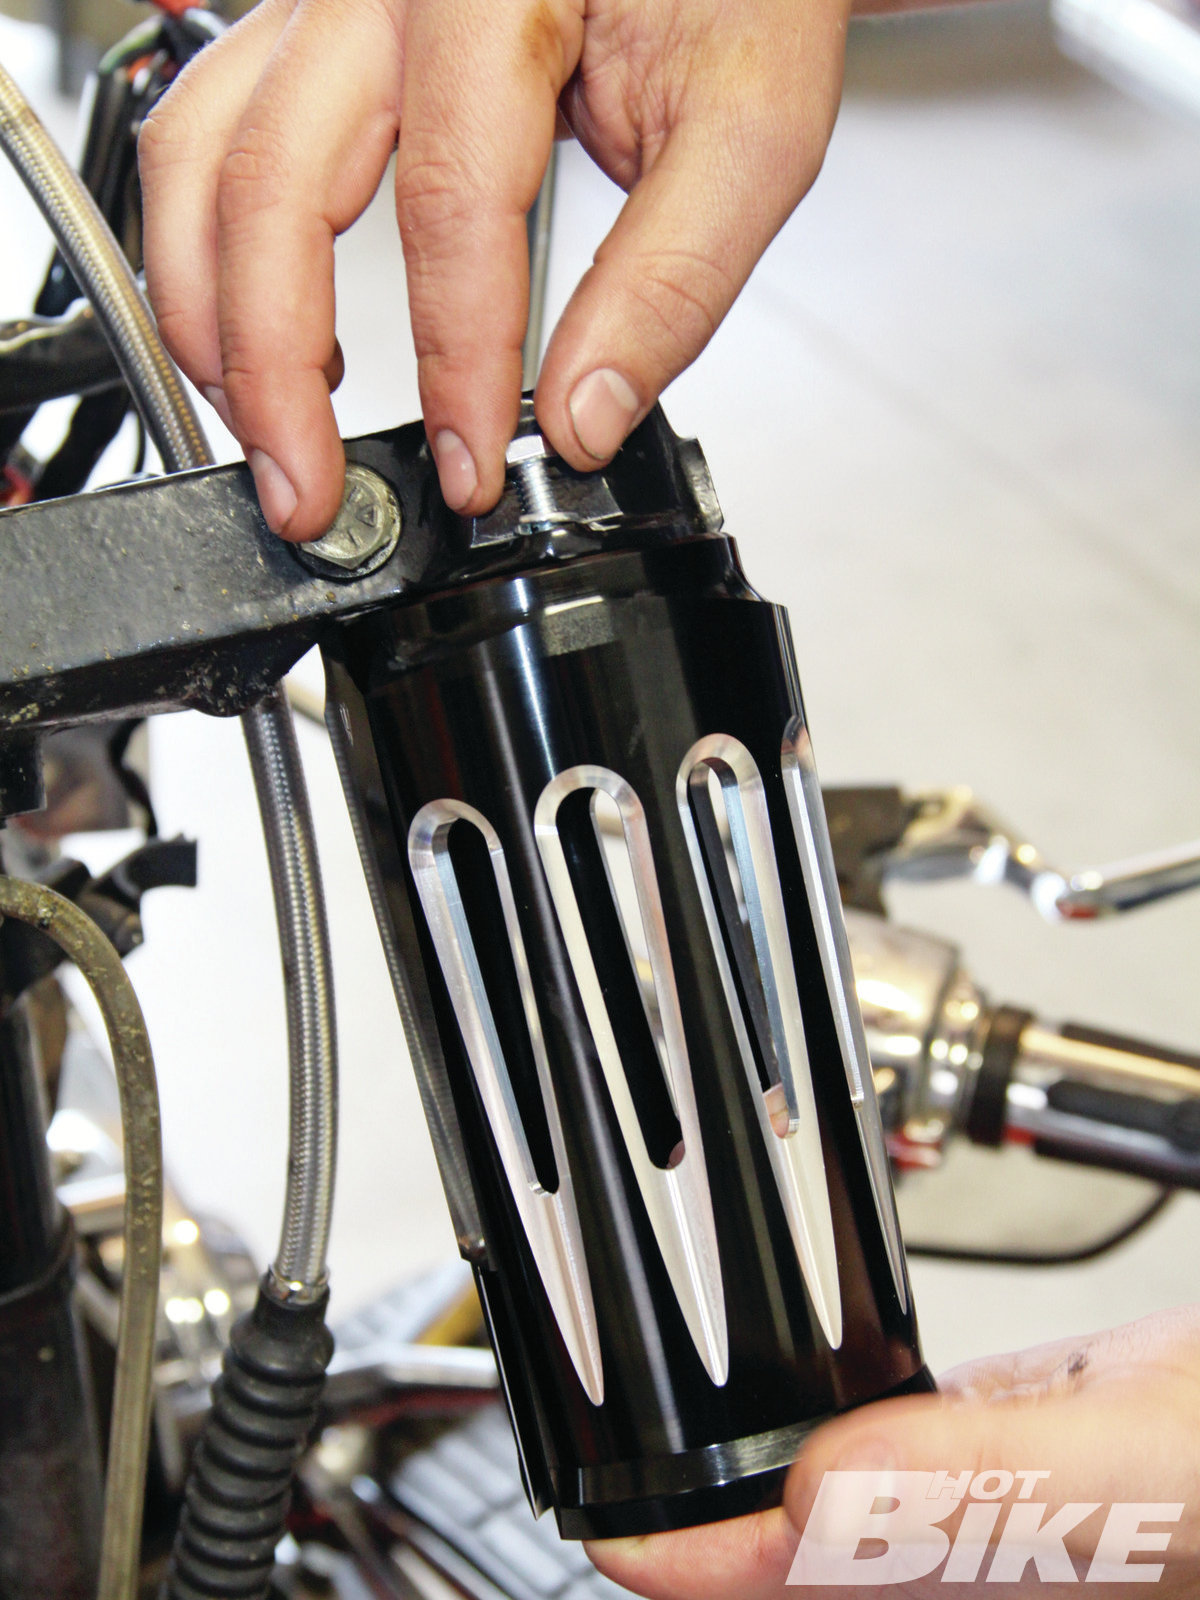
01 For this install, we picked up a set of the Ness Deep Cut Hot Legs for Softail models ($599.95). The black-coated legs feature machined grooved accents that run down the legs, hence the Deep Cut moniker. The legs come with a Zinc-coated 12L14 steel hidden axle and the necessary hardware. Looking at the bottom of the legs, the axle slides in through the right and threads into the left leg. The cap (arrow) then slides over the bottom to hide the right side of the axle.
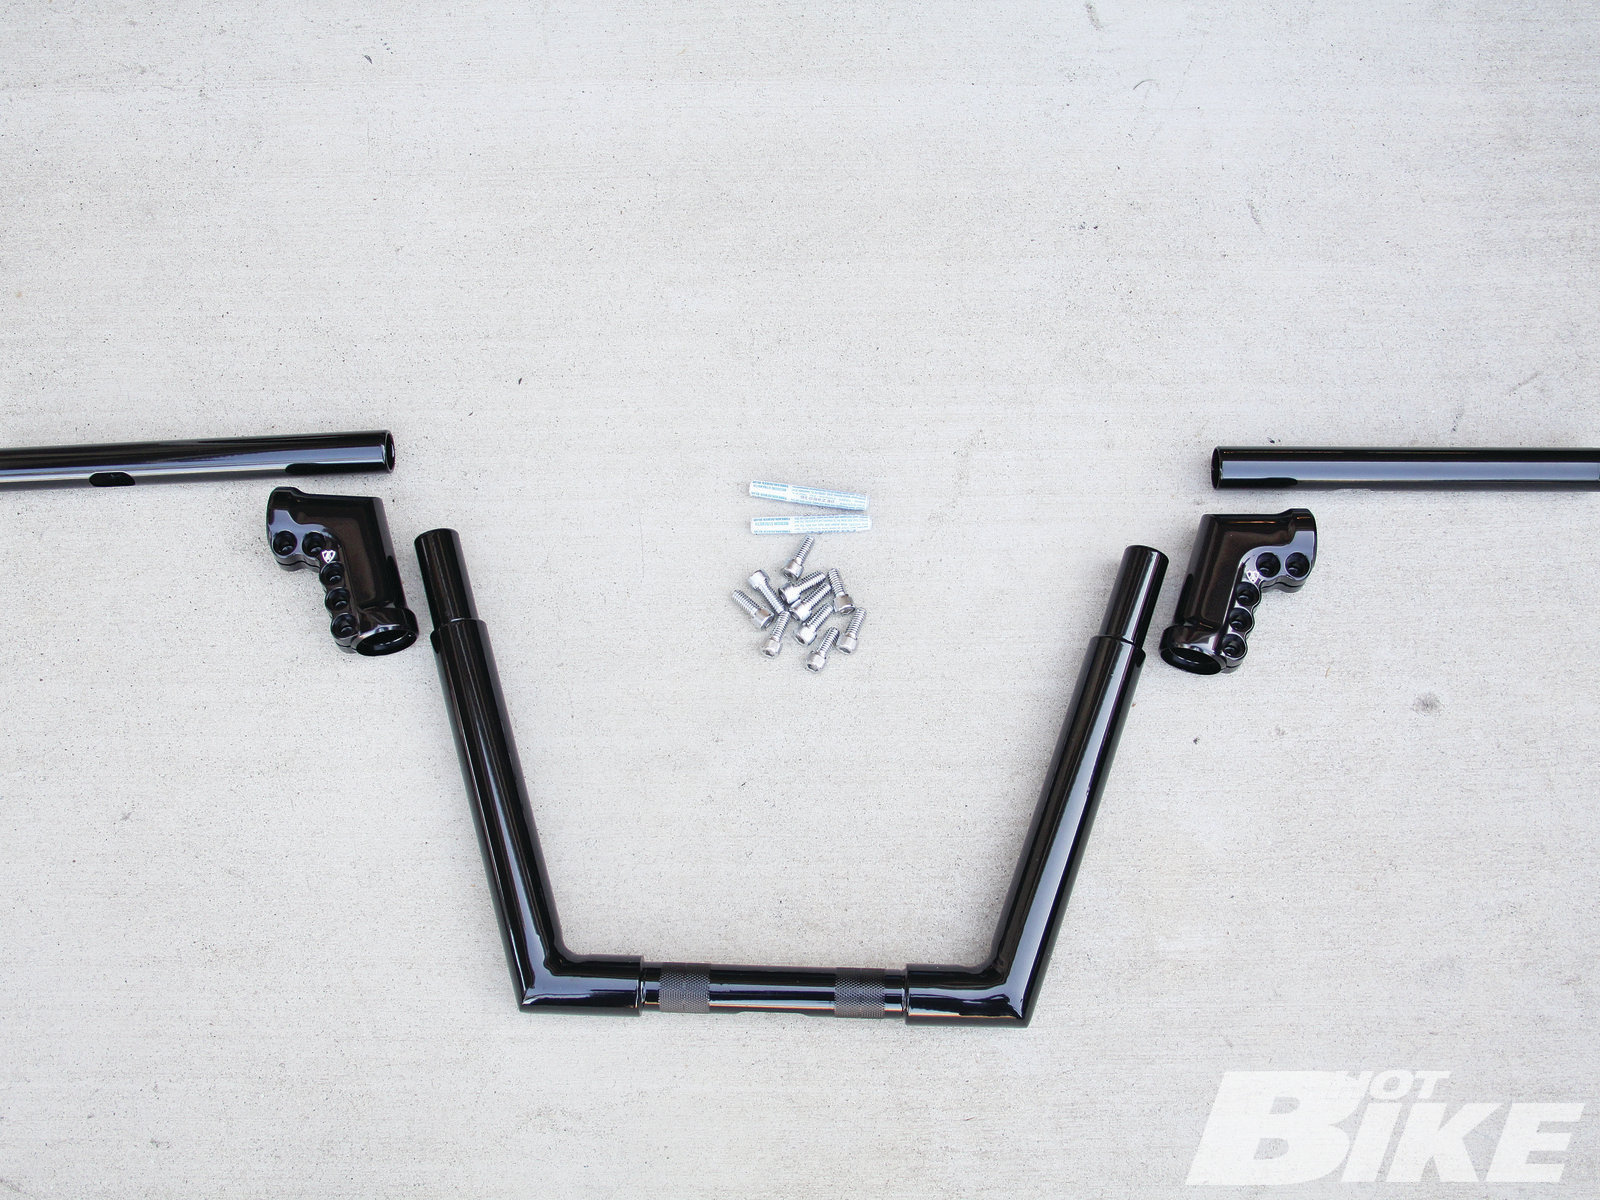
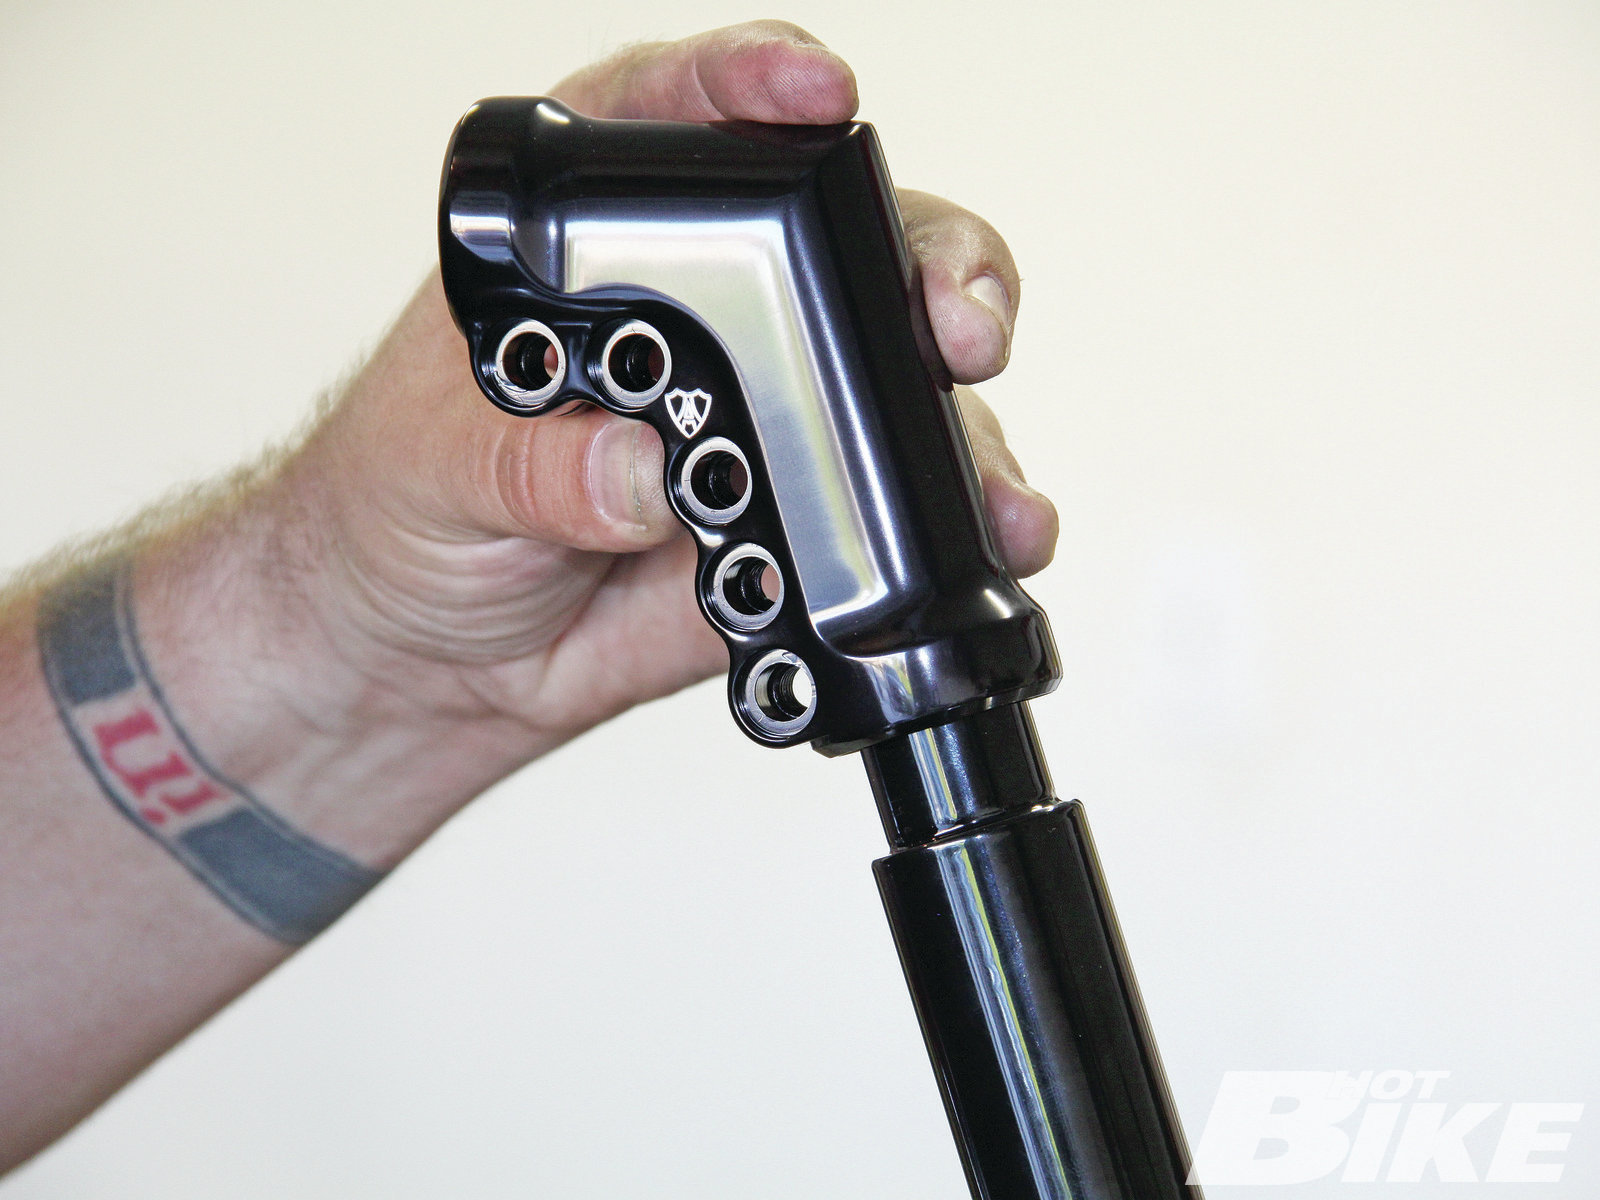
02 To beef up the top we picked up a set of the black Modular Mini Apes ($459.95). It’s basically a five-piece system with left and right handlebar control tubes, left and right billet junctions, and the lower handlebar section. The mini apes feature 3-1/2-inch on center knurling to fit most H-D models, and they come with 10 5/15-18 socket head bolts.
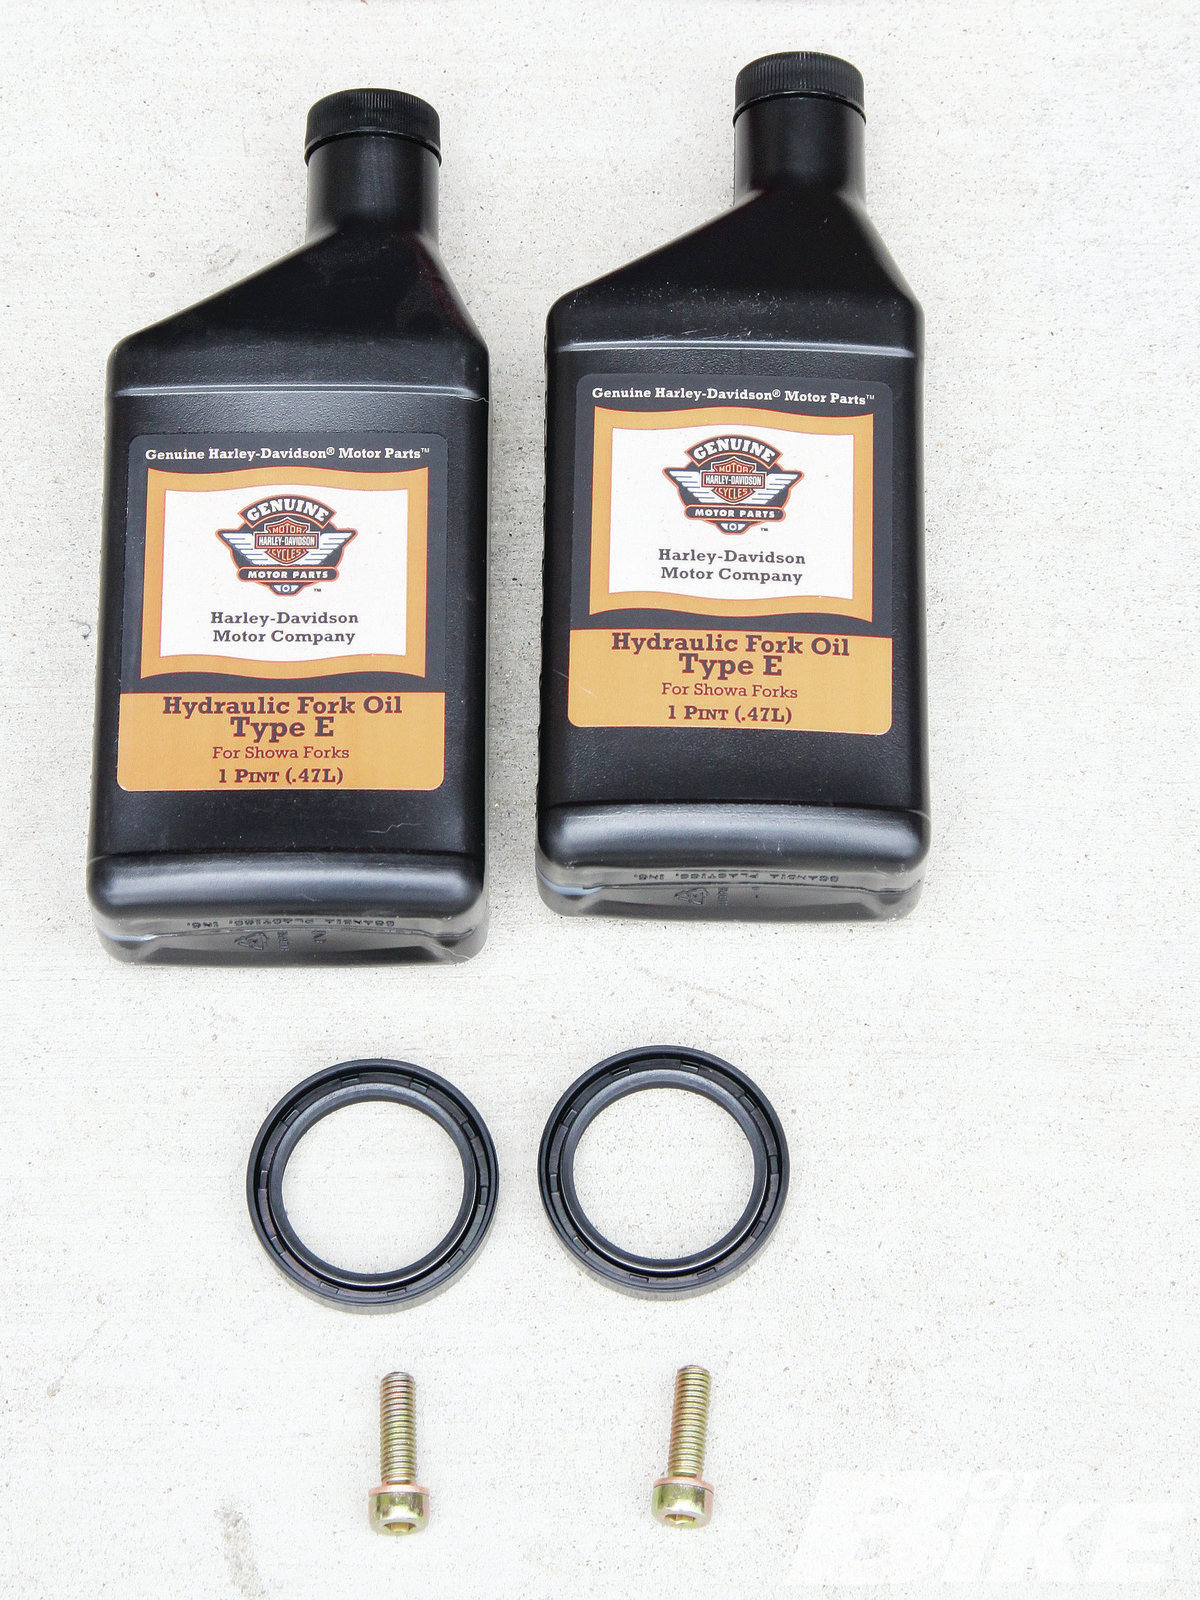
03 Since we were going to be removing the legs, we made sure to pick up some fork oil, new fork slider oil seals, and new lower Allen bolts and washers for securing the bottom of the fork legs.
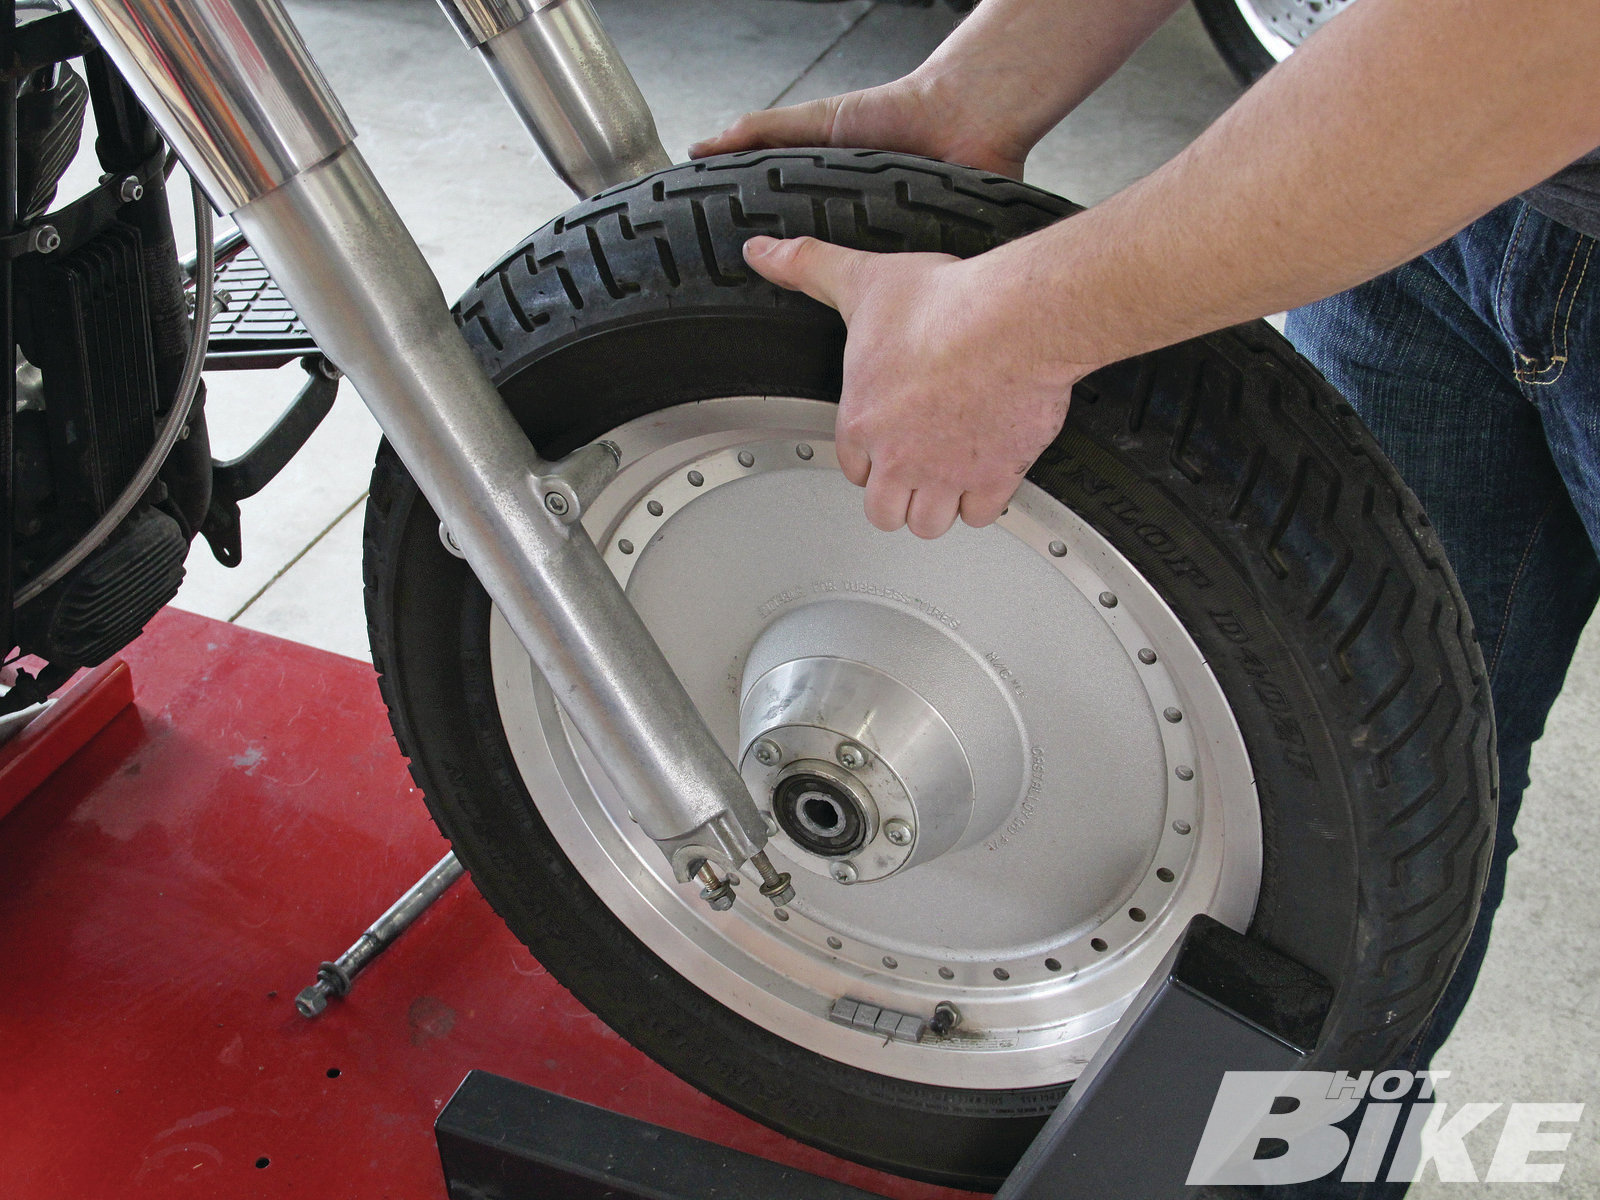
04 We started the parts swap by securing the bike on a lift and using a center jack to raise the frontend. We then removed the front wheel.
05 We are going to be installing new hand controls and grips, along with new brake, clutch, and throttle lines to fit the 10-inch bars, so we removed the handlebars, controls, and all the lines as an assembly. We also removed the nacelle so that we could gain access to triple tree pinch bolts and the fork boot bolts.
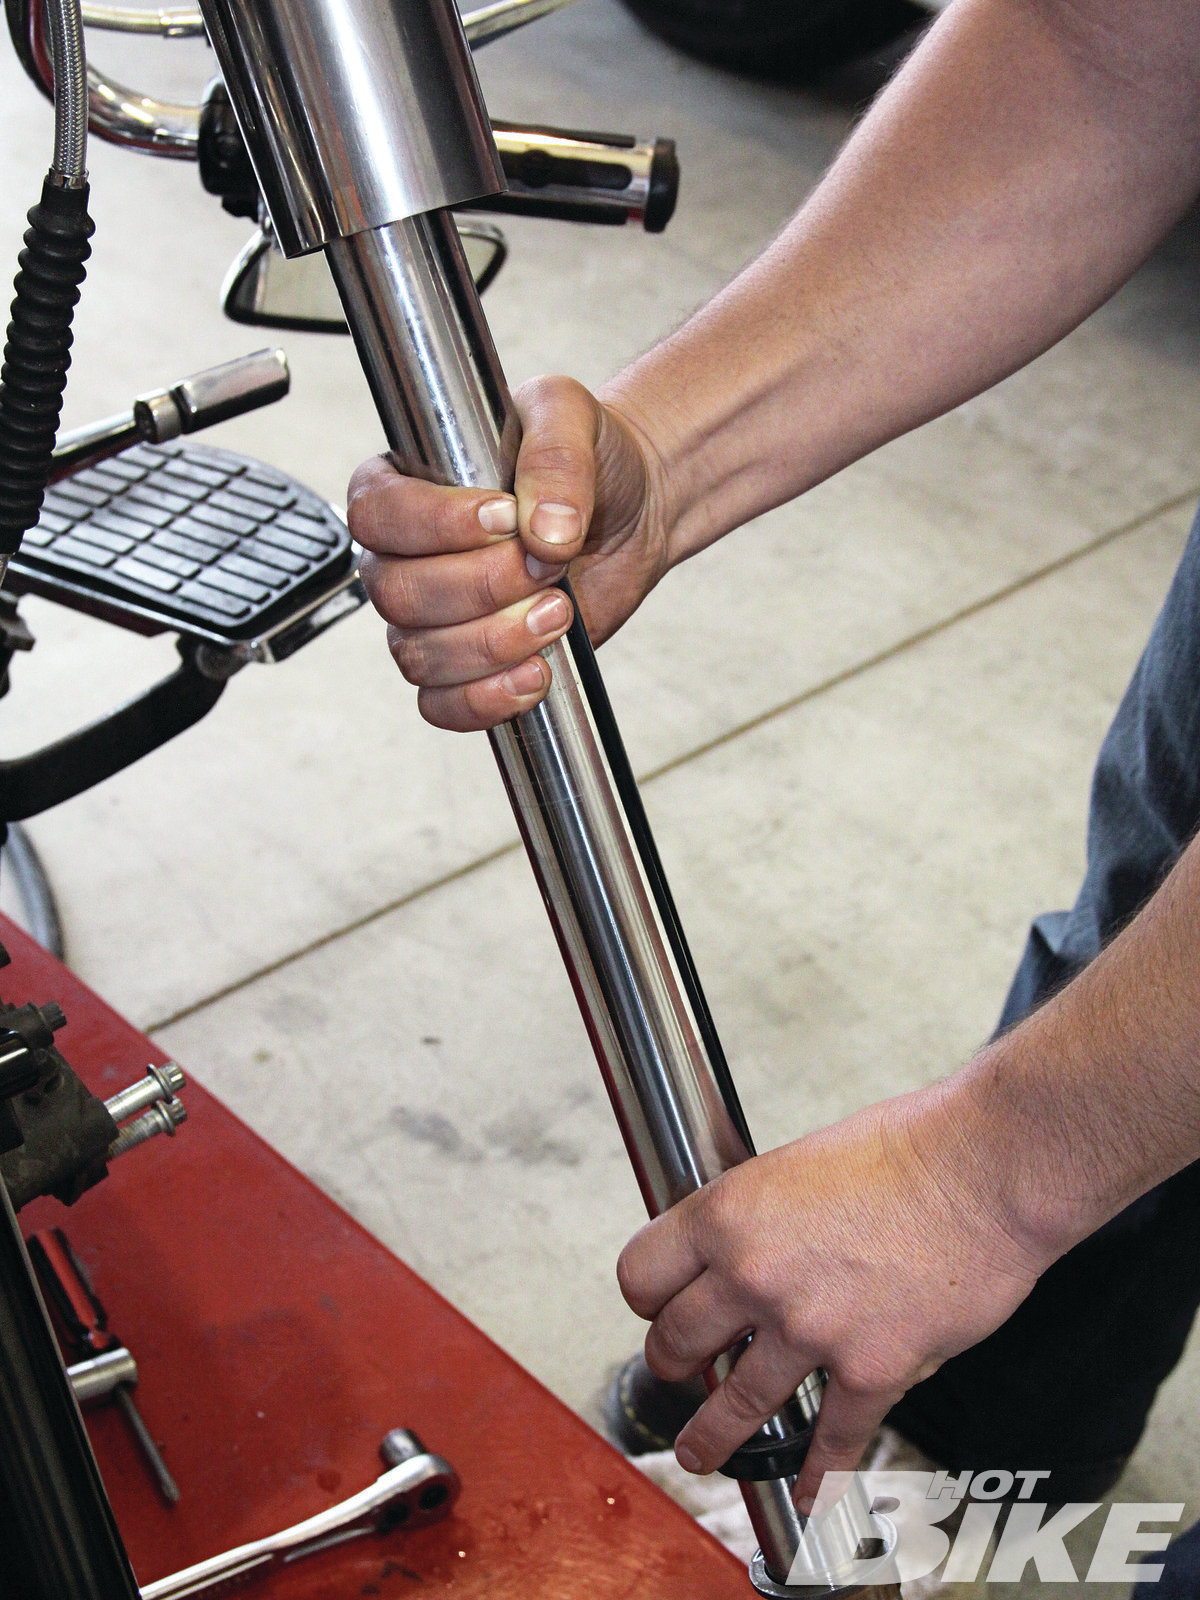
06 We swapped out the left-side fork leg first. With the bars out of the way, we were then able to loosen and remove the fork cap bolts.
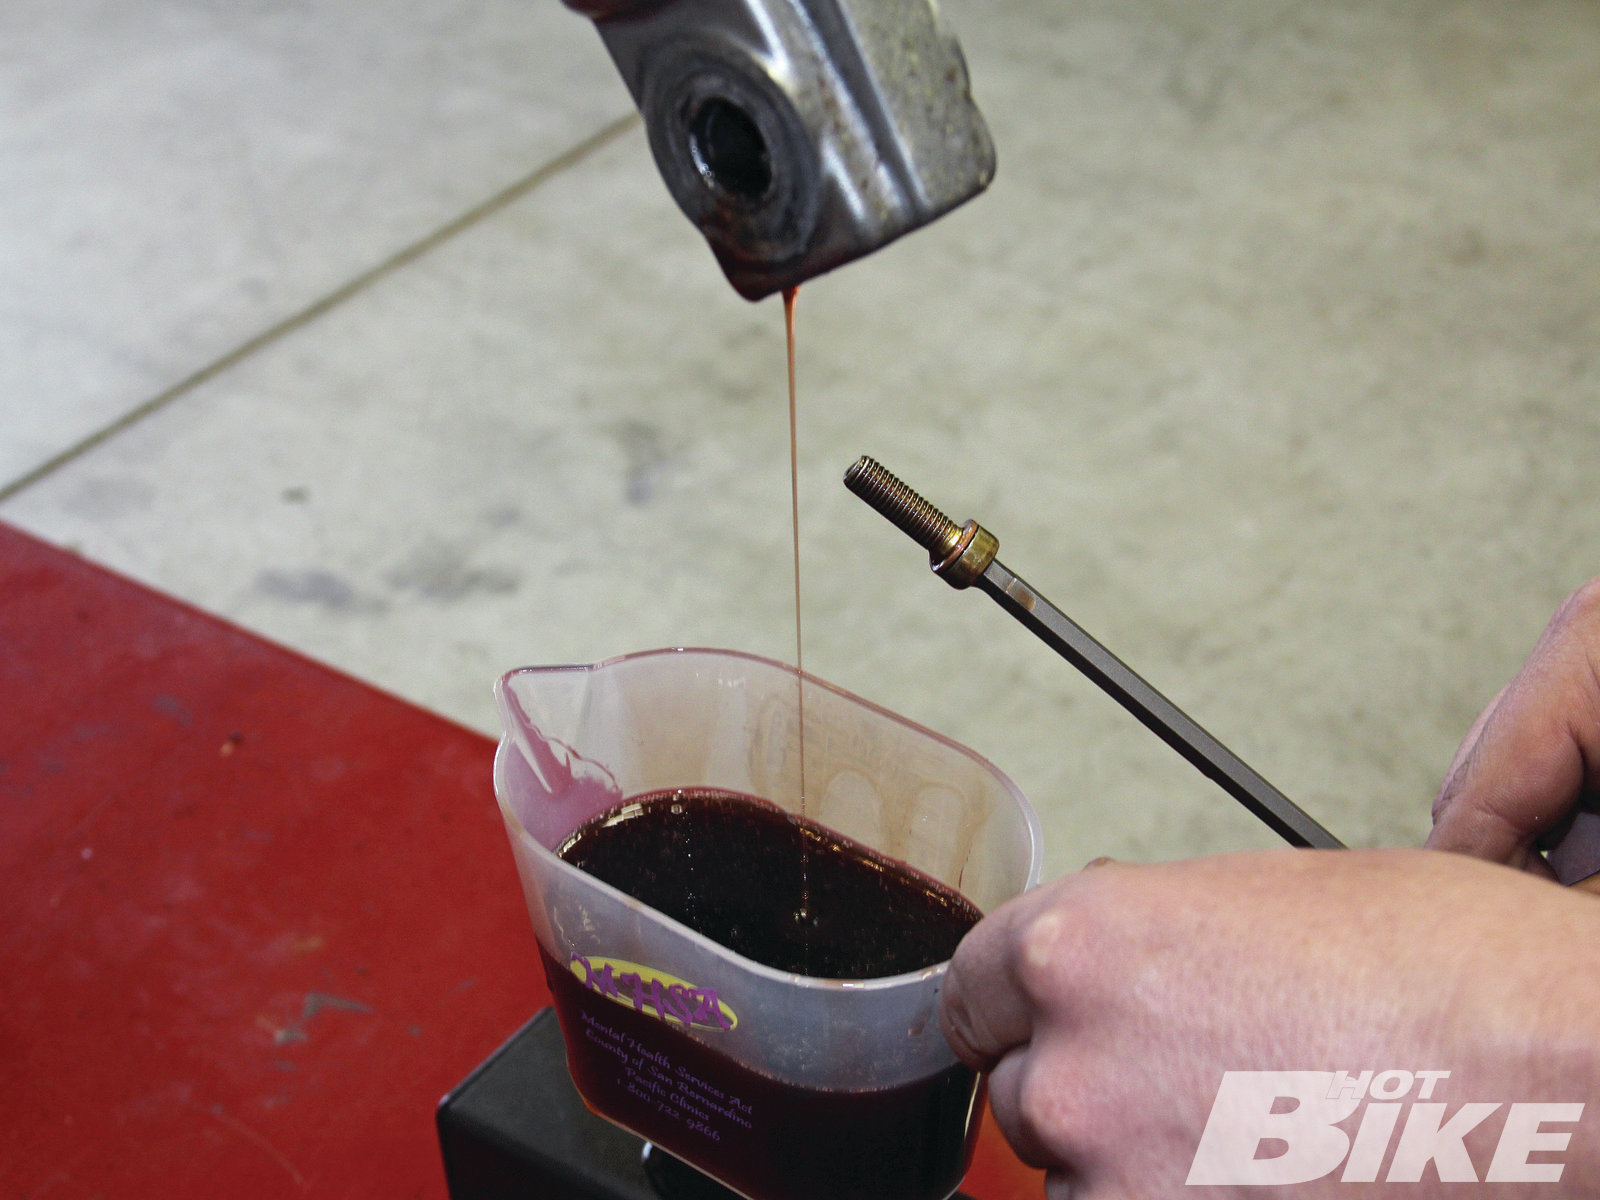
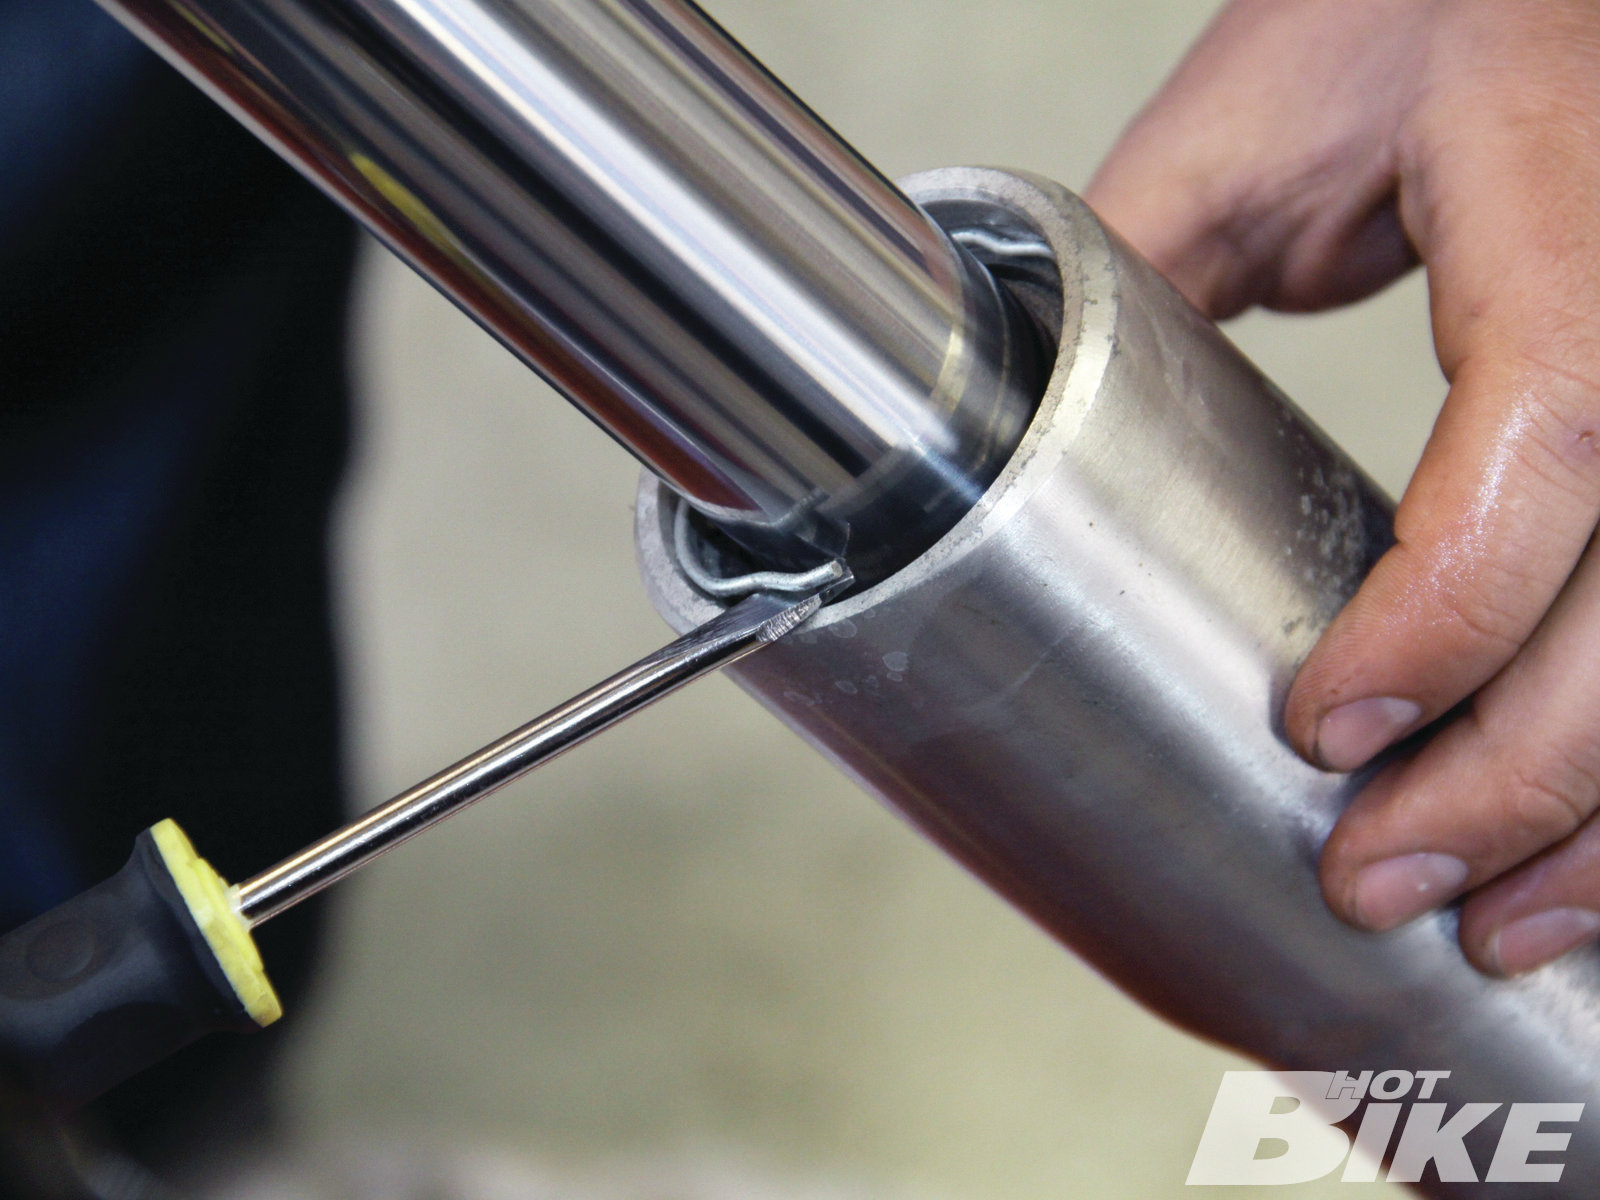
07 We then removed the Allen head bolt from the bottom of the left fork leg. The right leg is a two-piece design consisting of the fork slider and axle clamp, the left fork leg is a one piece design. Therefore a long Allen head wrench was needed to reach up inside and gain access to the Allen head bolt. An impact wrench was used to remove the bolts. We made sure to have a container ready to catch the fork oil. Compressing the fork helped squeeze out the oil.
08 We were then able to slide the lower leg down a bit, then remove the oil seal retaining ring.
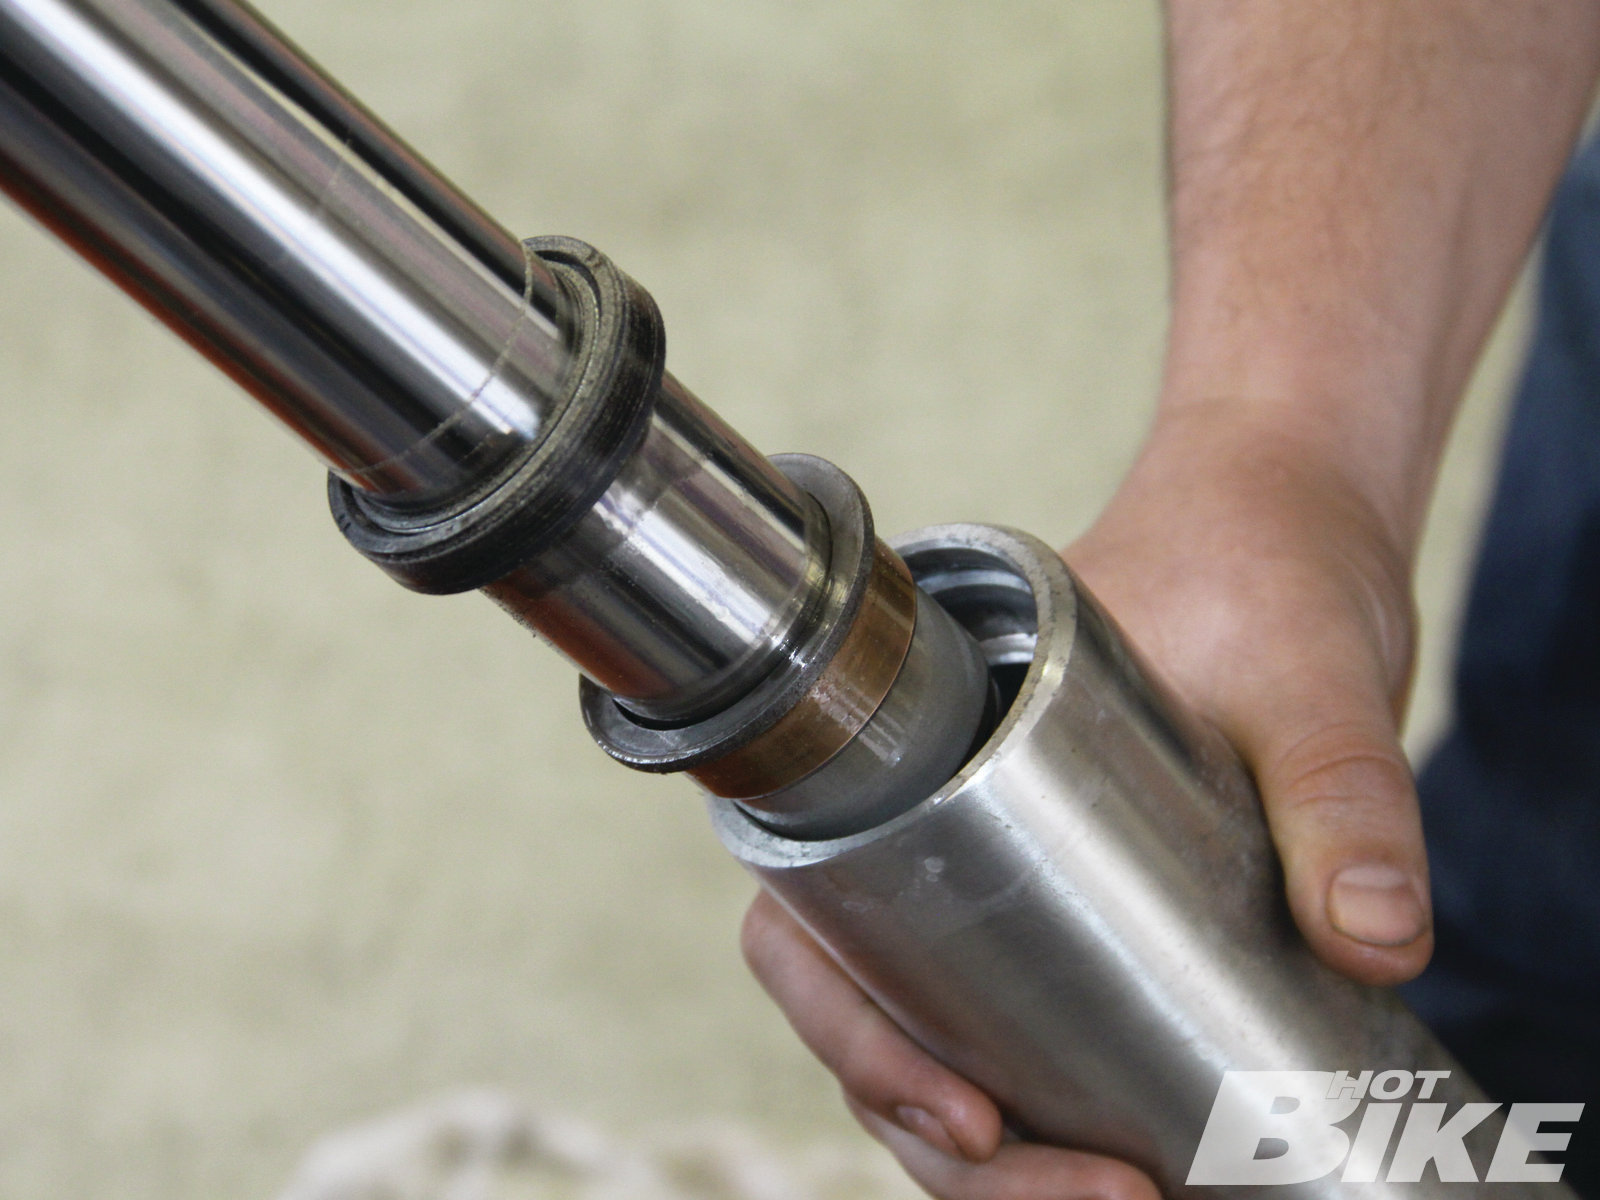
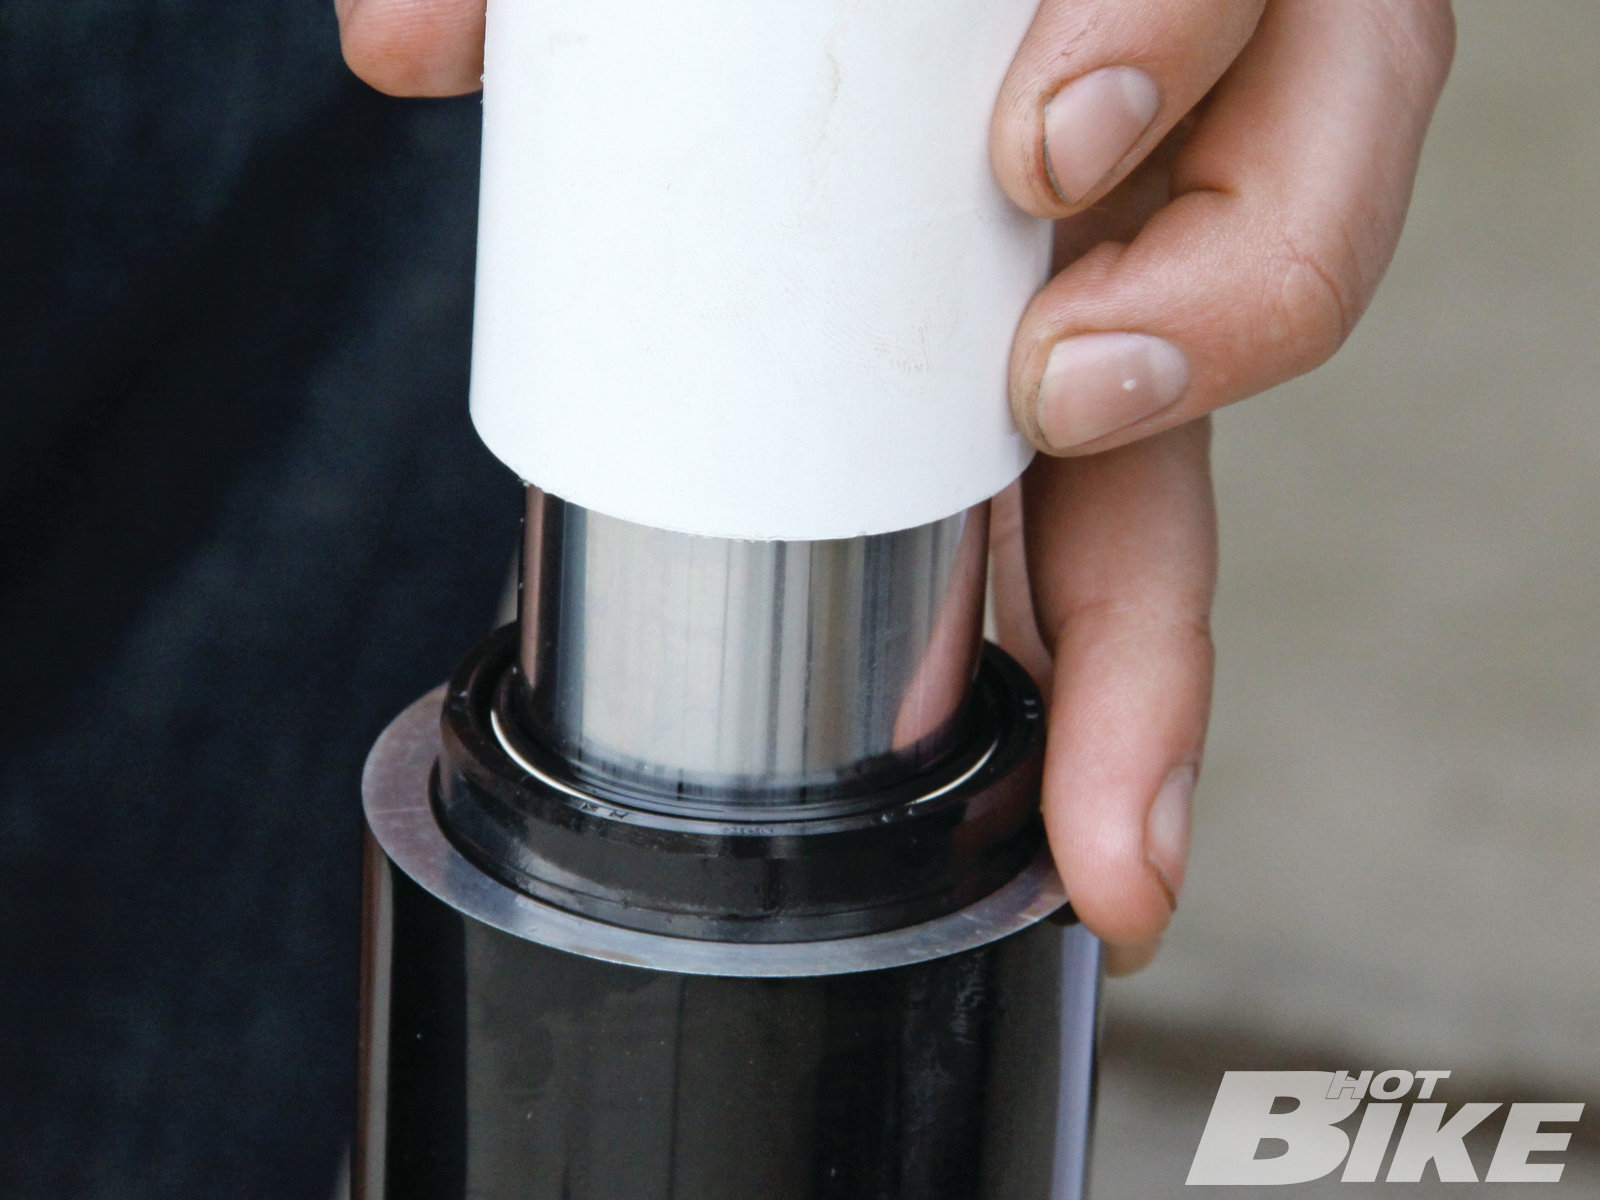
09 With the fork tube still secured in the triple trees, it allowed us to slide the lower leg up and down until we could separate and remove the lower leg from the fork tube. Here you can see the lower slider bushing (green arrow), upper slider tube bushing (red arrow), seal spacer (blue arrow), and slider oil seal (yellow arrow) on the lower portion of the fork tube.
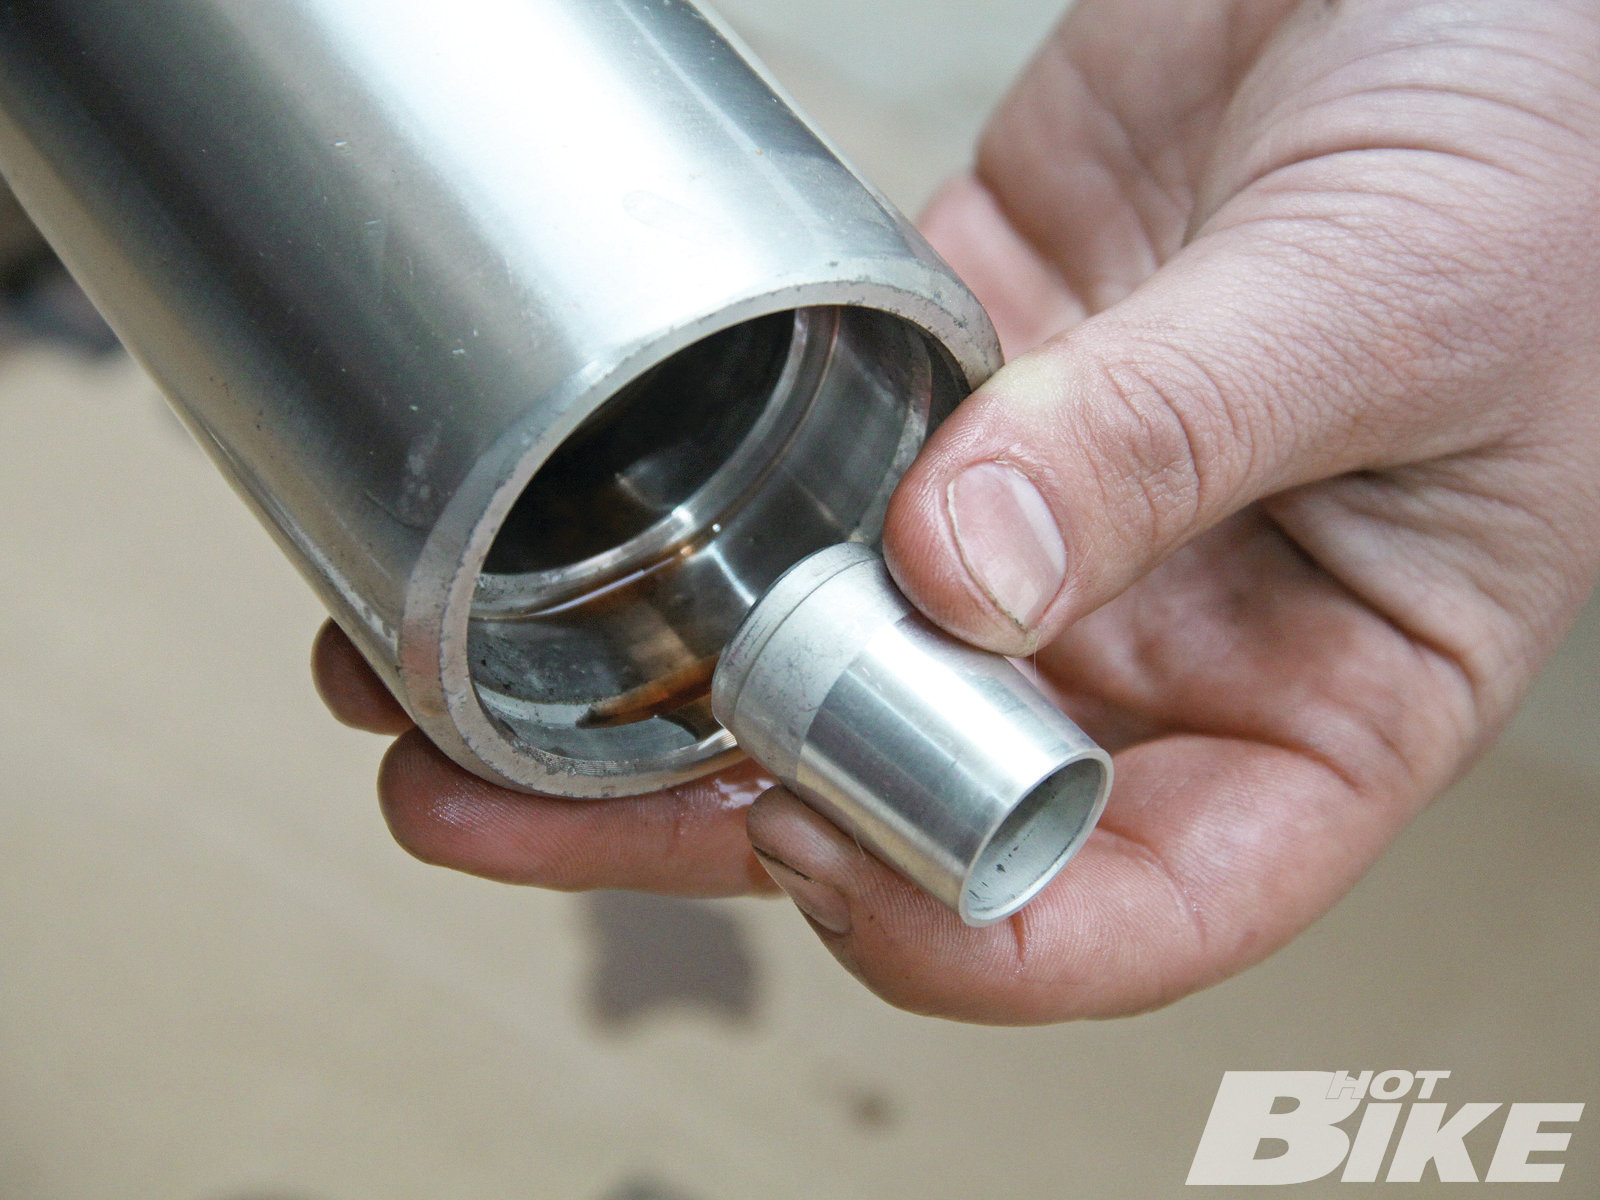
10 We drained the remaining fork oil from the lower leg and made sure to set the lower stop aside as it would be reused with the new legs.
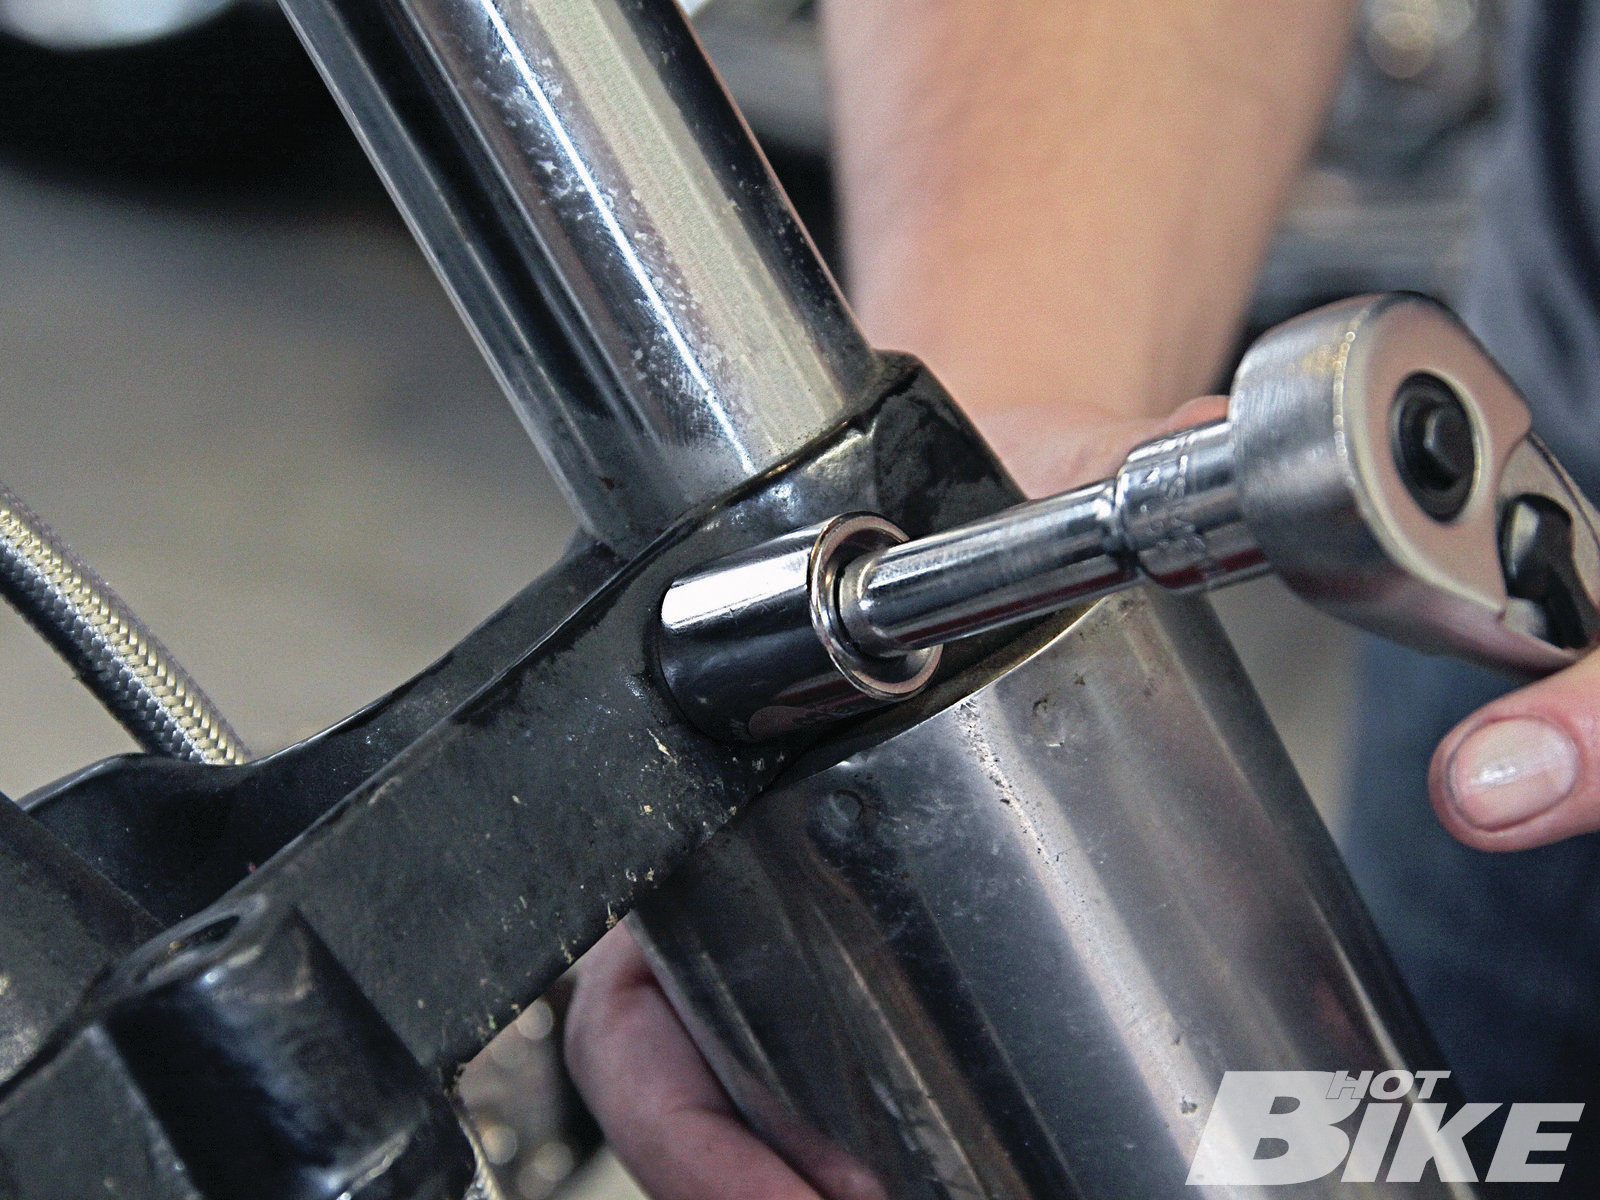
11 Next, we loosened the pinch bolts on the triple trees and…
12 …removed the fork tube assembly from the triple trees.
13 To begin reassembly with the new fork leg, we placed the lower stop over the bottom of the damper tube, then…
14 …slid the Ness lower leg over the bottom of the fork tube. With pressure against the slider and fork tube, the new Allen heal bolt and washer were then secured in place and torqued to proper spec.
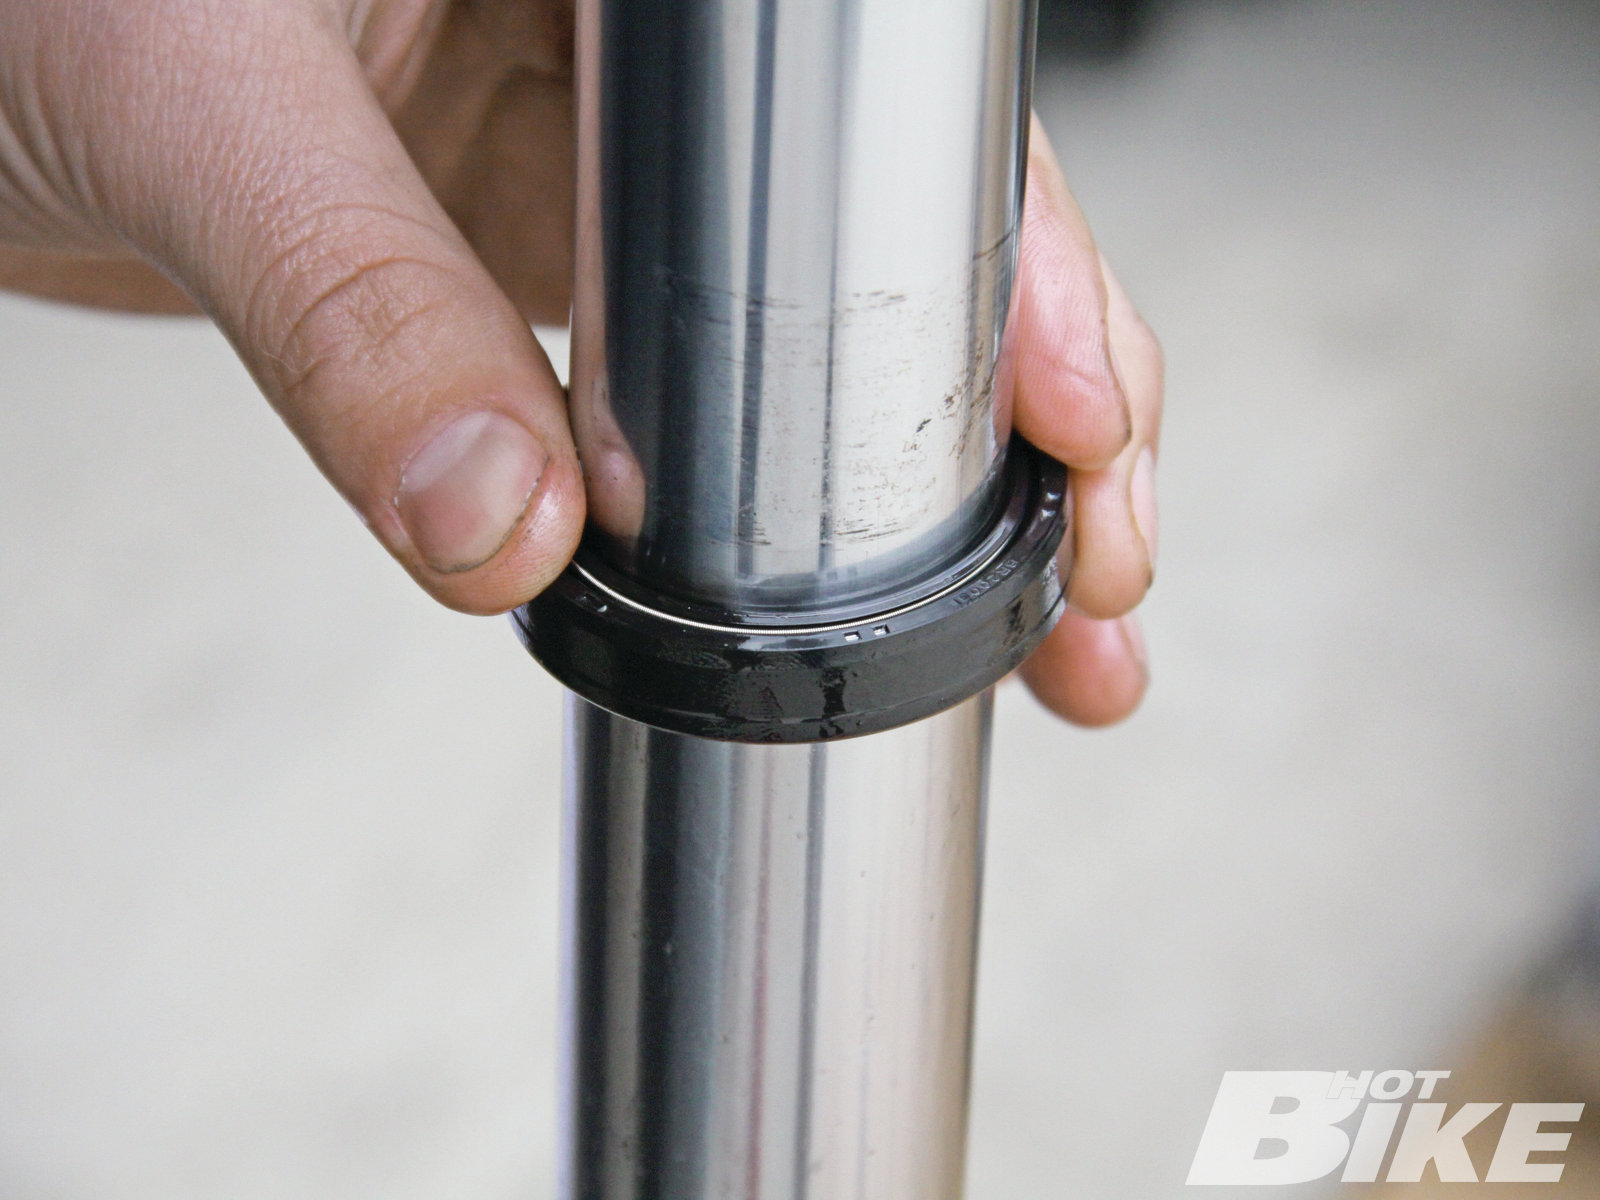
15 The seal spacer, upper slider tube bushing, and lower slider bushing were still in good shape so we left them on the fork tube. It is recommended any time you separate the legs that you replace the fork seals, so we removed the old seal and installed the new one. It’s important to make sure the writing on the seal is facing up as you slide it onto the tube.
16 We then stood the fork assembly up and made sure to have the bottom well protected/padded. When it comes to seating the fork seal, it’s easiest if you have the proper fork seal install tool for your diameter fork leg. George’s Garage offers 39-, 41-, and 44mm Fork Seal Installers for about 50 bucks (not including shipping and handling). But there are other ways to seat the seal. It took some work but we were able to use a piece of PVC tubing as sort of a slide hammer to get the seal properly seated. Watch your fingers and use plenty of towels wrapped around the PVC and fork leg to help keep things protected.
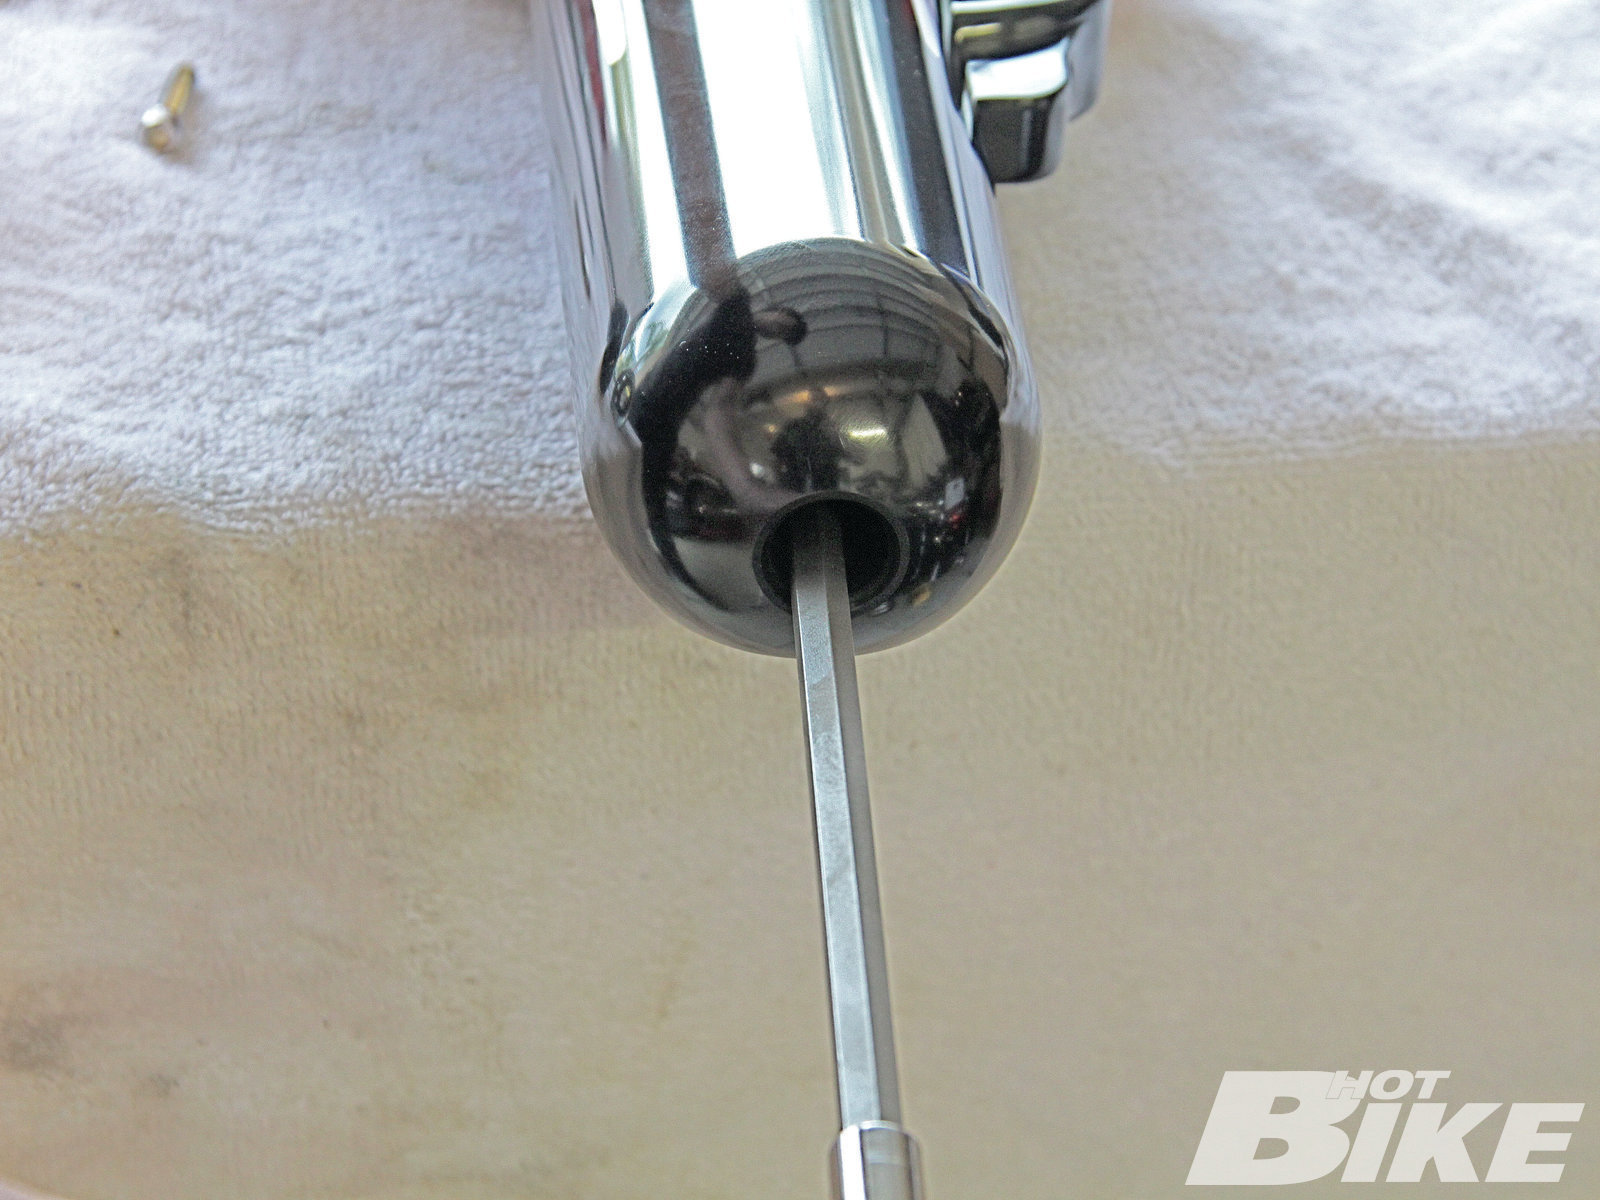
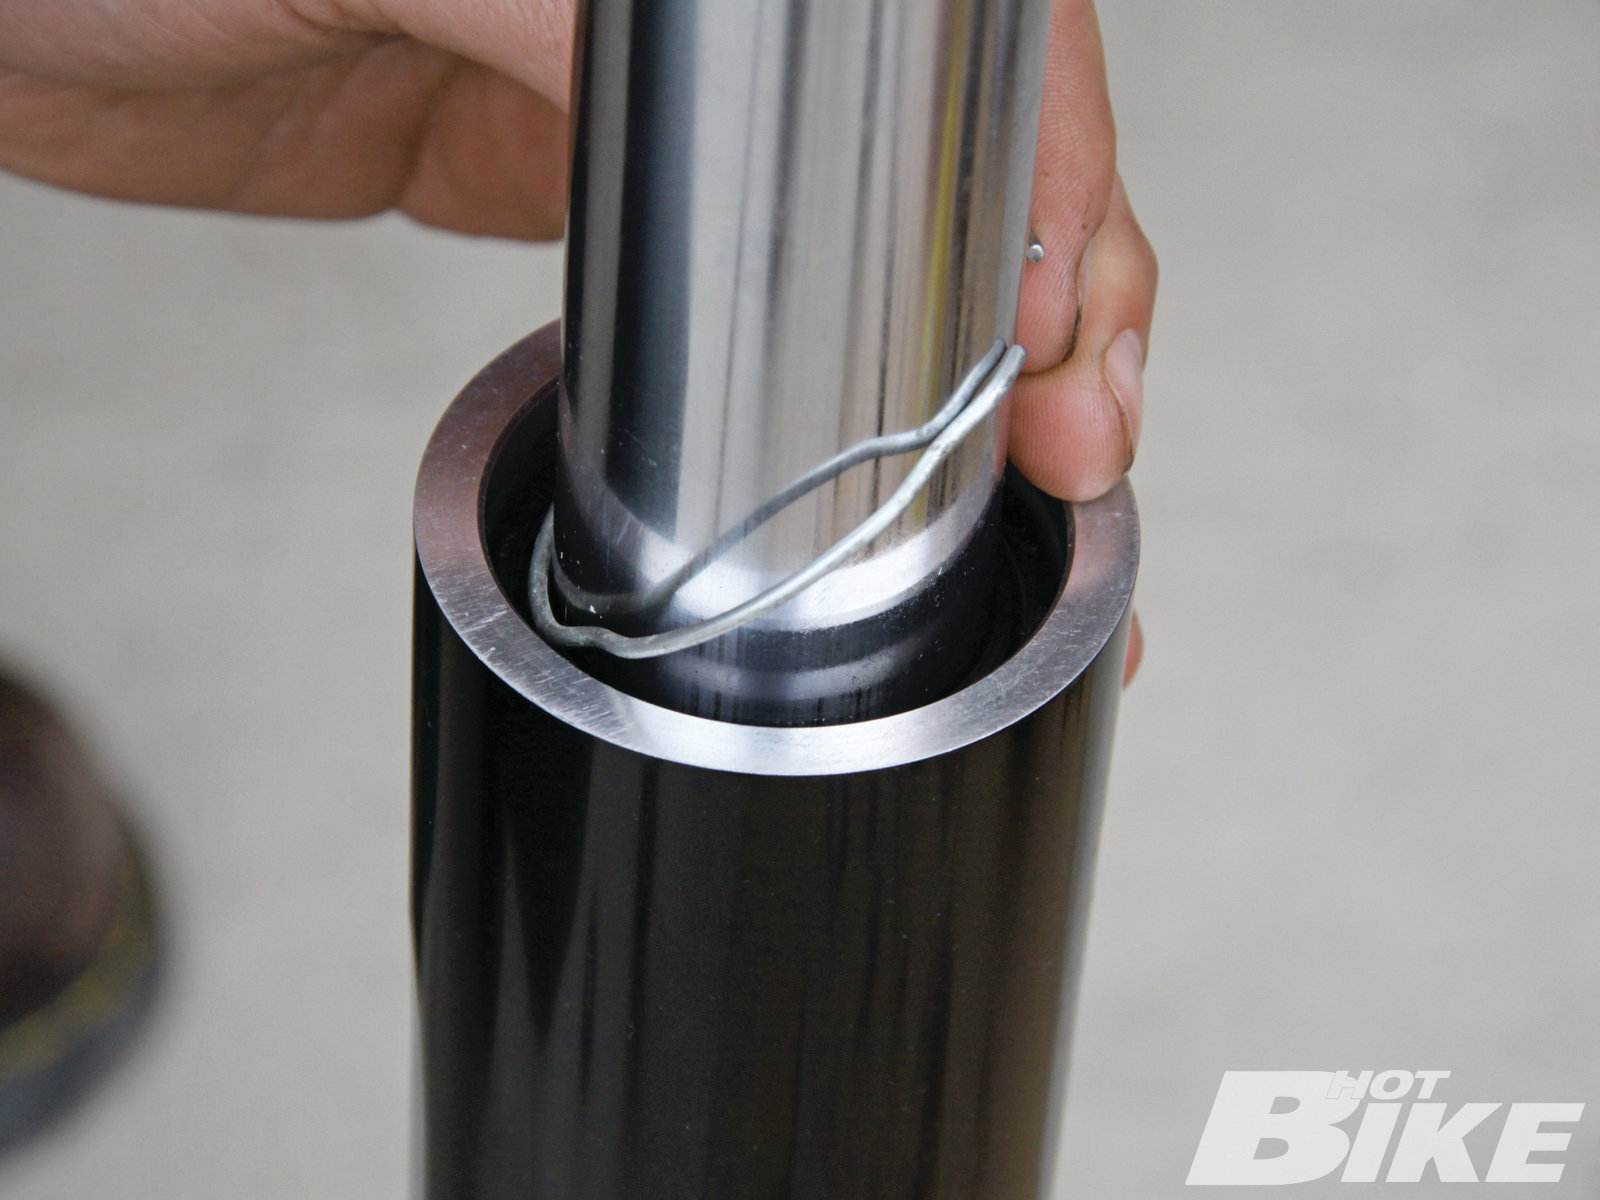
17 Once we had the seal properly seated, we installed the oil seal retaining ring. A flat head screwdriver was used to make sure the ring slid all the way down into its groove.
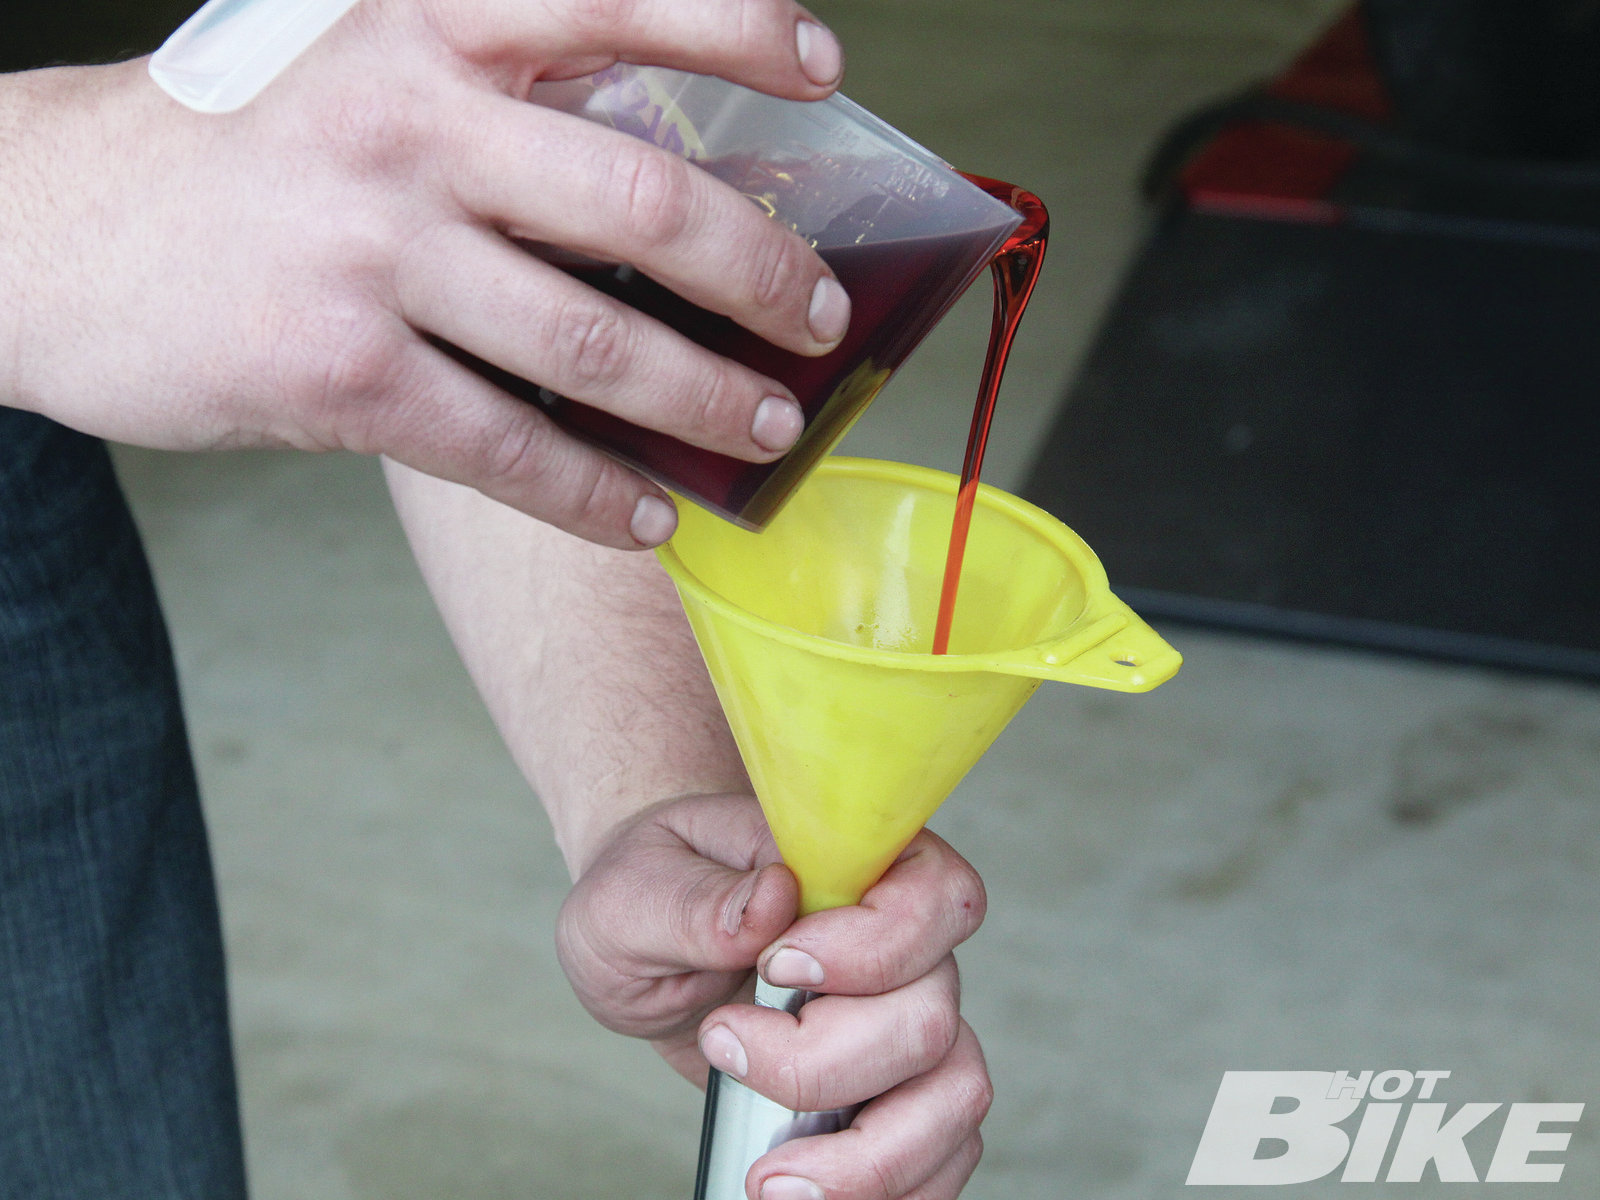
18 the fork tube assembly was compressed and filled with the proper amount of fork oil.
19 Before reinstalling the fork leg assembly, we removed the stock fork boots and installed the new Ness fork boots. The boots secure in place with two bolts, one on the front side and another on the backside.
20 The fork leg assembly was then slid up through the fork boot and triple trees and then the pinch bolts were torqued to spec along with the fork tube bolt.
21 After repeating the process on the right-side fork leg, we slid the front wheel in place and lubed the axle with some anti-seize.
22 The axle was then slid through the right side fork leg, the wheel, and threaded into the left-side leg.
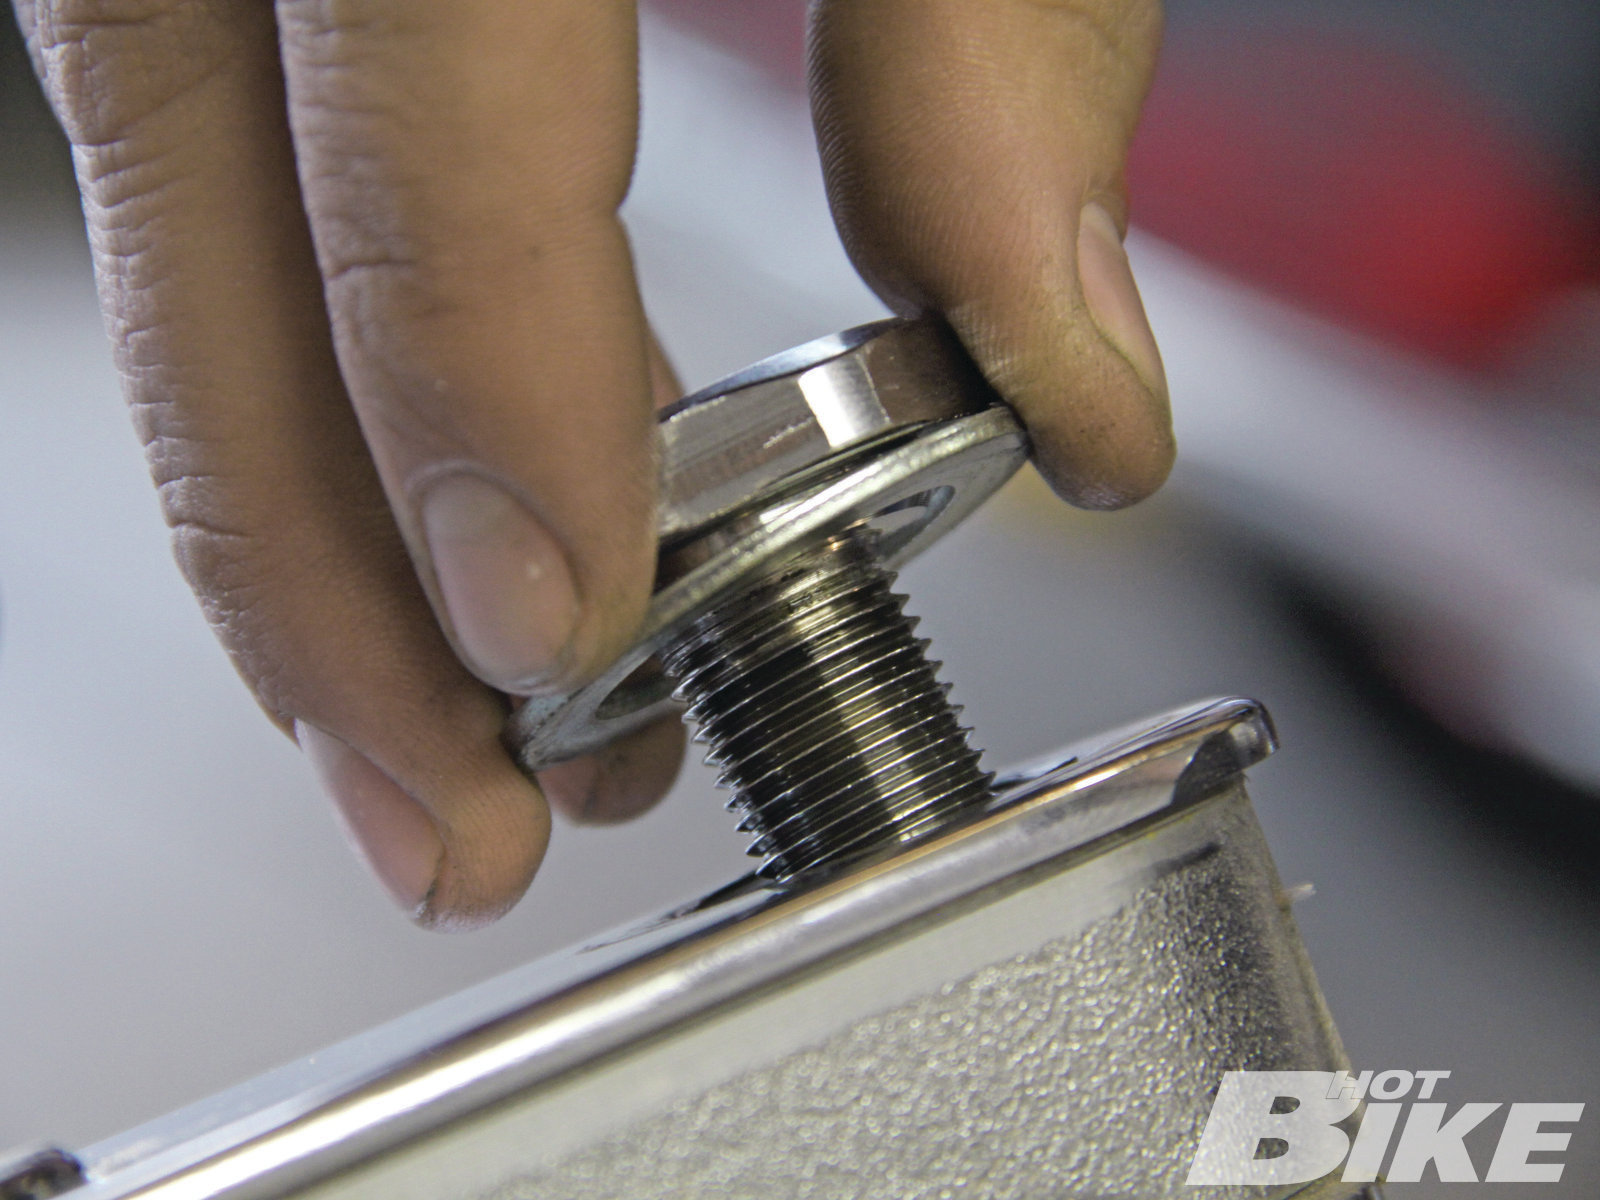
23 We finished the leg swap by installing the lower fork cap with its hidden hardware.
24 Moving up top, the lower handlebar section was secured to the risers.
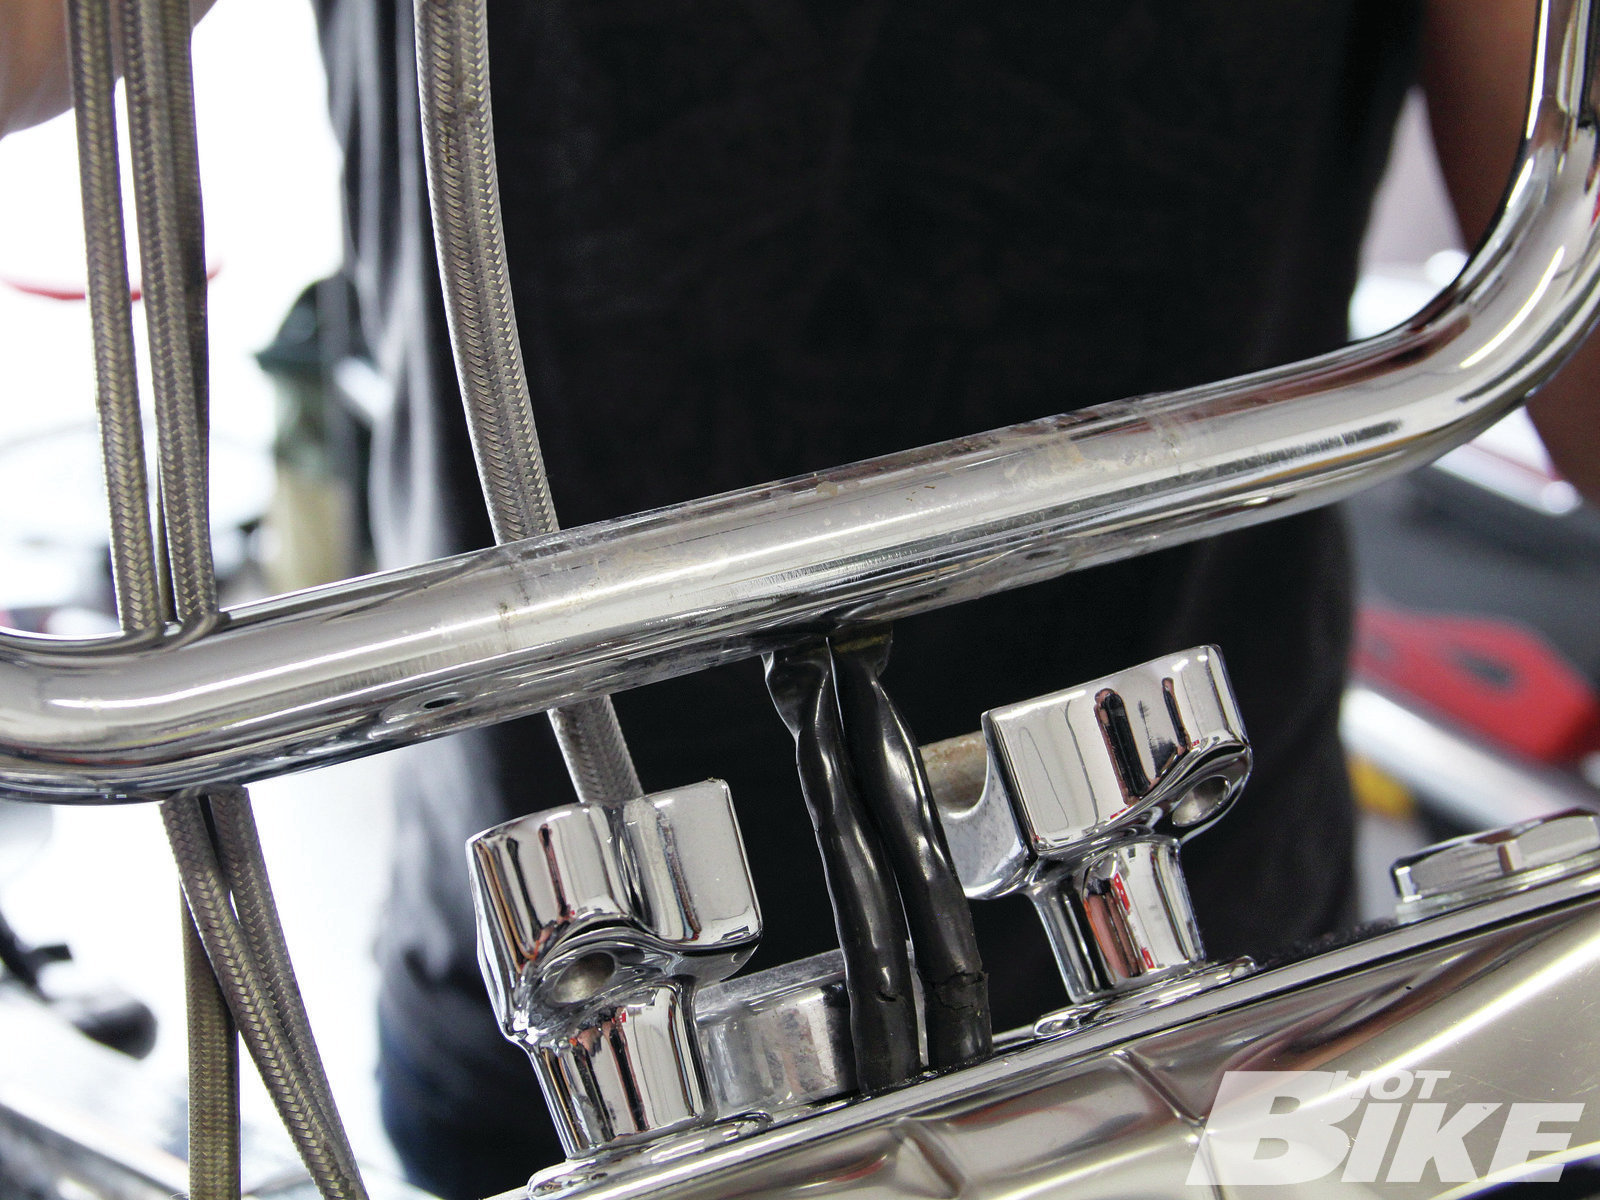
25 Next, the left side billet junction was slid in place. There is a specific left and right side junction. You can tell which is which because the heads of the socket head bolts face you when sitting on the bike. The end with the three fasteners fits over the top of the lower handlebar section. The hand control tube will slide into the end with two fasteners.
26 When it comes to the hand control tubes, you can tell which is which because the right side is notched (arrow) for fly-by-wire applications. You can also see that the tubes are slotted for internal wiring.
27 We then slid the left-side hand control tube into the junction and installed the fasteners. Once you have the bars adjusted to how you want them, the instructions call for applying the supplied thread locker to the bolts and then torquing them to 20 lb-ft and repeating the process three times until all the fasteners are equally torqued to 20 lb-ft. Since we still had to install the controls and wiring, we just loosely tightened the bolts.
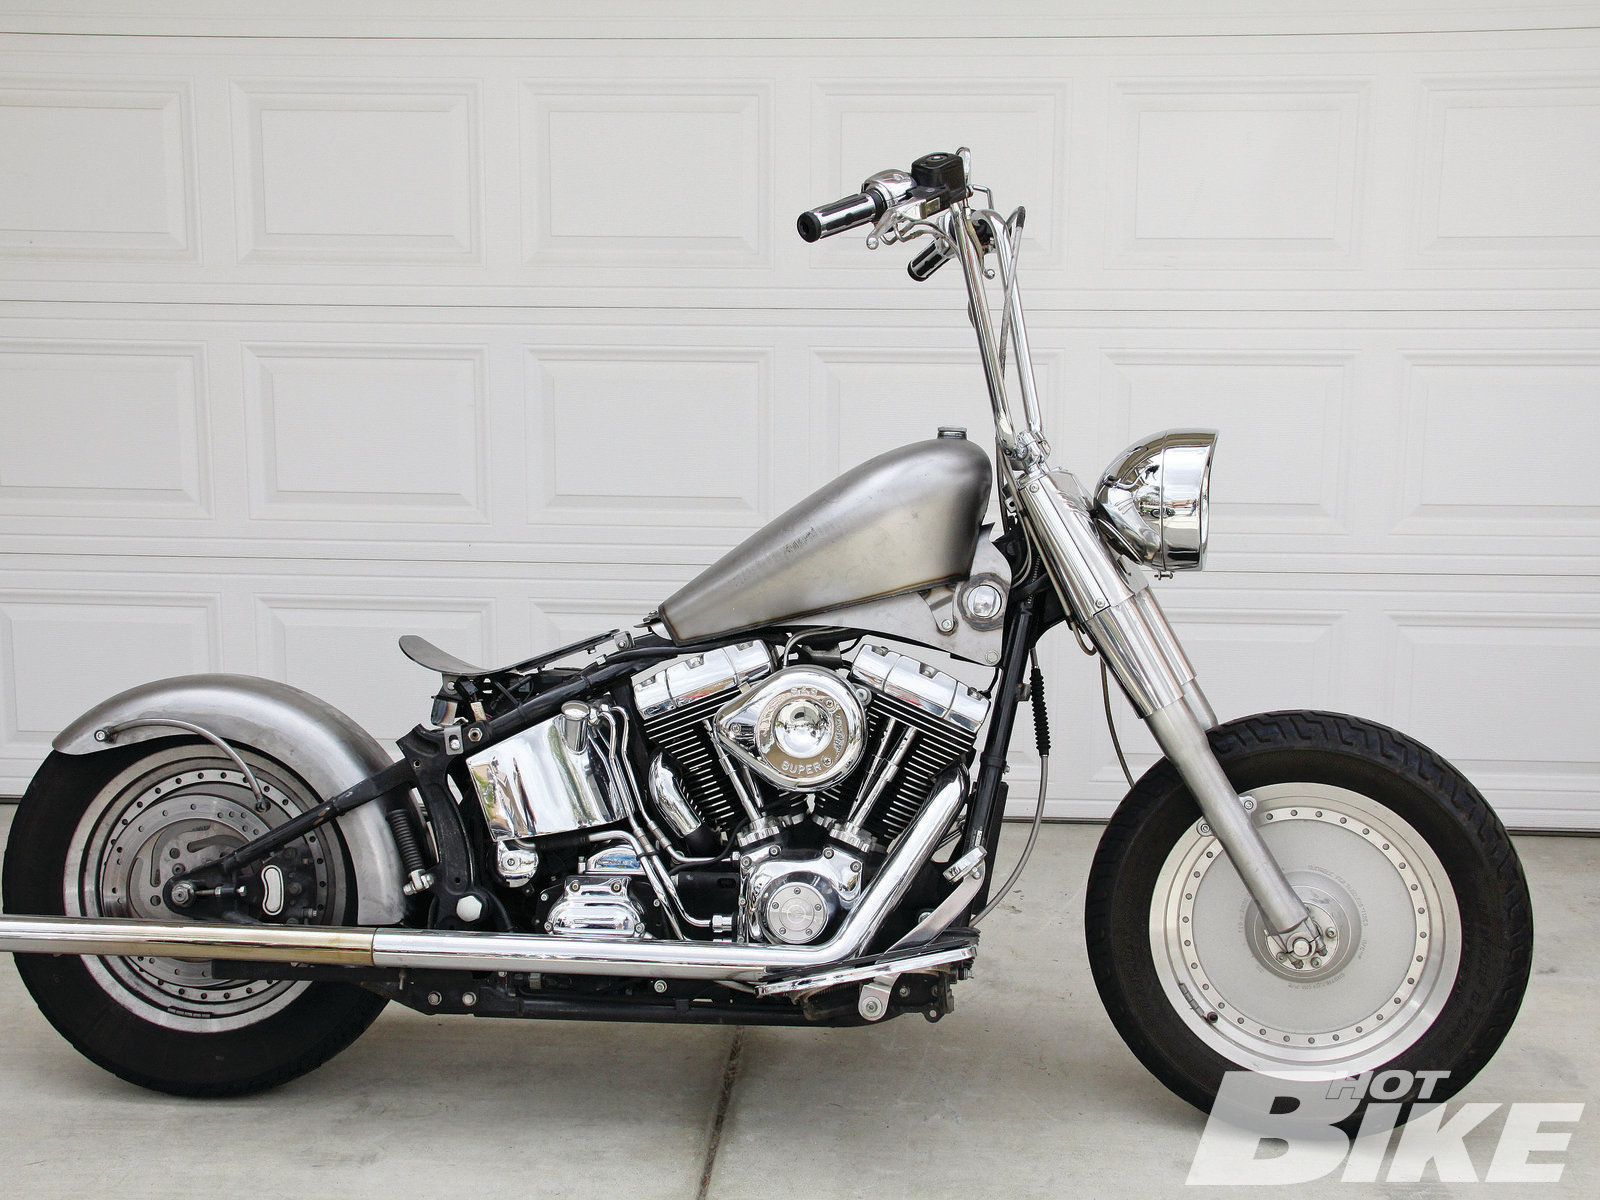
28 This is what the Fat F*cker looked like before the install.
29 And with the new legs, fork boots, and handle bars.
30 The fork legs and boots make a night-and-day difference and really look great together. It still has that thick Fat Boy look, just cleaner and meaner. Swapping the legs wasn’t that difficult and only took a couple hours with basic handtools (depending on if you use fork seal installer tool).
31 The 1-1/4-inch bars add some much-needed muscle to the top of the frontend. The multi-piece design of the bars will make running the hand control wires internally a breeze and will allow us to adjust the bars to a precise and comfortable riding position. Check back next time when we add some hand controls and new brake, clutch, and throttle lines.
Source:
Arlen Ness
arlenness.com | (925) 479-6350


