
Rekluse auto-clutch upgrade
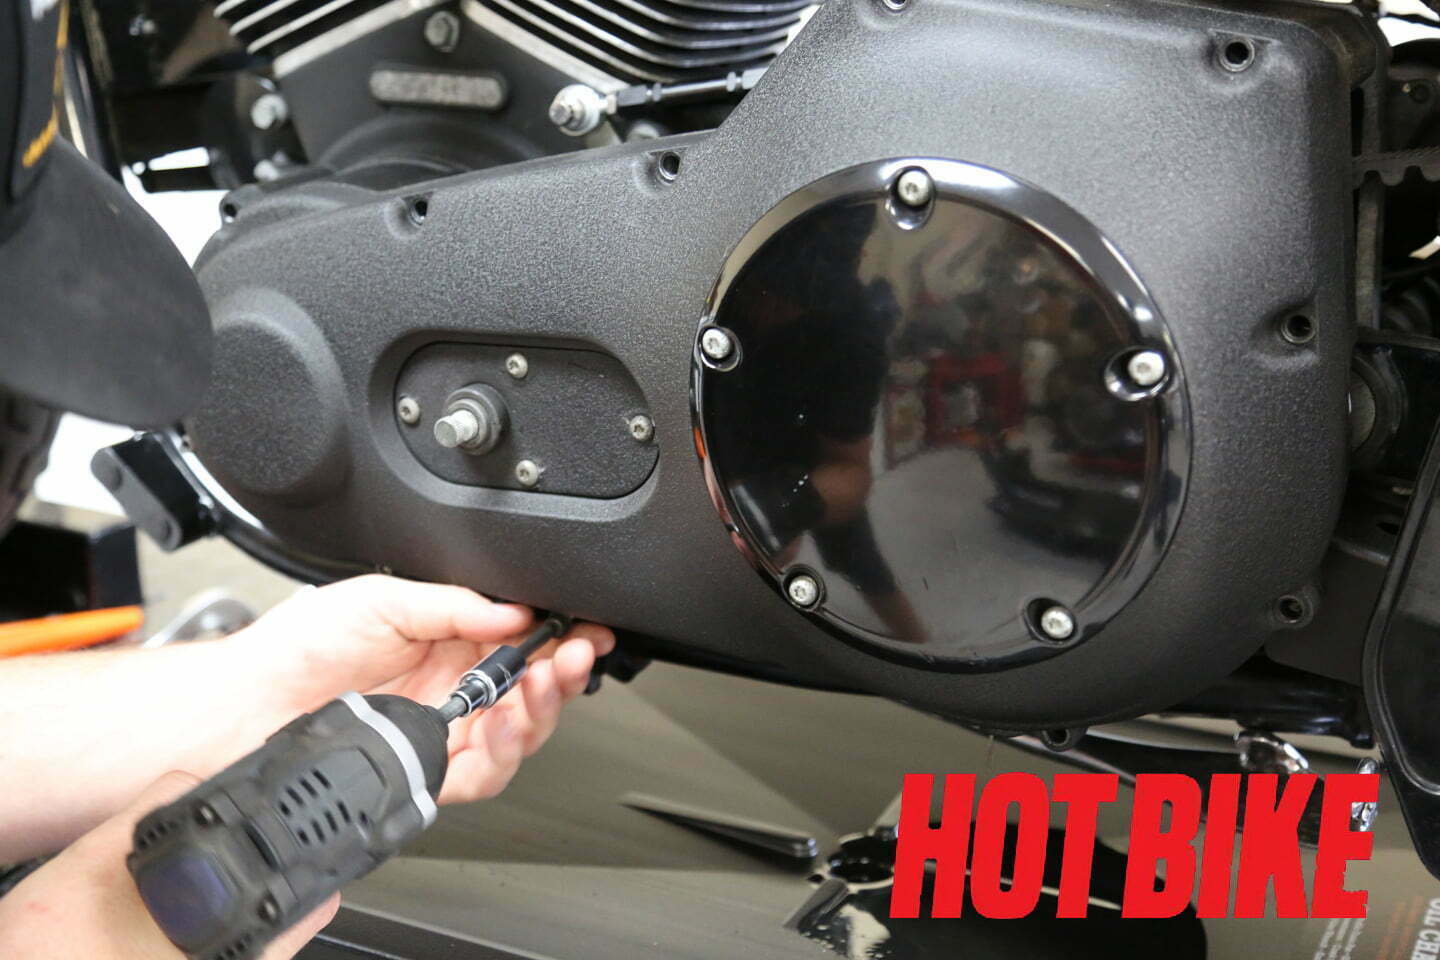
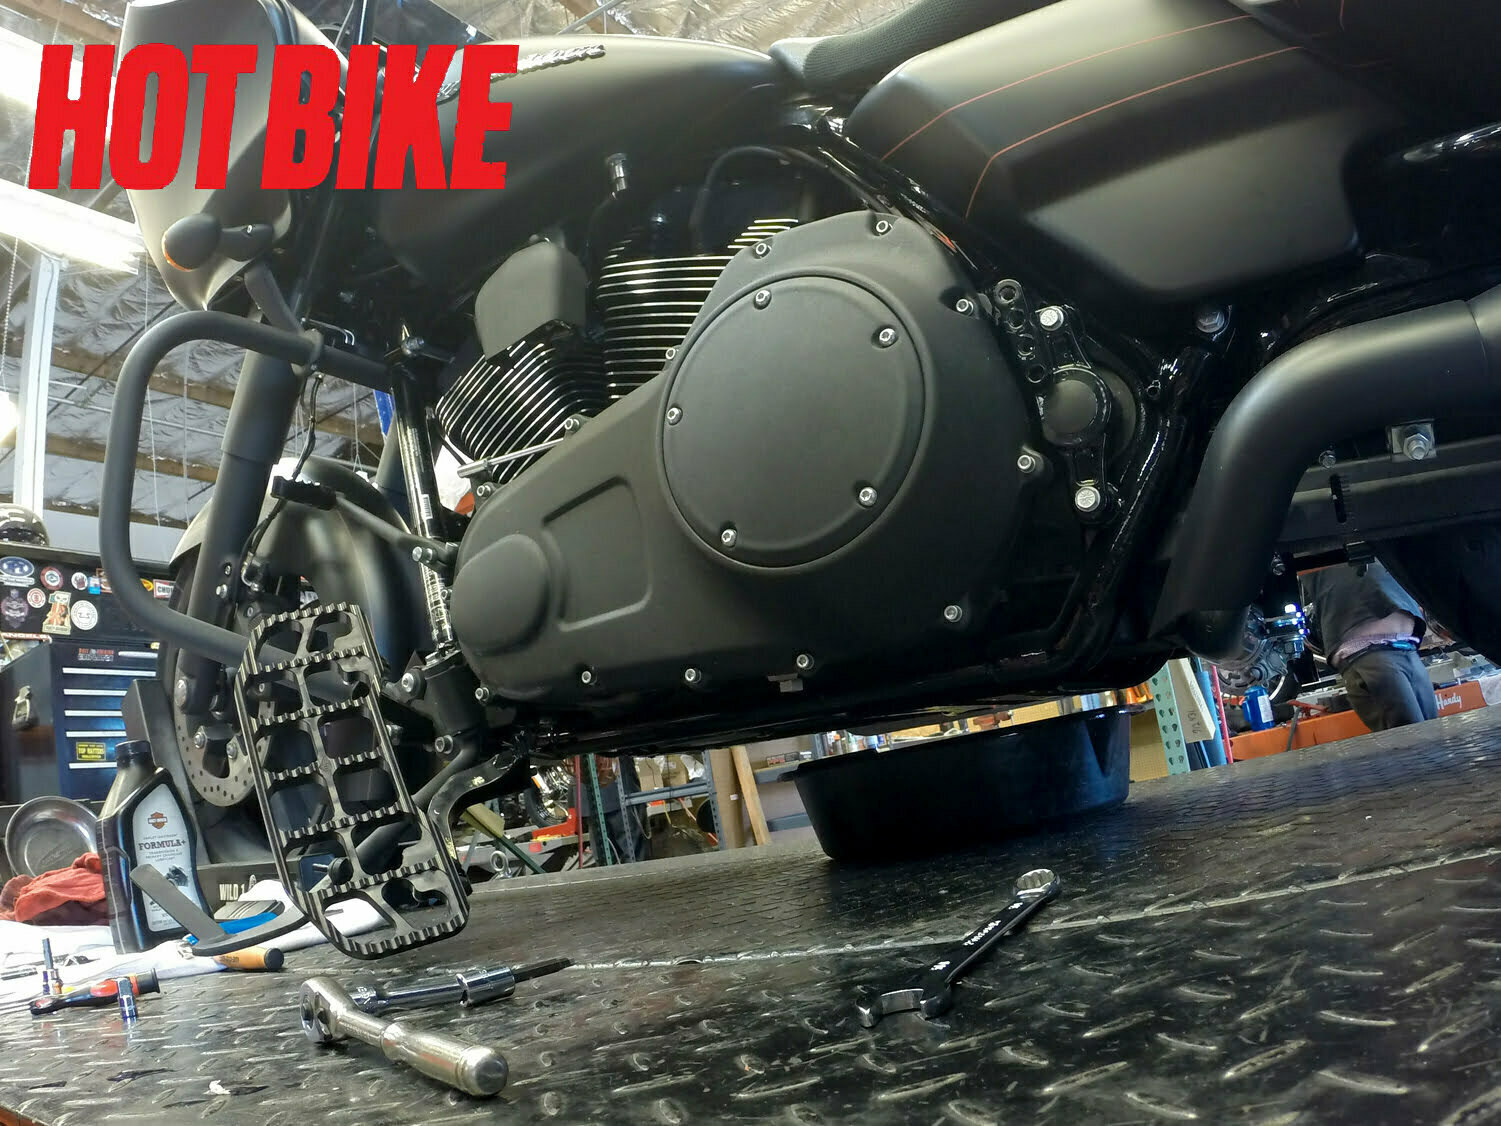
- After putting the bike on the stand and draining the primary oil, You’ll need to remove the rear passage footrest to be able to remove the primary cover. The front shift mechanism and floorboard will need to either be removed or placed out of the way to access the primary cover. With all of that done, you can get started on the install. Remove the primary case cover bolts. Make sure to pay attention to bolt lengths because different lengths go with different holes.
John Zamora
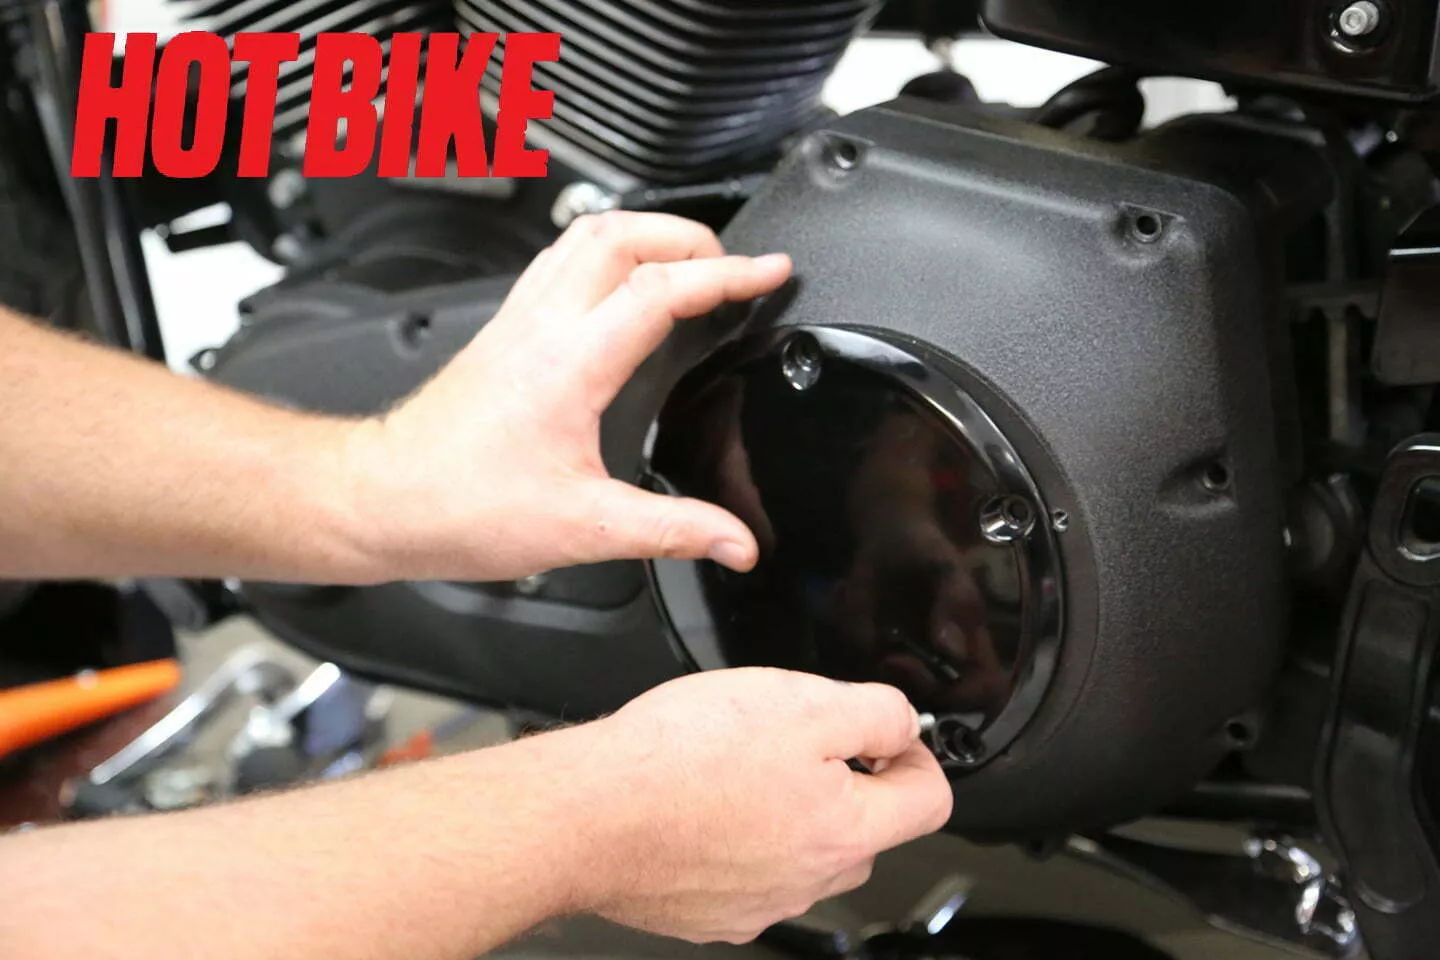
- Remove the derby cover and finally the primary cover to access the clutch.
John Zamora
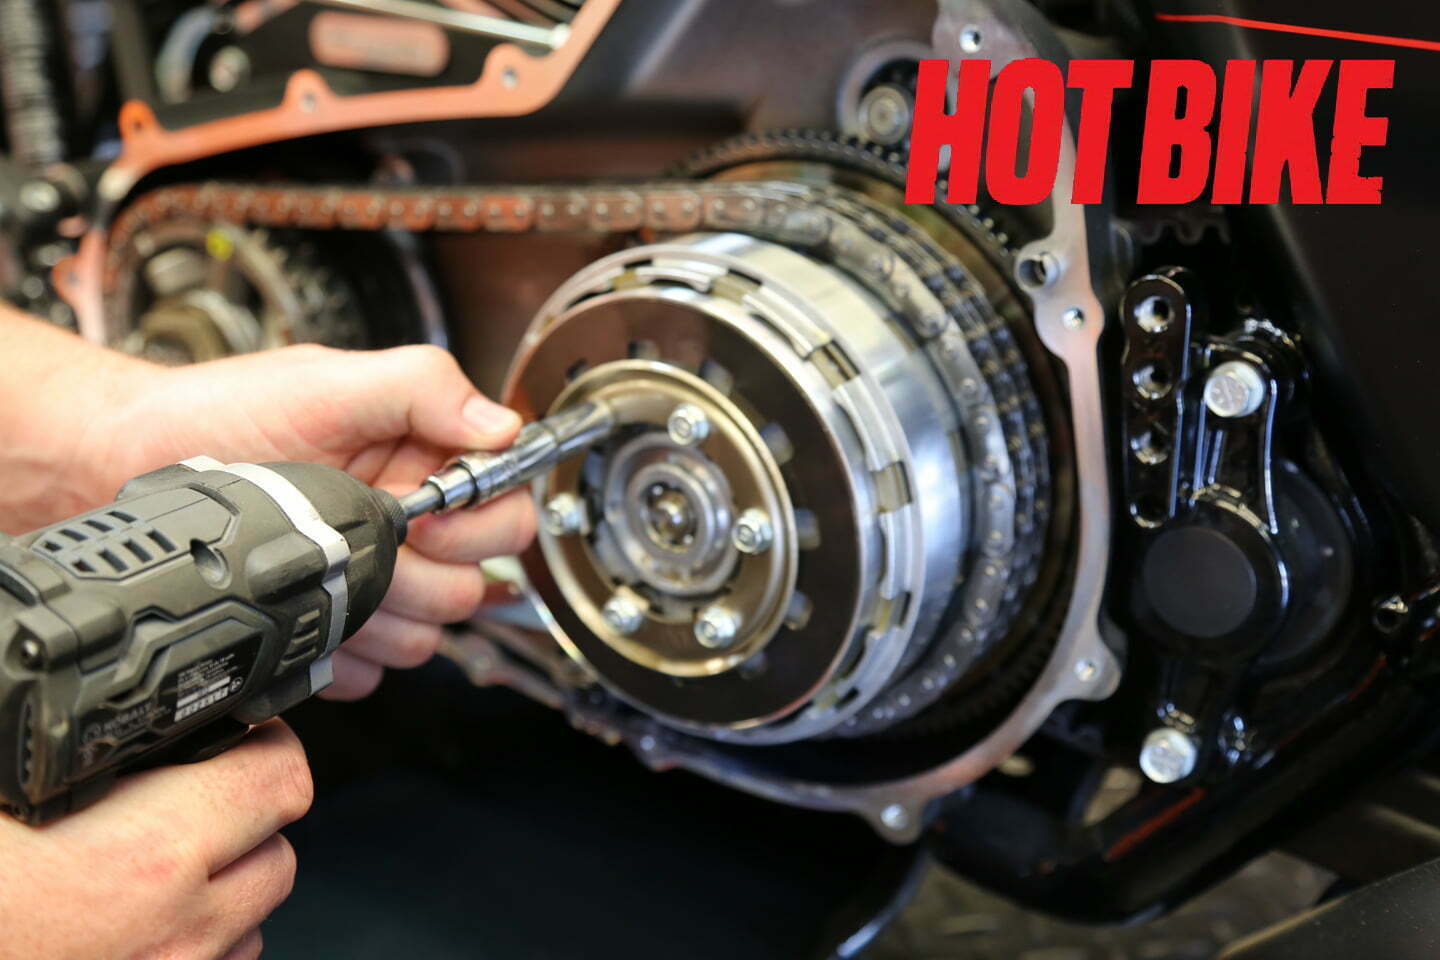
- Remove the pressure plate bolts holding the spring ring and Belleville spring together.
John Zamora
- Pull the pressure plate and throw out assembly off the clutch pack.
John Zamora
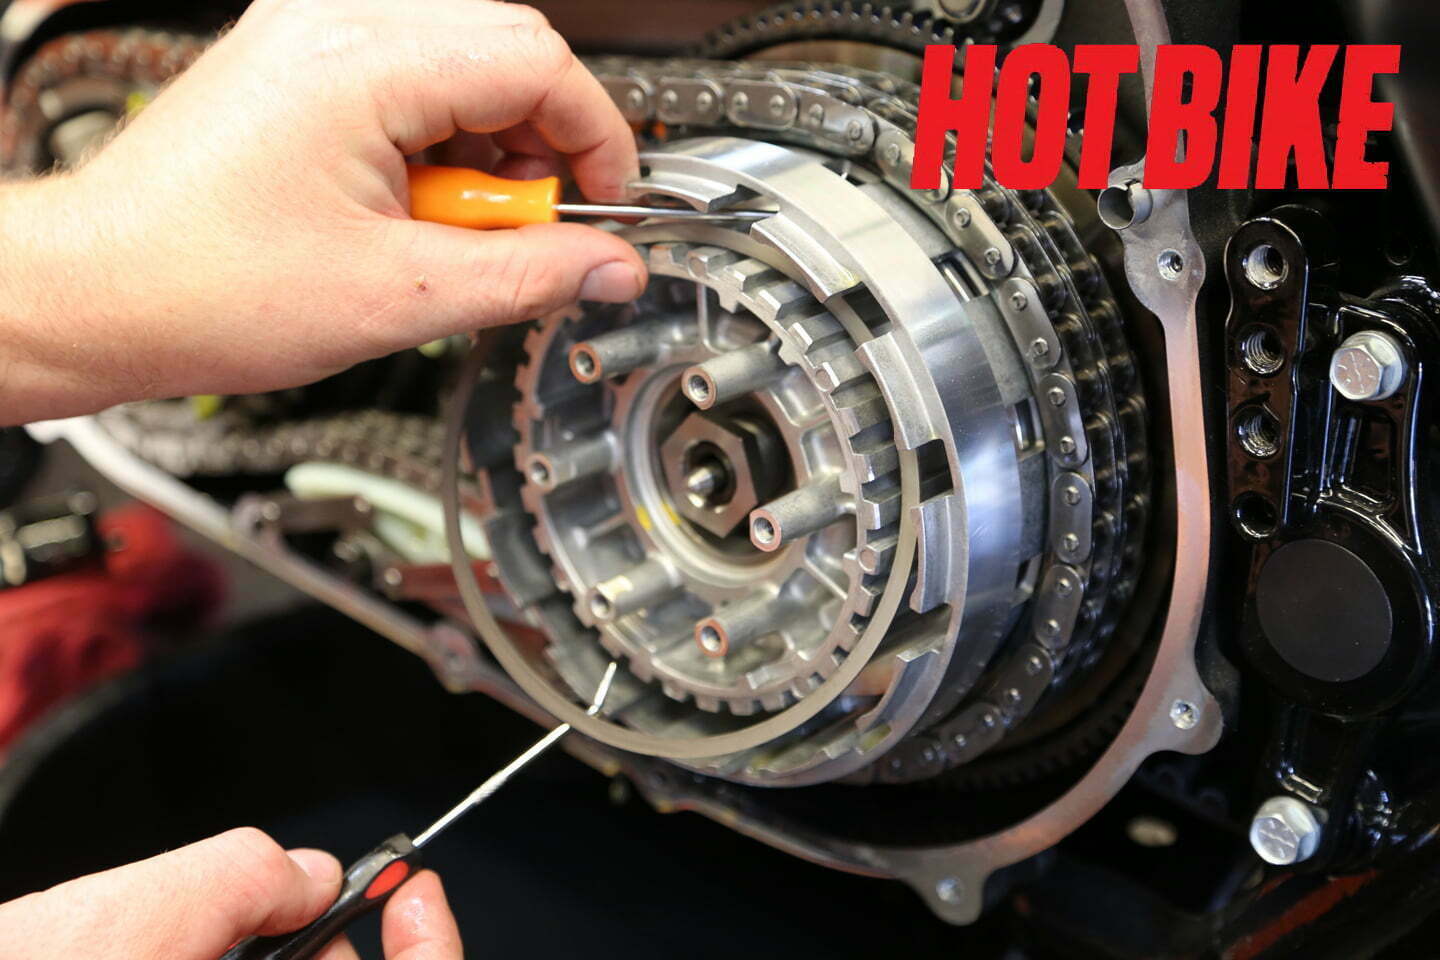
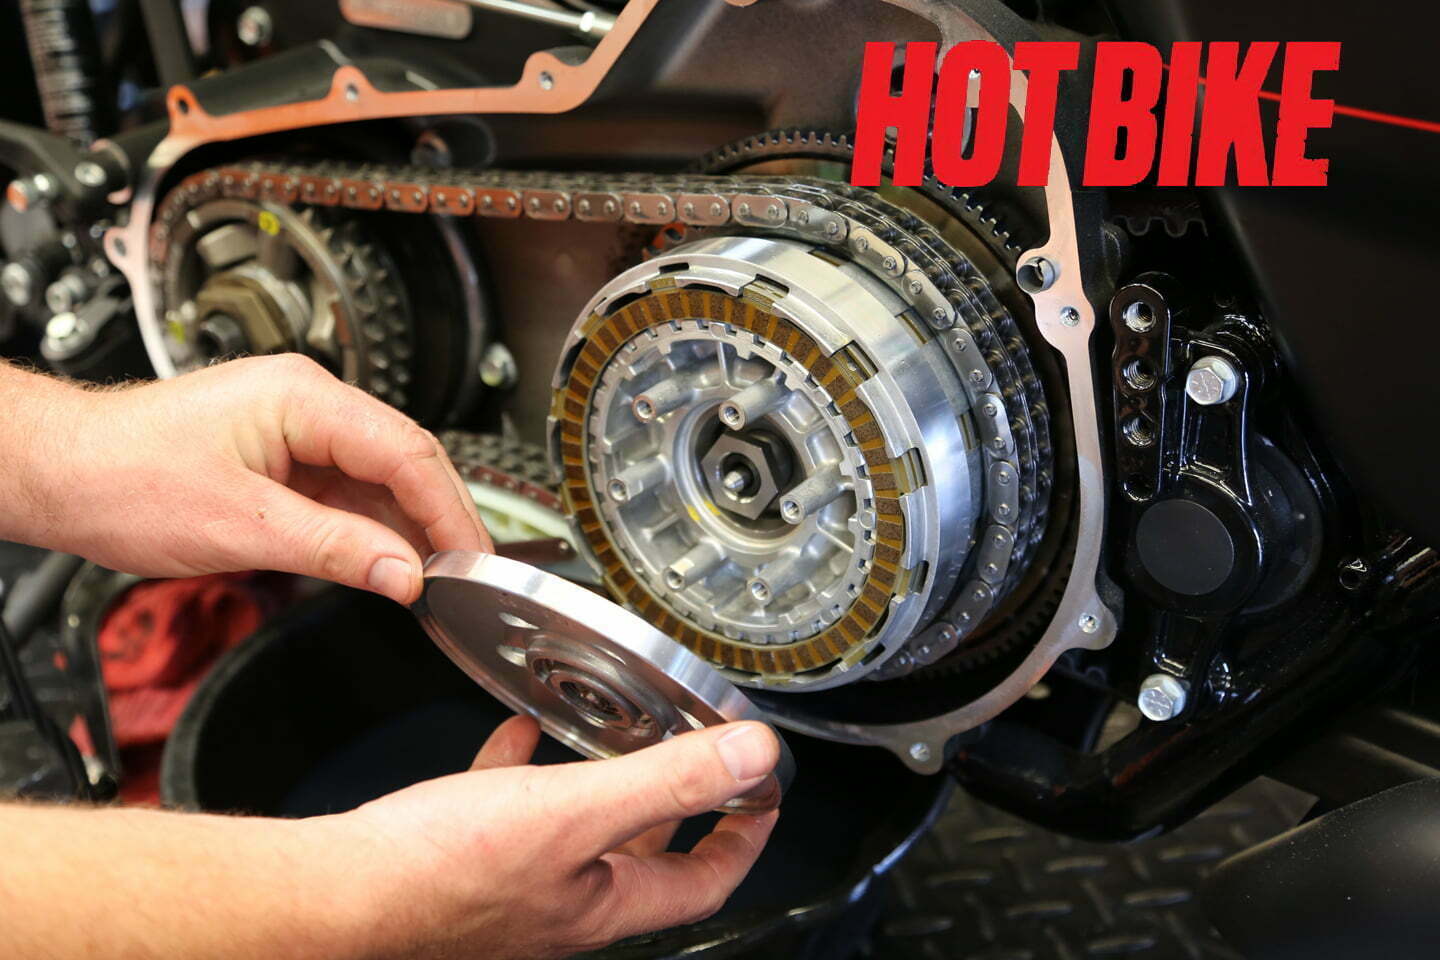
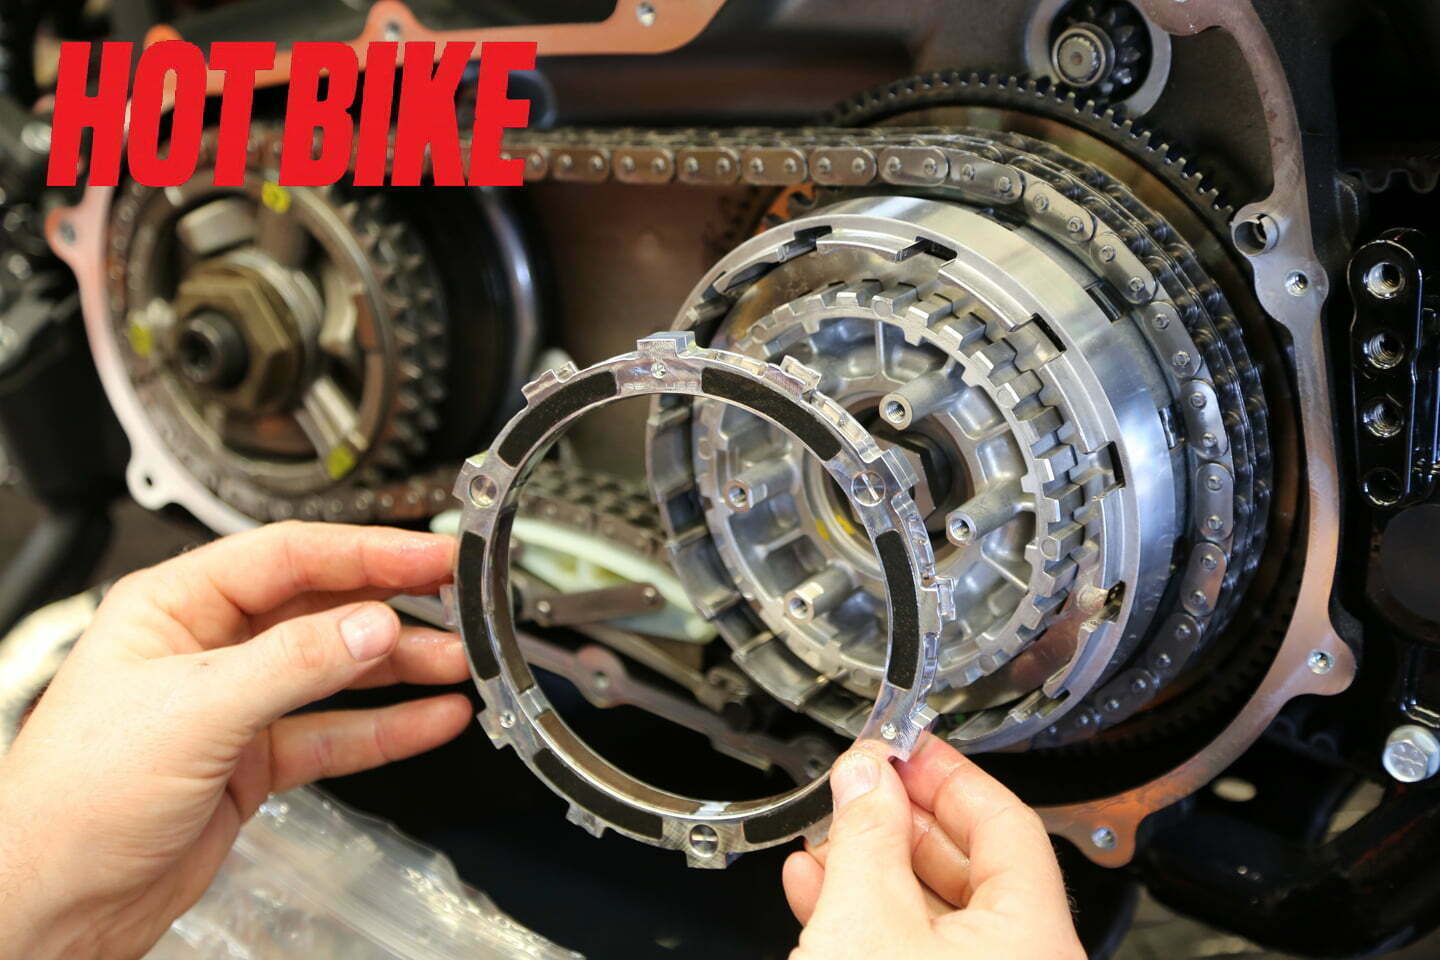
- Remove the clutch pack, including the metal judder spring and spring seat. It might be helpful to use picks to remove them.
John Zamora
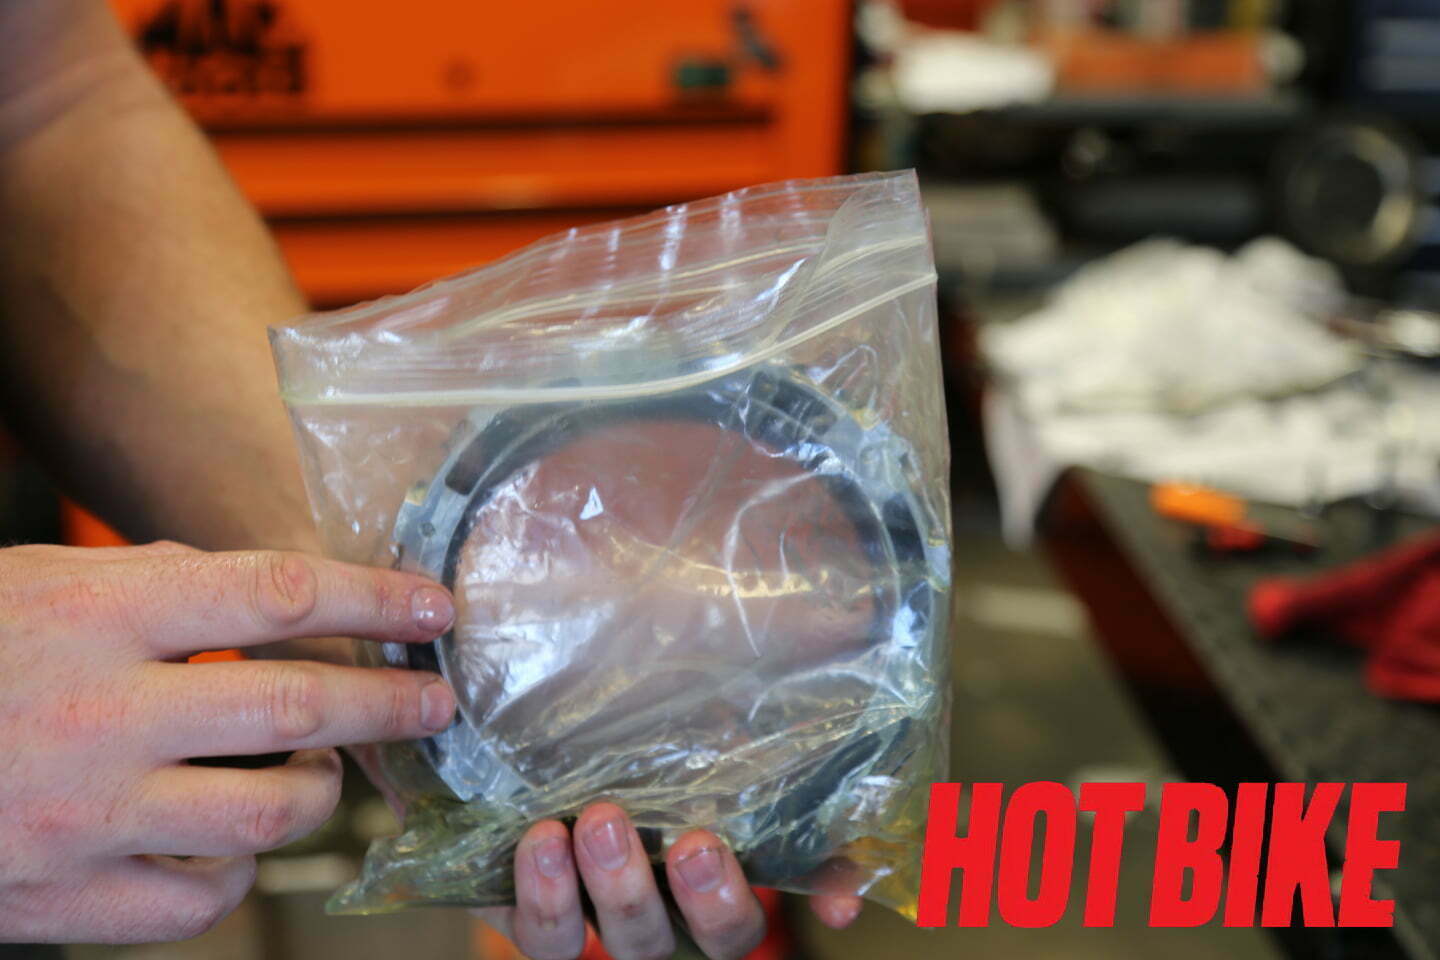
- Soak the Rekluse clutch plates thoroughly in transmission oil inside a bag. Make sure that parts of the plates are heavily soaked.
John Zamora
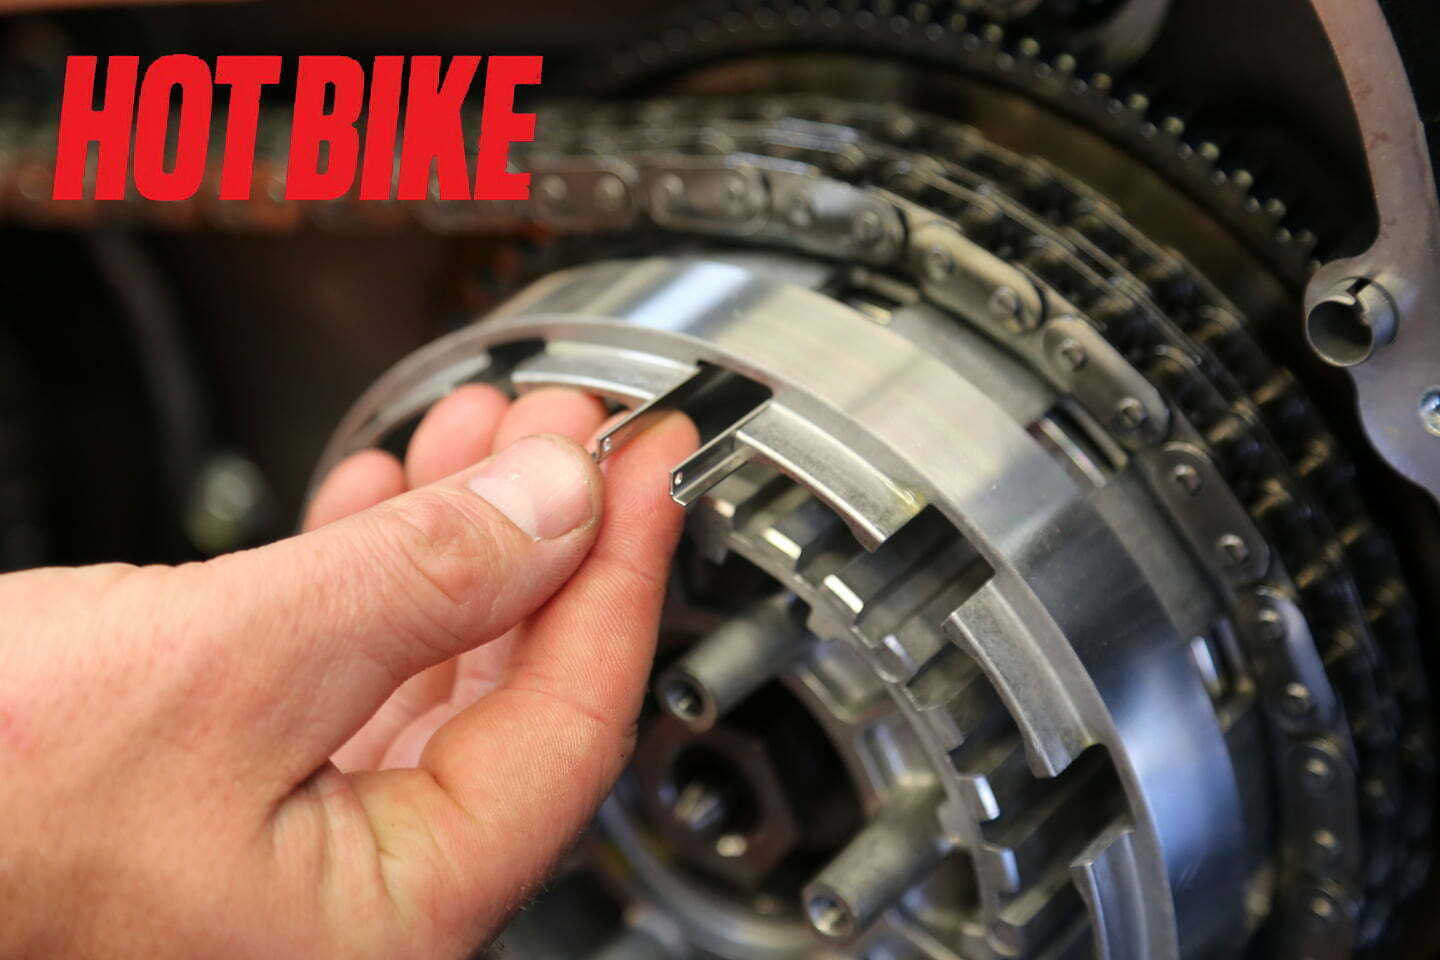
- Install the supplied basket sleeves into the basket slots with the flat tabbed side facing inward. Make sure they are seated all the way. In some models the sleeves might stick above or below the basket tangs.
John Zamora
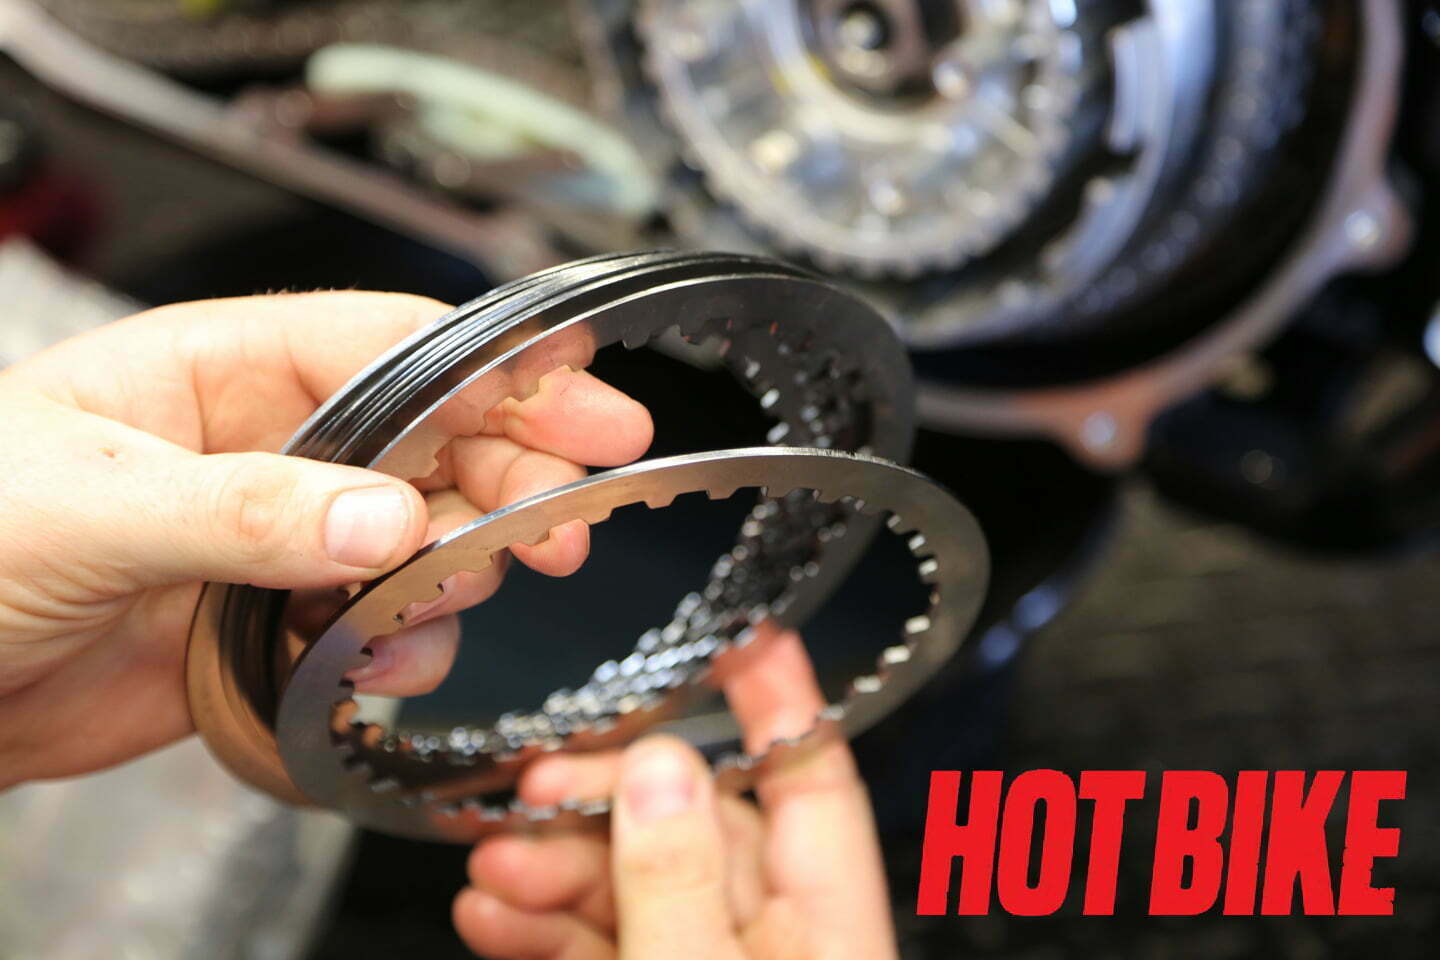
- Next, you’ll begin to organize your soaked clutch packs and rings for installation. Be sure to align the notches on the friction disk for best performance.
John Zamora
- Install the thicker friction disc that will be installed first. Next, carefully follow your instruction manual for the order of installing the OEM spring seat, judder spring and drive plates. Finally install the EXP disk on top of the clutch pack.
John Zamora

- Take the pressure plate and replace the OEM throw out assembly with the one supplied from Rekluse. There is a C-clip that holds in place.
John Zamora
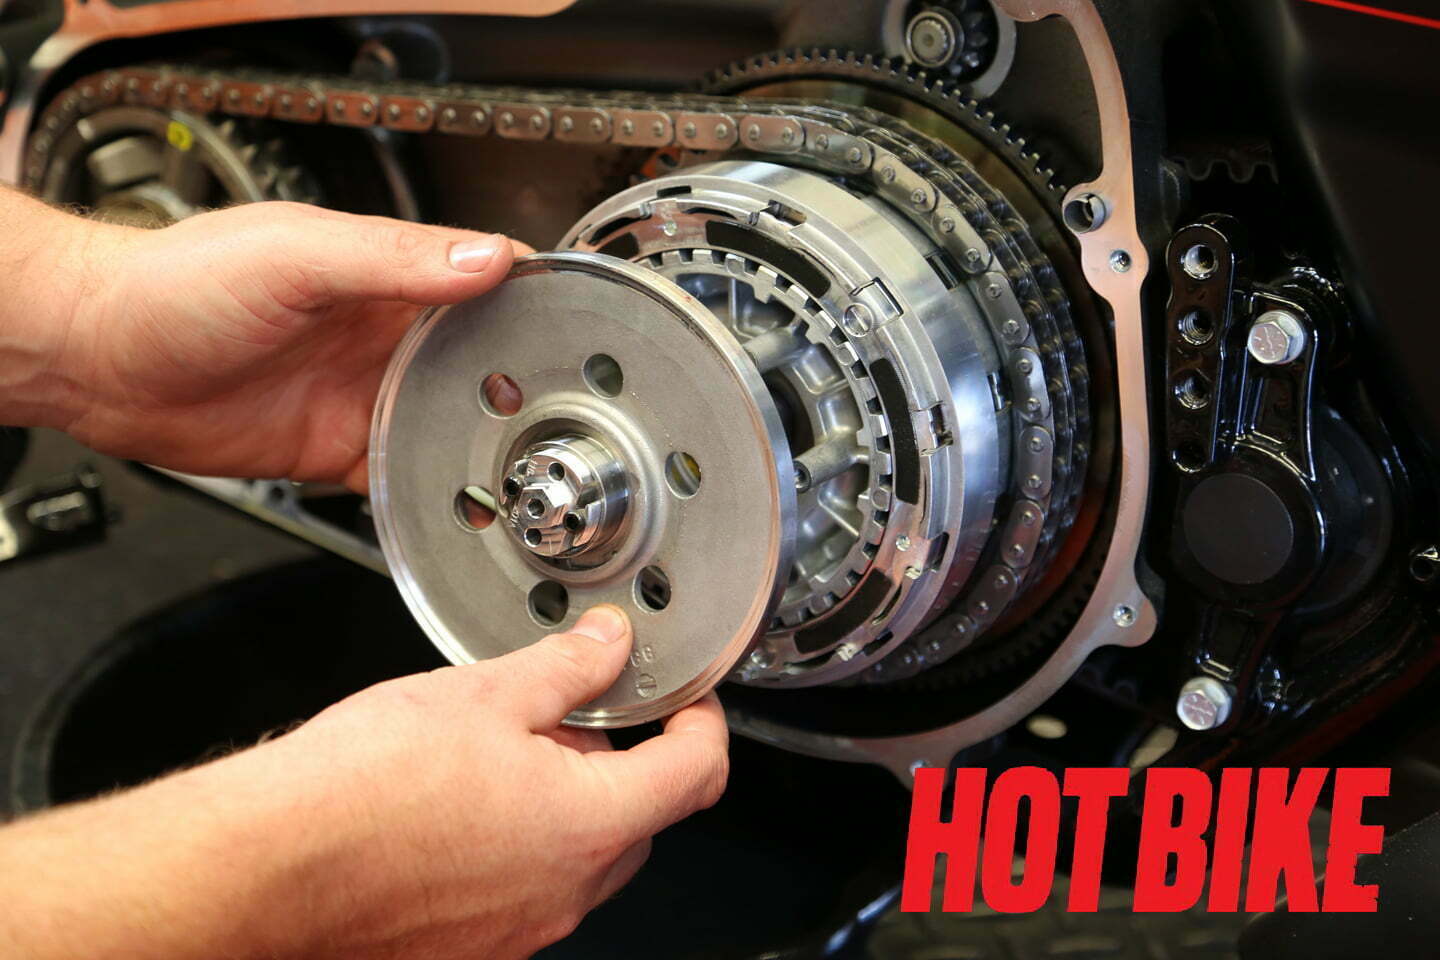
- Next, reinstall the pressure plate onto the clutch.
John Zamora
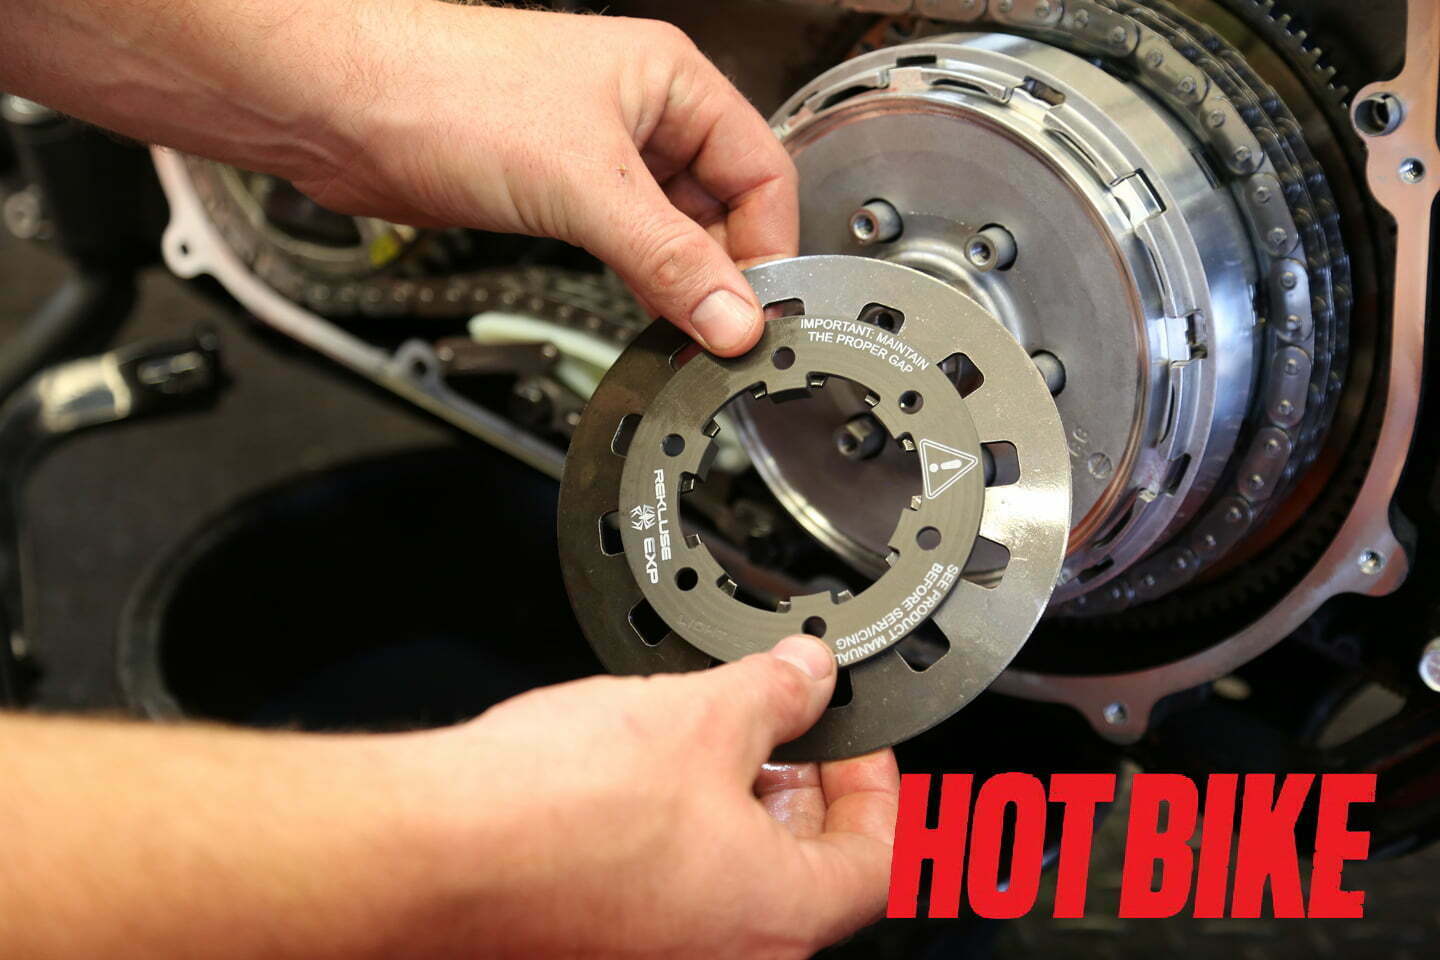
- Place the OEM Belleville spring, cup-side down, along with supplied Rekluse High-Torque Hold-Down Ring, to secure the Belleville spring to the pressure plate.
John Zamora
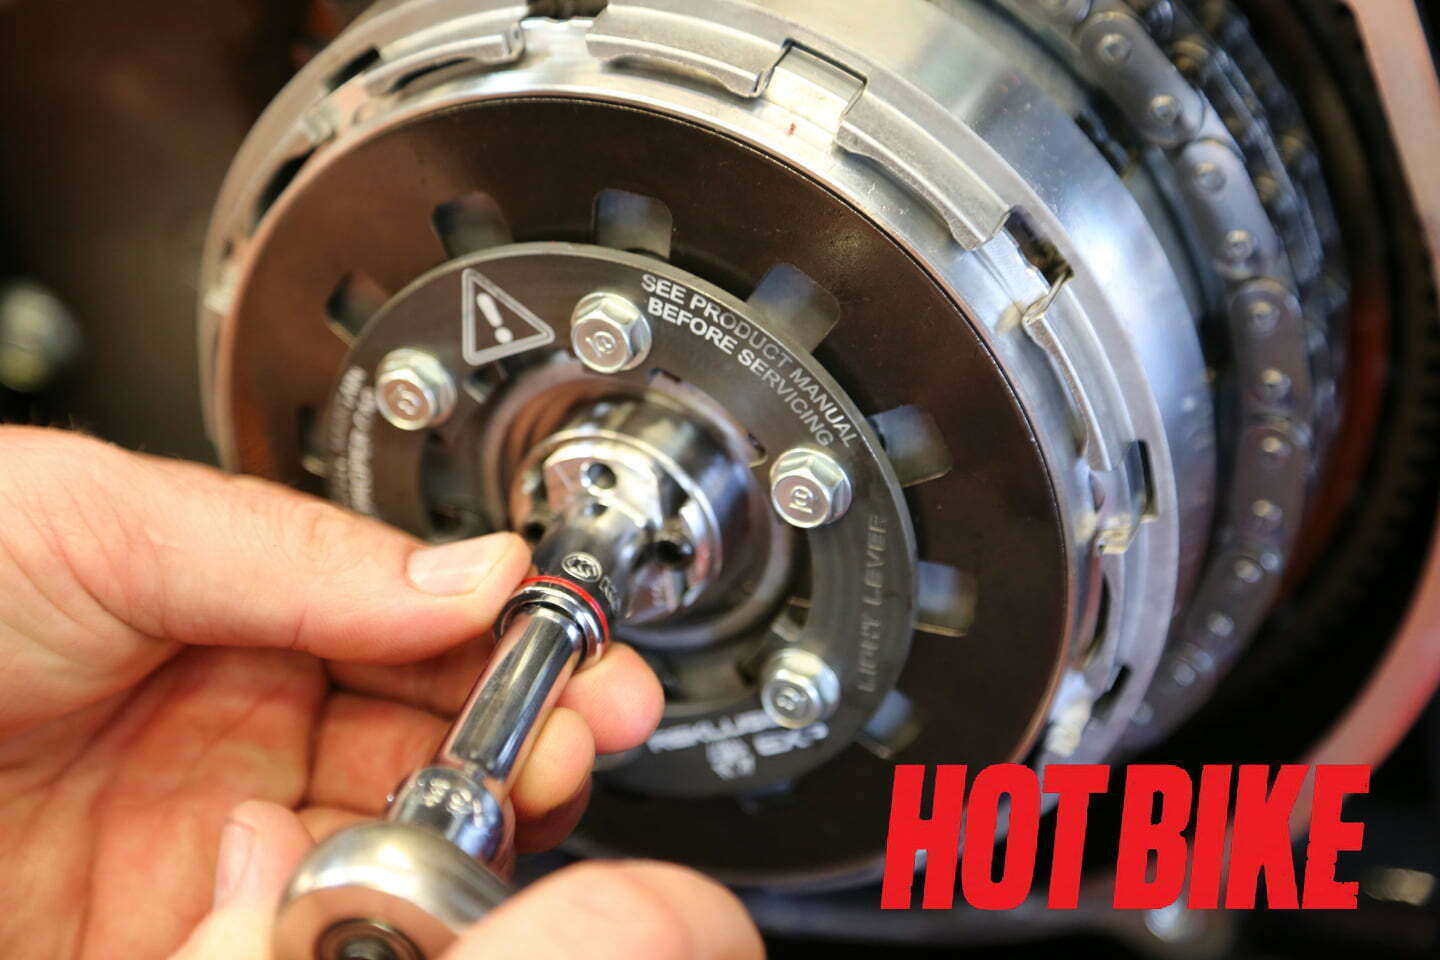
- Snug up the bolts in an even star-like pattern. It’s important to tighten them as evenly as possible. Torque to OEM specs.
John Zamora
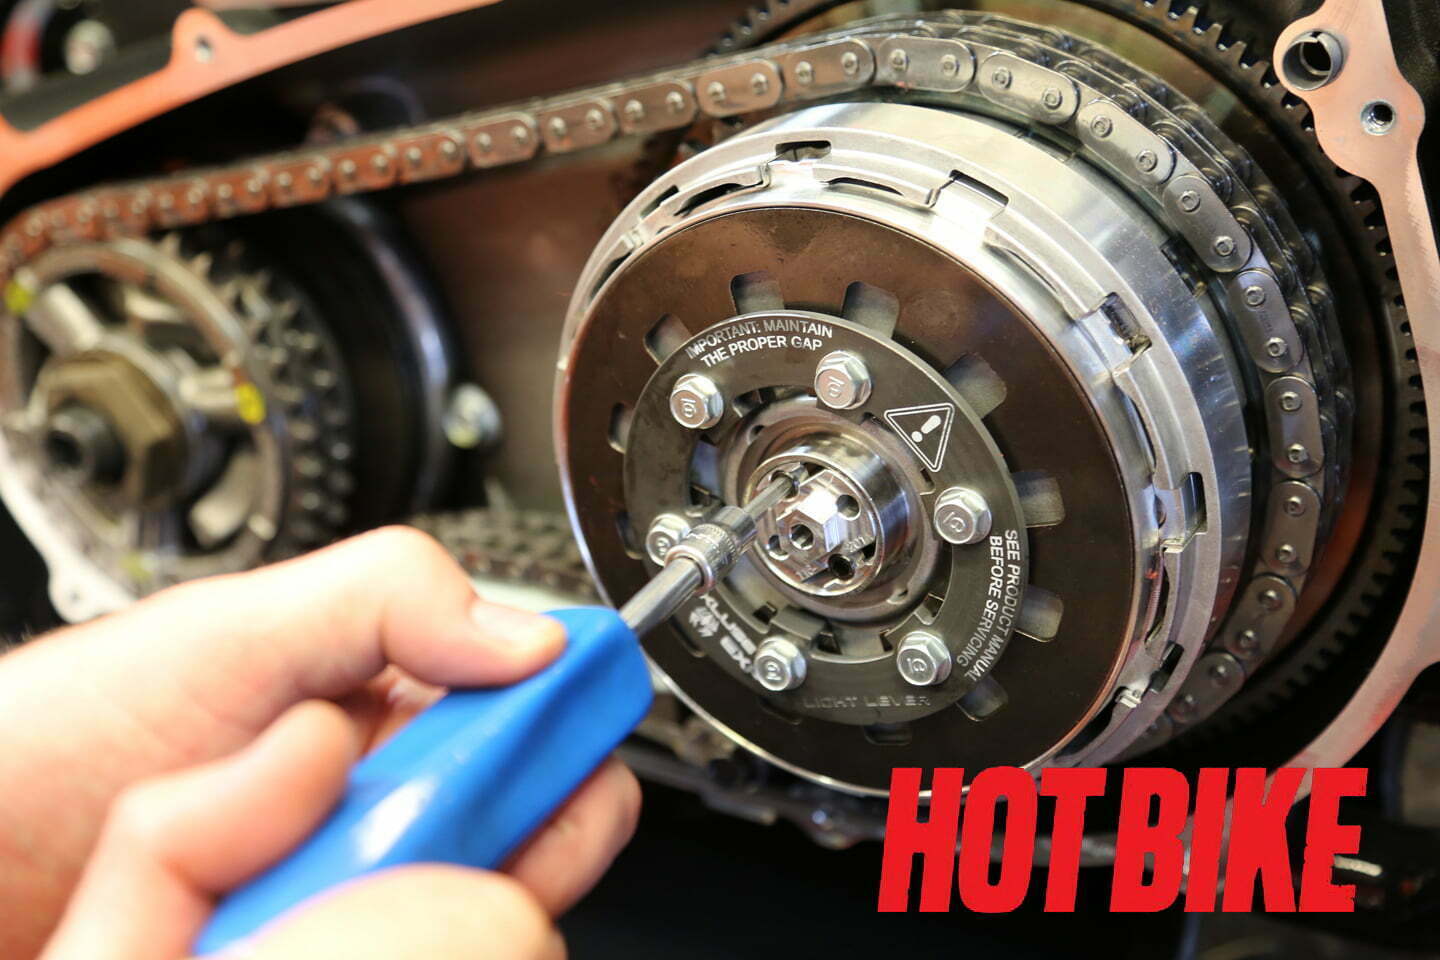
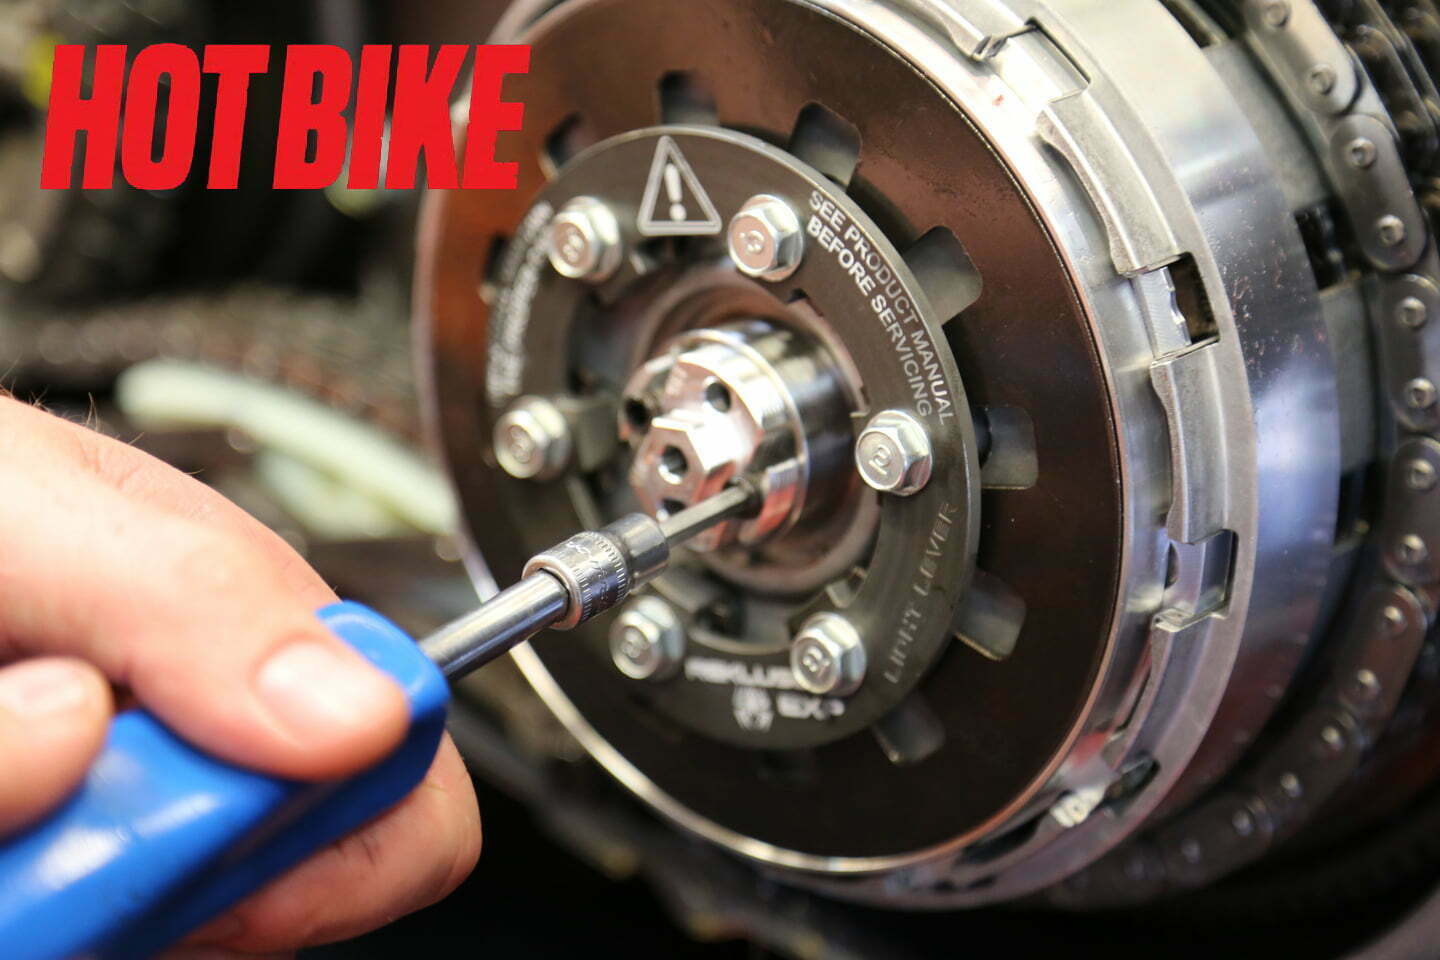
- Next, slightly tighten the Rekluse throw-out assembly, leaving enough play to allow adjustments to be made.
John Zamora
- Next, set the install gap. This step is critical for the auto clutch to work properly. Make sure to double-check instructions to achieve the exact amount of necessary play. Start by turning the adjuster clockwise until you feel an increase in pressure. Then turn the adjuster 1-1/4 turns more. Finally torque the Rekluse throw-out assembly to specs to keep it from backing out.
John Zamora
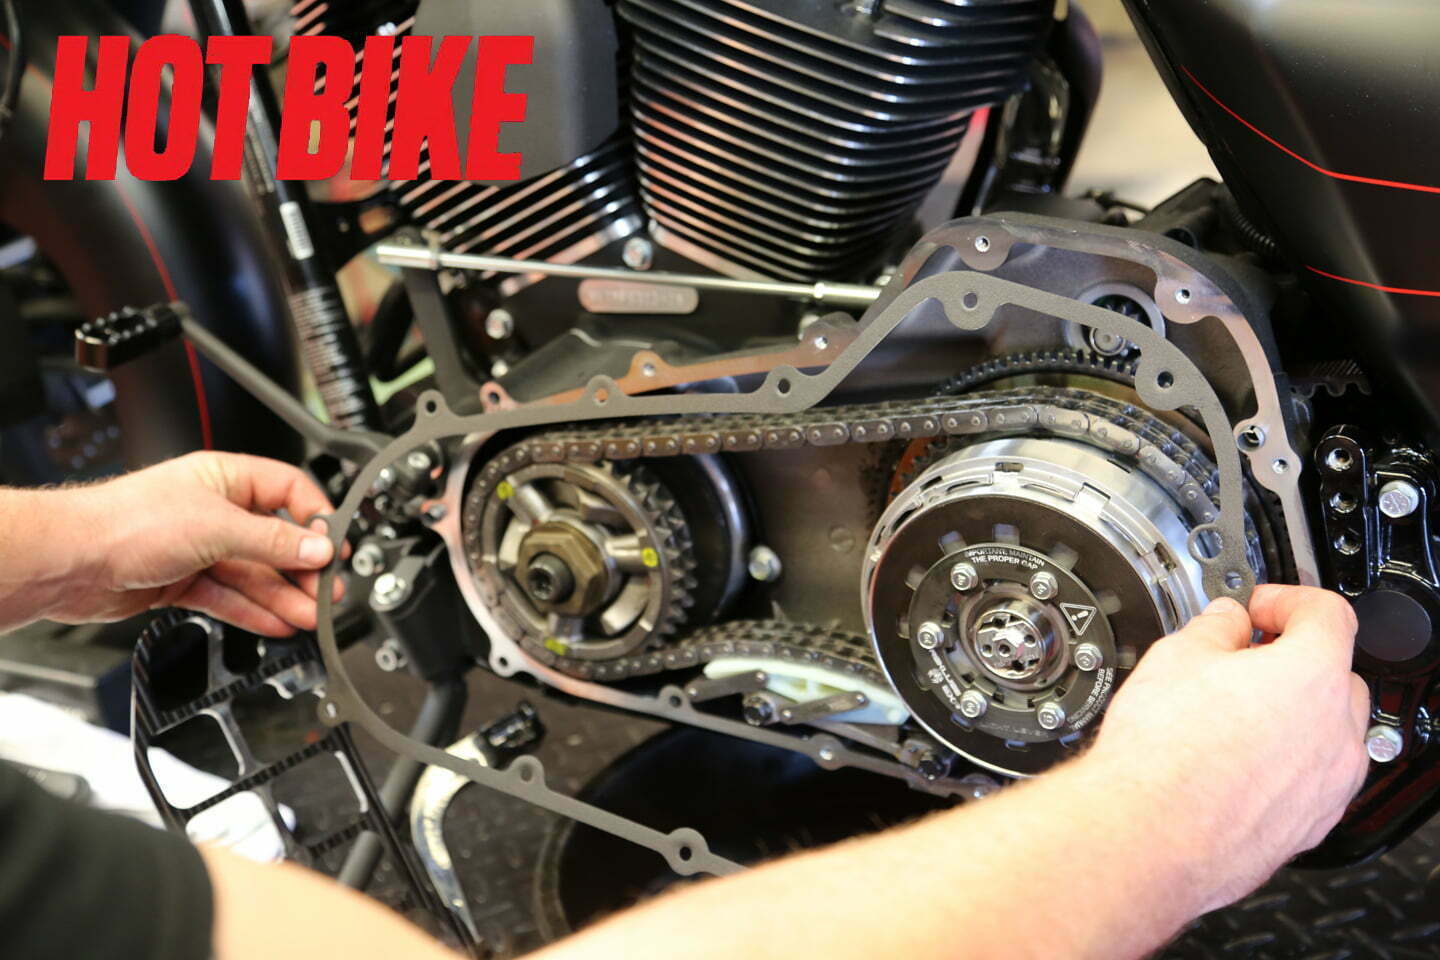
- Replace the primary cover gasket to avoid any leaks.
John Zamora
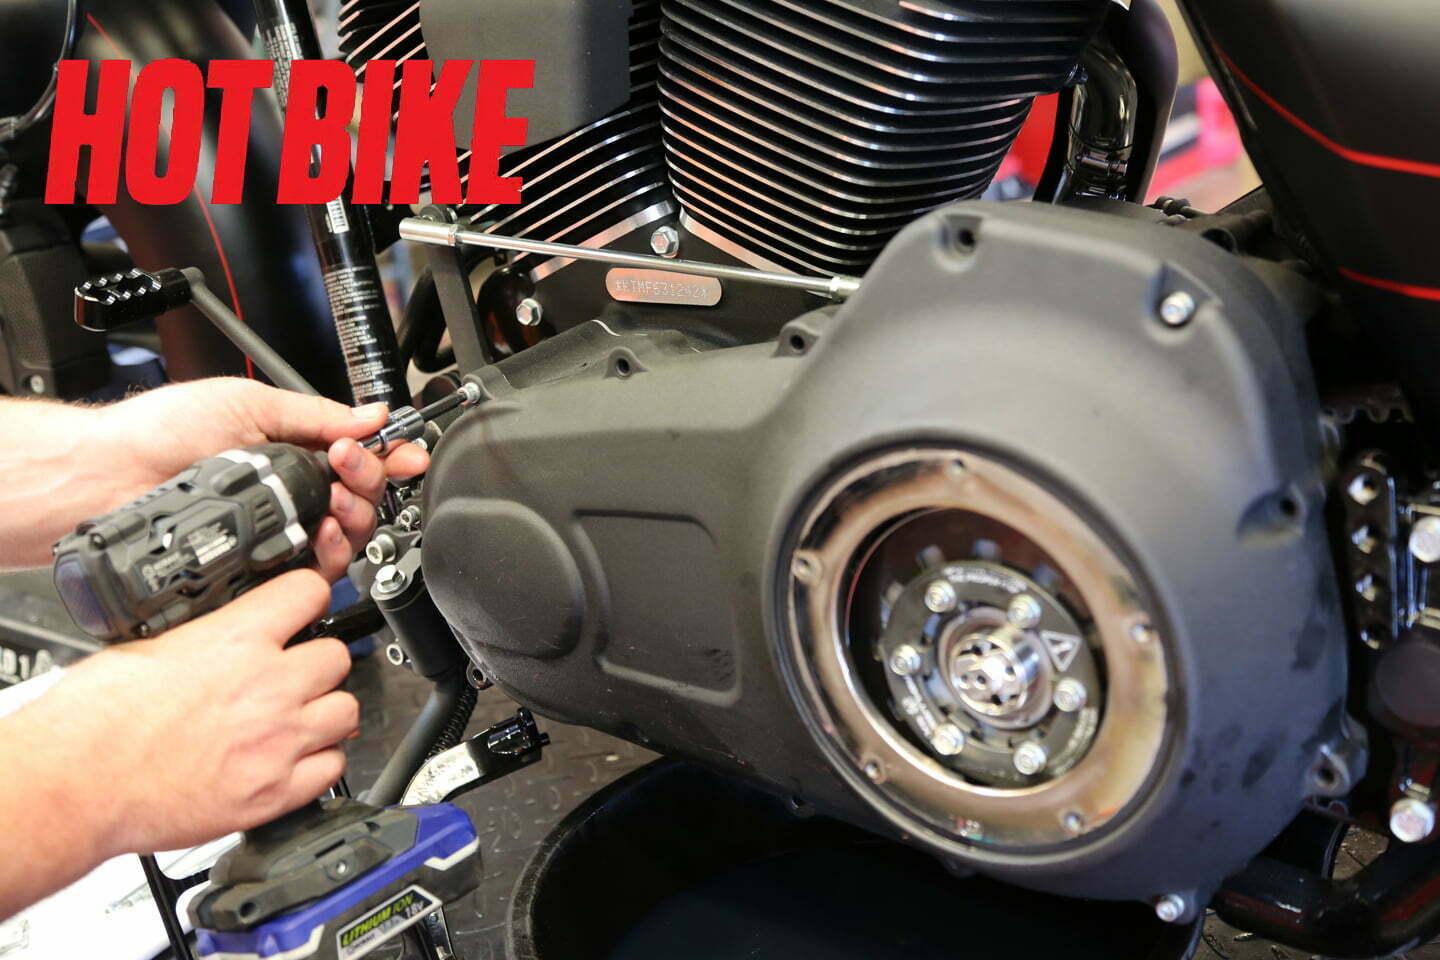
- Replace the primary cover bolts with the correct length going to the correct location torqued in the correct order. Don’t forget to reinstall the drain plug. Leave the derby cover off.
John Zamora
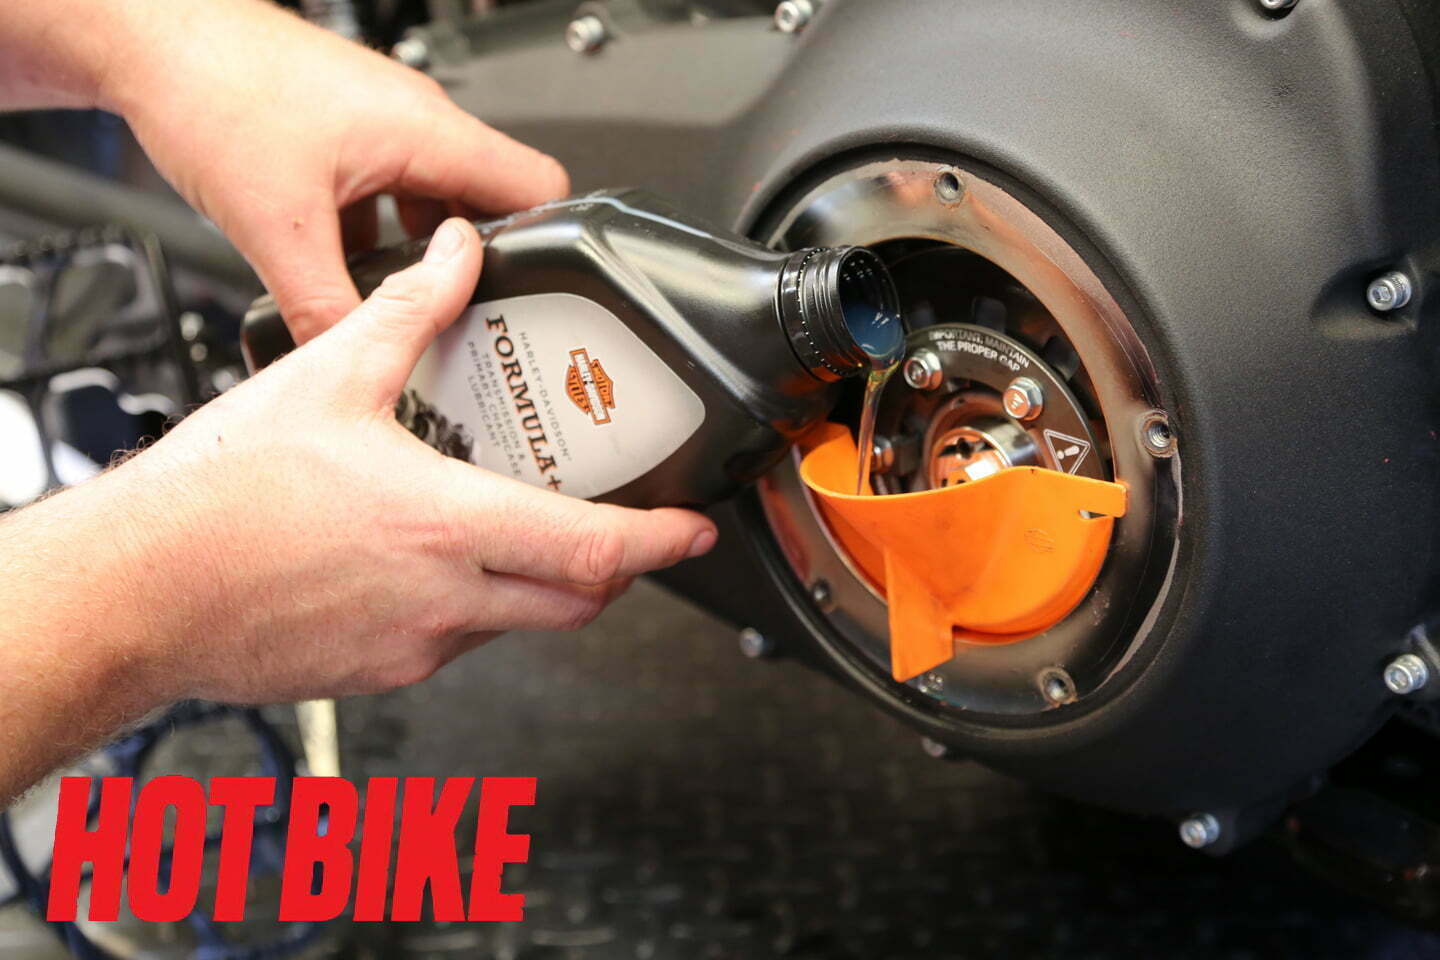
- Finally, refill the primary cover with transmission oil to the correct levels.
John Zamora
- Reinstall the derby cover and footrests, and adjust the clutch lever for correct free play.
John Zamora
Is there really a system available to convert your Harley-Davidson over to an automatic? Well, sorta. While it’s not like you’re going to put the shifter into “D” and take off, what the Rekluse system does allow you to do is come to a complete stop in gear or take off without engaging the clutch lever. What’s nice is if you want to still use the clutch lever like normal, simply just pull it like always. You might ask why would you want a clutch that doesn’t require the lever. Where the Rekluse auto clutch becomes useful is in situations like slow-speed riding, such as at rallies and parking lots, or, like our bike owner, low arm strength from a previous injury. Installation is almost identical to a regular clutch with the exception of a few additional items. If you can change a clutch, you can upgrade it to Rekluse auto system. Make sure and check out this complete installation and demo video.


