
Spray On Attitude
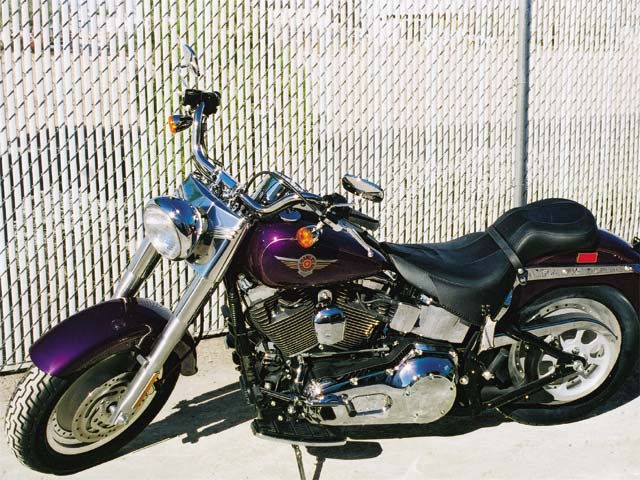
Before

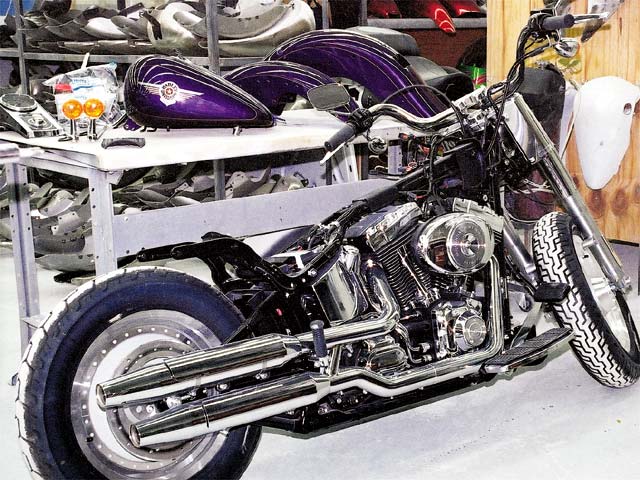
After
1. The first step was to wheel the bike into the shop to remove all the sheetmetal.
2. All decals, stripes, and logos are smoothed away with an abrasive wheel.
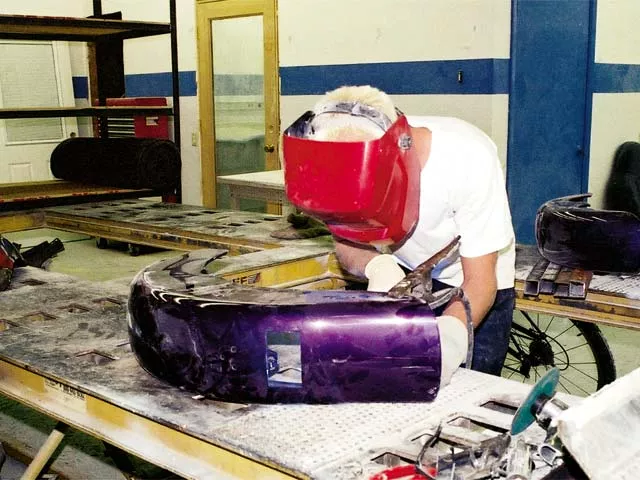
3. To give the finished pieces a smoother look, all the rivets and the unnecessary tabs are ground off. Here we see the rear fender welded after some of the rivets have been removed.
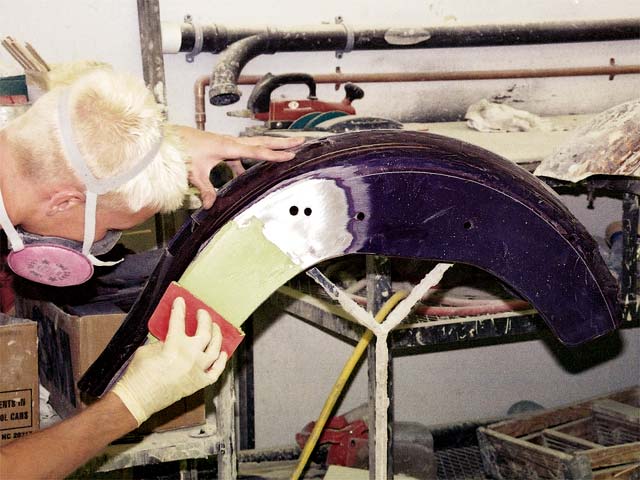
4. A little Bondo is used to remove any surface irregularities. As soon as the Bondo is dry, it will be sanded and the surface will be checked for smoothness before moving to the next step.
5. Now the parts go to the polyester booth. All surfaces are shot with a polyester coating to further smooth and seal the metal. The polyester coating also helps to prevent the paint from shrinking. Once the polyester coating dries, it is dry-sanded with 150-grit paper.
6. The polyester was followed by a few coats of primer, and everything was carefully wet-sanded with 400-grit sandpaper.
7. It’s time for the first coat of color. Deano’s starts by shooting a black basecoat over the fenders and the gas tank.
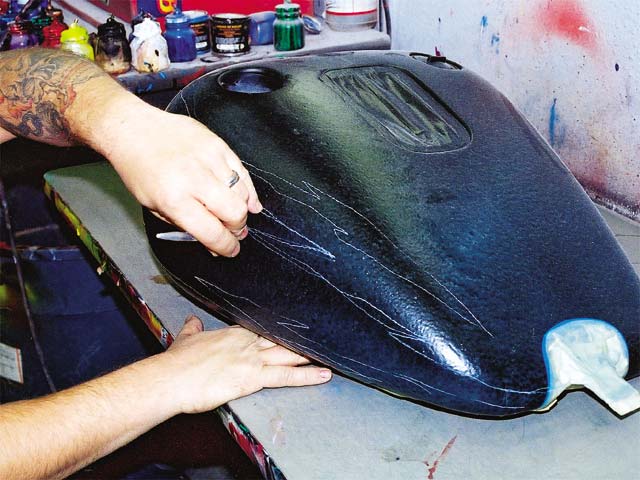
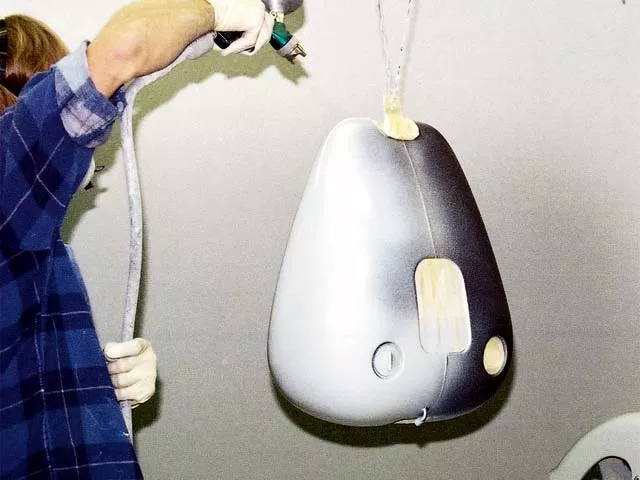
8. This part is really cool. Deano’s uses a trick masking spray called Grip-Mask by AKZO NOBEL. It’s not cheap, but Deano’s finds the excellent results well worth the cost. The gas tank has already been sprayed with Grip-Mask and is marked for the next layer of paint.
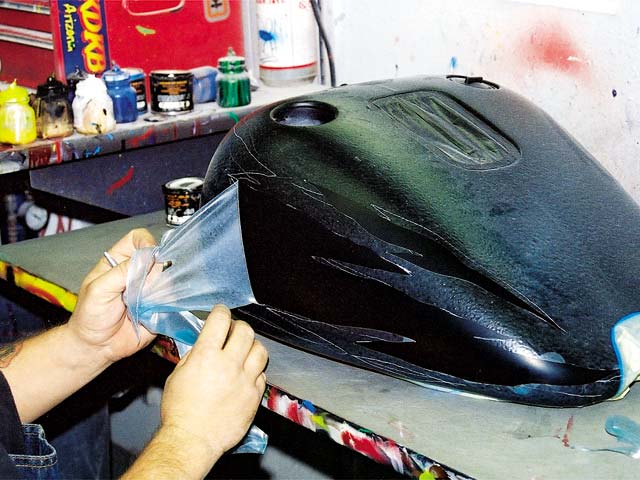
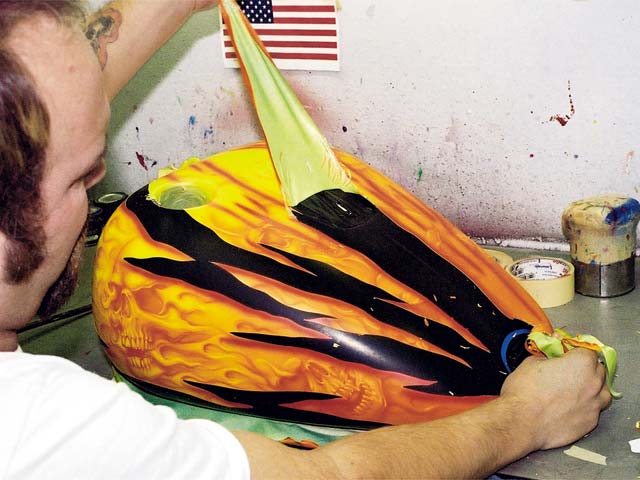
9. The Grip-Mask is peeled away and the remaining material will act as a masking tape as the next layer of color is applied.
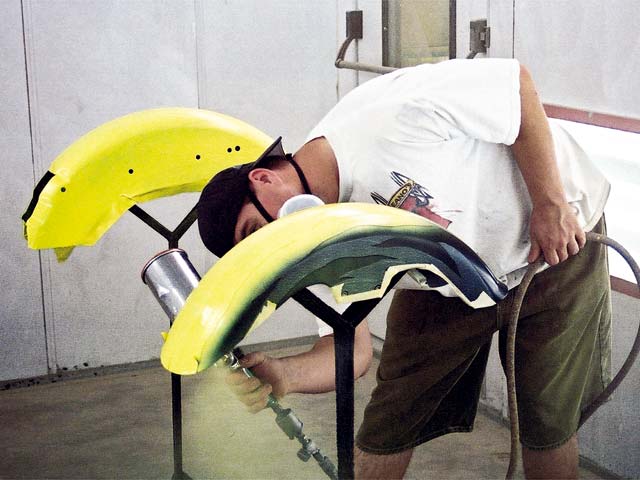
10. We’re back in the booth to watch as a little yellow is applied to the sheetmetal.
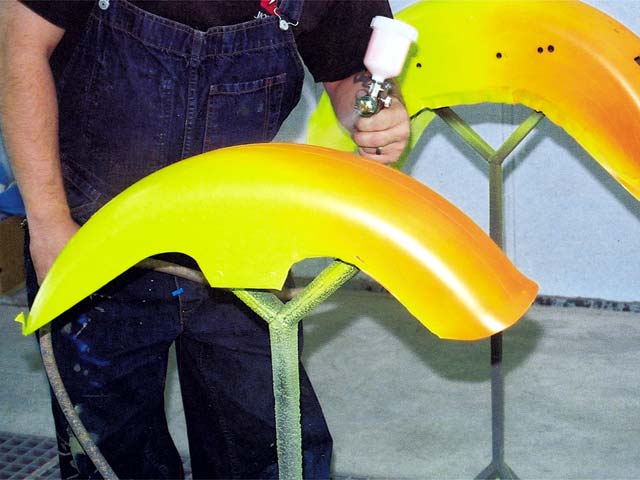
11. Some more Grip-Mask is applied, and a few coats of orange are laid down.
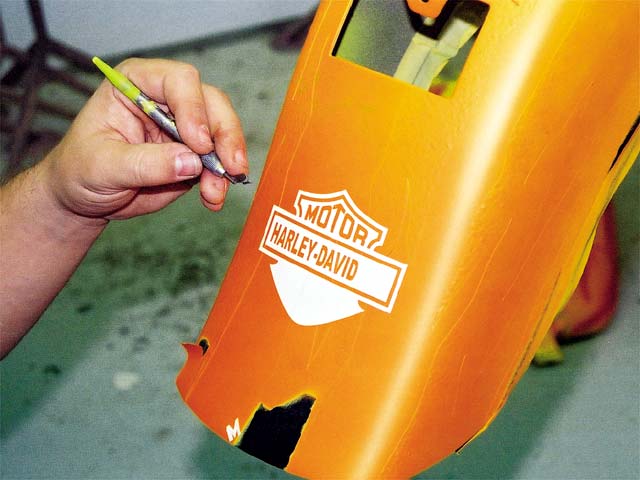
12. Deano’s has a custom CAD (Computer Aided Design) program that allows them to reproduce logos and artwork with ease. They made this Harley logo with the CAD program, and it’s applied to the rear fender for masking duty before the logo is filled in with an airbrush.
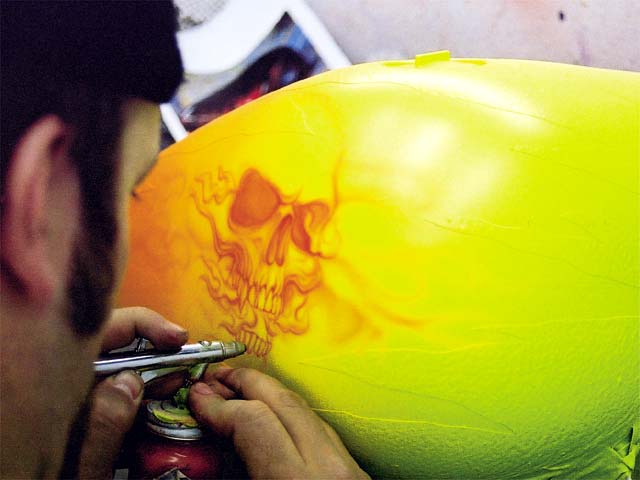
13. While the logo is being done on the rear fender, another Deano’s employee is busy working airbrush magic as he creates a skull on the right side of the gas tank.
14. We’re ready to peel off the Grip-Mask to see how things look.

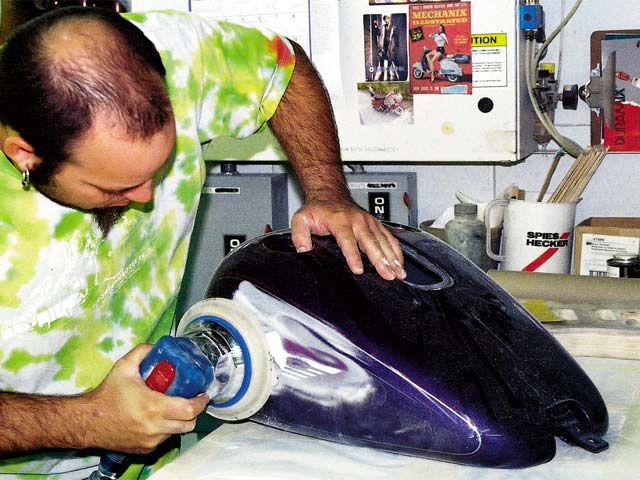
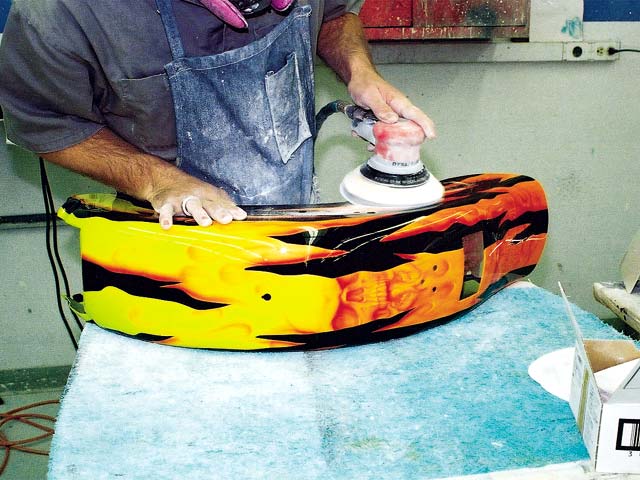
15. “Yeah, I’m cool. What about it?”
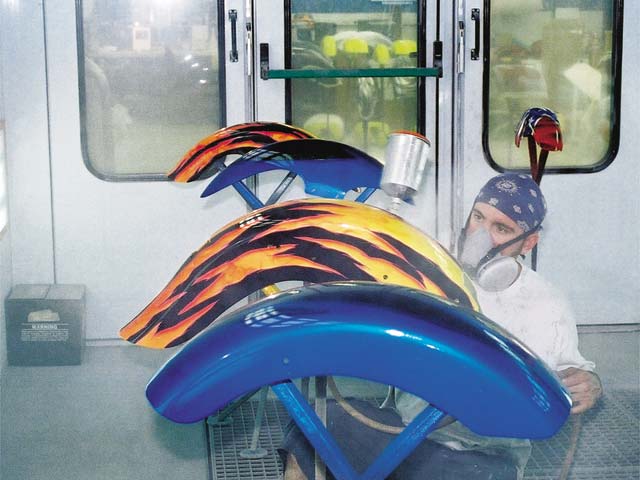
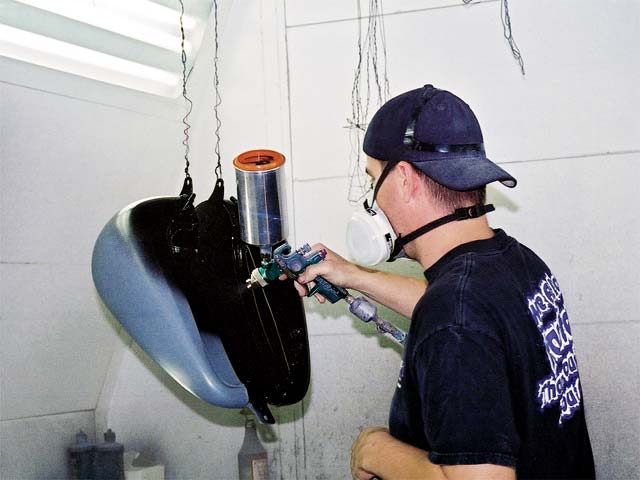
16. After the paintwork is approved, it’s taken into the spray booth for a final coat of clear to protect the graphics and to smooth the surface. You can tell Deano’s is busy by the number of parts being clearcoated at the same time. Five coats of high-grade German urethane are applied in this final round of spraying. The finish will be baked until it is cured.
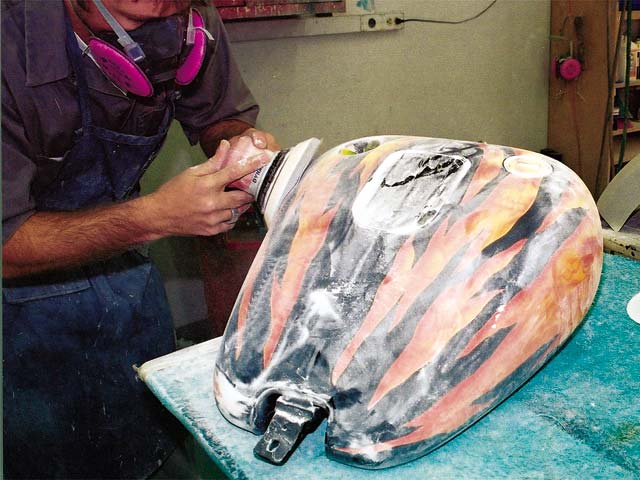
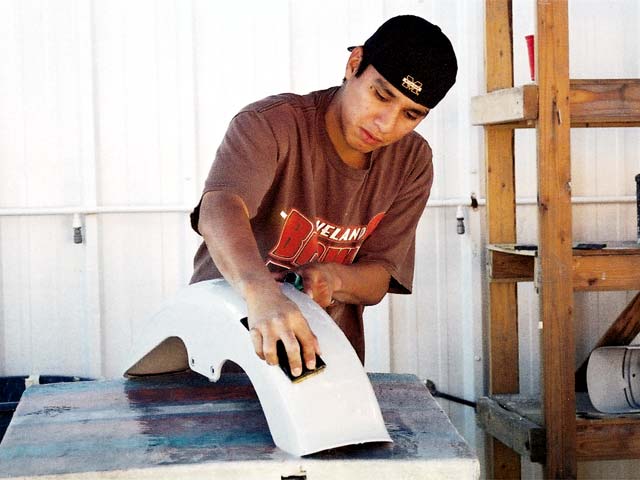
17. As soon as the clearcoating is dry, it is sanded with a dual-action sander and an 800-grit pad. It will then be hand-sanded with a 2000-grit pad and some water.
18. A small amount of buffing compound is added to a buffing pad, and all the parts are buffed to a mirror-like finish.
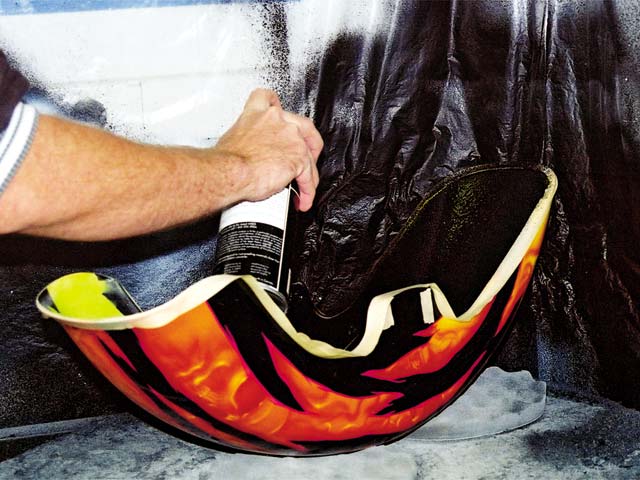
19. A healthy dose of undercoating is added to the lower surface of the fenders, and the parts are given one last polishing session before going back on the bike.

20. After a rigorous inspection, everything is carefully bolted back on the bike.
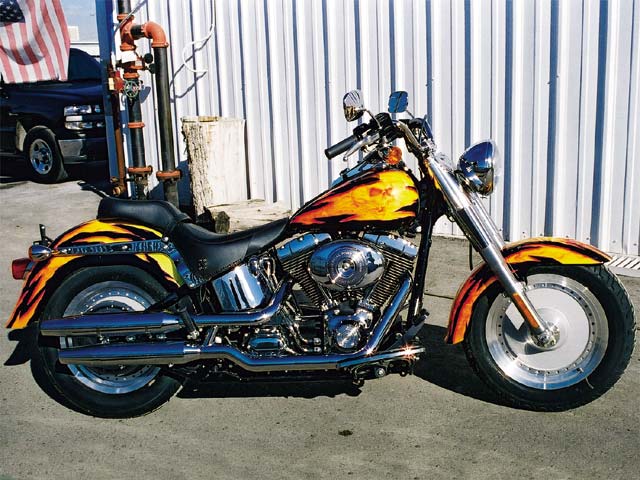
21. And that’s it. Look at the incredible change to the bike’s appearance that was brought out by doing nothing more than changing the color. Proving once again that you can’t get more bang for your customizing buck than you’ll get from a new paintjob.
There are no less than a million or so ways that you can trick out the look of a stock Harley. A long frontend, new sheetmetal, or new wheels can help, but there isn’t anything else that will provide the visual bang-for-the-buck that you get from a custom paintjob.
You can add skulls, stripes, tear-away graphics, and anything else your mind can possibly conceive to enhance your hawg. Unlike engine hop-ups or other things that are stuck within the confines of reality, a custom paintjob can conjure up visions of things that cannot possibly exist outside of your imagination. And, with the many new masking and spray techniques that have been created in recent years and the ever-increasing number of painters found in every metropolitan area, getting a quality paintjob is much easier than it was four or five years ago.
We’ve seen so much fantastic work coming out of Deano’s in Tempe, Arizona, throughout the years that we felt the shop would be the perfect choice to show us the right way to paint a bike. The Deano’s crew took a stock ’02 Fat Boy and turned it into the bike its owner had always dreamed of riding. Grand Canyon Harley-Davidson of Belmont, Arizona, sent the bike to Deano’s because the owner of the new bike requested a Deano’s paintjob before he accepted delivery of it — nothing else would do. Follow along as the skilled staff at Deano’s handles everything from disassembly, prep, paint, graphics to reassembling the bike.
What ends up leaving the shop is a huge improvement from what came in, and the owner couldn’t have been more pleased with the results.


