
Screamin’ Eagle Ignition Module – Extinguishing Sportster Backfire
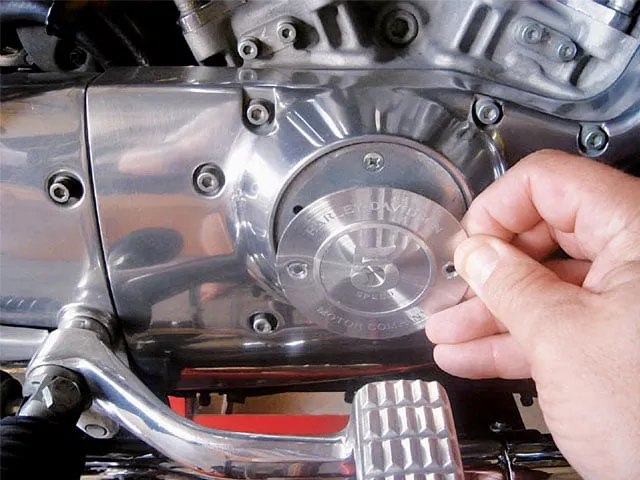
1. First, Craig lifted the Sportster and disconnected the battery cables. To remove the outer cover, Craig used a 1/8-inch drill to take out the rivets. Then he needed a small screwdriver to knock off the remaining collars. Even with care, the outer cover often gets scratched, so (like Craig) you might want to pick up a new cover. Craig ordered a new cover from Drag Specialties (part No. DS-373919). Next, he removed the two Phillips-head screws holding the inner cover.
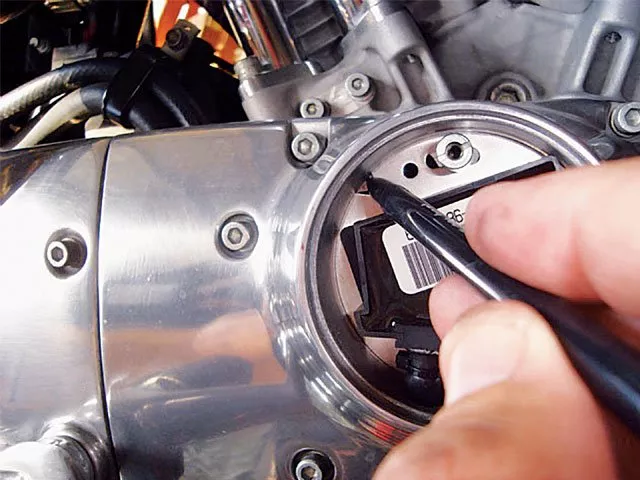
2. Before removing the two screws holding the module plate, Craig marked its position in the adjustment notch. This would make it easier to statically time the engine later.
3. The instructions say that in order to remove the OEM module plate, you must first remove the pins from the female Deutsch connector and pull the wires up through the cam cover. This keeps the OEM module intact in case you’re performing other maintenance and will need to re-install it later. However, since Craig was replacing his, he cut the module wires at the nose cone and pulled the old wires out of the bottom of the cam cover.

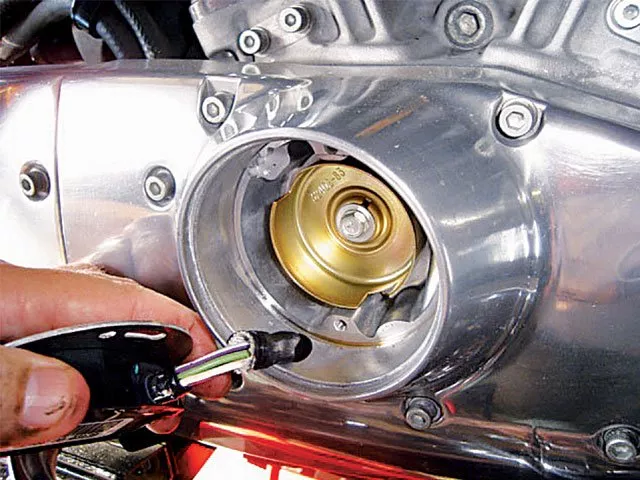
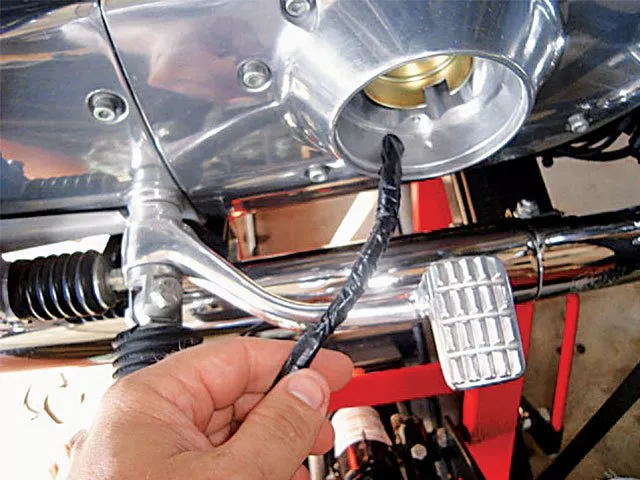
4. Looking under the bike, Craig located the ignition-module connector (six-pin Deutsch connector) below the transmission. He popped it off the T-stud on the frame and disconnected it.
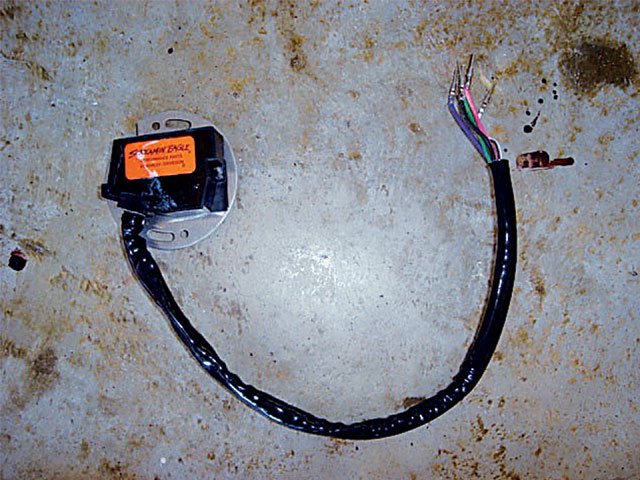
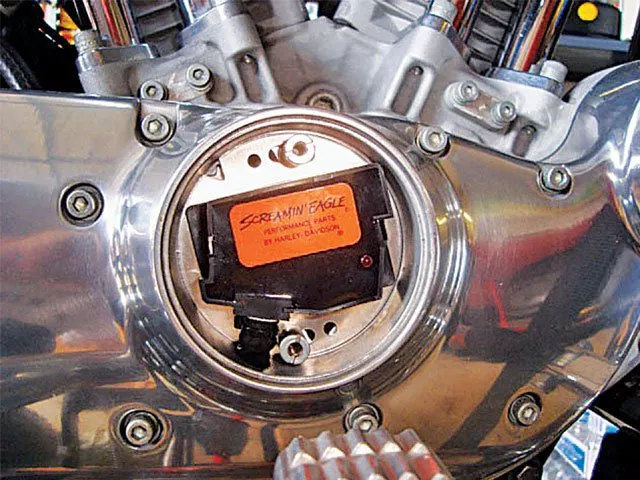
5. Here’s a photo of the new SE ignition module plate. The instructions say to install the new module and route the wires back to the connector location. Sounds simple and easy. But most of us have learned the hard way that when it comes to electrical wiring, it seems the manufacturers start with a wiring harness and build a bike around it.
6. The only way to route the new wires is to run a thin snake through the cam cover, tape the end of the snake and the end of the new wires together, and then gently pull the bundle down the hole. For Craig’s snake, he used the old harness sheath, which was easy to remove and stiff enough to push through. He also lubricated the path with a thin film of motor oil.
7. With the wires pulled through, he installed the two stand-off screws to secure the module plate to the nose-cone housing. Craig then aligned the adjustment notch with his mark from the OEM plate but left the two screws loose so he could adjust the timing later.
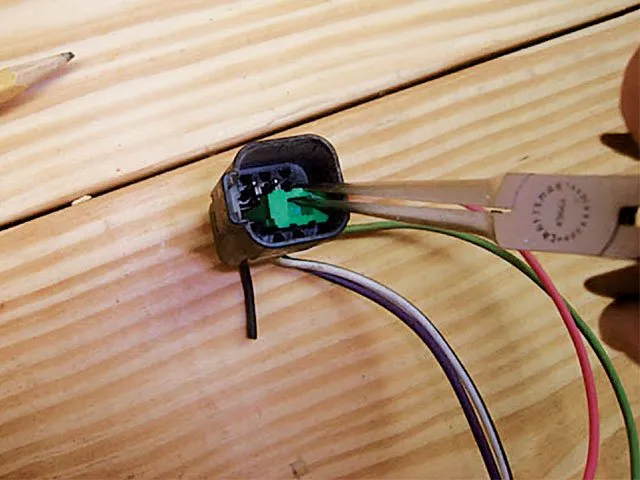
8. Next, Craig transferred the female half of the Deutsch connector from the OEM harness to the SE harness. He used thin needle-nosed pliers to pull the green wedge from inside the body, thus releasing the pins so each wire could be removed from the back of the body. Craig sketched the position of the wire colors as a guide.
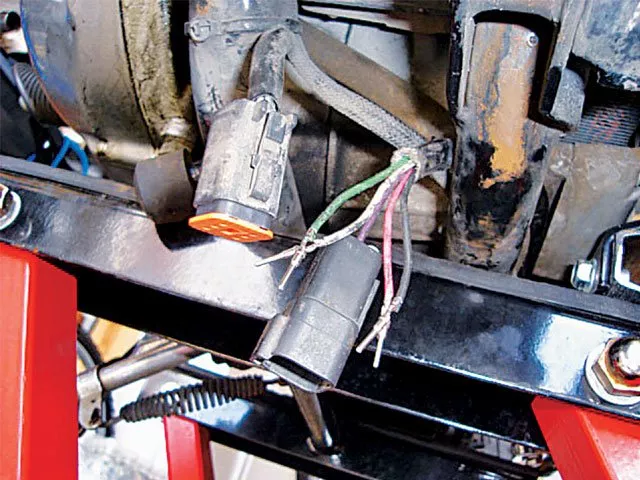
9. Now back under the bike, Craig inserted the new wires into the connector in the same positions as the old ones (if you don’t make a position guide, you can just match the colors on each side of the connector). Then he re-inserted the green wedge, mated the connecter halves, and secured the connector to the frame.
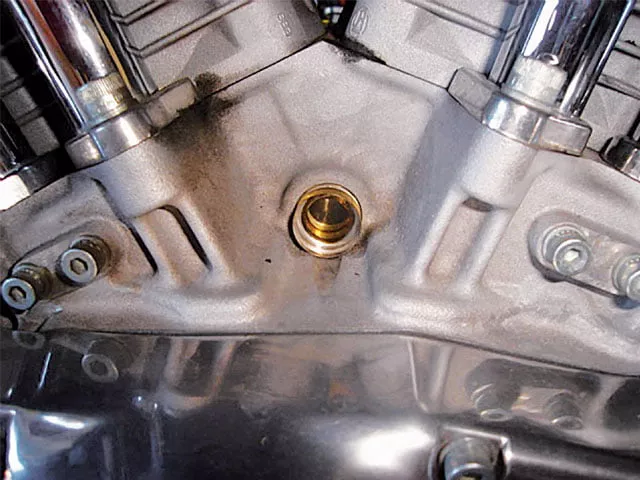
10. With the new SE module installed, it was time to set the engine timing. Craig reconnected the battery cables, positive side first. He also installed a clear timing hole plug from Drag Specialties (part No. DS-196040) so he could view the timing marks without splattering oil down the case. The instructions to statically time the engine involve removing spark plugs, raising the rear wheel, and rotating the engine until the front intake valve opens and the TDC mark is centered in the timing window. However, since Craig marked the original location of the ignition module, the new module was close enough, so Craig skipped those steps. Then he hooked up a borrowed timing light and adjusted the timing to be slightly retarded because several Sportster mechanics suggested it would also help reduce the detonation problems. Craig also noted that the timing is taken off the rear cylinder cam, so you have to turn the module plate counterclockwise to retard and clockwise to advance, which is the opposite of what you’d expect if the timing were taken off the crank.
11. To finish up, Craig tightened the module plate screws to 15-30 lbs-in (note: that’s pounds-inch) and installed his new domed outer cover. Craig reported that the new Screamin’ Eagle ignition module has extinguished the backfiring, and he no longer has a problem with the engine missing.
Editor’s note: A while back, a friend of a friend was experiencing some technical difficulties with his Sportster. Always in search of some quick and handy tech for our readers, we told the friend of the friend to document the process he went through to solve his problem, and we’d print it in the magazine. Well, here it is.
Several months ago, a riding buddy by the name of Craig was having trouble with his ’03 Sportster XLH. The Sporty was backfiring and missing at highway speed. Naturally, in today’s online world, Craig’s first step in diagnosing the problem was to search the Internet for advice from others who had experienced (and hopefully solved) the same problem. The difficulty with the Internet is that often the good advice is buried in an avalanche of poor, wrong, or irrelevant advice. Craig chased down many false leads, replacing spark plugs and jets; cleaning the air filter and the carburetor; and checking the coil, alternator, battery, and plug wires.
Finally, he came across comments which indicated that detonation problems were fairly common with Sportsters because of the ignition settings and advance curves that Harley-Davidson uses in its stock ignition module. Most problems are mild and go unnoticed unless the stock ignition module begins to fail. With that hint, Craig looked into ignition-module failures. On his Sportster, the ignition module is located inside the cam nose cone.
Craig devised a simple experiment to test the ignition. He removed the outer cover to expose and cool the ignition module. Then he rode around. No backfire, and no engine miss. With that new knowledge in hand, he ordered an H-D Screamin’ Eagle Performance Ignition Module (part No. 32979-98A). The SE part was a few dollars cheaper than stock. He also picked up a new outer cover because the original got scratched during removal. Here are the steps Craig performed to replace the ignition module.


