
Wakin’ The Giant
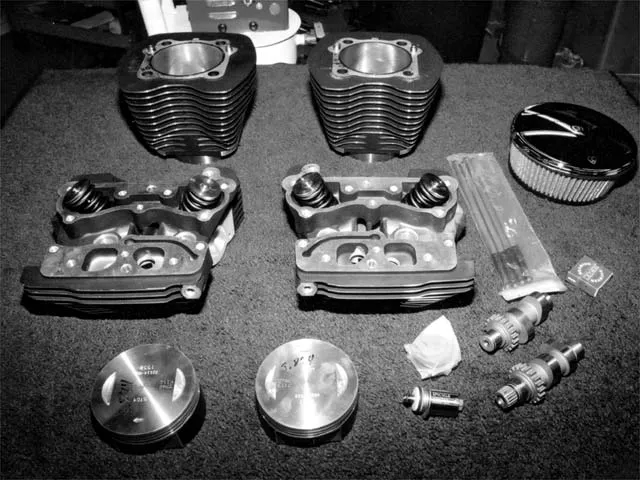
This is the basis of our kit: the Head Quarters 1550 Low Compression kit, the Ness Big Sucker 2 air cleaner, and the Epicycle adjustable pressure regulator. Not shown in this photo are our RC Cycles dresser slip-ons and the Power Commander; they were installed on the bike the night before.
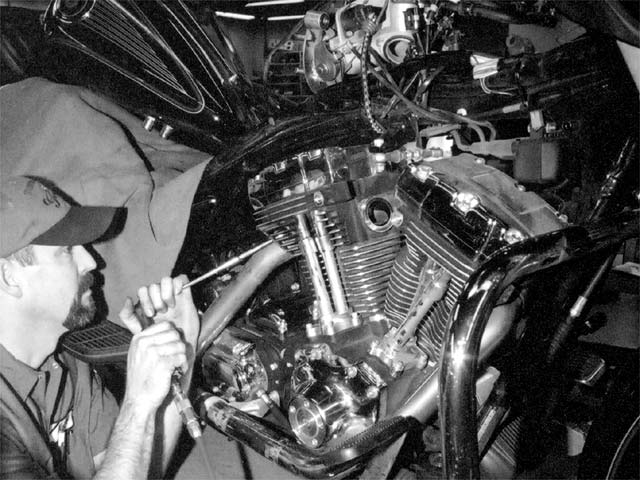
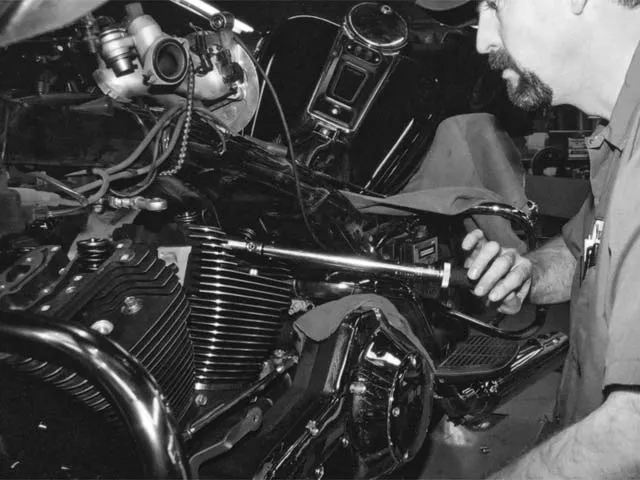
Dan Vesterby has the bike up on the lift, while the seat and tank are quickly moved out of the way. After disconnecting the battery, Dan removes the fuel-injection manifold; here he is seen unbolting our stock exhaust headers.
Now the rocker box covers are unbolted and the rockers are removed from the rear cylinder.
After taking the front rocker assembly off, Dan removes the pushrods, the tubes, and the lower rocker box housings.
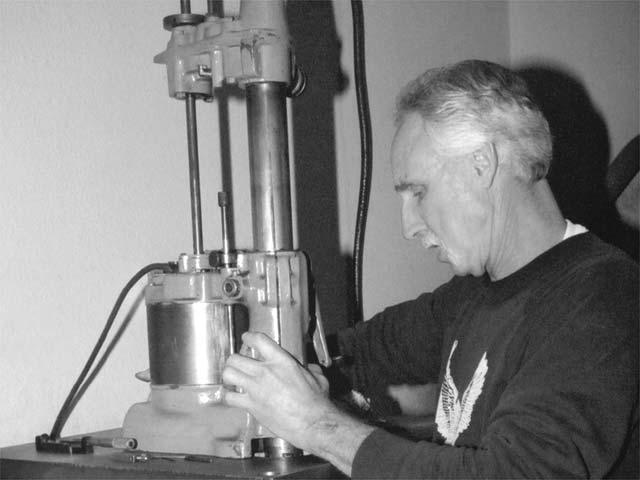
The heads are unbolted and the cylinders are slid off the top of the pistons. As soon as our cylinders were freed, we jumped in a truck and took them to BCR Engineering in Montclair, California, to watch as shop owner, Bill Chambers, bored and honed them from 88 to 95 cubic inches. Bill locks the cylinders into his boring jig and removes enough material to a get us a few thousandths short of our target bore. He does this in two passes with the cutter to keep from overloading the tool.
Now the cylinders are clamped into a set of torque plates to ensure they are round during our final honing process. Bill uses stones of three different grits to remove the final 0.0004-to-0.0005-inch of material. When he’s finished, we’ll have a 0.0002-inch piston-to-cylinder clearance. This will allow for a shorter break-in period with less chances of overheating or scoring the cylinder walls.
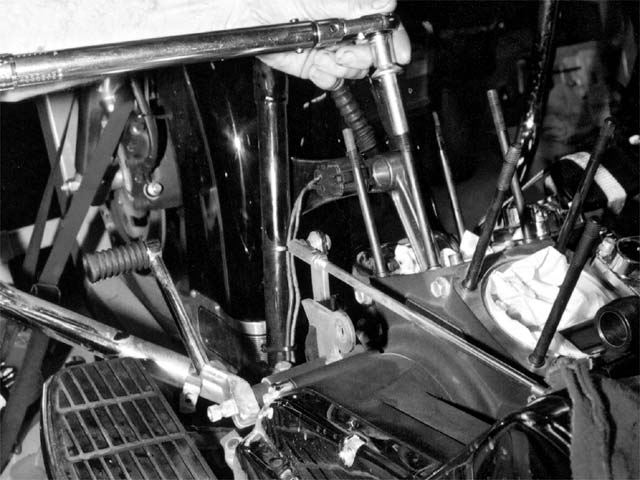
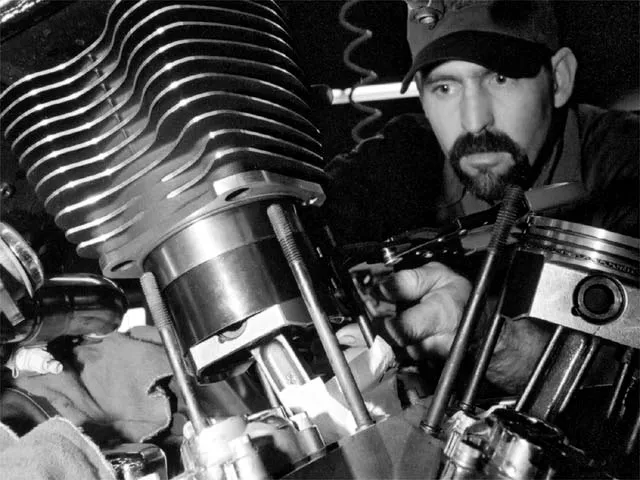
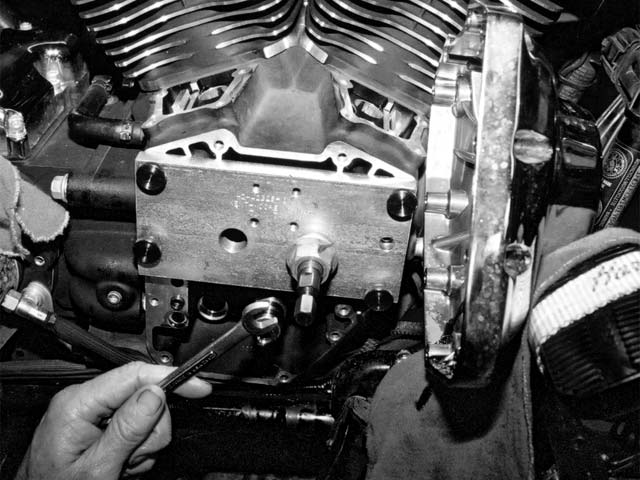
This is a nice little touch that you don’t see often. Before sliding our freshly bored cylinders on, Dan is checking the studs for proper torque. They could have been loosened during use or while removing the heads, and it never hurts to go that extra step.
After commenting on the nice job Bill Chambers did cutting the cylinders for us, Dan uses a piston to square the rings in the bore before measuring their end gap.
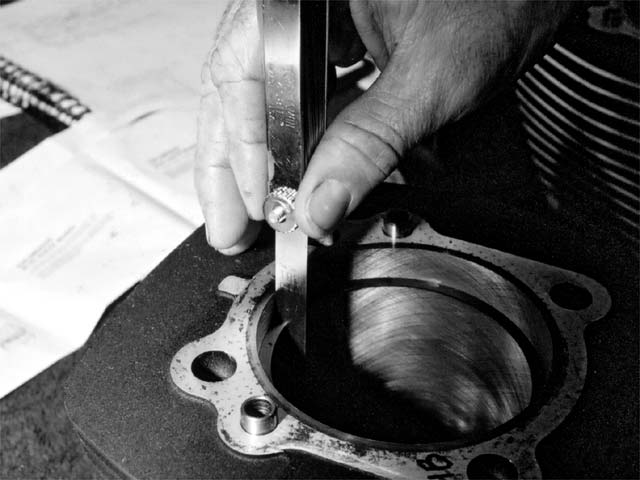
Everything checks out and Dan will take a small, fine stone to the open edge of the rings to knock the sharp edge off of them where they meet the cylinder wall — another nice touch to ensure reliability.
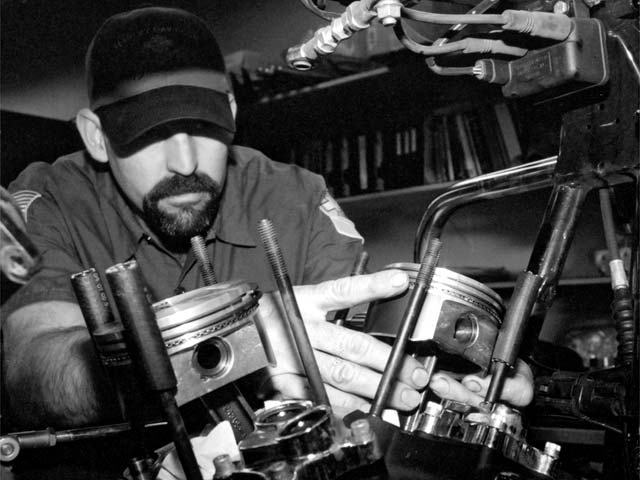
With a couple of pieces of hose slipped over the outer studs to protect our piston skirts, Dan slips the pistons on the connecting rods and inserts the wristpins and the locking clips.
The insides of the cylinders are thoroughly cleaned out and treated to a wiping of oil for initial lubrication. The piston skirts are wiped with a smidgen of engine assembly lube, clamped into a ring compressor, and the cylinders are slipped over one at a time.
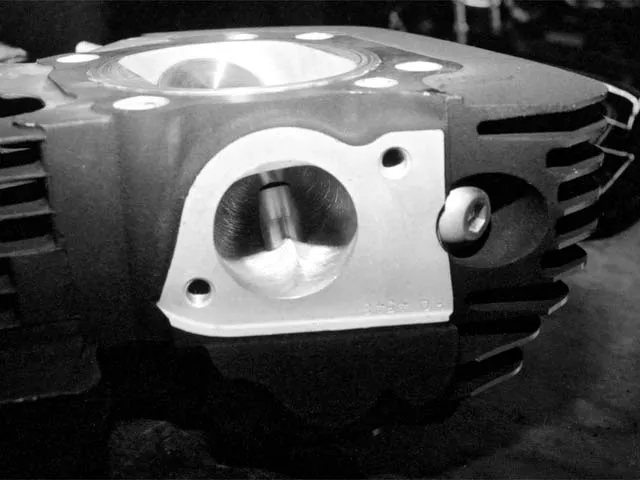
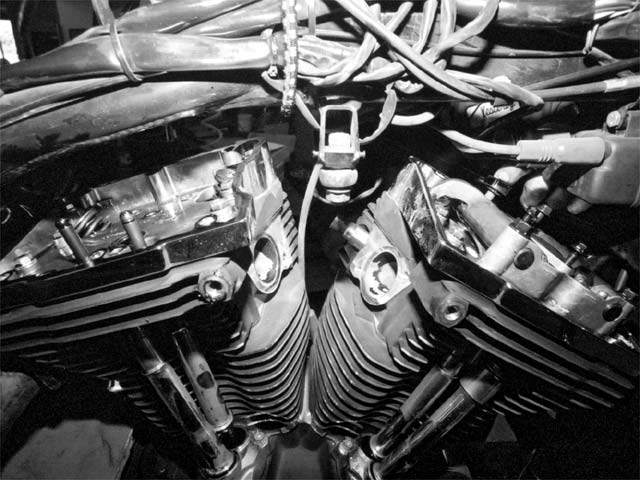
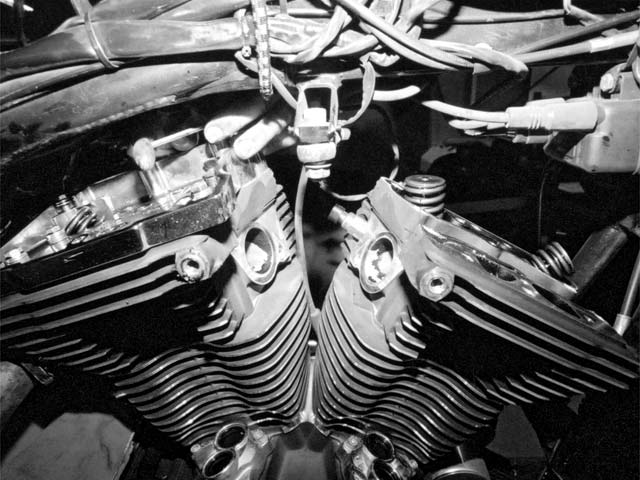
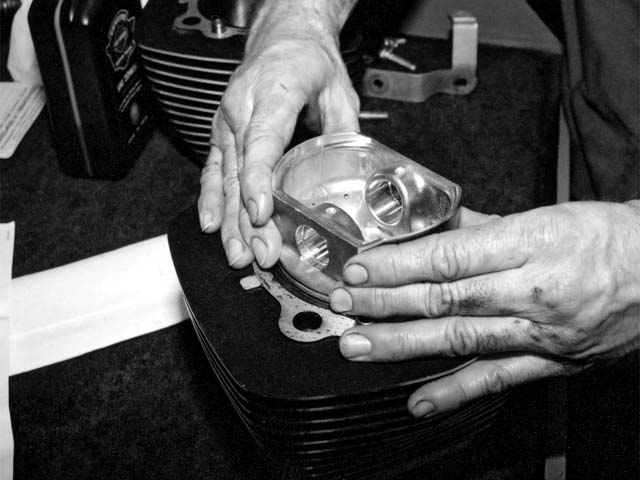
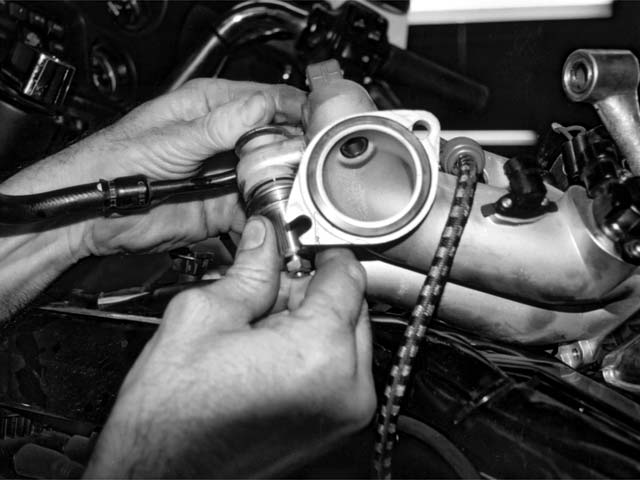
Before Dan bolted the heads on, we wanted to show you this nice shot of all the work done to the intake tracts. These babies really look like they’ll have all the flow we’ll ever need.
The heads are put on with new gaskets and Dan is ready to go through the beginning torque sequence.
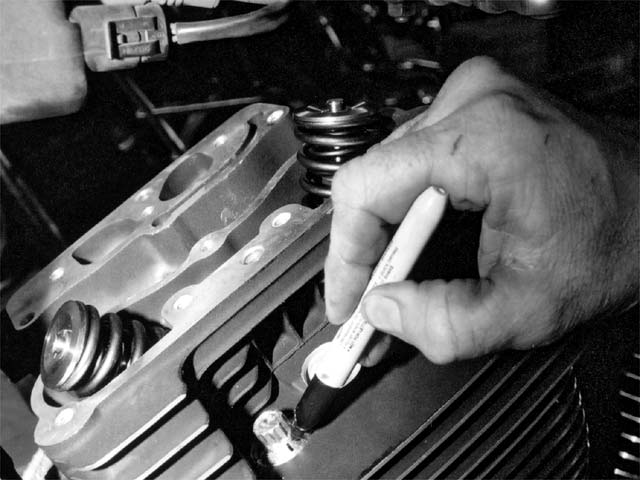
Final torquing is done by giving each bolt a twist of 90 degrees. Dan marks the head bolts with a pen to use as a turning index mark.
When we got to the lower rocker boxes, Dan was a little concerned about the clearance around the valve spring retainers. We probably would have been OK running them like they were, but Dan, being the thorough guy he is, insisted on grinding out a little extra clearance on each one.
Now it’s cam time. Dan removes the nose cone in preparation for cam swapping.
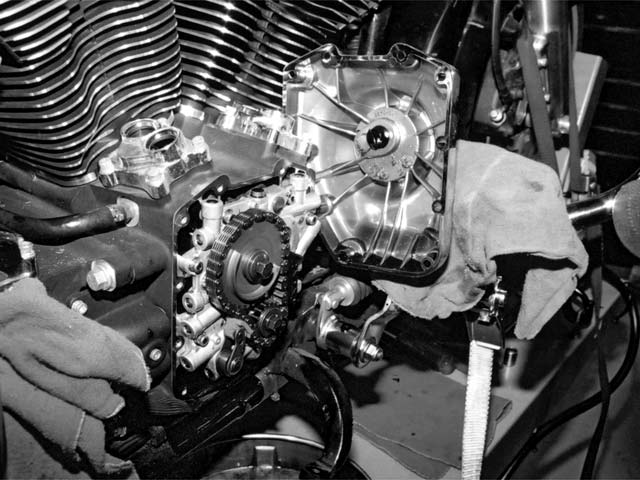
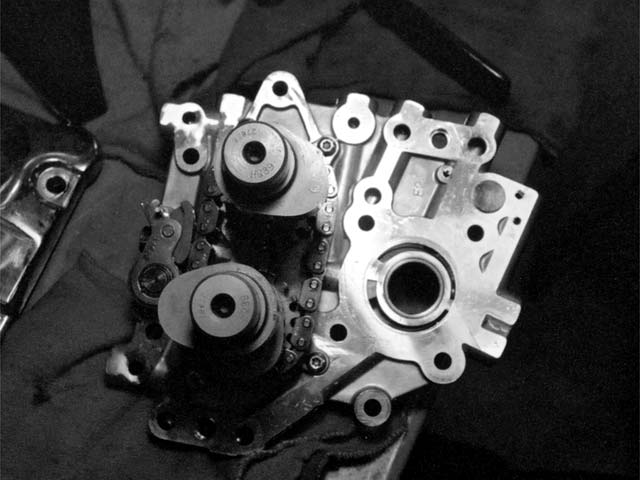
The outer cam chain is taken off, the oil pump and cam plate bolts are removed, and we can now slide the entire works out of the engine.
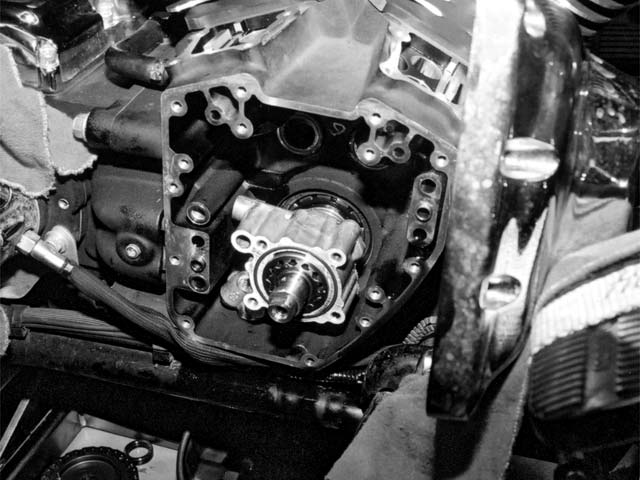
With everything out of the way, we can now slip the oil pump off of the shaft. Don’t let anything fall out, and make sure the pump rotors are all kept in order during removal and set aside.
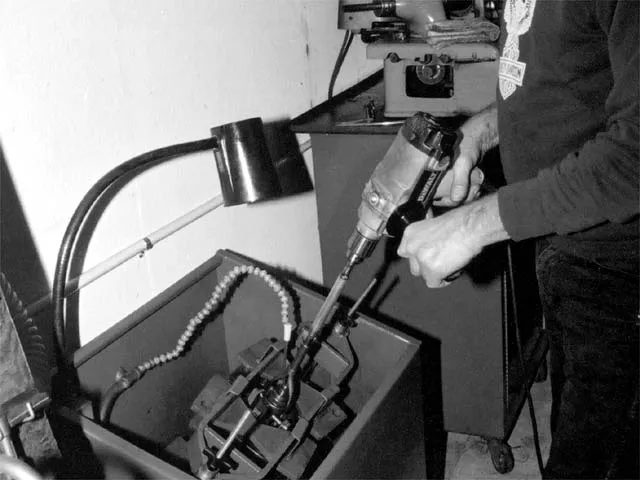
It wouldn’t make any sense to run the stock inner cam bearings with new cams, so Dan uses a JIMS cam bearing removal/installer tool to replace them.
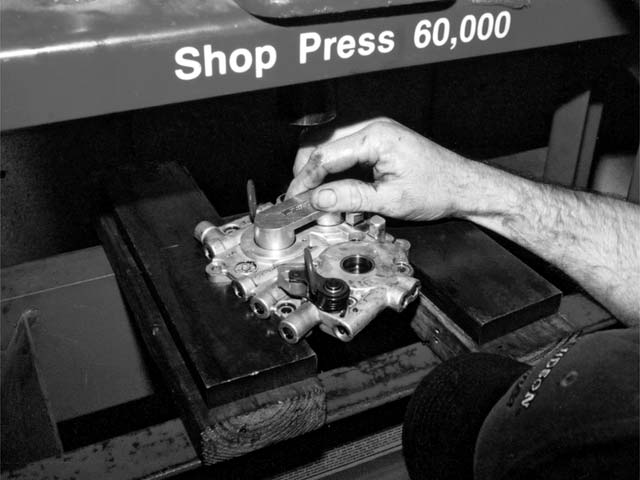
The cam support is chucked up in PVHD’s massive hydraulic press, and the stock cams are pressed out.
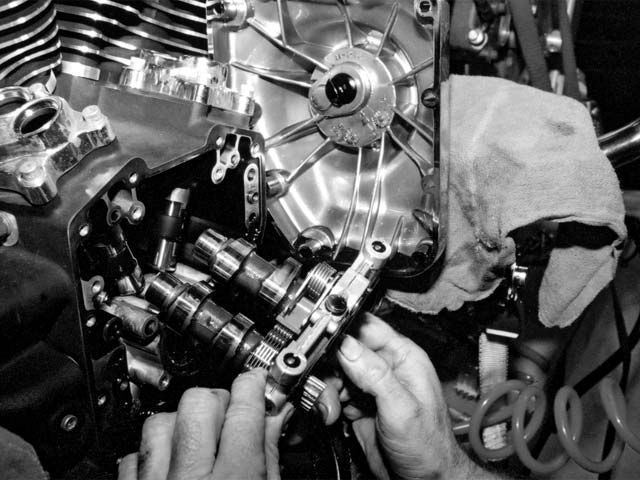
Just a couple of more minutes and Dan has our HQ0039 cams installed in the cam support and ready to go back into the motor.
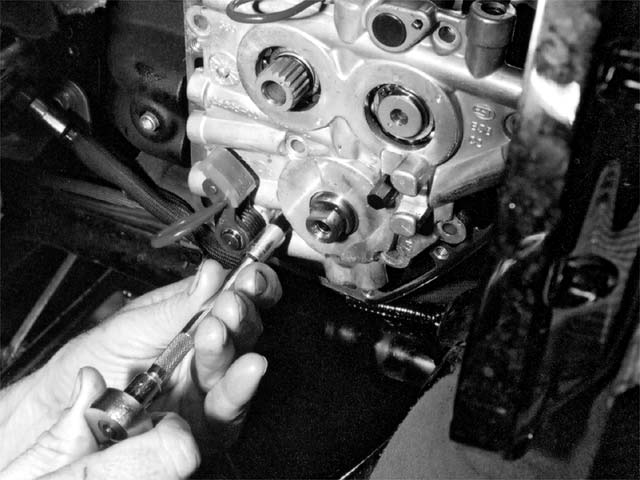
Before the cam support is torqued down, a pair of Evo tappet alignment studs is used (see arrows) to make sure the oil pump is properly aligned. This pump, similar to many TC88 pumps we’ve come across, has a slight amount of grooving in the body and rotors from running slightly off-center, but not bad enough to warrant replacement of the pump. Once these two bolts are snugged down, the other two oil pump bolts, and the rest that hold the support in place, are installed and torqued to spec.
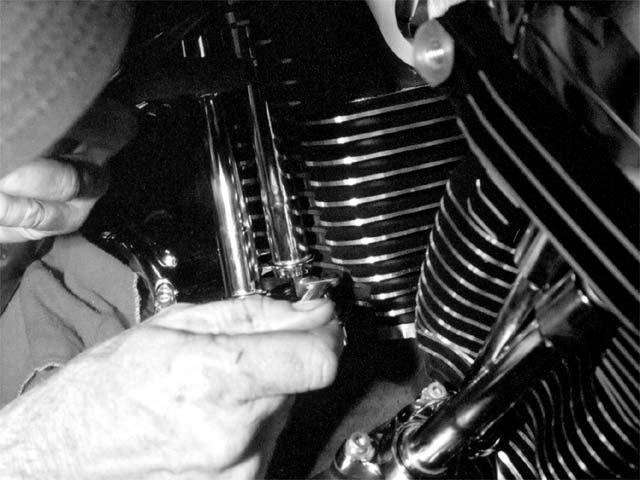
The nose cone is buttoned back up and our HQ adjustable pushrods are installed. Dan recommends using the older-style pushrod tubes because we had a little trouble accessing the lower adjustments on these rods. Each rod is adjusted per the instructions, and we wait about 10 minutes to allow the lifters to bleed down before turning the engine over to work on the next one. Premature movement of the engine can cause interference and damage by parts smacking together, so don’t get in too much of a hurry to rush things along.
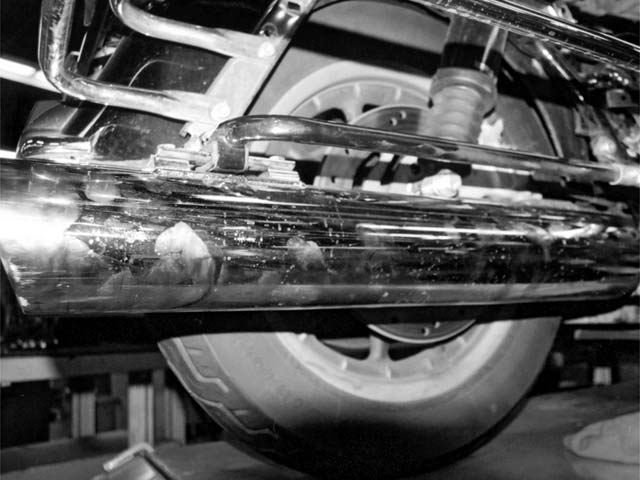
They might be covered in fingerprints, but the RC Cycles slip-ons will sound great, look much better than the stock ones they replace, and give us a nice boost in power.
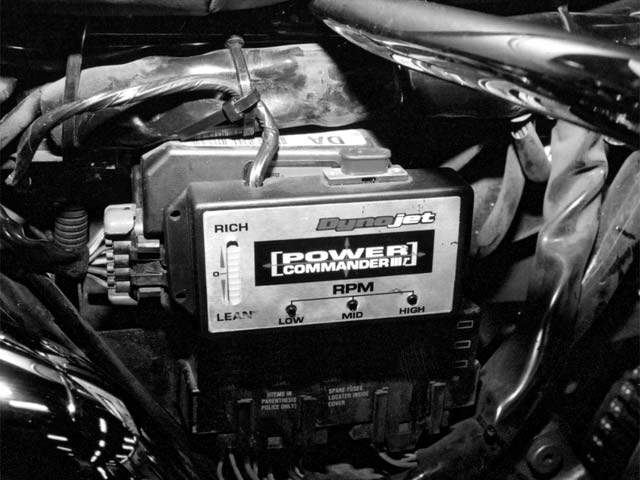
Our PCIIIr Power Commander is a new unit for ’99-’01 Magnetti-Marelli injection systems that neither Dan nor Tony had seen yet. Having a ton of experience with the PCIIIr on later Delphi injection systems is all the help Tony will need to tune this one for us.
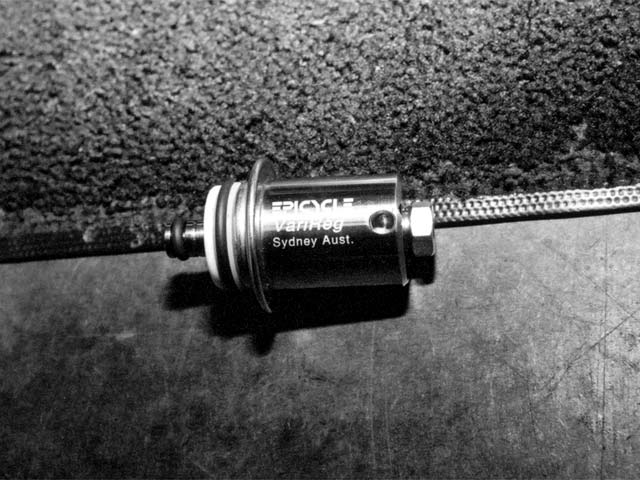
This is the cool Epicycle adjustable fuel pressure regulator we spoke of earlier. It comes adjusted at 52 psi from the factory (where we’ll leave it set) or can be dialed back to factory pressure if you wish. This will give us much more fuel delivery with a nicer spray pattern from the injectors. Epicycle claims this regulator alone can be tuned to remove all pinging from later-injected, completely stock bikes by richening up the fuel mixture.
Installing the Epicycle regulator in the induction manifold takes less than five minutes.
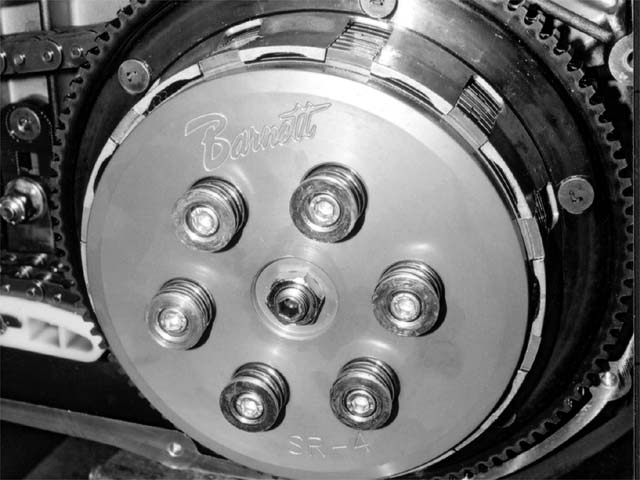
Since we’ve been able to make the stock clutch slip a time or two, we upgraded to a Barnett SR-4 billet pressure plate for more clutch bite. The gold springs can handle as much as 105 lb-ft of torque and can be mixed with the stronger green ones in the kit for varying amounts of clamping force for higher-output applications.
The next thing we did was flash the stock ECM with one of Harley’s Stage II maps. Since the Power Commander doesn’t take over until the engine reaches running temperature, the ECM flash will clean up the way things run until the bike is warm enough for the PC to kick in. It also raises our rpm limit and improves the overall run quality of the bike.
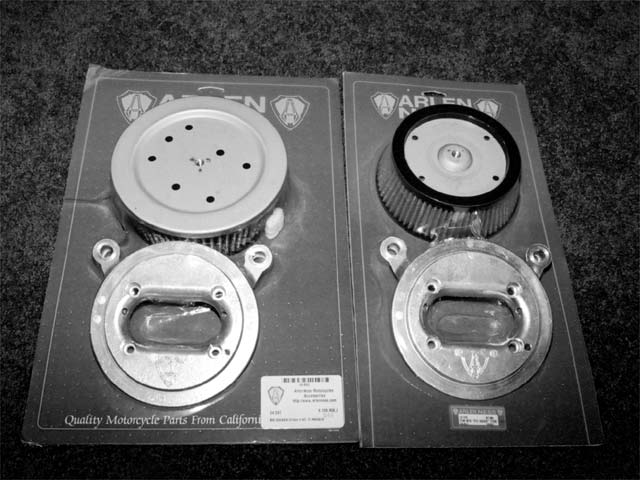
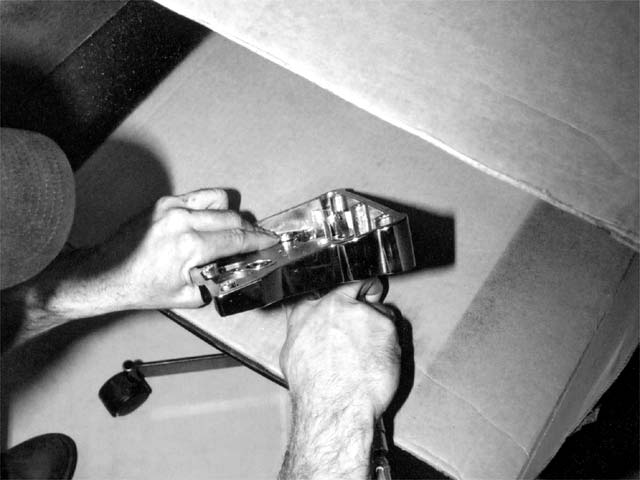
This is the last thing we did before we hit the dyno room. We added an Arlen Ness Big Sucker 2 kit, shown on the left, to help our engine catch its breath. The Big Sucker 1 on the right side of the photo is slightly smaller, but the stock air cleaner cover will fit it nicely, where the Big Sucker 2 will require another cover to make it work.
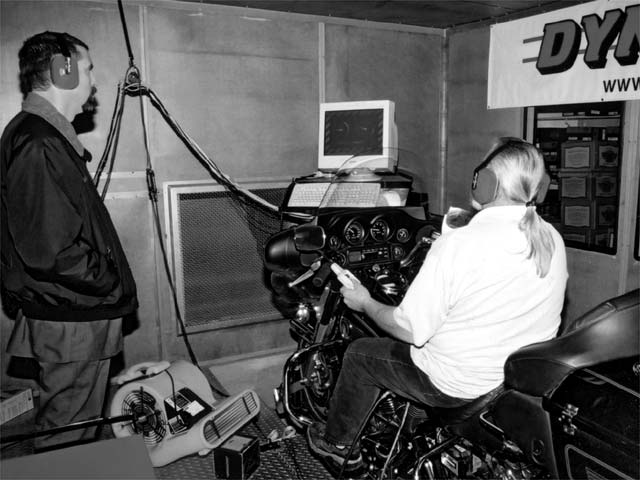
It’s now time to go into the dyno room for some initial fuel curve mapping. Tony Denius will tune the bike a bit toward the rich side to keep the temperatures down while we break it in.
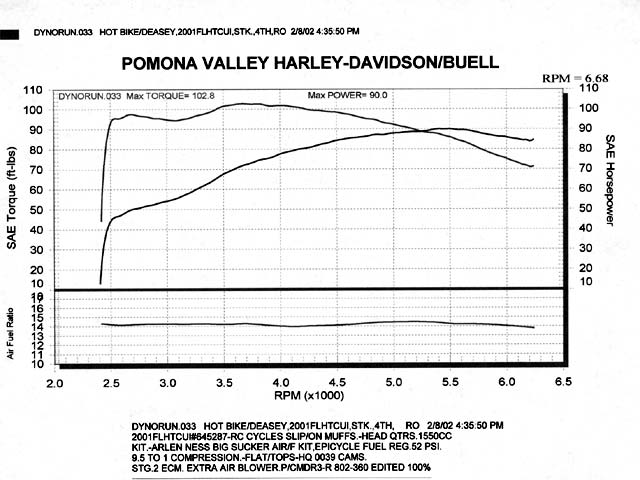
After about a 1,000 miles or so, we dropped back into PVHD to get our final mapping done and to get our dyno numbers to see how well everything worked. The Head Quarters kit really delivers. Our peak torque is now 102.8 at a very favorable 3,500 rpm, with 95 lb-ft coming in at only 2,500 rpm. Horsepower is now up to 90.0, and the powerband couldn’t possibly be better for a heavy touring bike like our Electra Glide Ultra Classic.
Part of our job here at HOT BIKE is to test as many of the thousands of parts available as we can get our hands on each year. When it comes to testing engine components, we’ve found that a part that may offer huge power gains in one setup will cut them drastically in another.
Unless you have a dyno, a gas analyzer, and an unlimited budget that allows you to try over and over until you hit on the proper combination of parts, the best idea is to let someone else do the research and development work for you. When you start mixing cams, rockers, pistons, and things, clearance issues become very important and damage can result if everything is not thoroughly checked for clearance before you turn the motor over. This can take literally dozens of extra hours to check, making a pre-fit and tested kit a better way to go.
After we sat around the table and hammered out a plan, we got on the horn to Head Quarters and ordered one of its Low Compression 1550 Twin Cam big-bore kits. The Low Compression kit comes with 9.5:1 pistons, HQ0039 (0.580-inch lift intake with 0.530-inch lift for exhaust) camshafts, pushrods, and a set of HQ’s Spin-Drop TC88 cylinder heads. These heads come with a set of 1.625-inch exhaust and 1.900-inch intake valves, titanium valve springs, and, most importantly, some of HQ’s trademark porting and polishing work. The heads are set up for a volume of 82 ccs, and Viton valve stem seals are installed for years of trouble-free service.
We also ordered a Power Commander PCIIIr from Drag Specialties to adjust our fuel levels and a really cool adjustable fuel regulator from Epicycle in Sydney, Australia, that will be used to push our fuel pressure up a few pounds. Stock fuel pressure is about 43.5 psi. The adjustable Epicycle regulator comes set at 52 psi, which should give us better fuel atomization and more fuel delivery when we need it most. We decided to use an Arlen Ness Big Sucker 2 air cleaner to guide air into the motor, and a nice-sounding set of RC Cycles slip-ons was added to the pipes. The RC slip-ons are extremely quiet, considering how free flowing they are.
Everything was boxed up and shipped to Pomona Valley Harley-Davidson/Buell in Montclair, California, where we made an initial dyno pass of 64 peak hp and 75.3 lb-ft of torque a few days before we started taking the bike apart. PVHD’s head tuning guru, Tony Denius, turned us over to Dan Vesterby to do the work after a short consultation. Here’s how it went.
Arlen Ness Inc.
Dept. HB
16520 E. 14th St.
San Leandro, CA 94578
(510) 276-3395
www.arlenness.com
Barnett
Dept. HB
2238 Palma Dr.
Ventura, CA 93003-5733
(805) 642-9435
www.barnettclutches.com
Drag Specialties
See your local dealer
www.dragspecialties.com
Epicycle Racing Services
Dept. HB
115 Carlingford Rd.
Epping, Sydney, 2121, Australia
0011 61 9868 2691
www.epicycle.com.au
Head Quarters
(519) 289-5990 (sales)
(519) 289-5229 (tech/kit info line)
www.head-quarters.com
Pomona Valley
Harley-Davidson/ Buell
Dept. HB
8710 Central Ave.
Montclair, CA 91763
(909) 981-9500
www.pvhd.com
RC Cycles
Dept. HB
30872 Huntwood Ave.
Hayward, CA 94544
(510) 471-9755
www.billetboys.com


